final: scriptorium
Scriptorium is a double-sided PCB mill intended to require minimal interaction during operation. It is designed around a stock carrier (which I call the cassette), which it uses to hold, manipulate, and index a PCB blank. Scriptorium can mill both sides of the blank without user interaction, and can do automatic tool changes (though I only have one spindle).
CAD linked in onshape, or STEP files available as a tarball (nb: some final additions didn't make it into the assembly and so are only accessible through the onshape link). The mechanical design is built on top of a modified version of Jake's Clank-Stretch.
Current version of firmware and host-side driver program available as a source tarball here.
Previous updates can be found at the following links:
system summary
Scriptorium is a PCB mill which is in some ways normal. It's built on top of Jake's Clank-Stretch -- a gantry motion system with a mounting plate and a tool changing system called Kleat. It has a brushless spindle and uses stepper motors and belts to drive the axes.
However, it is also built around a cassette that holds the PCB blank, and is flipped by the machine to enable two-sided milling. The stepper motors are driven by individual Modular Things h-bridge boards with Xiao RP2040s onboard. The spindle and servos are driven by a raspi pico. All of these run their own control loops but communicate realtime data over USB CDC-ACM serial ports and are centrally controlled by an application on a consumer laptop.
I designed the cassette, the PCB flipper system, the holddown system, all firmware, the controller, the tool changer (with advice from Jake), and various modifications to the Clank base and mounts onto it.
cassette
The idea is that we can put indexing features on the cassette rather than milling or marking the stock. This means that the only fixturing the user has to do is load the cassette — it can be located very coarsely in the machine and will be indexed successfully in the home position for first-side milling.
After the first side is complete, the machine automatically unlocks, pushes the cassette around a track that flips it, and re-locks. It then mills the second side, and unlocks the cassette for the user to retrieve.
The cassette I designed fits this 105mm x 155mm 2-sided FR1 from SparkFun. I was inclined to try to make the cassette design and the machine adaptable wrt. stock dimensions, but decided against it due to complexity and space limitations in the machine. The cassette design itself is parametric, but the machine assembly would have to be reworked for different external cassette dimensions.
pcb flip
The cassette design enables the machine to autonomously flip the stock -- the pins ride on a teardrop-shaped track:
There is an interesting sequence of moves to get the cassette to flip:
I am using the tool head without the tool attached to push the cassette around because this seemed the most straightforward way to accomplish this. A more mature design would certainly keep better control of the cassette, and I'm not sure I would want to leave this design unattended, but it does work.
Once the cassette is pushed into the corner of the loop, the rotating shaft picks up a feature and pulls the cassette around. This is run on timers, so I have the shaft in velocity mode at low current and let it skip steps if the gantry is still in the way.
The solenoids on the back of the gantry pick up the cassette and put it back where the Kleat mount can be abused to grab it and push it back to the holddowns at the front.
tool changer
I implemented this following a suggestion by Jake. The carrier for the spindle bolts on to the Kleat interface, but in between on both sides there is a gap. This fits the forks on the tool holder part and has just enough room for the Kleat mount to get in and out.
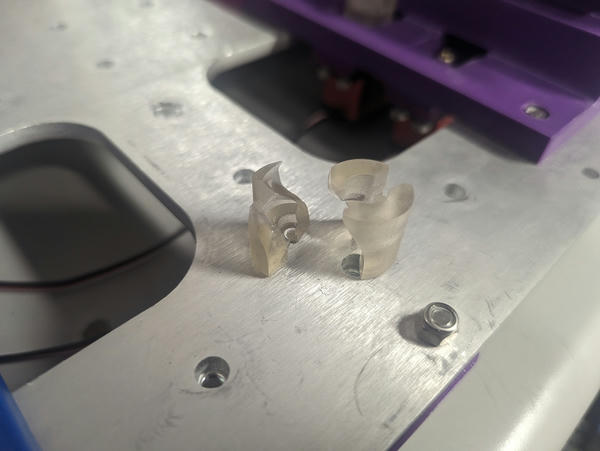
Notable iterations on this design include the 90 degree beam members members on the forks -- truly an incredible amount of extra strength. The first revision without the beams broke as soon as I put the spindle carrier on it. The most recent revisions have had the whole gantry bash into them repeatedly and not break.
index / holddown
You can see the holddown approach in the model above -- the cassette has these holddown features that interface with partial screw / cam-type holddowns mounted on the servos.
Interestingly, I'm not 100% sure if the holddowns are engaging as I hoped they would. I think the cassette is spaced a bit too high, and the holddowns are kind of centering it, but I don't think they're really grabbing the "wings". I don't have them turning too far to avoid breaking things:
But they seem to hold quite firmly if they're in the right place. Something to look at in the future.
modifications
clank
- rotated the baseplate 180 degrees for access to cutouts (holddown servos)
- had to replace the corner blocks anyway (below) -- much more of a pain to rebuild the x axis
- raised the gantry (taller corner blocks) to accommodate cassette + flipper z requirements
- new corner-feet with higher counterbores for spacing
- new, separate feet to raise the baseplate for servos to fit underneath (reduces gantry blockup requirements)
firmware / modular things replacement
I was initially going to use Jake's firwmare and Python stack to drive the machine. However, it didn't work on my machine (Linux or Windows -- serial ports showed up, but never sent any data back to the OSAP runtime), and for me the threshold is low to rewrite something that is mission critical so I understand it fully end-to-end, especially since Jake was out frequently.
As a result, I rewrote all of the firmware and the controller. All of it is
in Rust, so I didn't have to write any serialization code due to automatic
derives, and I'm using postcard, an embedded-oriented Rust serialization
library. My packets are a few bytes at most.
There are three separate firmwares -- one for the motors, one for the servo/spindle controller (pico), and one for the solenoids. The solenoid firmware barely counts as it runs on an h-bridge board and is a slimmed down version of the motor code.
motion updates
I ran into some tension when attempting to get the stepper motion code to update as fast as possible. I timed a single update at 150us, and decided to try triggering updates on 200us, 300us, 500us intervals, but these all seemed to be starving out the USB implementation -- Linux was complaining that the devices were misbehaving. I moved the USB stack onto the second rpi core to fix this — while doing that, I found a crash which was probably the cause of the original problem (it frustrates me to no end that Xiao SWD pins are on test points, making it nigh-impossible to do in-system debugging). But this at least keeps the motion code decoupled from the message handling, which should keep performance consistent.
Currently should be updating at about 5kHz.
modular things
I maintained part of the spirit of modular things in that each motor has its own independent controller, and they communicate over USB.
Not having heard Jake's code run, I suspect there's a bug in my H-bridge code, as some of my steppers are extremely loud (Y axis especially). I didn't take the time to debug this because it worked and is microstepping, so I ran with it.
what worked / not?
FDM printing continues to save the day. I describe work on projects like this as mostly about feeding the printers. It's the fastest way to iterate and refine fit/function -- I was printing continuously while I was at lab for almost a month to get all the parts working.
Surprisingly, the loop concept, pushing the cassette with the tool head, and the solenoids all worked. I really expected some of these to run into irreconcilable collisions, but they all just worked on the first or second try.
I wrote a separate 'jog controller' that I used for tuning all the motion -- it's driven by any gamepad you plug in. I used this cheap ($20) little 8BitDo controller to manually execute all of the motion sequences first, and took my first cuts with it:
This was a huge help to quickly iterating on ideas and getting motion paths down.
Having the design and all the parts for the Clank from Jake was great, but I also had a lot to debug from little things that are in his head but not mine, and he was out a lot during the semester / I didn't get a start on the machine in earnest until pretty late. This is both a worked and not-worked for these reasons.
what components + materials? cost?
The Clank (baseplate, 8020, fasteners, power supply, 3d prints, stepper motors, bearings, fasteners) and Modular Things components (h-bridge, mux board) were generously provided by CBA via Jake. Miscellaneous additional hardware supplies were also sourced from CBA (bearings, shafts, belts, pulleys, fasteners, servos, etc.).
I estimate 2-4kg of FDM filament (mix of PETG and PLA) were used to build this project. This was partially from my own personal supply and partially from Responsive Environments. Some additional electrical components (raspi pico x2, adjustable buck converter, servo driver) came from ResEnv as well.
The brushless spindle motor and driver were donated by Brian Mayton.
I purchased almost nothing directly for this project -- it all came out of existing stock. I estimate the cost to replicate the final build to be on the order of $650. I'm basing this on Jake's estimate that the Clank would cost ~$400 sans controllers, plus this $70 spindle + controller and around $150 for the modular things boards, picos, servo controller, additional servos, and additional 3d prints in my build.
how evaluated / implications?
The goal I ended up setting for myself was to mill a board on both sides without my intervention. The machine succeeded at this metric.
What I was hoping to get out of this project was a start on a more autonomous PCB mill. I think I have that, but unfortunately it's costly and I really can't leave it to mill a board alone in its current state -- it needs to be much more closed loop. I see this as a decent proof of concept and will be continuing to work on it going forward.
Implications I feel are minimal at the moment, as the machine is too high-overhead for anyone else to use. I'd like to get to a point where milling a 2-sided board just works and you don't need to think about it. We're a ways off, but I plan to keep moving towards that.
add'l credits
Thanks especially to Jake for the parts and ideation, and Sam Chin for helping with the wiring and electrical debugging.