
Week 11 documentation
Overview
For this week, the plan is to:
- figure out what kind of communication system to use
- design a board to interface with it + mill + solder it
- set up the code to get it working
What do
In my case I'm making a modular system so I need to connect between them. From my midterm review with Miana she suggested I use wifi connection with the esp32 (c3 should work) to communicate between the modules since i'm aiming for a relatively small scale array. Wifi over bluetooth would let me communicate to it with my laptop and set up a server with one of the modules.Whats the plan?
- fix existing issues: can't move component after exporting in fusion, reverted to pre export.
- the esp32 looks really similar to the rp2040 so I should just be able to do similar things
Looks like I should aim to
- setup micro python, arduino
- get the esp32c3 working by making it turn on a light or something,
- then try to get it to act as an access point,
- then read data from a website,
- then do something with that input and finally,
- maybe get a board working.
Overview
Aside: Fixing eagle export
Setup
Test AP and Connecting
Sending data over AP
Eagle
After running the ulp for singleImg processing the component origins are disabled and no longer accessible by going onto layers and unhiding the origins tab the components are moveable again!
I also started designing the new board with only 2 hbridges and using the esp32 but decided to hold off for later
setting up
Following the software setup section of this guide, I setup my arduino software to interface with the esp32https://wiki.seeedstudio.com/XIAO_ESP32C3_Getting_Started/
Downloading packages for the board manager actually took around 30min but otherwise was fine.

Connecting to wifi
I've been worried about this since I know connecting to MIT wifi networks has become annoying for devices like my switch that don't support the authentication processes.First I'm just gonna follow along the seeed guide on using wifi: https://wiki.seeedstudio.com/XIAO_ESP32C3_WiFi_Usage/
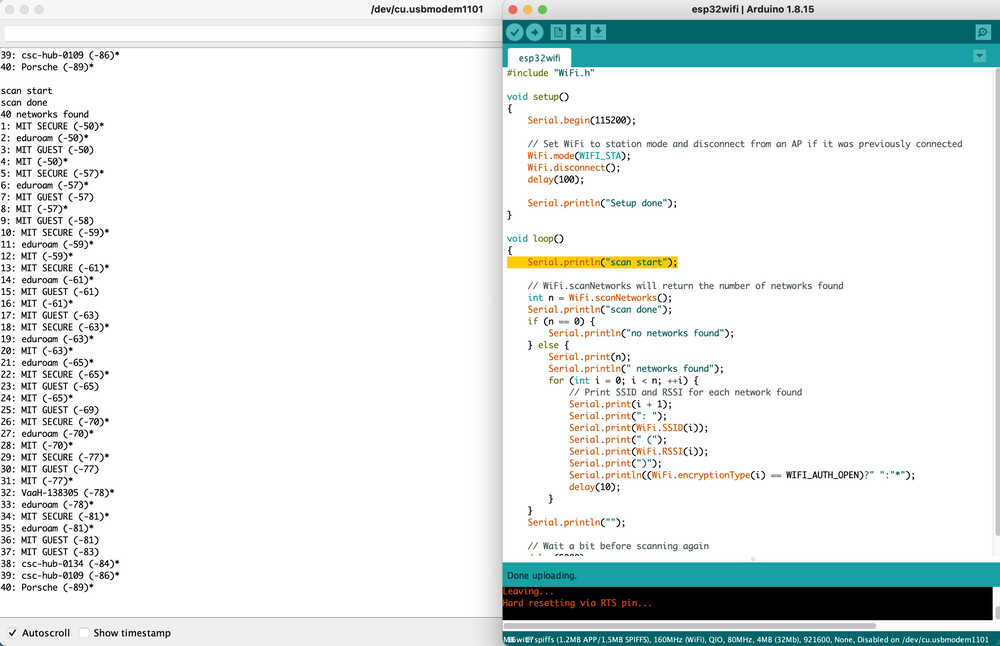
Starting with scanning for networks, I just copy the code and upload it and it works!
Next, I'm gonna try to connect to the "MIT" network, I remember this network being open when I was a freshman so I tried connecting using "" as password but its failing. After looking up stuff about mit's wifi, the details of which are here https://ist.mit.edu/news/open-wifi-changes I just followed the link and got an access password for "MIT" and put it into the sample code.

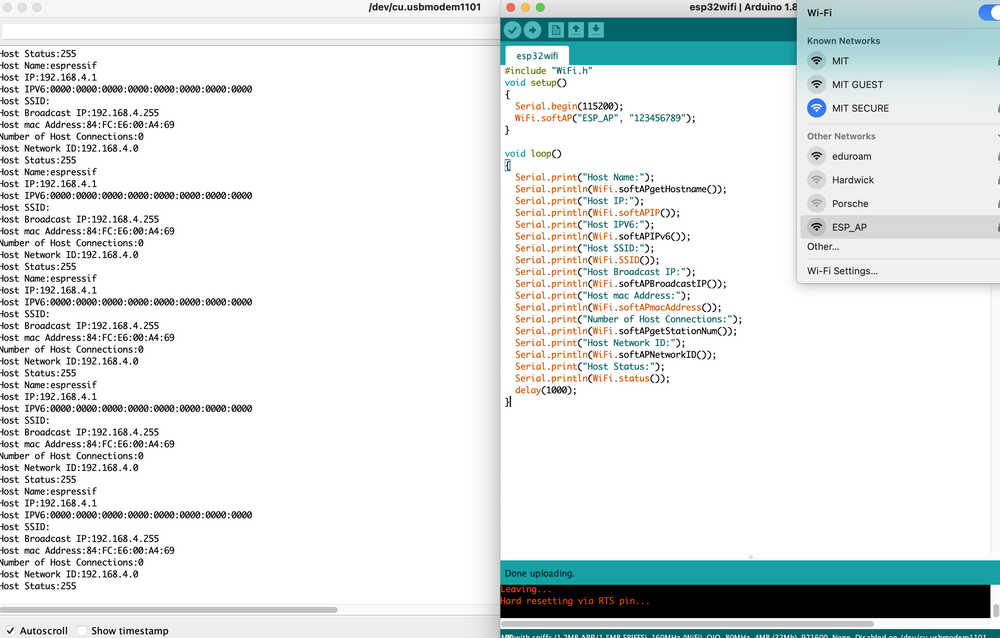
Now, since I'm gonna try to have my modules communicated locally to each other using one as an access point I'm gonna try to set one up.

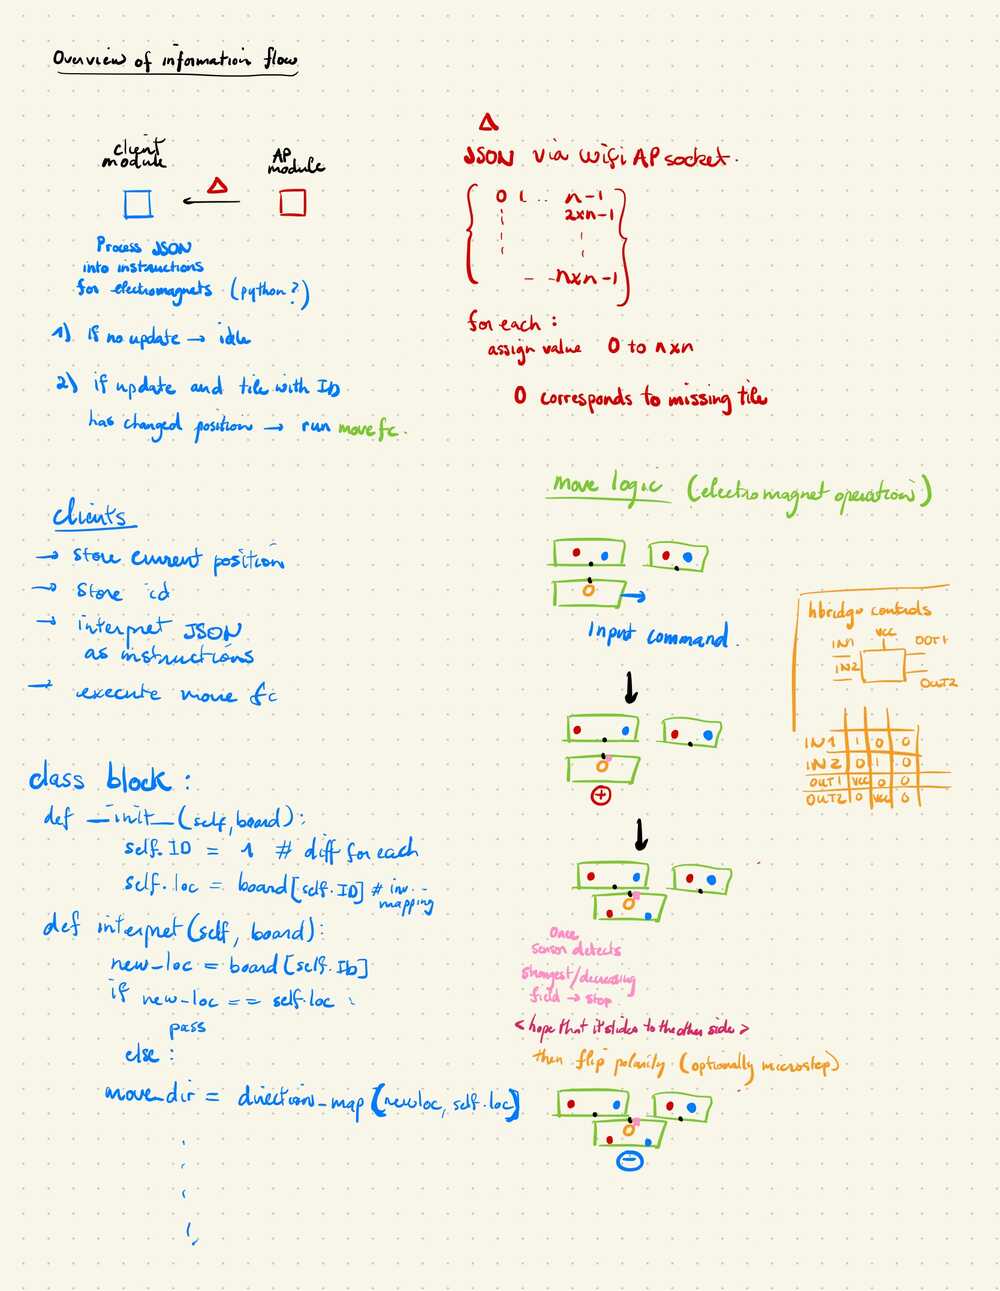
Now I'm starting to think about what information I'm gonna be sending and I got excited so I spent some time implementing the game in python.
Anyway now I wrote the game implementation and a bfs solver that can handle n=3 games
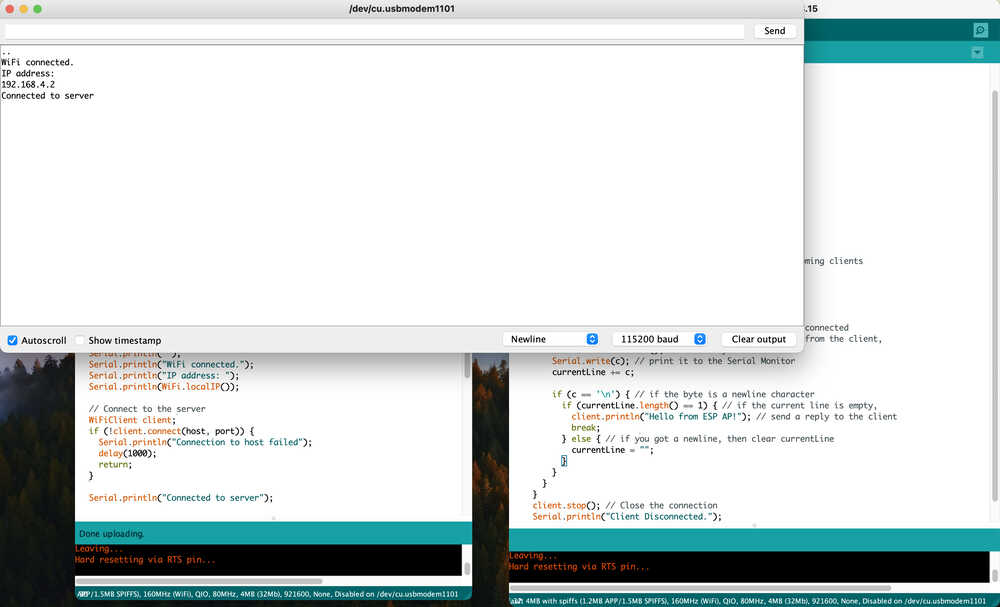
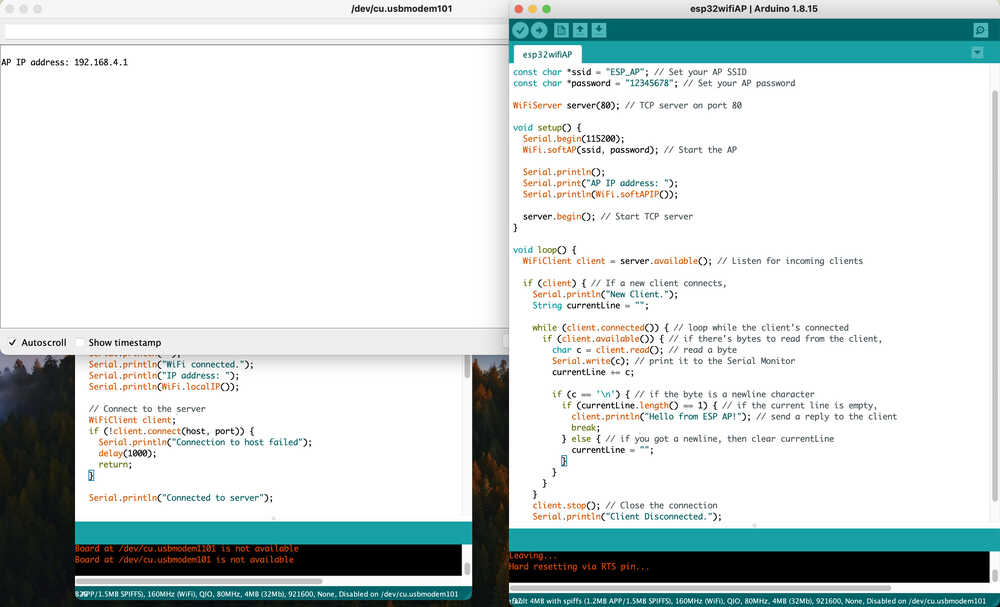
Sending data over WiFi
So after a quick chat with GPT I decided to use TCP as the socket for communication since it has an emphasis on reliability and the speed probably isnt affected that much.I got some sample code as well to try out which I will put here once I learn how to do format code.
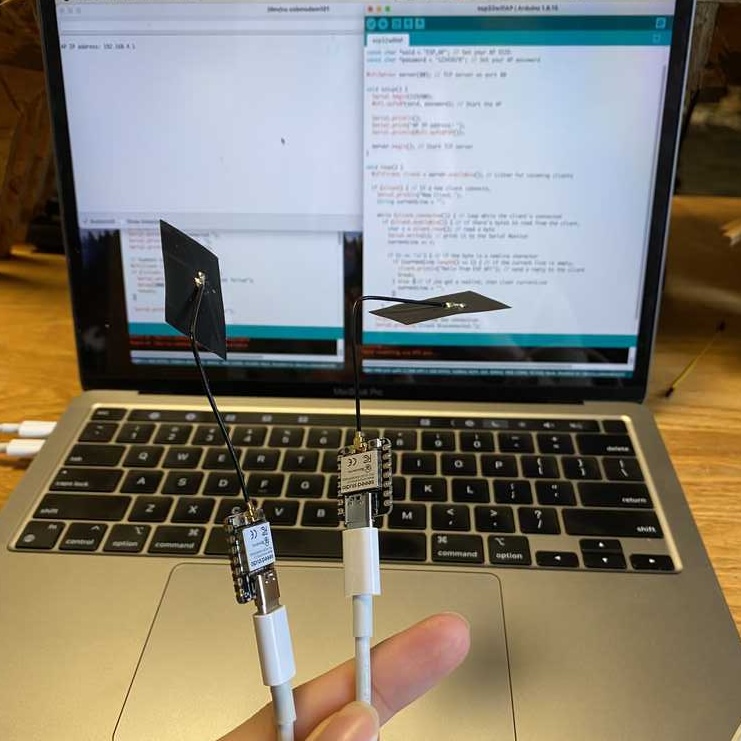
For my setup I have two esp32c3 that are connected to my laptop and I'm uploading the AP code to one then sending the client code
#include
// For ESP32, use #include

const char* ssid = "ESP_AP"; // AP SSID
const char* password = "12345678"; // AP Password
const char* host = "192.168.4.1"; // AP IP address (usually this for ESP AP)
const int port = 80; // TCP port

void setup() {
	Serial.begin(115200);
	WiFi.begin(ssid, password); // Connect to the AP

	while (WiFi.status() != WL_CONNECTED) {
	delay(500);
	Serial.print(".");
	}

	Serial.println("");
	Serial.println("WiFi connected.");
	Serial.println("IP address: ");
	Serial.println(WiFi.localIP());

	// Connect to the server
	WiFiClient client;
	if (!client.connect(host, port)) {
	Serial.println("Connection to host failed");
	delay(1000);
	return;
	}

	Serial.println("Connected to server");

	// Make a request
	client.println("Hello from Client");
	client.println();

	// Wait for the response and print it
	while(client.available() == 0) {
	delay(100);
	}

	while(client.available()) {
	char c = client.read();
	Serial.write(c);
	}

	client.stop(); // Disconnect from the server
}

void loop() {
	// Nothing to do here
}
#include
// For ESP32, use #include

const char *ssid = "ESP_AP"; // Set your AP SSID
const char *password = "12345678"; // Set your AP password

WiFiServer server(80); // TCP server on port 80

void setup() {
	Serial.begin(115200);
	WiFi.softAP(ssid, password); // Start the AP

	Serial.println();
	Serial.print("AP IP address: ");
	Serial.println(WiFi.softAPIP());

	server.begin(); // Start TCP server
}

void loop() {
	WiFiClient client = server.available(); // Listen for incoming clients

	if (client) { // If a new client connects,
	Serial.println("New Client.");
	String currentLine = "";

	while (client.connected()) { // loop while the client's connected
		if (client.available()) { // if there's bytes to read from the client,
		char c = client.read(); // read a byte
		Serial.write(c); // print it to the Serial Monitor
		currentLine += c;

		if (c == '\n') { // if the byte is a newline character
			if (currentLine.length() == 1) { // if the current line is empty,
			client.println("Hello from ESP AP!"); // send a reply to the client
			break;
			} else { // if you got a newline, then clear currentLine
			currentLine = "";
			}
		}
		}
	}
	client.stop(); // Close the connection
	Serial.println("Client Disconnected.");
	}
}
(During final project week I get the board to interface with my laptop over wifi and a few buttons)