Create bodies in CAD, add an offset, and then use the "project" function to create a new sketch which you can export as a dxf file to CorelDraw
Week 02
Vinyl cutter, laser cutter, and gitlab
This was a fantastic week where I built further on my limited CAD skills, used a vinyl cutter for the first time, used a laser cutter for the first time, and learned how to push content to my website using the Mac terminal and "git" commands.
Vinyl cutter
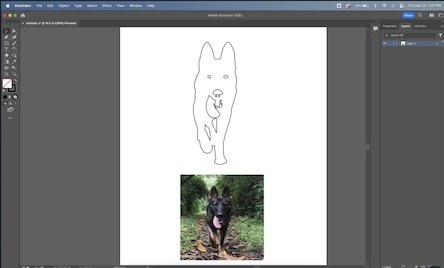
For the vinyl cutter project, I took a picture of my dog, Akira, and outlined her frame in Adobe Illustrator to create a vector line that I wanted to cut. I saved the vector as a png file. I used the Roland model CAMM -1 GS-24 vinyl cutter and the software program Coreldraw to "print" the vector file on the vinyl cutter.
Notes about the vinyl cutter:
- The program CorelDraw did not like my initial png file when I tried to “outline” in clip art, but when I changed to “center line”, it made a smooth outline of the dog. The printer was happy.
- The small pieces, like the eyes, were difficult to remove. Simply took some patience and deliberate motions.
- The excess vinyl was easiest to remove if I peeled it back at an angle. In other words parallel to the final product on the table, as opposed to up and away.
See the linked file on the left sidebar which includes a guide on how to use the vinyl cutter.
My dog Akira was my inspiration for the vinyl cutter project.
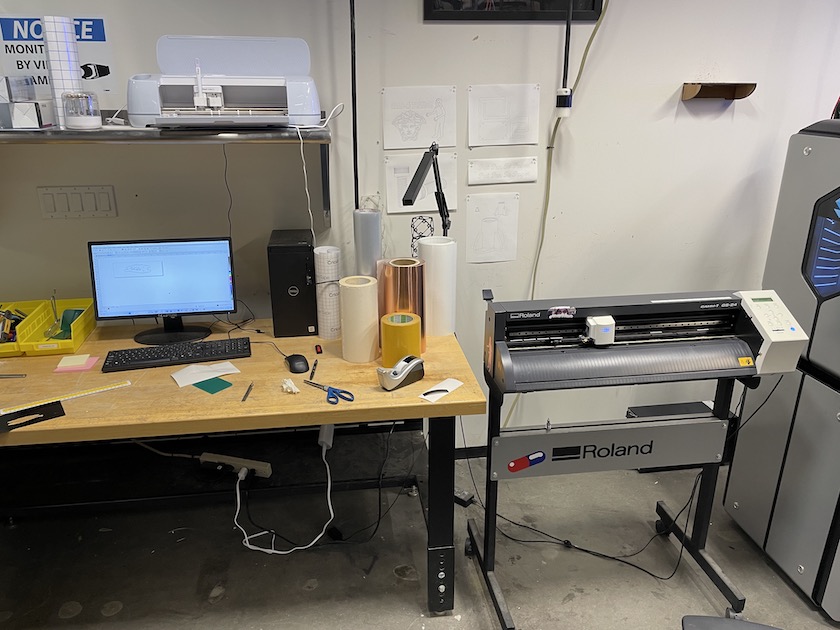
I used the Roland CAMM -1 GS-24 model vinyl cutter.
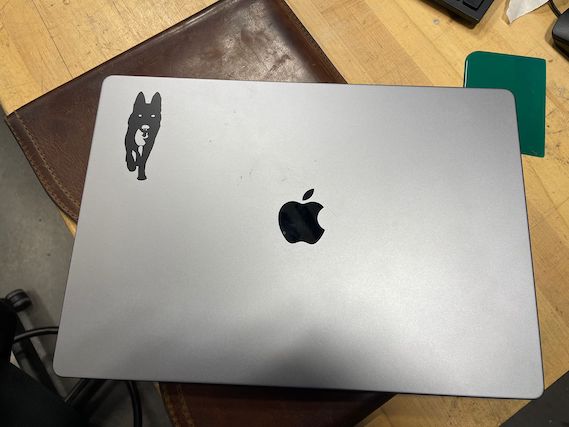
The final result was a sticker that I proudly showcase on my Macbook.
Laser cutter
For laser cutter, I drew the outlines of a moped and thought about how I could create equally sized shapes to build the body of the bike. I created two wheels and two bases to hold the wheels vertically. I created a simple shape with joints that could be slotted together to build the shape of the bike.
At first, I had a great deal of trouble exporting my dxf file from Autodesk Fusion 360 to Coreldraw. At first, I was trying to export all of my shapes via one large dxf file. This resulted in weird outputs and many lines in Coreldraw. I learned I need to make a sketch of my final shape, and export that specific sketch via a dxf file. I also learned later that I should use the “project” function to create a new sketch for export with the offset lines includes. Thanks Alfonso for the help!
While using the laser cutter, I discovered that it did not cut all the way through the cardboard towards the bottom right area of the bed. This is because the cardboard was bowed and raised slightly at that section. The laser profile was not tuned to cut optimally at that section of the cardboard. Following John’s advise, I focused all future cuts on the top left area of the bed.
To determine the kerf of the laser cutter, I went with trial and error. First, I set an offset in Autodesk Fusion 360 via a parameter called “offset” to 0.2mm. I cut out a few pieces of the “body” of the moped, and realized a 0.2mm offset was actually too much - I was unable to fit the joints together. Therefore, I changed the offset parameter to 0.1mm, which was too small - the joints could be fit together, but there was no friction or resistance holding the pieces together. They moved freely. So next I tried a 0.15mm offset, which resulted in a snug fit when joining the cardboard pieces together. Based on this, I know the kerf has a radius between 0.10 mm and 0.15mm, but closer to 0.15 mm. See the group assignement page, linked on the left, to see more about calculating the kerf.
The settings of the laser cutter that worked well to cut through the cardboard were:
- Speed: 2.3 -> 2.1, we had to slow it down to 2.1 to cut all the way through the cardboard in a single pass
- Power: 100%
- PPI: 200
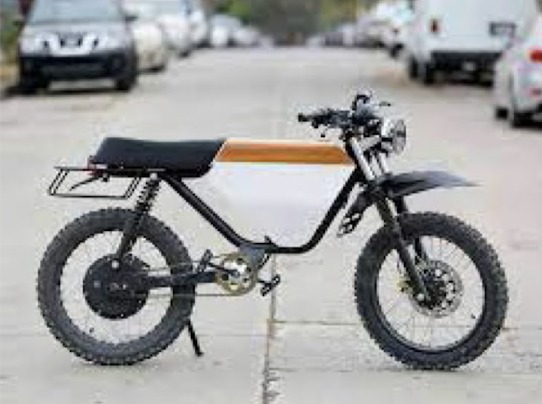
My moped for inspiration.
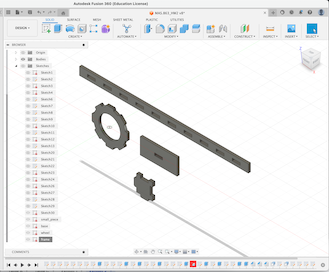
The construction pieces I designed in Autodesk Fusion 360 using parametric design.
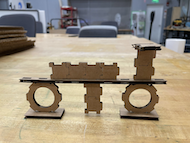
The final product - the joints hold together well with a 0.15mm offset.
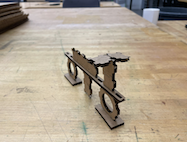
The final product.
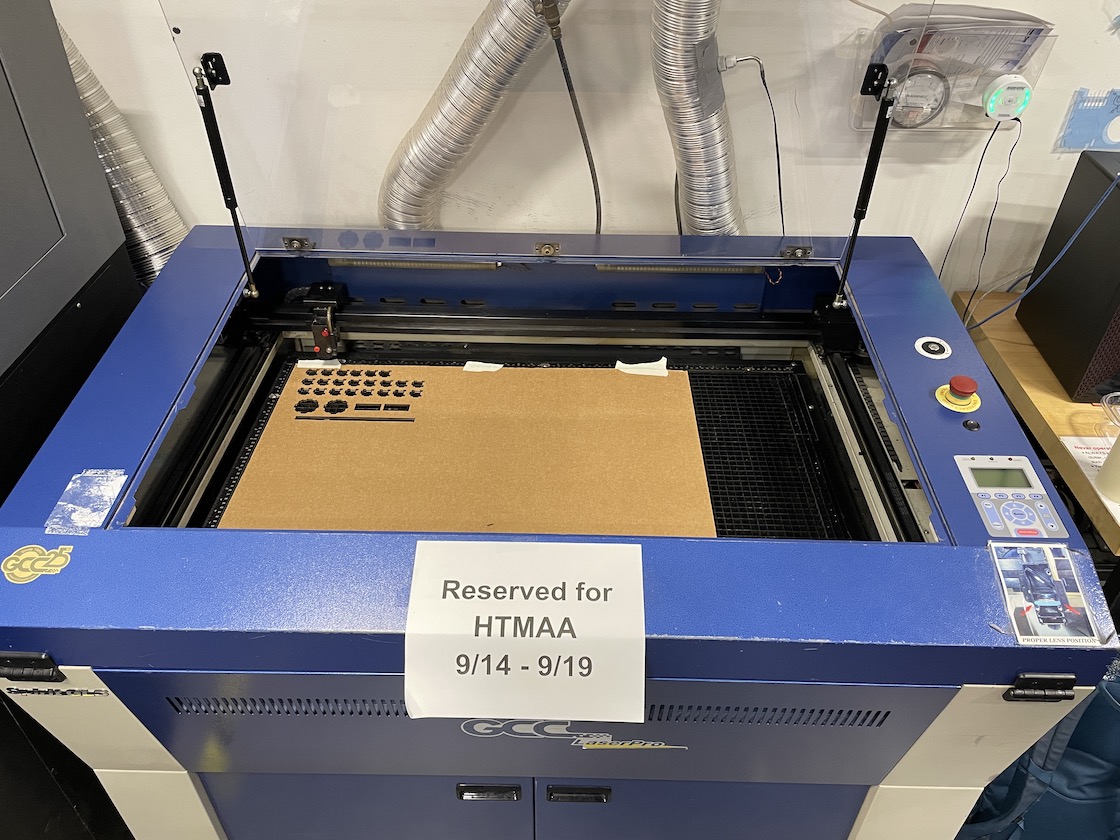
The GCC laser cutter used to create the moped pieces from cardboard.
Challenges with the laser cutter:
- I didn’t correctly measure the thickness of the cardboard for my CAD drawing. Luckily, it was thin enough that the pieces fit into my cutouts with some gentle pressure, and actually holds the pieces well.
- I struggled and still struggle with transitioning drawings/files from Fusion to CorelDraw. Specifically, when I had shaped with holes or multiple lines, they all carried over as individual lines to CorelDraw. I am not sure how to transfer the shapes as one single unit/icon. Additionally, when I created an “offset” in Fusion, it created two sets of lines, both of which transfered to CorelDraw. I always had to delete the smaller line.
Group Assignment
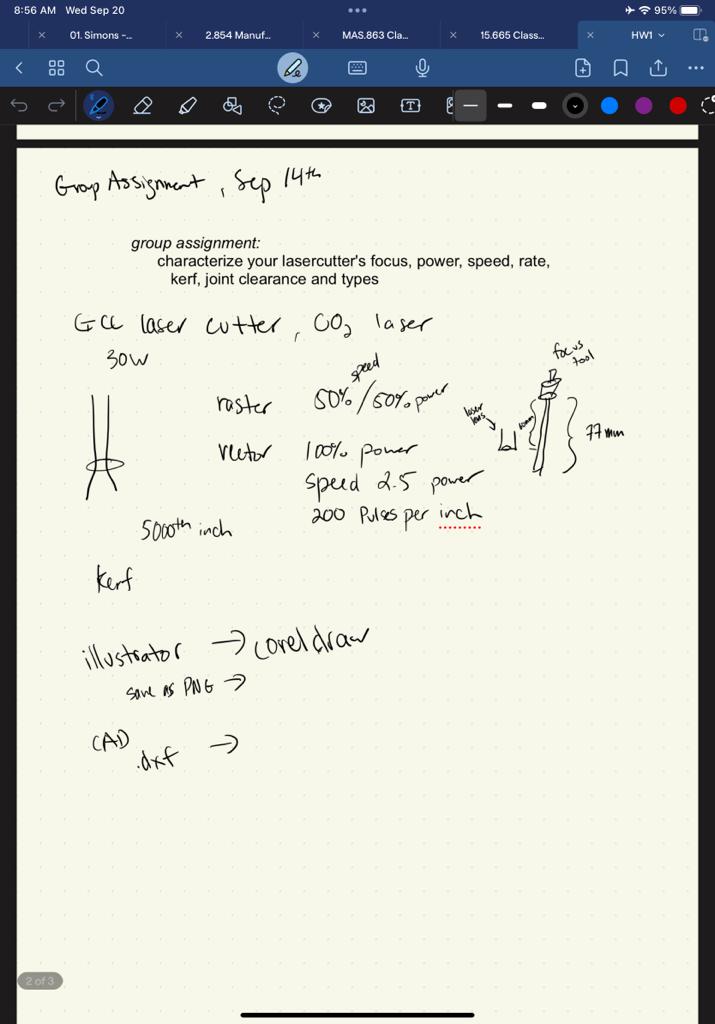
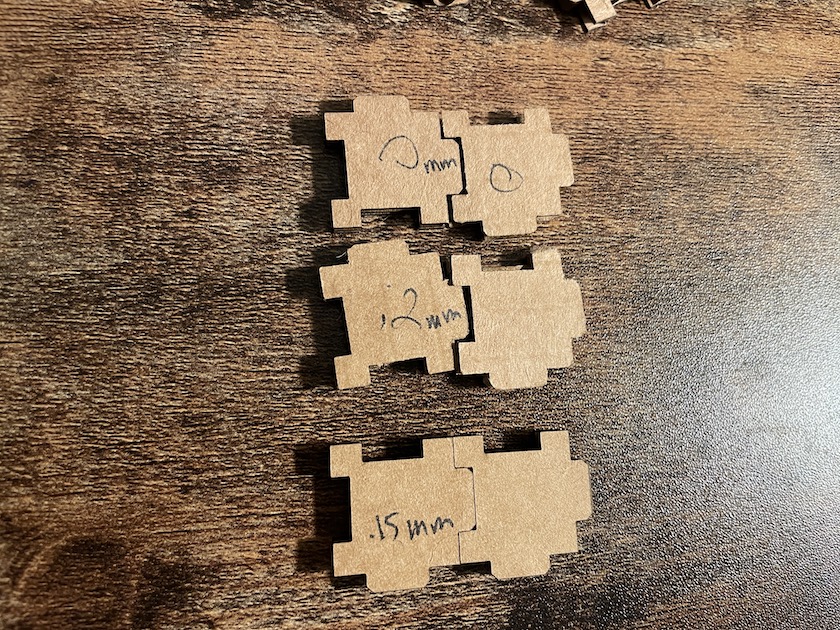
I determined the kerf by changing the offset in the CAD design and through trial and error. The radius of the kerf is between 0.10 mm and 0.15 mm based on the fit of the joints above.
Using the mac terminal to push to git lab
This was a steep learning curve for me, and would not have been possible without the TAs help. Specifically, I needed help setting up the SSH key so that my laptop could communicate and "shake hands" with the gitlab repository. Afterwards, I also needed help understanding the prompts and their sequence to push updates to the repository. I followed the instructinos on this >Git & HTML Recitation webpage to understand how to use the terminal on my machine and git commands to pull and push information to our gitlab repository.I know now that the order should be: