If you are using micropython to write code for the microcontroller, you can save it with the file name "main.py" on the microcontroller to ensure that it runs any time the microcontroller is powered on. This way you do not need to "run" the code from Thonny each time you want the microcontroller to complete the prescribed actions.
Week 03
My first time with embedded programming
This week, we learned about embedded programming. Specifically, I learned how to embed a simple program on a Xiao RP2040 microcontroller both with C++/Arduino and with Micropython.
Initially, I was very confused during the week 03 class on embedded programming. I went to office hours on Thursday, September 21st to learn as much as I could. I was also able to pick up my very own XIAO-RP2040 microcontroller. I also wanted to understand a bit more about the fundamentals behind embedded programming, so I spent some time on YouTube.
For fun, I asked ChatGPT to explain the XIAO-RP2040 microcontroller to me as a 5th grader. The screenshot is below.
To learn more about the RP2040 microcontroller, I read through the wiki for the unit: https://wiki.seeedstudio.com/XIAO-RP2040/. The schematic was very interesting, and I observed that the microcontroller has 32 pins, but we only have access to 11 of them due to its small form factor.
Making the microcontroller blink with Arduino/C++
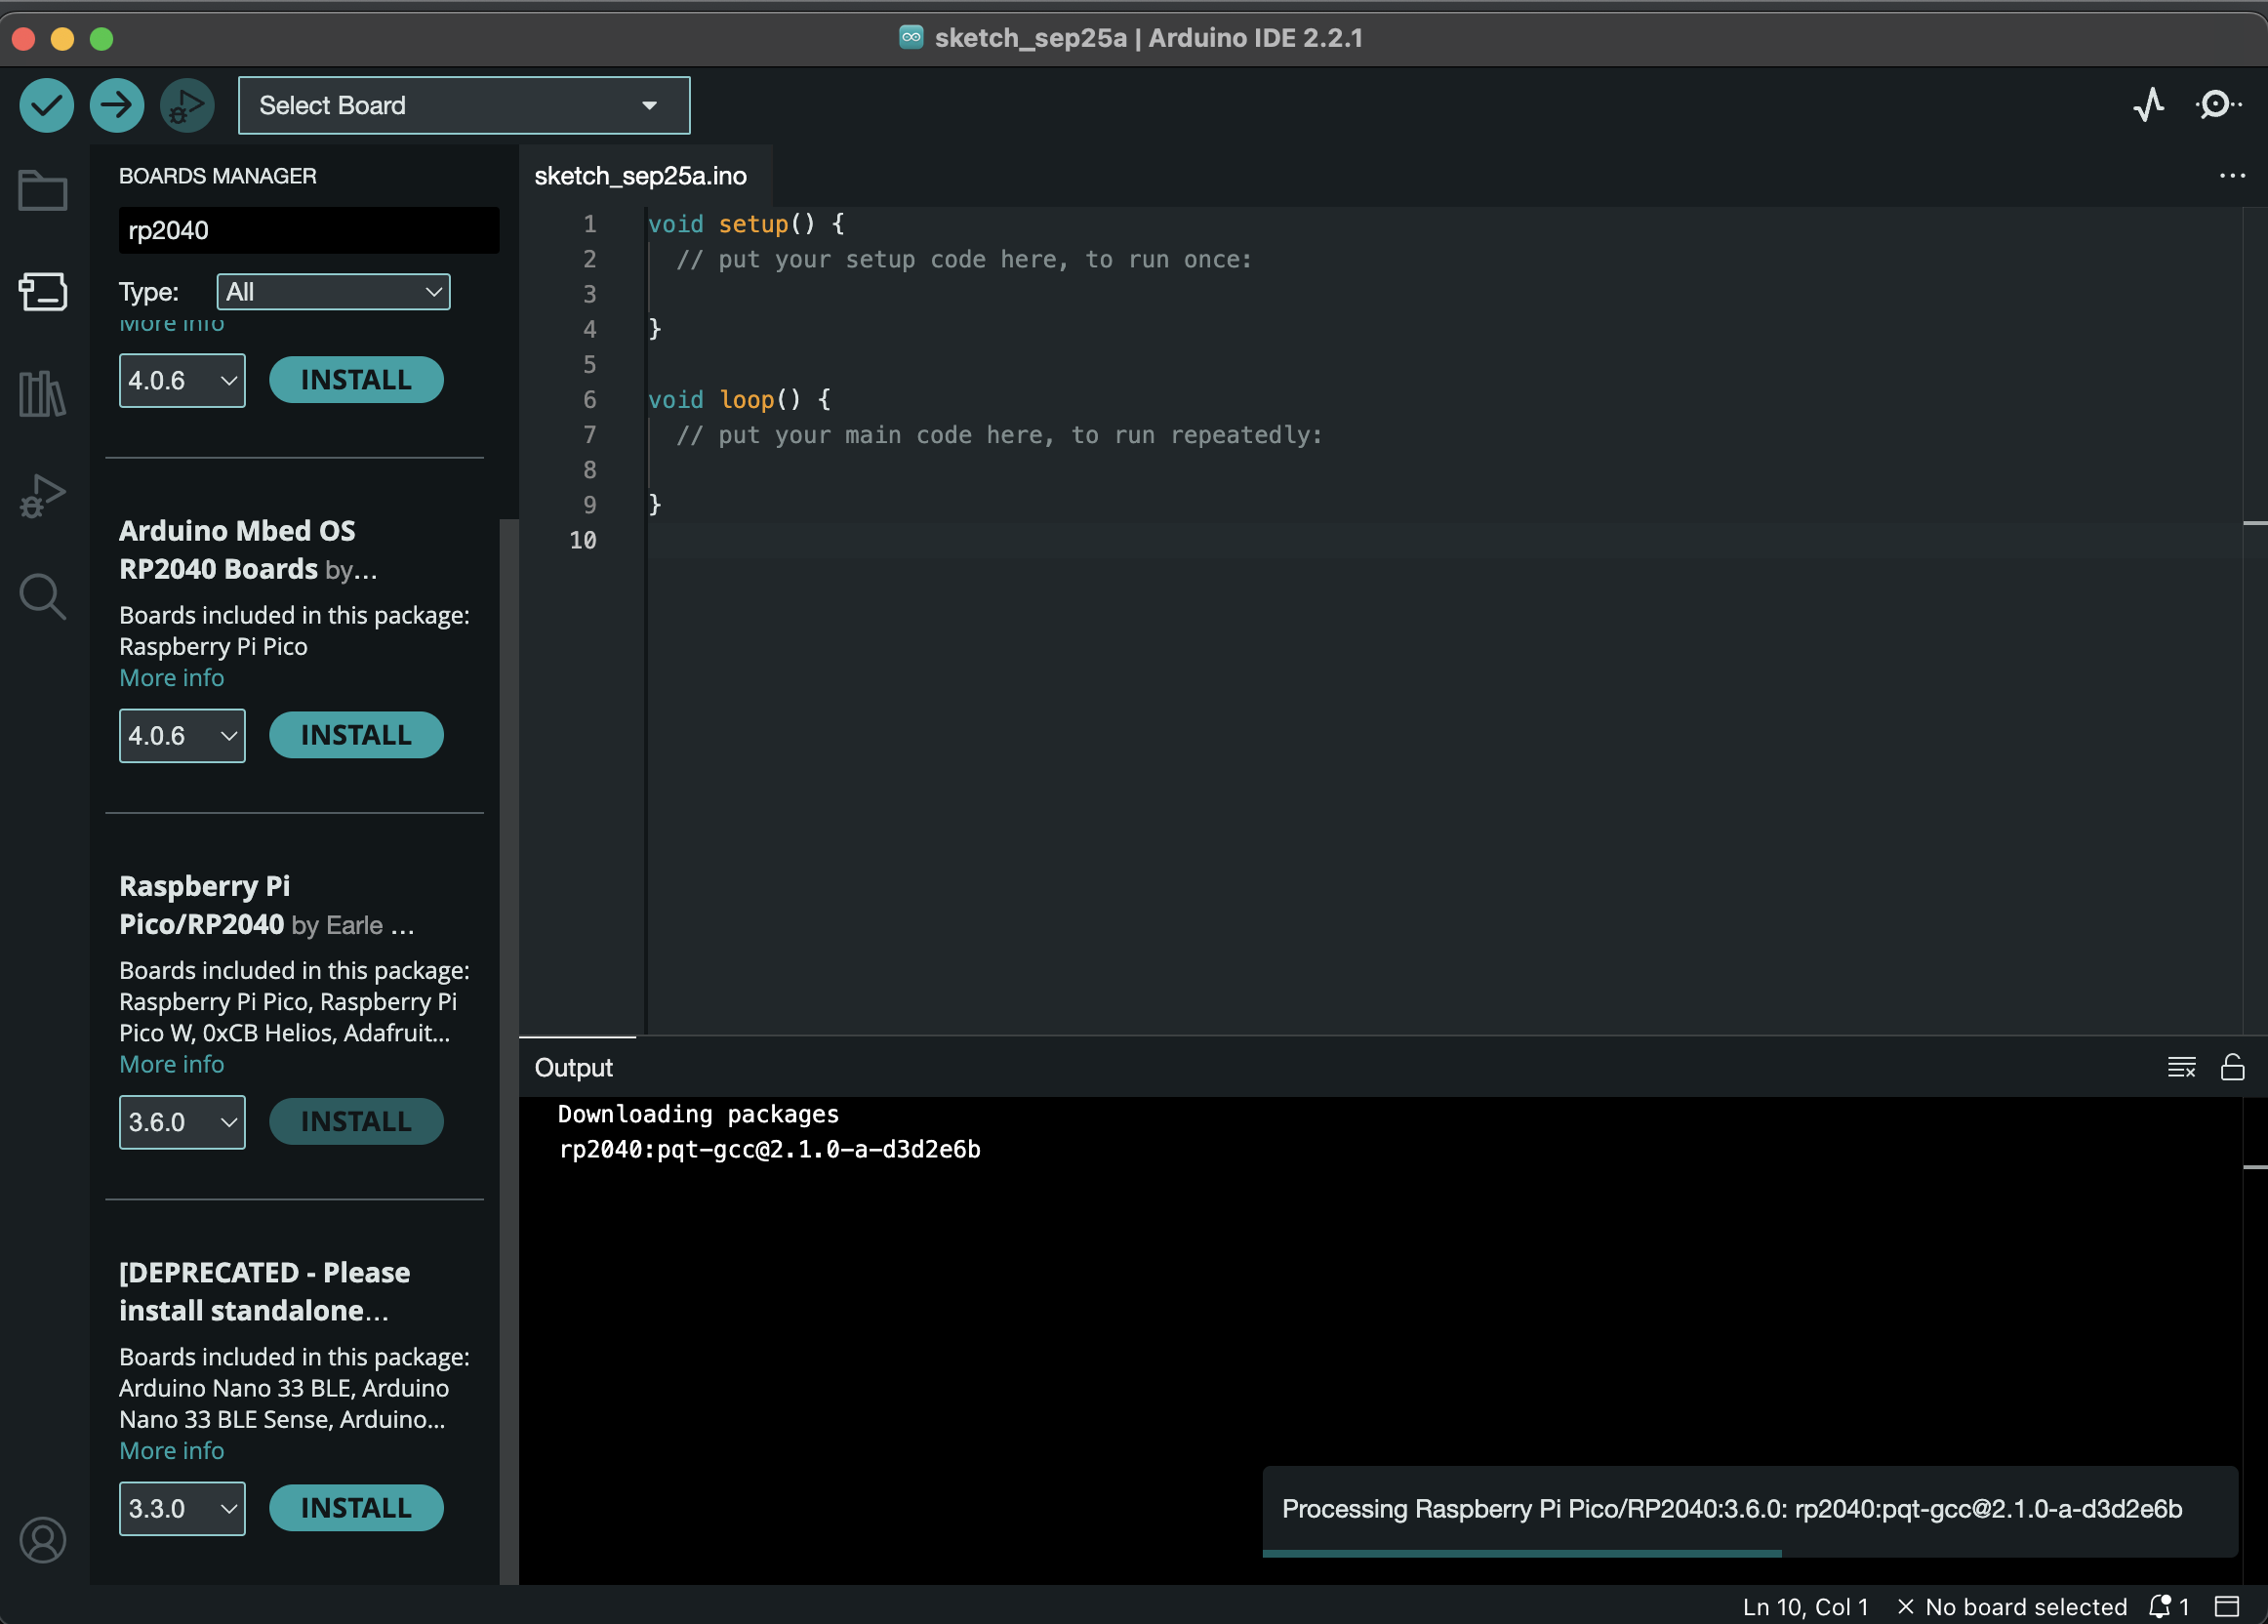
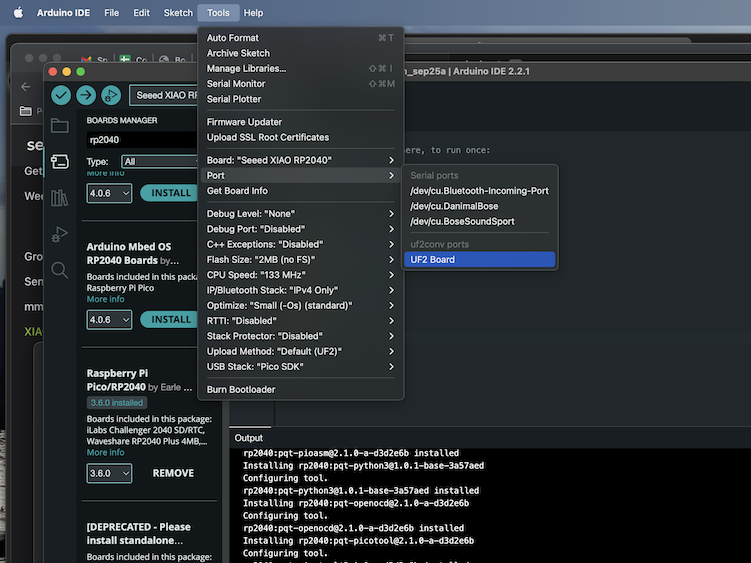
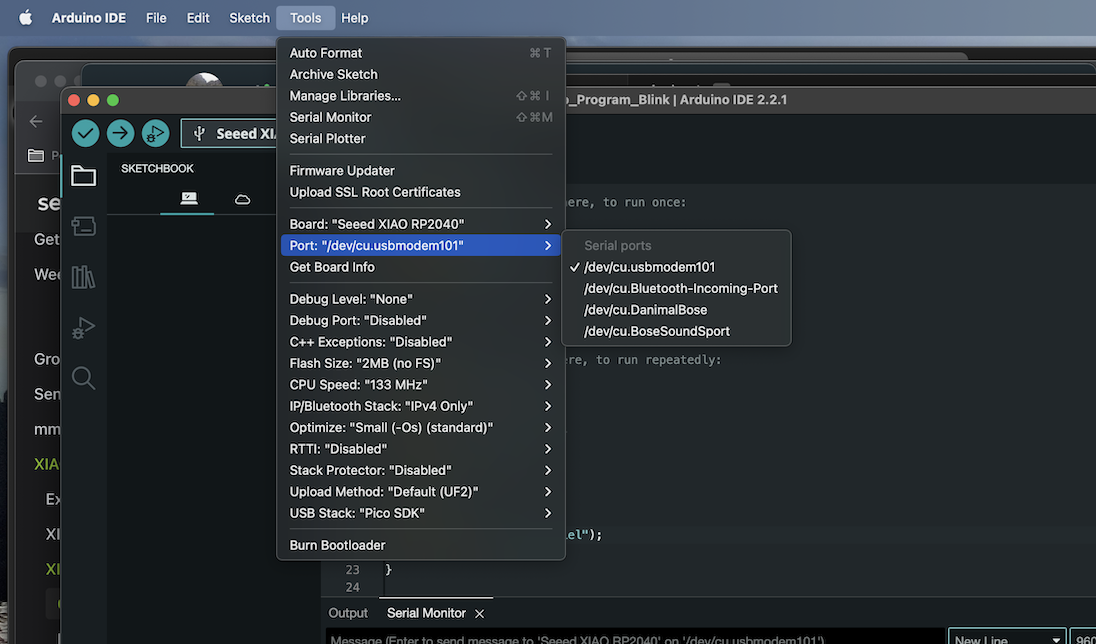
First I downloaded the IDE “Arduino IDE 2.2.1” and installed the RP2040 board on the IDE - see the screenshots below. The board installed very slowly because it is C++ code, and it converting to binary for microcontroller. While the RP2040 was plugged into my Macbook via a USB-C to USB-C cable, I pressed “B” button, then pressed “R”. This enters factory reset mode, then shows up in computer as a hard drive. Select UF2 board in “Port” under “Tools”.
RP2040 has a bootloader built in, which allows us to send code directly from our computer. This is the “UF2 system”.
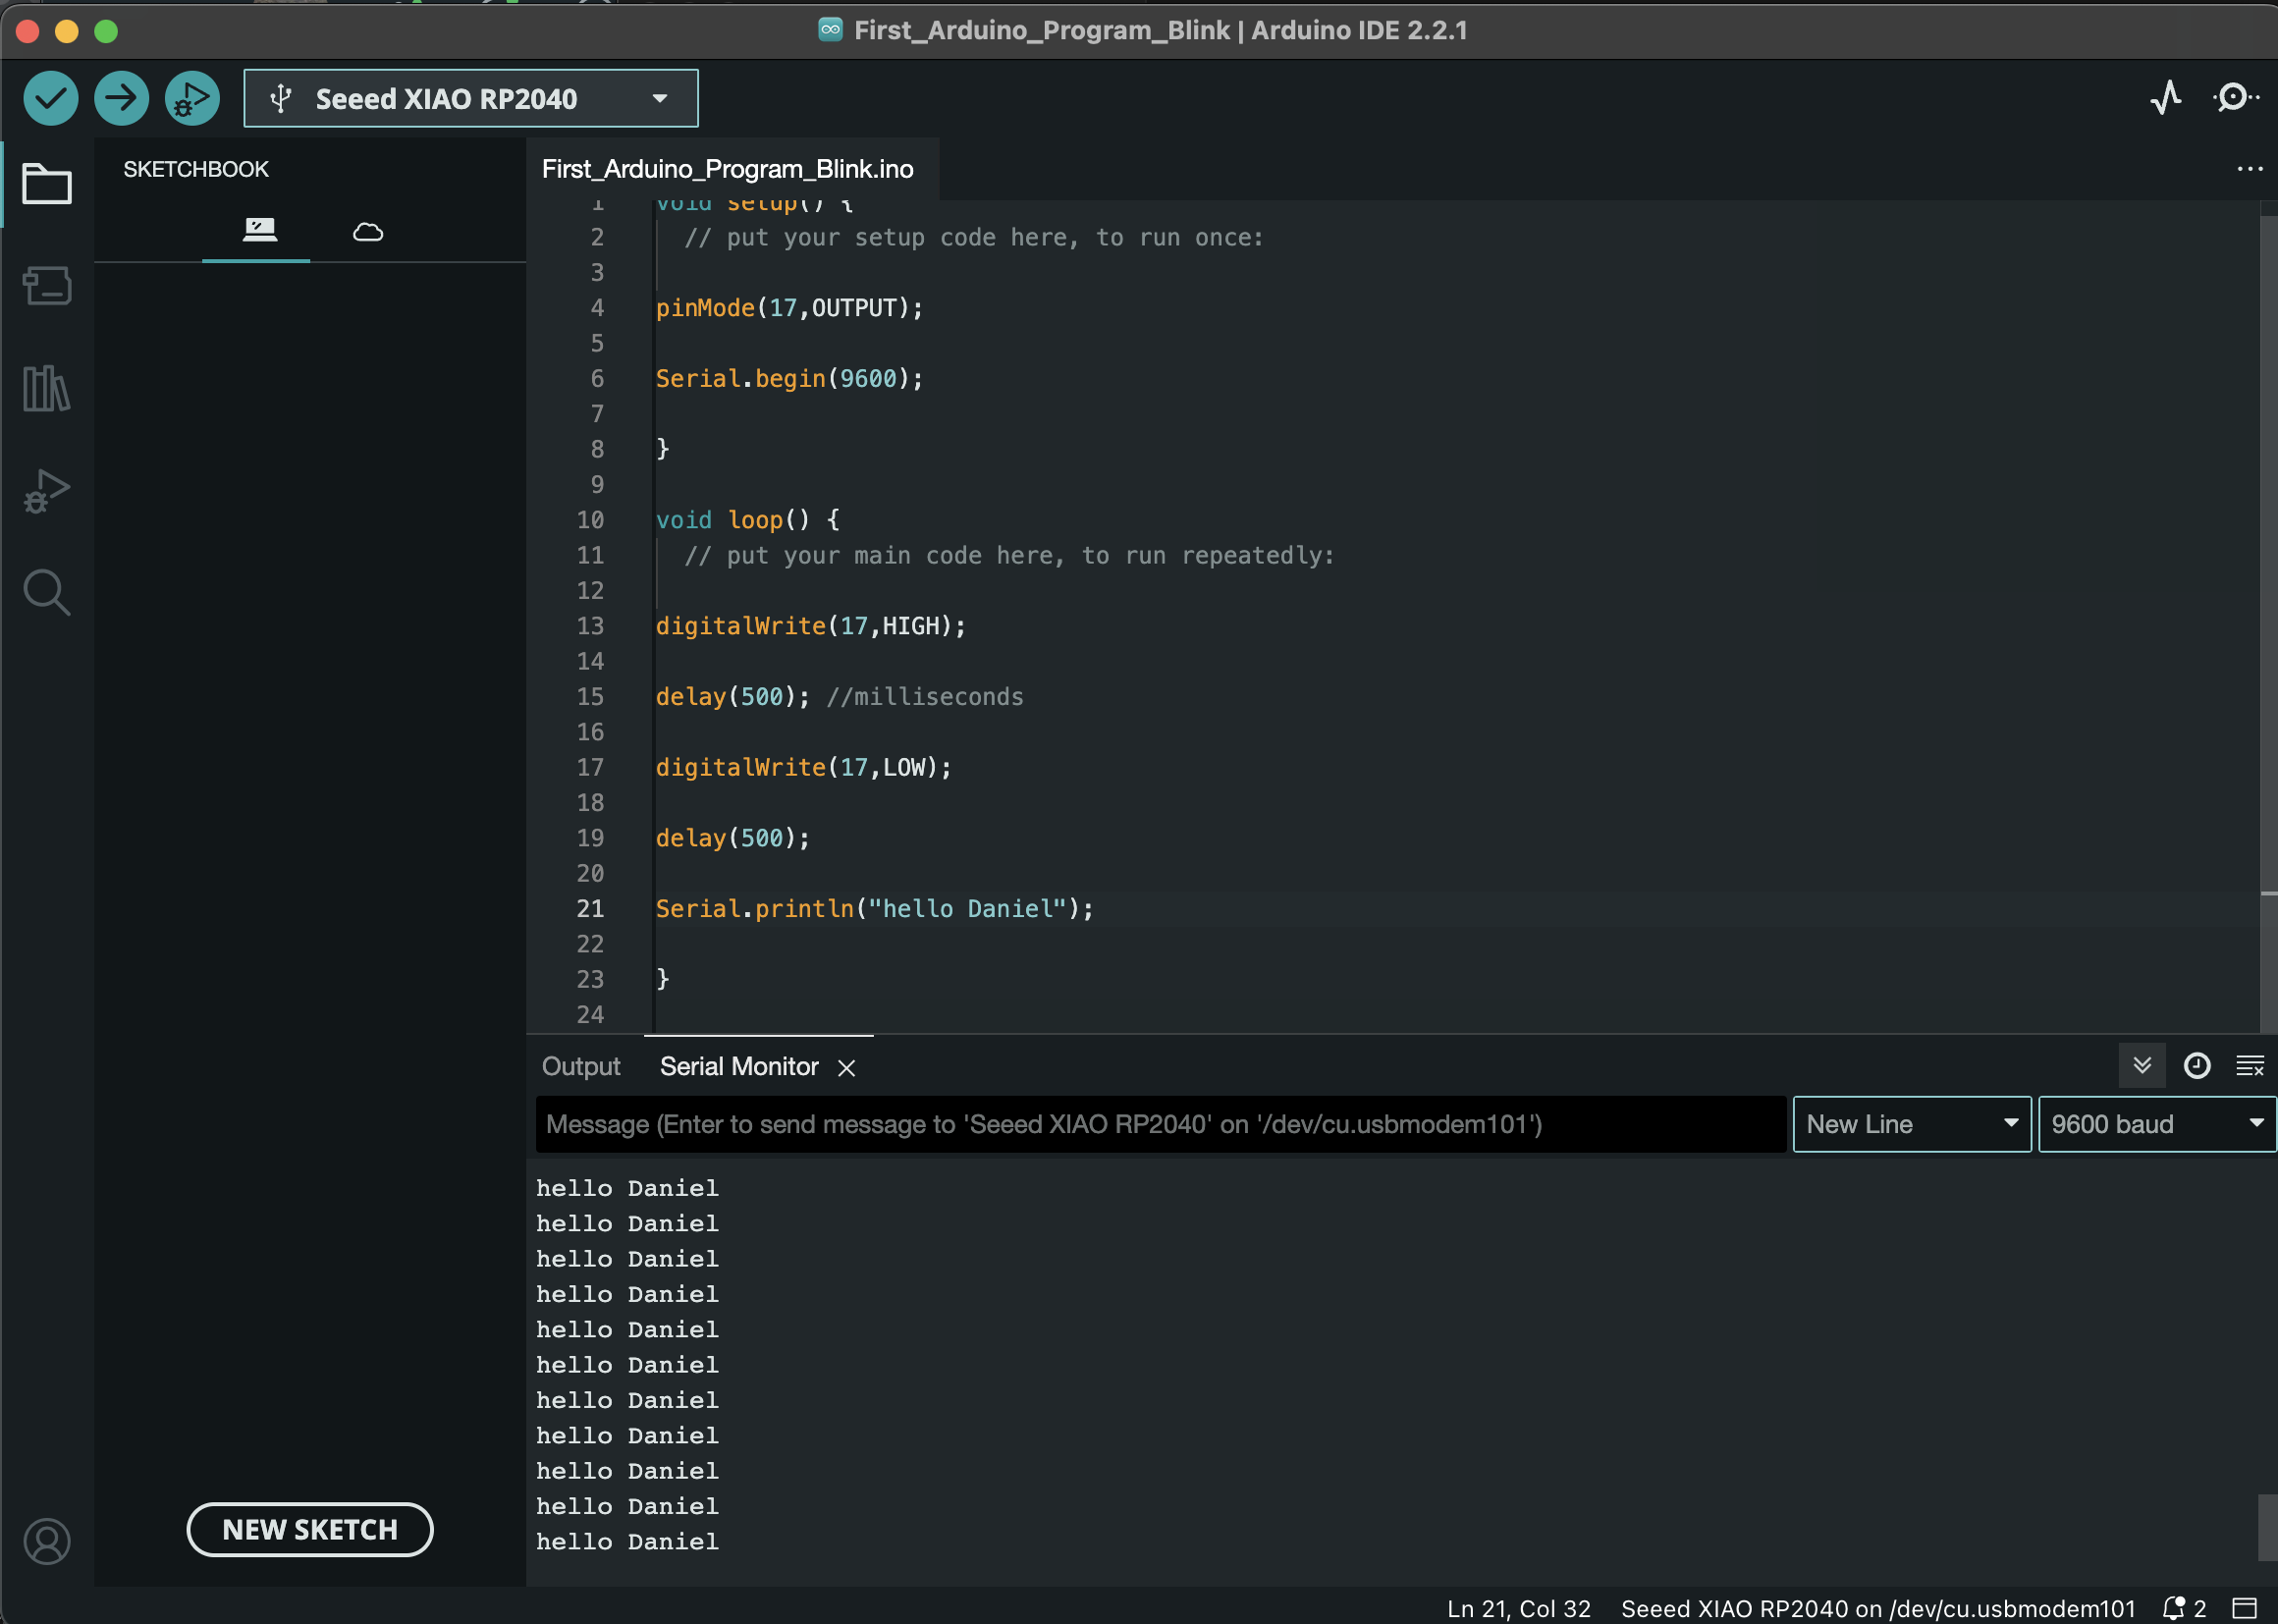
I wrote the code in the image below with help from Quentin, and then pressed "Upload" in Arduino to push the program to the microcontroller. After doing so, the light began blinking, as can be seen in the video below (please note, in the video I am using micropython - more on that below)
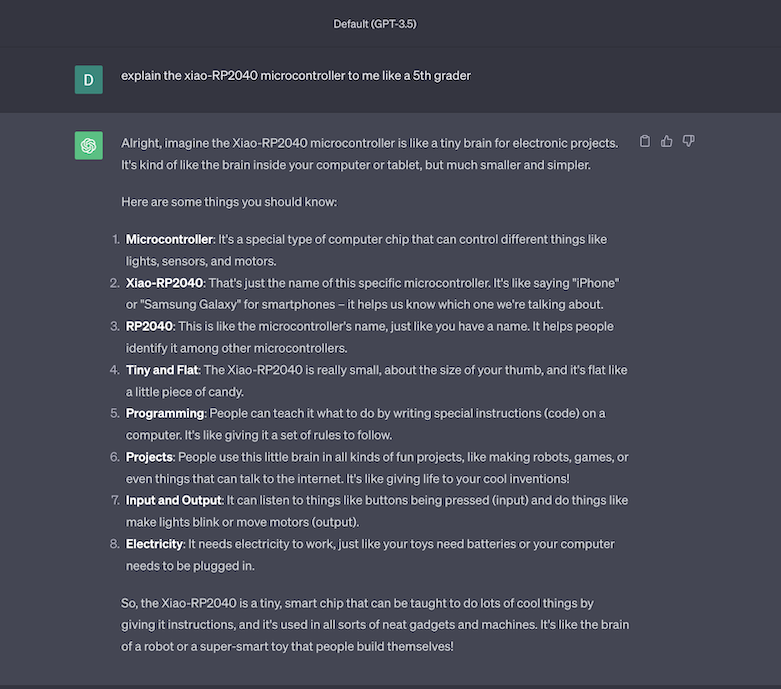
How does ChatGPT explain a microcontroller?
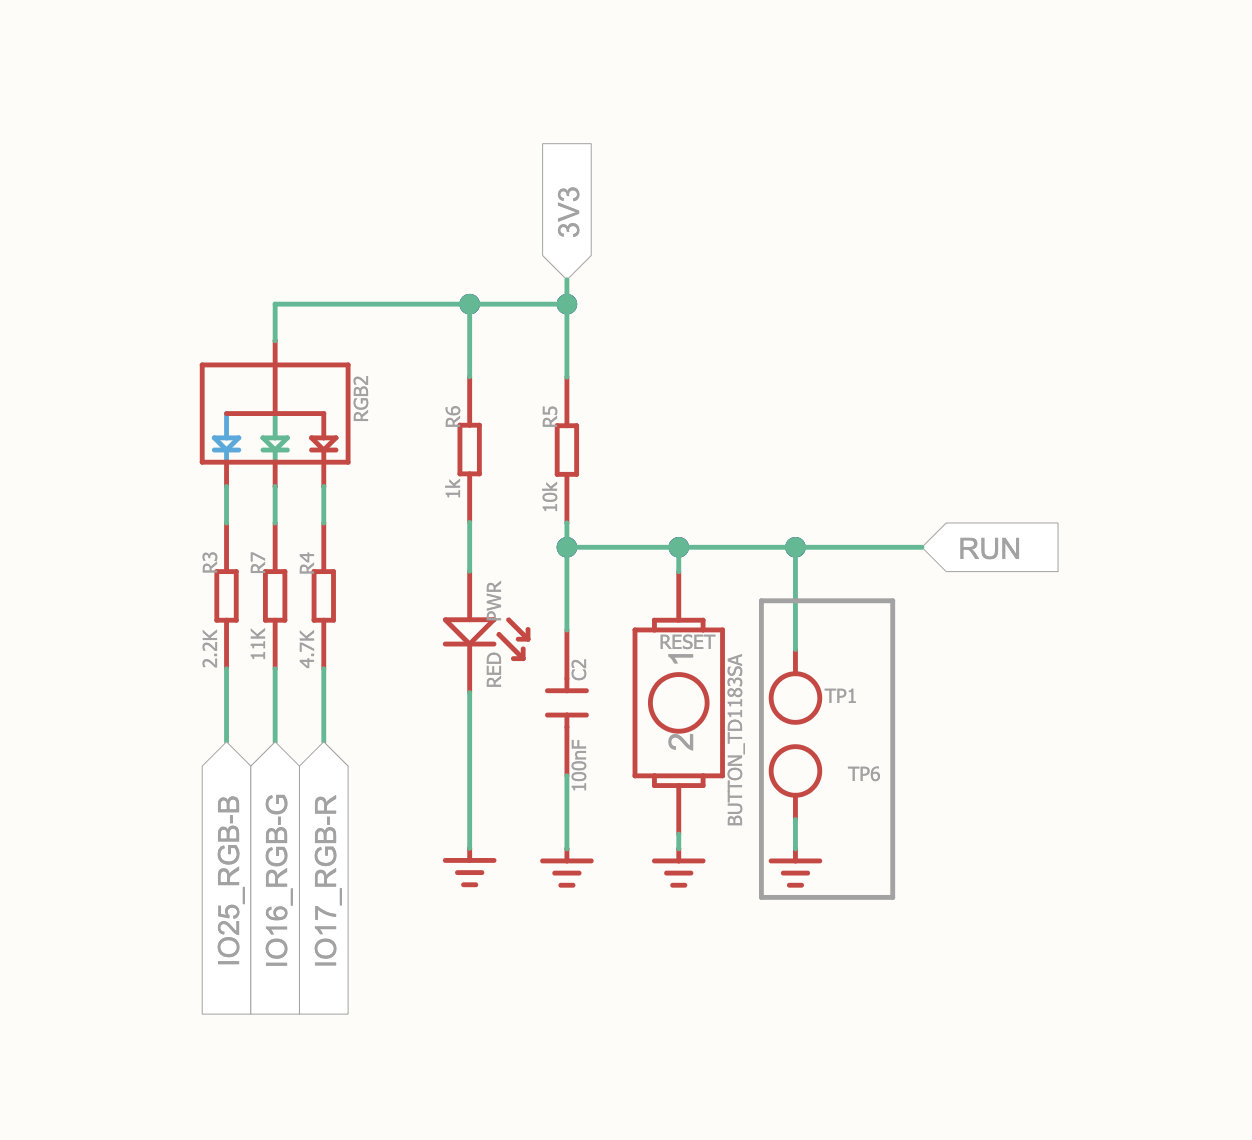
RP2040 schematic from the wiki page.
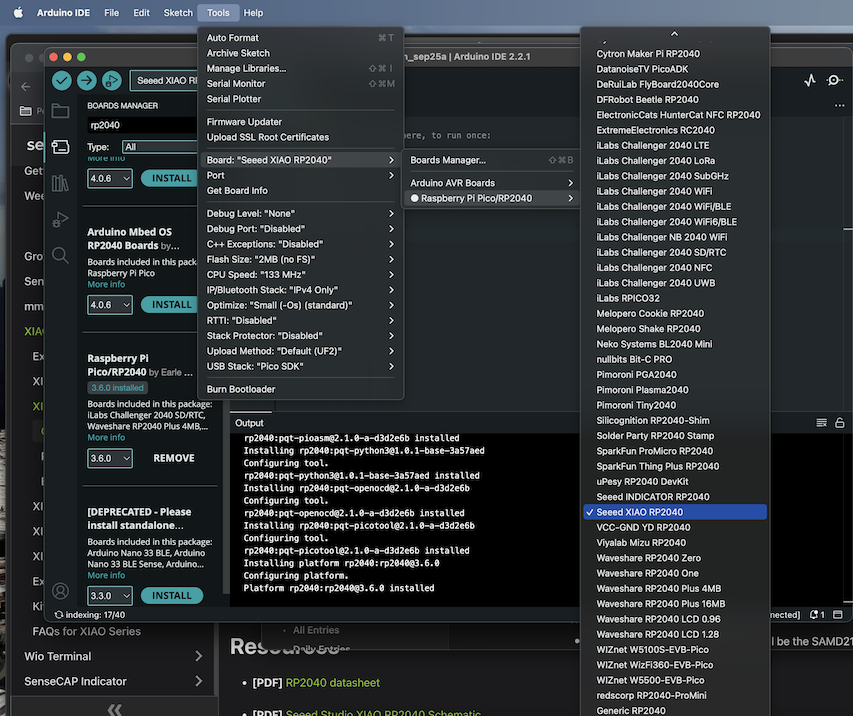
Setting up Arduino to write a program and upload it to the microcontroller.
Setting up Arduino to write a program and upload it to the microcontroller.
Setting up Arduino to write a program and upload it to the microcontroller.
Setting up Arduino to write a program and upload it to the microcontroller.
Setting up Arduino to write a program and upload it to the microcontroller.
Link to Arduino file to make the blue, green, and red light blink 10 times and then stop
First Arduino program
A video of uploading the Arduino code to the RP2040 microcontroller
Making the microcontroller blink with MicroPython/Thonny
In addition to using Arduino, I learned the basics of using an interpreter on the RP2040 microcontroller to make the light blink. Micropython uses an interpreter and you communicate with microcontroller in real time. This is crazy because we don’t have much flash memory on the microcontroller. Flash memory is for code. These are the steps I followed to blink the light on the RP2040 with micropython:
- I read through the tutorial on micropython: https://wiki.seeedstudio.com/XIAO-RP2040-with-MicroPython/
- I downloaded the latest version of micropython from micropython.org. You can install micropython on the board, and it then works as a python interpreter.
- I downloaded Thonny to write code and embed it on board
- How to blink light from python. “import machine” - it is a module that comes with micropython. “import time”
- Micropython has a great deal of functionality. Download micropython for “Pico”: https://micropython.org/download/RPI_PICO/
- I plugged in the microcontroller to my laptop and did a factory reset (press B, press R, let go of R, let go of B)
- Install micropython on RP2040 by dragging and dropping the RPI_PICO-20230426-v1.20.0.uf2 file to the board when it is connected to the computer.
- Install and open Thonny. Type “help()” in Thonny for tutorial. In Thonny settings, choose options in screenshot
- If wanted, you can use “flash nuke” to wipe out the microcontroller flash - this removes all saved programs
- I wrote this basic micropython code in Thonny to communicate with the microcontroller and make it blink.