Glass fibder and carbon fiber is itchy - wear gloves, overalls, glasses, and a face mask when working with the material
Week 14
Wildcard Week: Composites
Software Tools: Autodesk Fusion 360
Hardware Tools: 3D printing machine, glass fiber, carbon fiber, epoxy resin, vacuum bag
Previous experience: Basic CAD from previous weeks
This week was exceptionally fun and hands on. I'd like to say a BIG THANK YOU to Alfonso for the support, instructions, and patience this week! For wildcard week, I made a rear fender made from carbon fiber, glass fiber, and epoxy resin for my electric moped. It was an absolute success thanks to Alfonso, who helped me from the start with a CAD model to sanding and finishing the composite piece. See the pictures below.
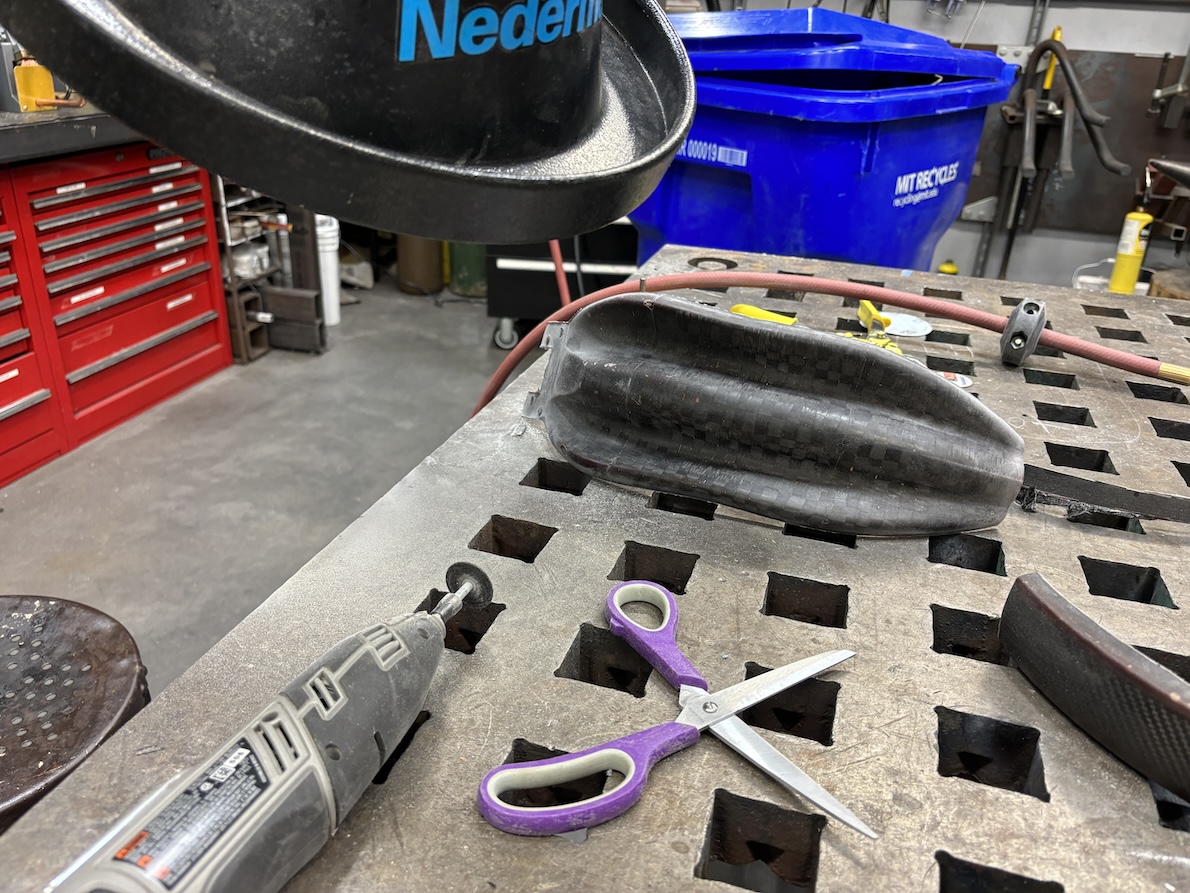
picture of the fender getting the final touches, specifically some sanding before the final polish
You can read more about the composites group on this MAS.863 website.
Creating the design in Fusion 360
The goal was to create a rear fender for my electric moped using a process similar to the one in this YouTube video.
I started by dismantling the rear section of the moped, taking measurements, and sketching the components I would need to work around. With help from Alfonso, we created a Fusion 360 design (file in the let sidebar for reference) which we later used to 3D print a mold. This week, I learned a great deal about using functions like "mirror" to minimize the work done in CAD by duplicating your design across a plane. I also learned about the function "thicken" which can be used on a shell to extrude material outwards - this allowed us to 3D print a mold with the original intended design as the surface of the thickened object.
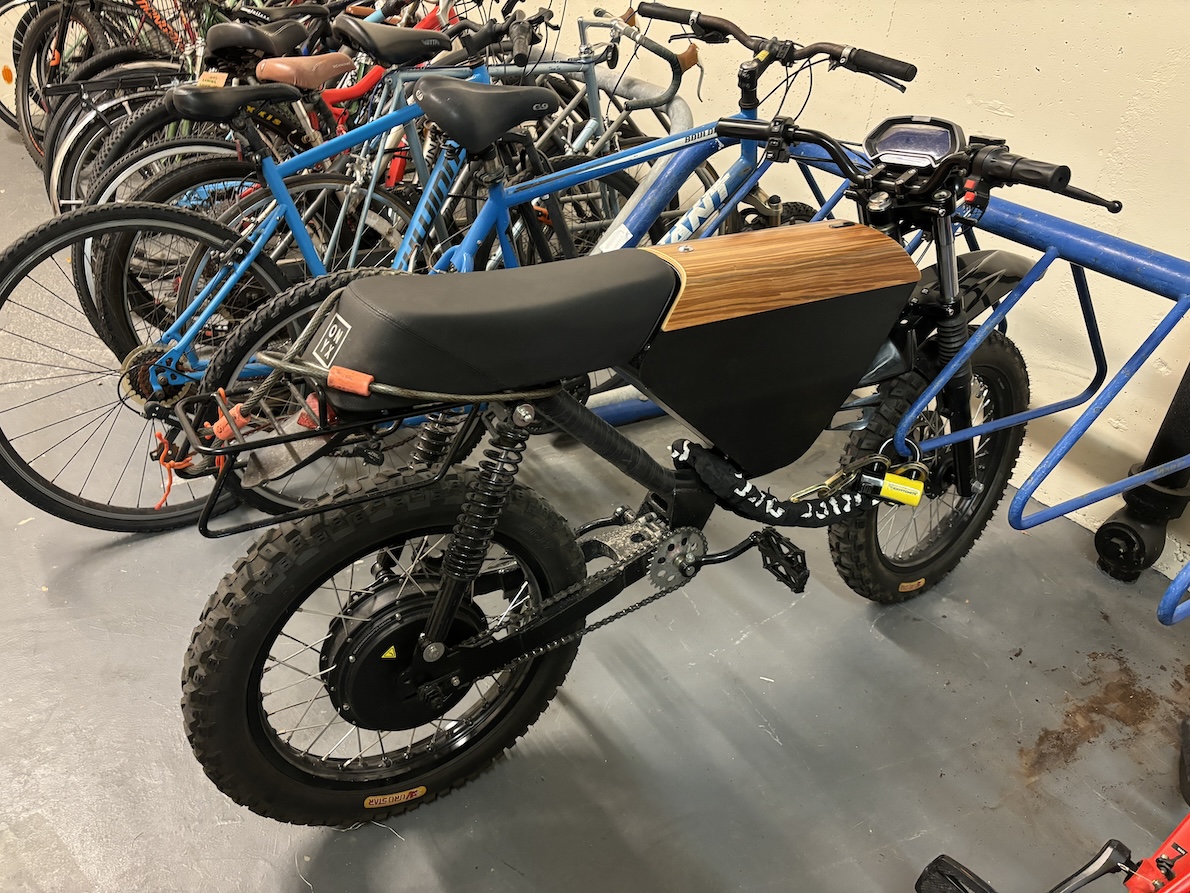
picture of moped
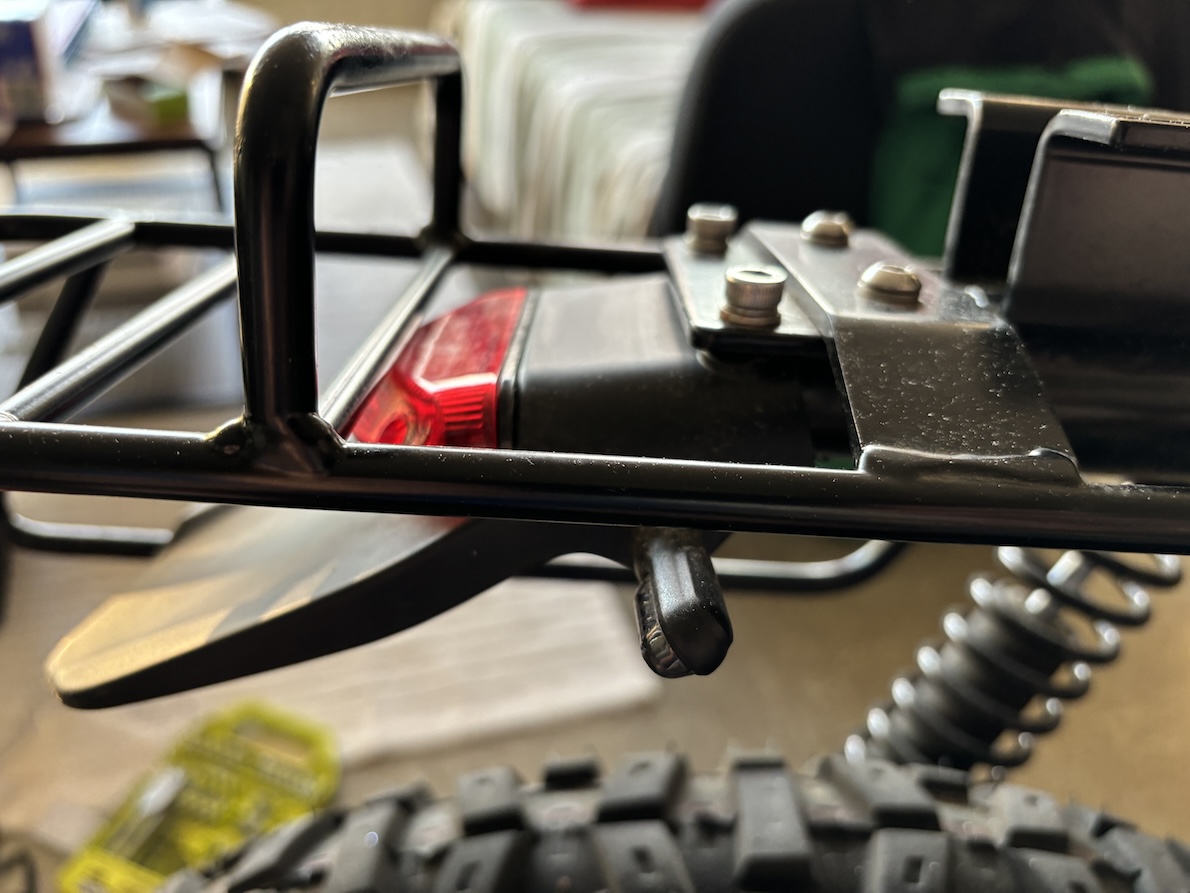
picture of moped fender
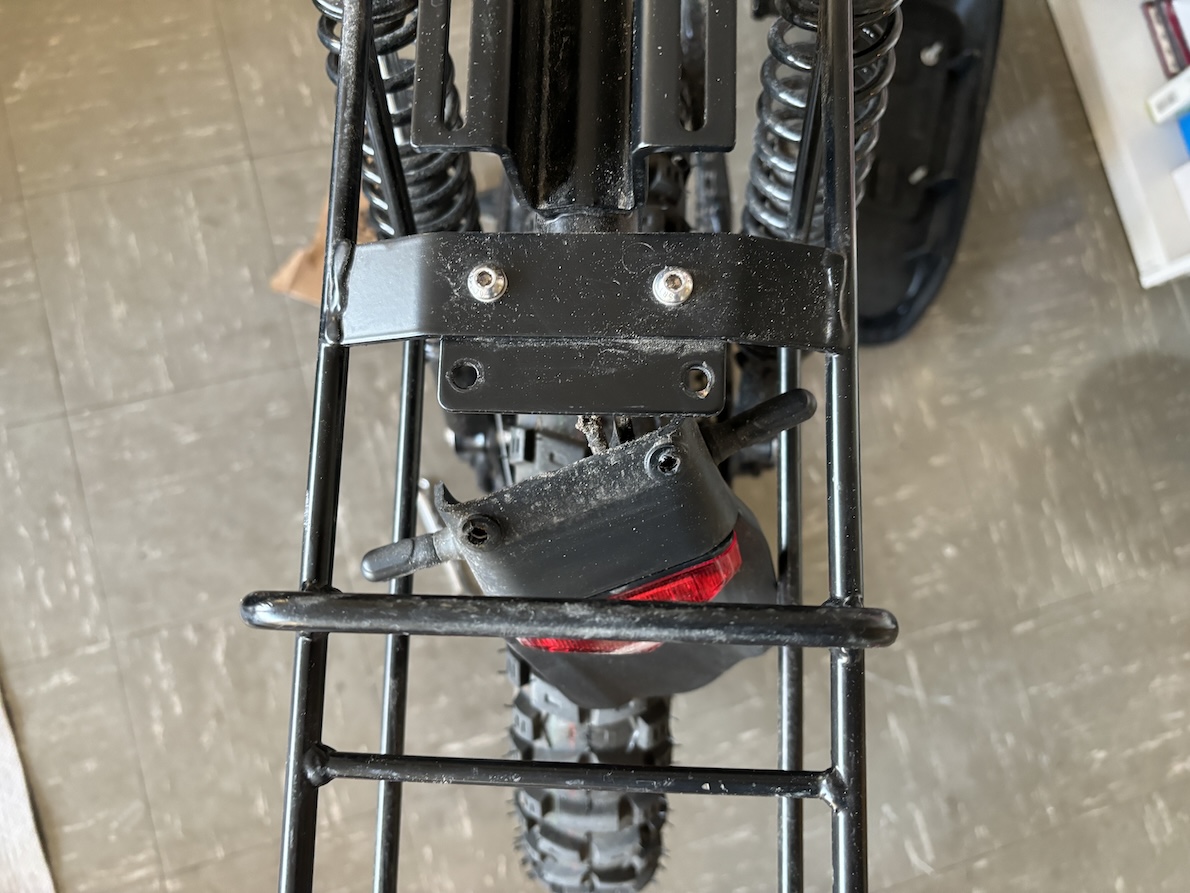
picture of moped fender
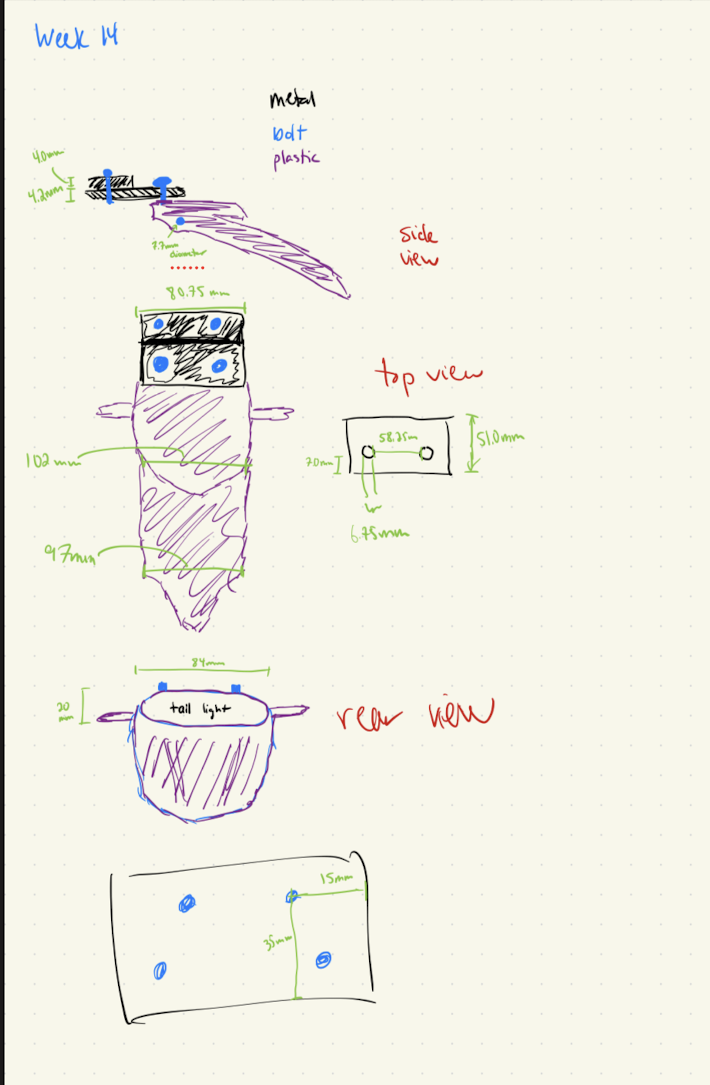
sketch of components with their dimensions
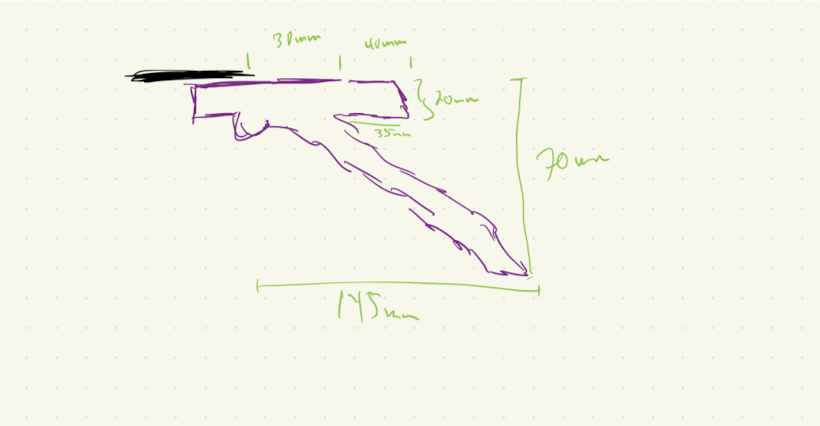
sketch of components with their dimensions
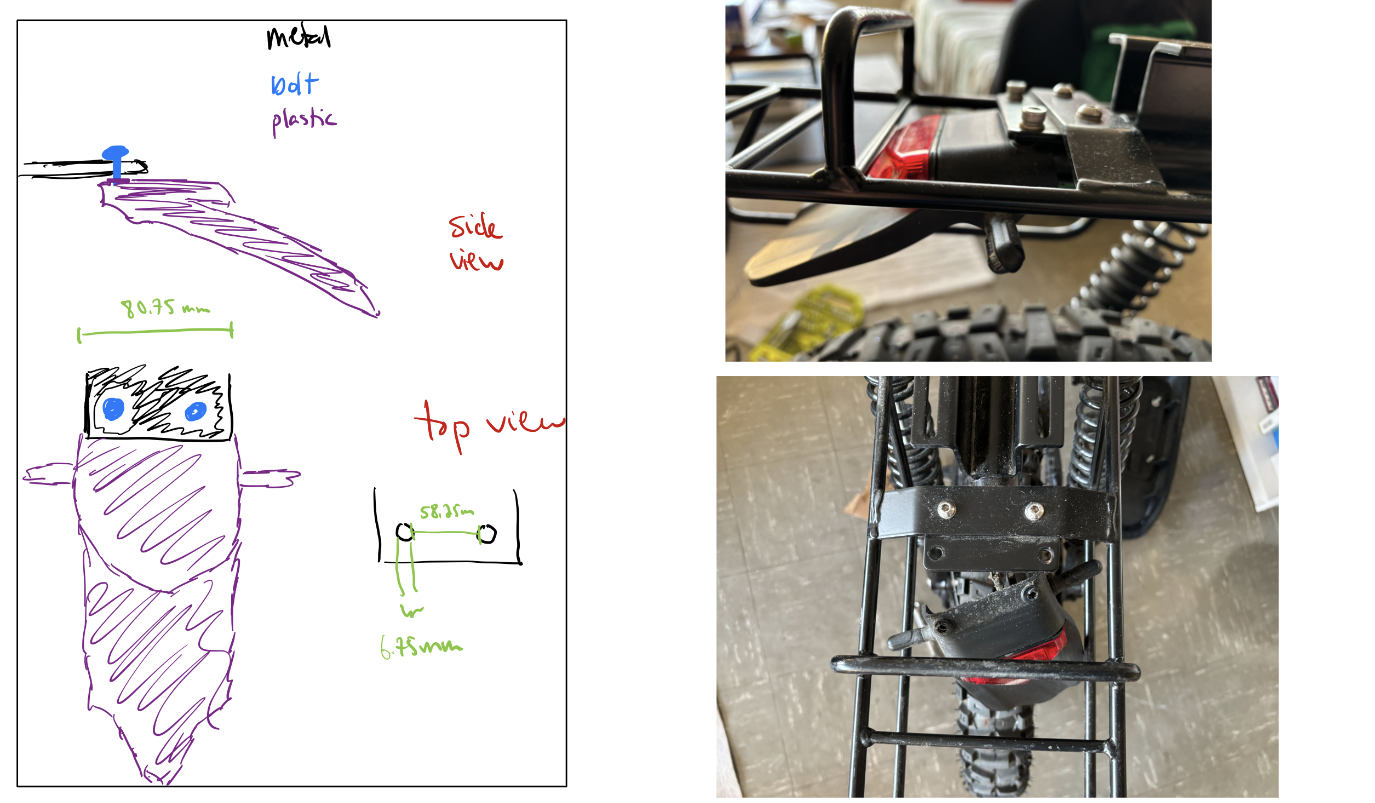
sketch of components with their dimensions
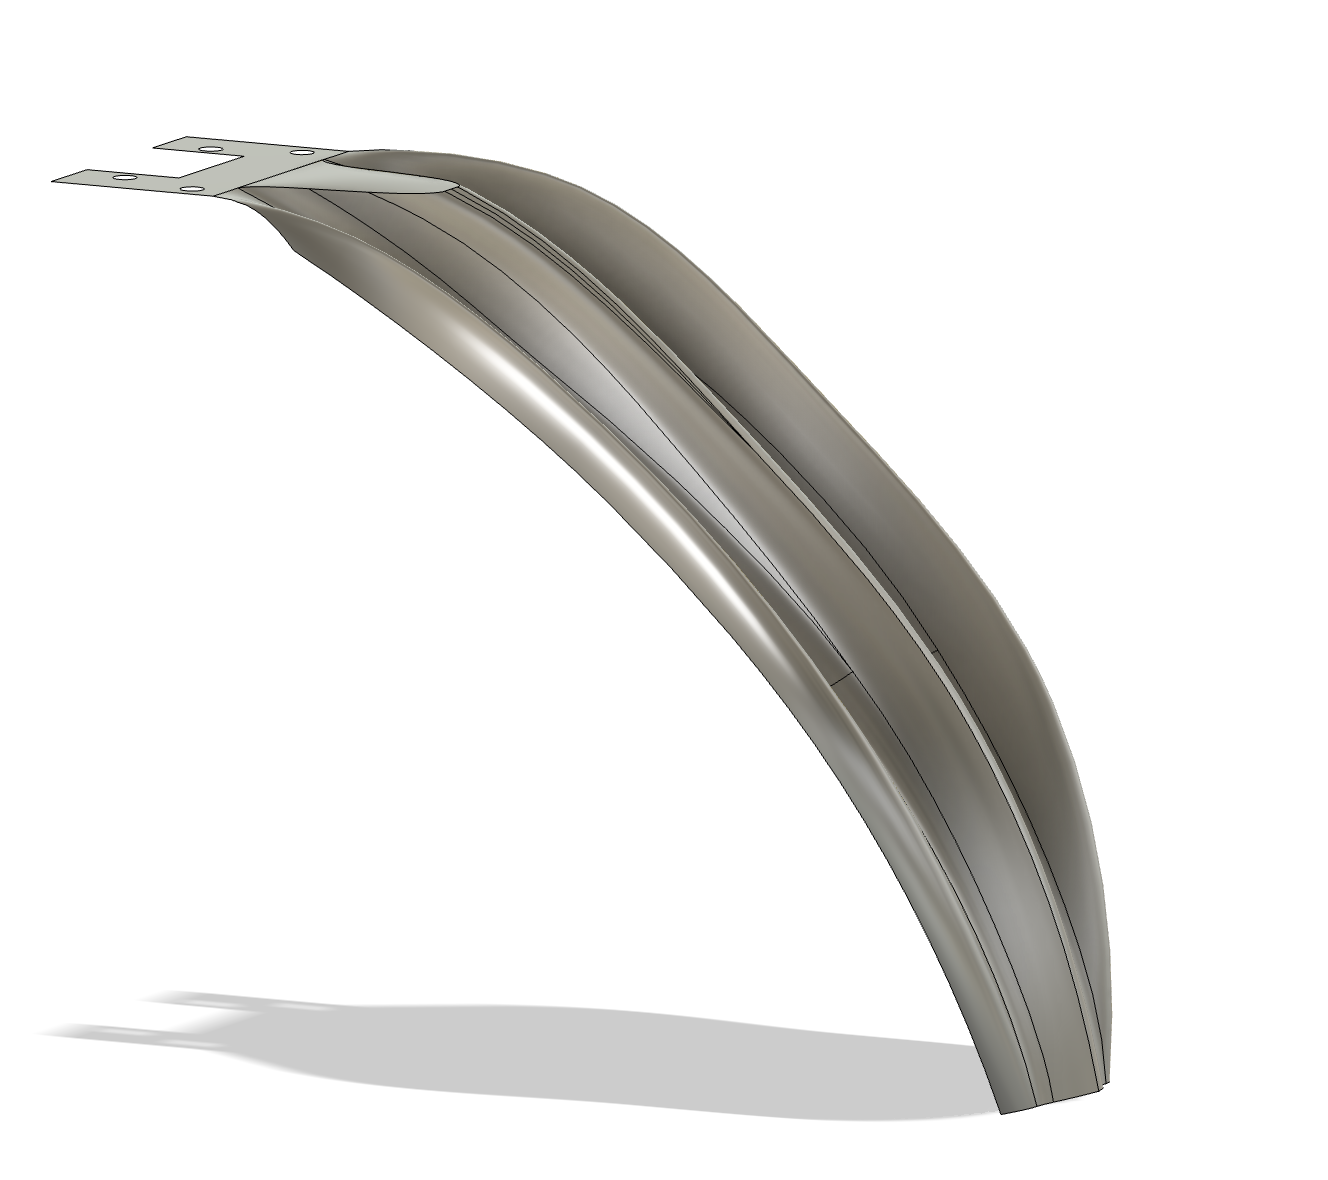
screenshot of fender design in Fusion 360
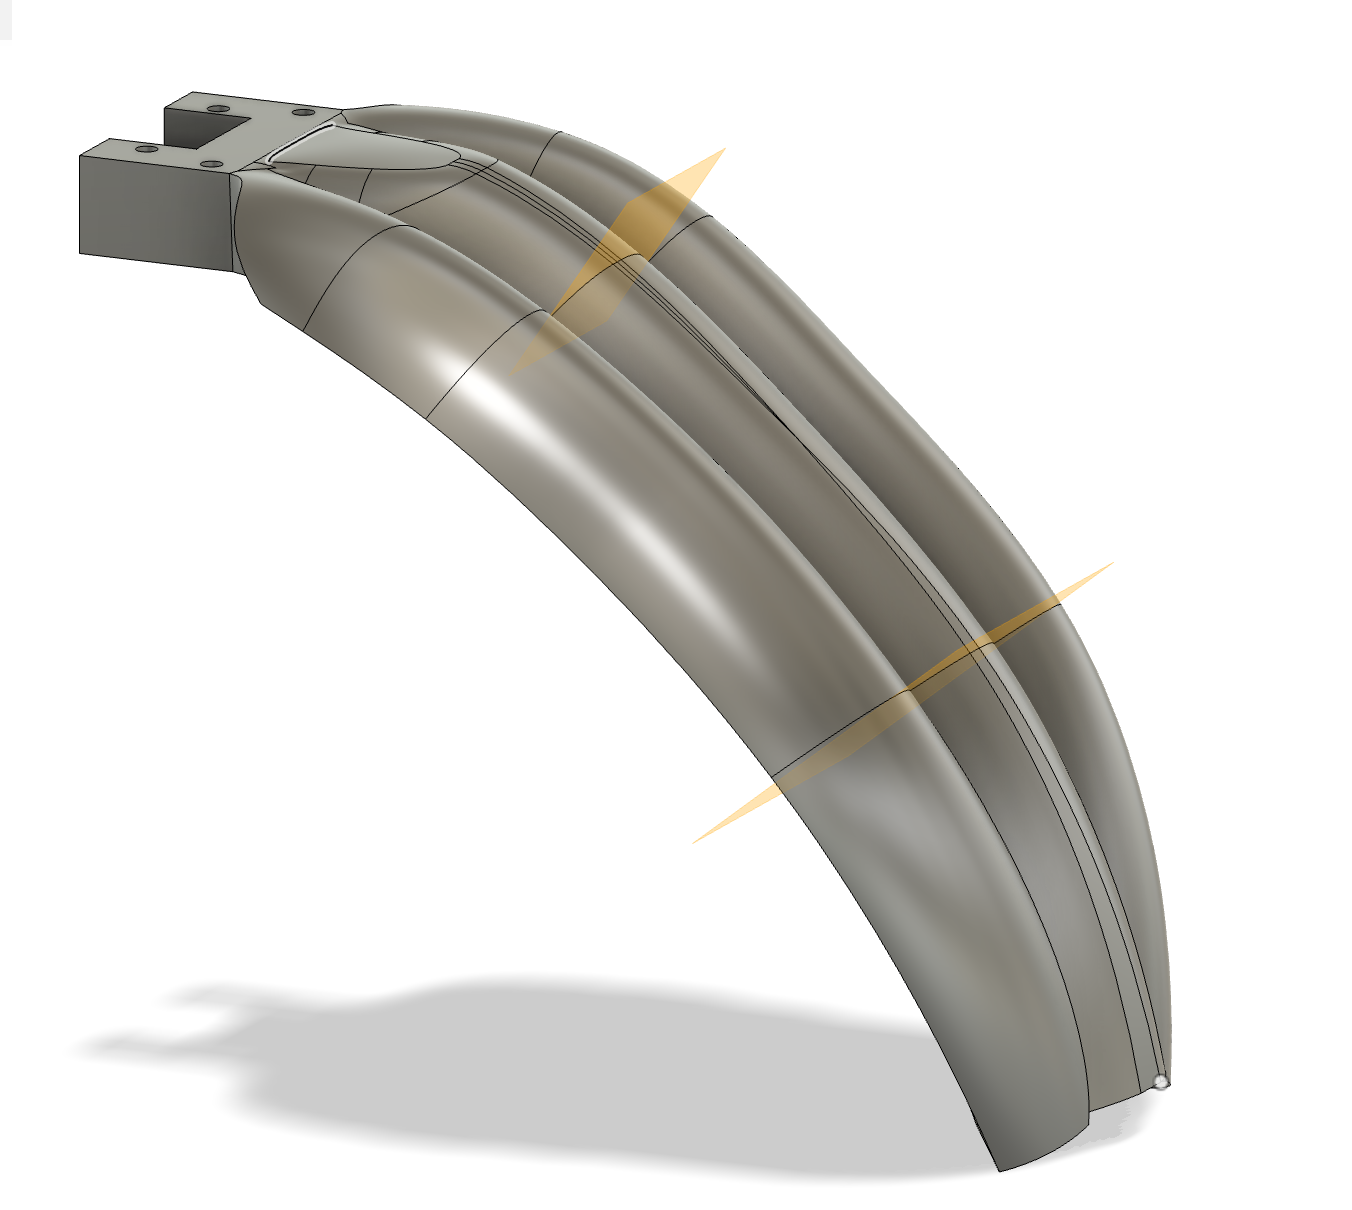
screenshot of fender design in Fusion 360 after using "thicken" function. this is what will be 3D printed as a "mold" for the composites.
Wet lay up and final product
We 3D printed the design from above to create a mold for the fender. We followed the wet lay up procedure in the YouTube video linked above.
Specifically, we did the following:
- Prepared our work bench by laying clean sheets of paper and clearing all unnecessary tools.
- Cut pieces of glass fiber and carbon fiber that are larger than the mold - we needed extra material to hang over the edge of the mold.
- Sand the mold finely to create a smooth surface, and then spray with a release agent, which is basically wax.
- Mix the epoxy resign according to the data sheet instructions. We used "105 Epoxy Resin Part 1" and "205 Fast Hardener Part 2". We mixed - you now have 9 minutes. GO!
- Spread a thin layer of resin on the mold. Then lay down the first layer of carbon fiber and push the material down with a light layer of resin and a firm brush. Repeat this step with each following layer of glass fiber - I used three in total. Add a bit of resign for each layer - just enough to wet the fibers, but not so much that it would clump up or create pools of resin.
- Position the molds in the vacuum bag, make sure there are no leaks, create channels for air to flow from the molds to the vacuum outlet, and let it run for multiple hours while the epoxy cures.
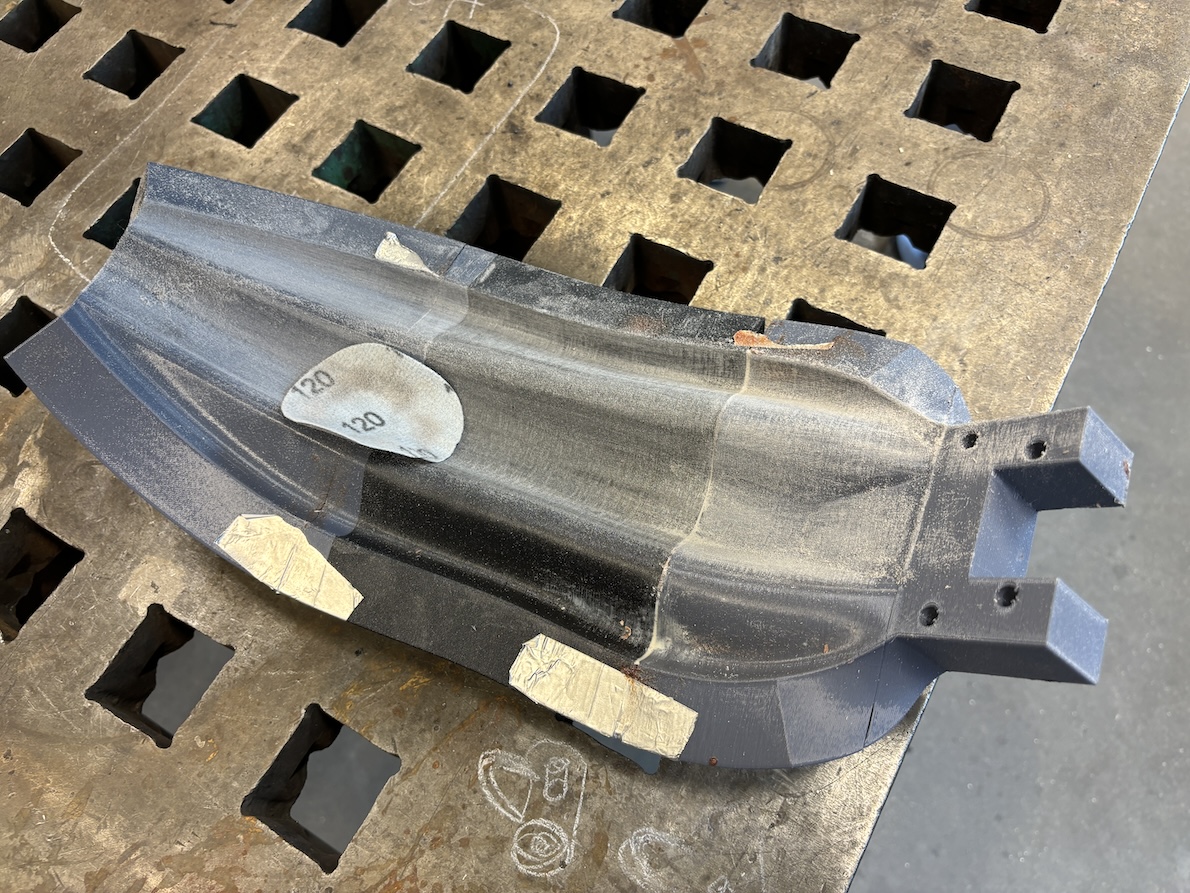
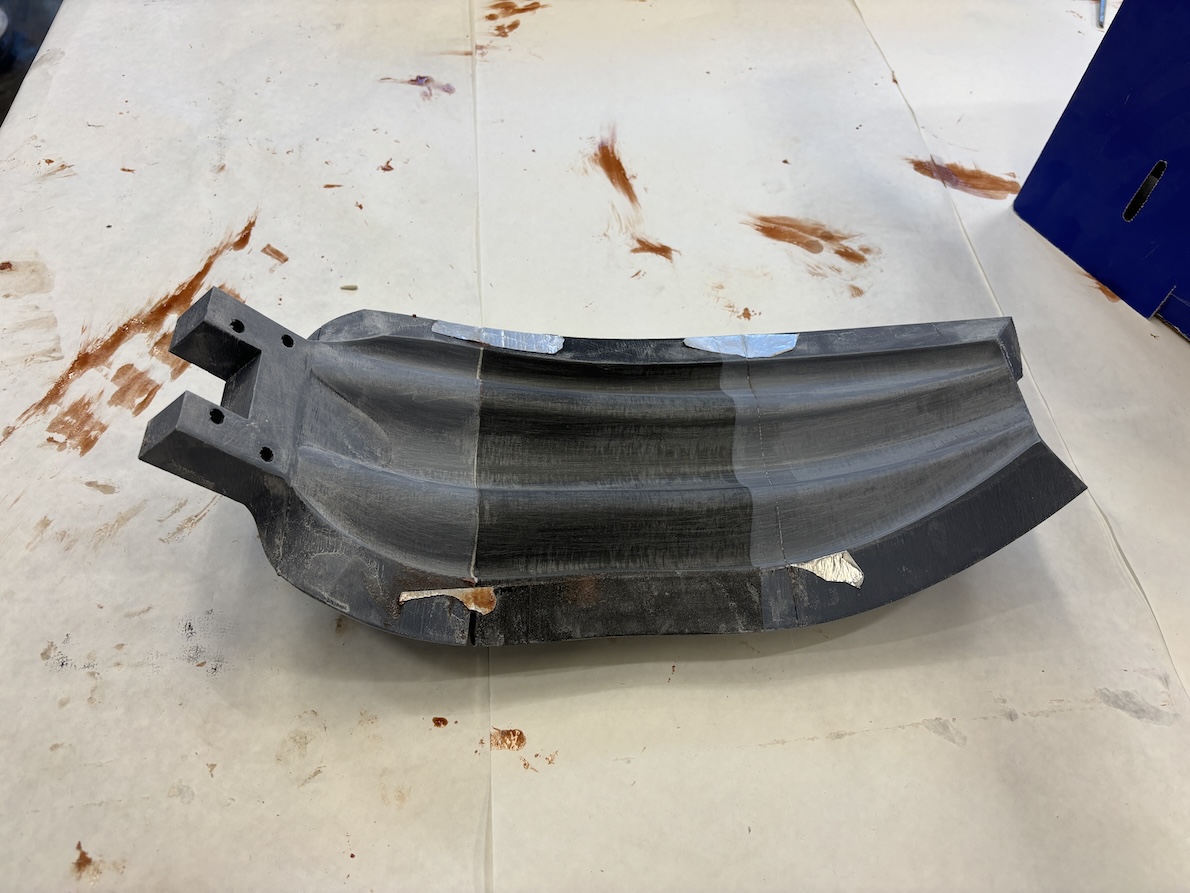
After the curing is complete, we removed the cured composite product carefully from the mold, cut off excess fiber, and sanded down the edges to a smooth final product.
picture of 3D printed mold
picture of 3D printed mold

wet layup setup
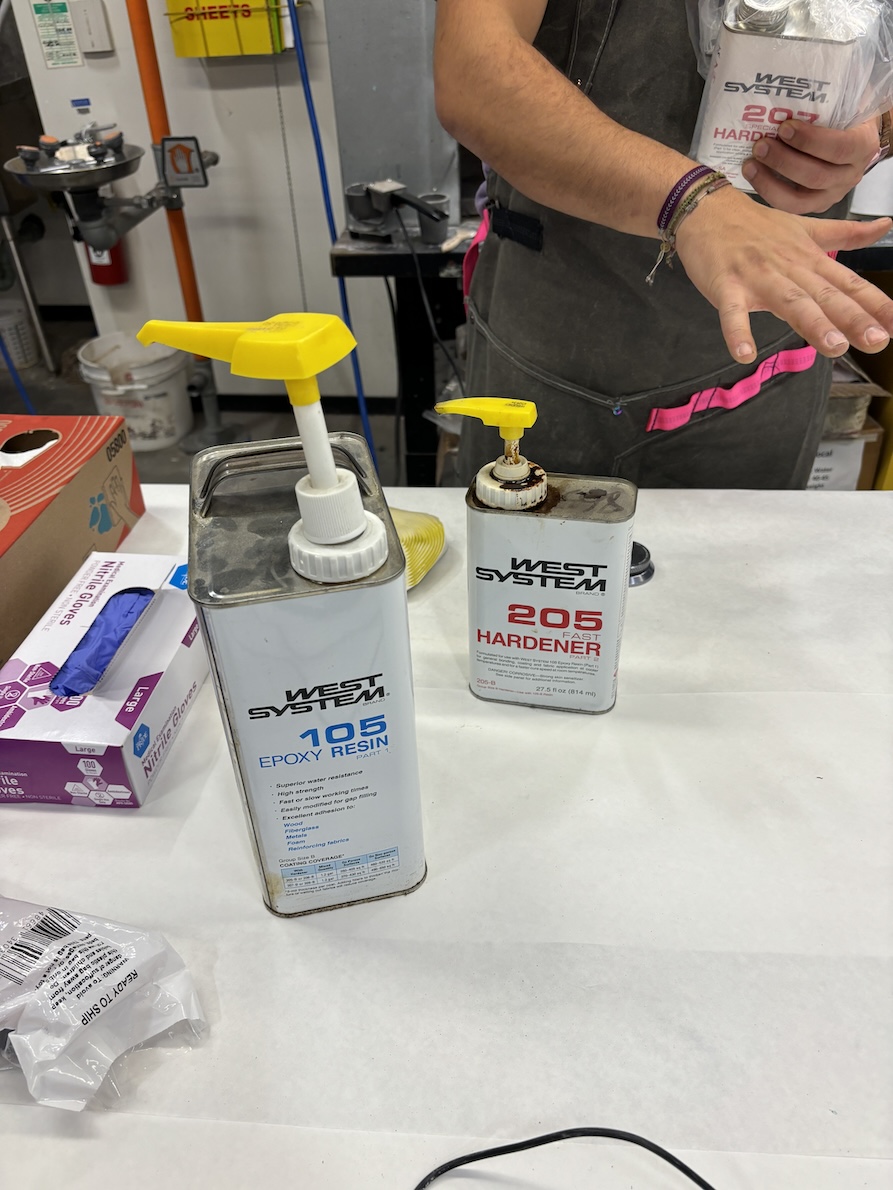
epoxy resin and hardener used for the project
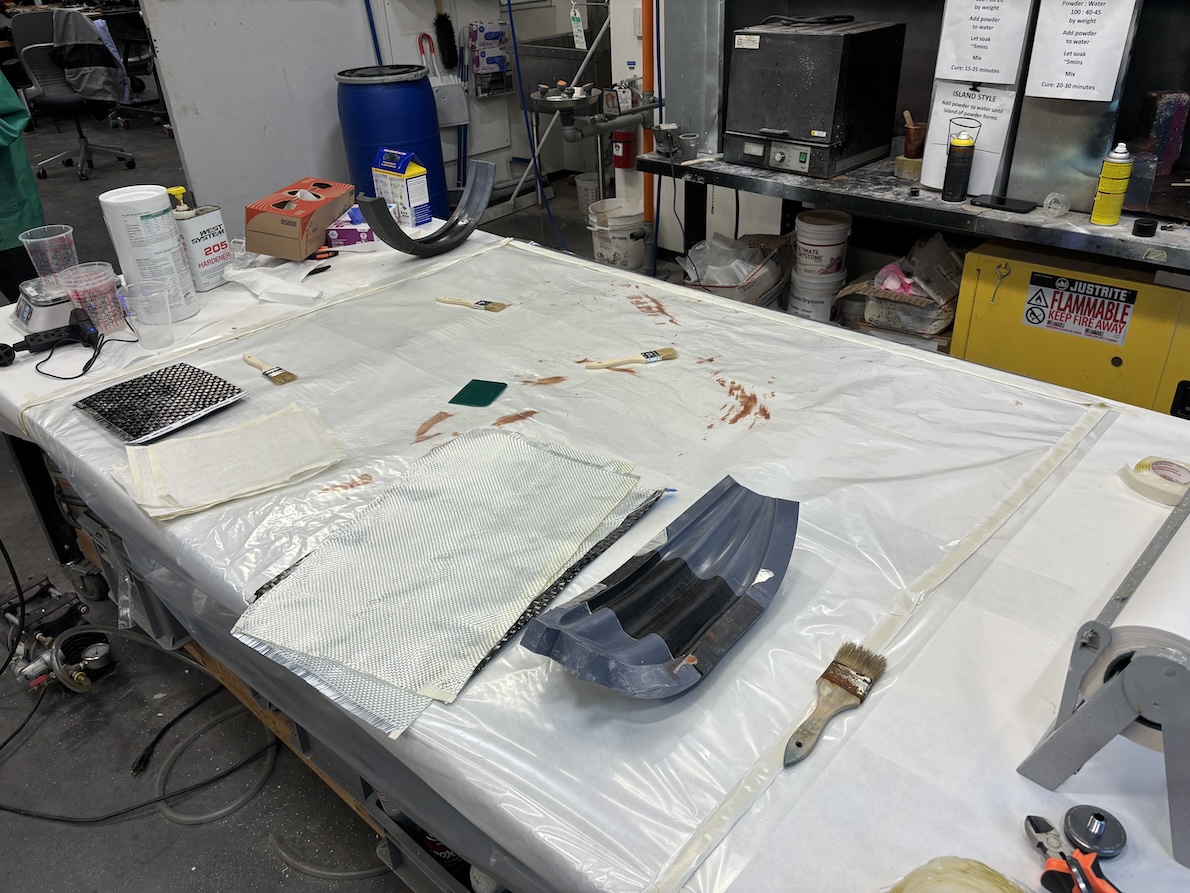
3D printed mold with glass and carbon fibers ready for resin
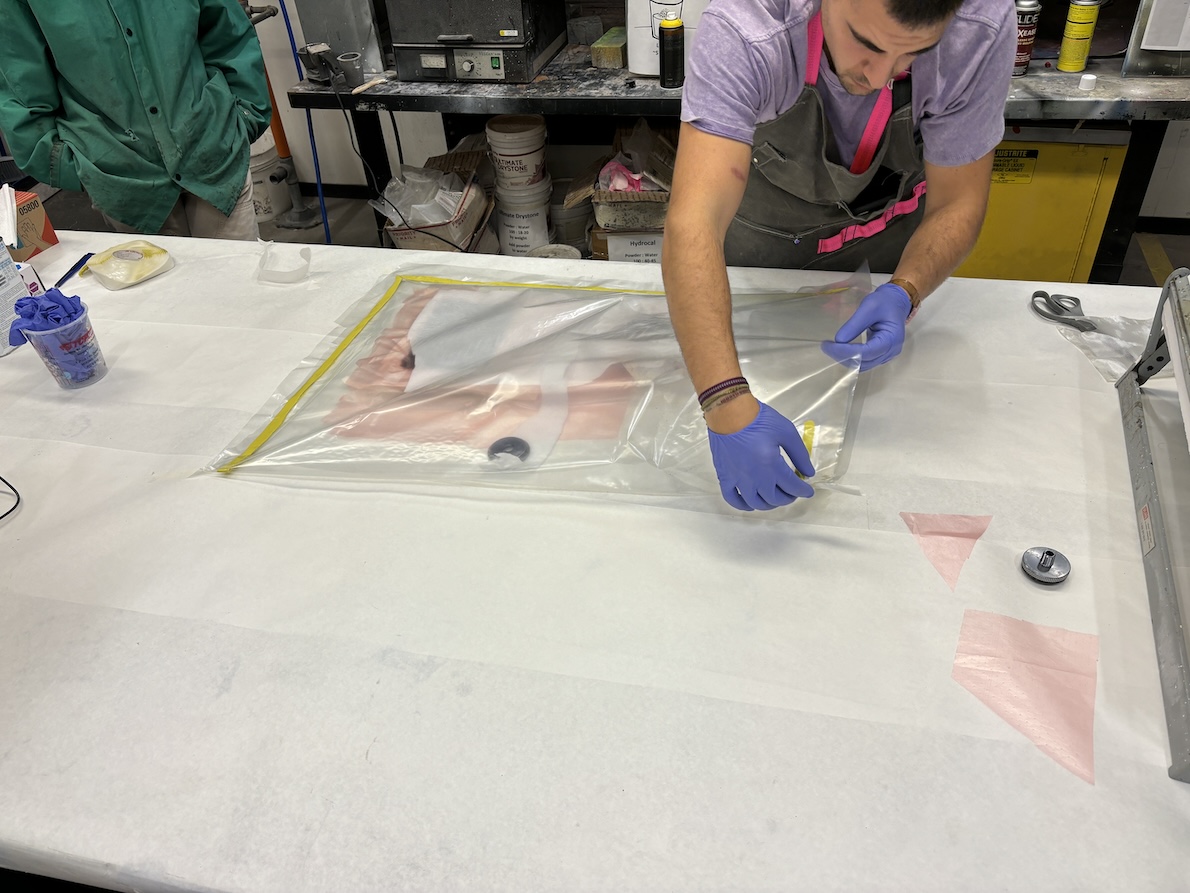
Alfonso closing the vacuum bag
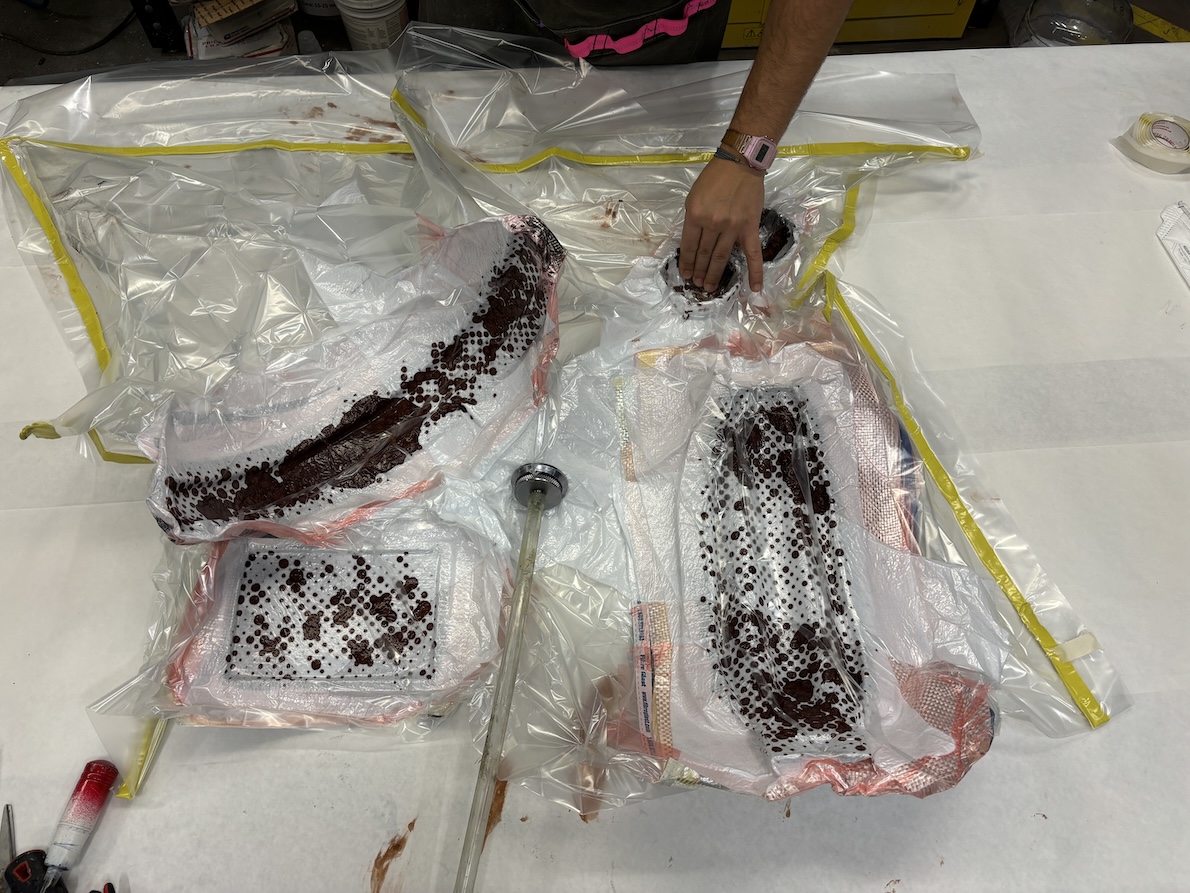
Our projects in the vacuum bag curing overnight
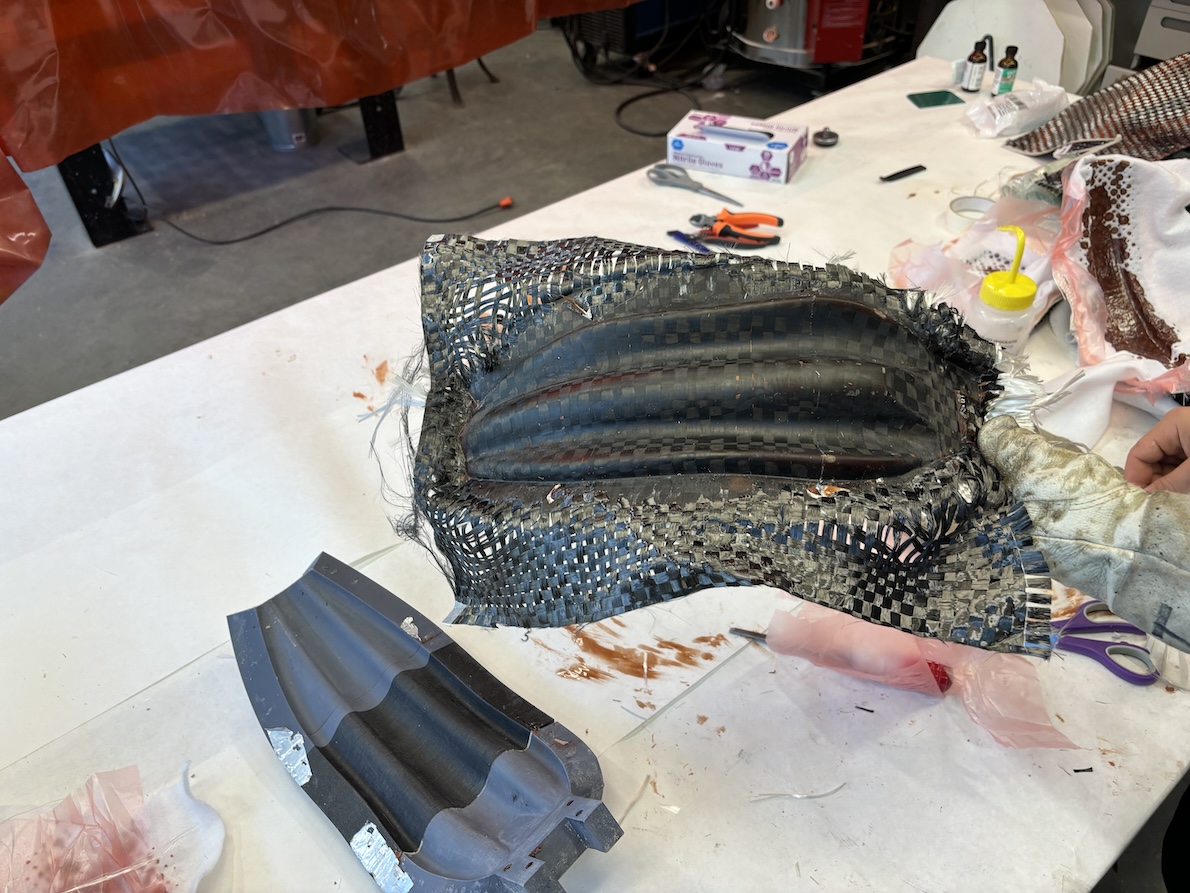
the cured final product after it was first removed from the mold
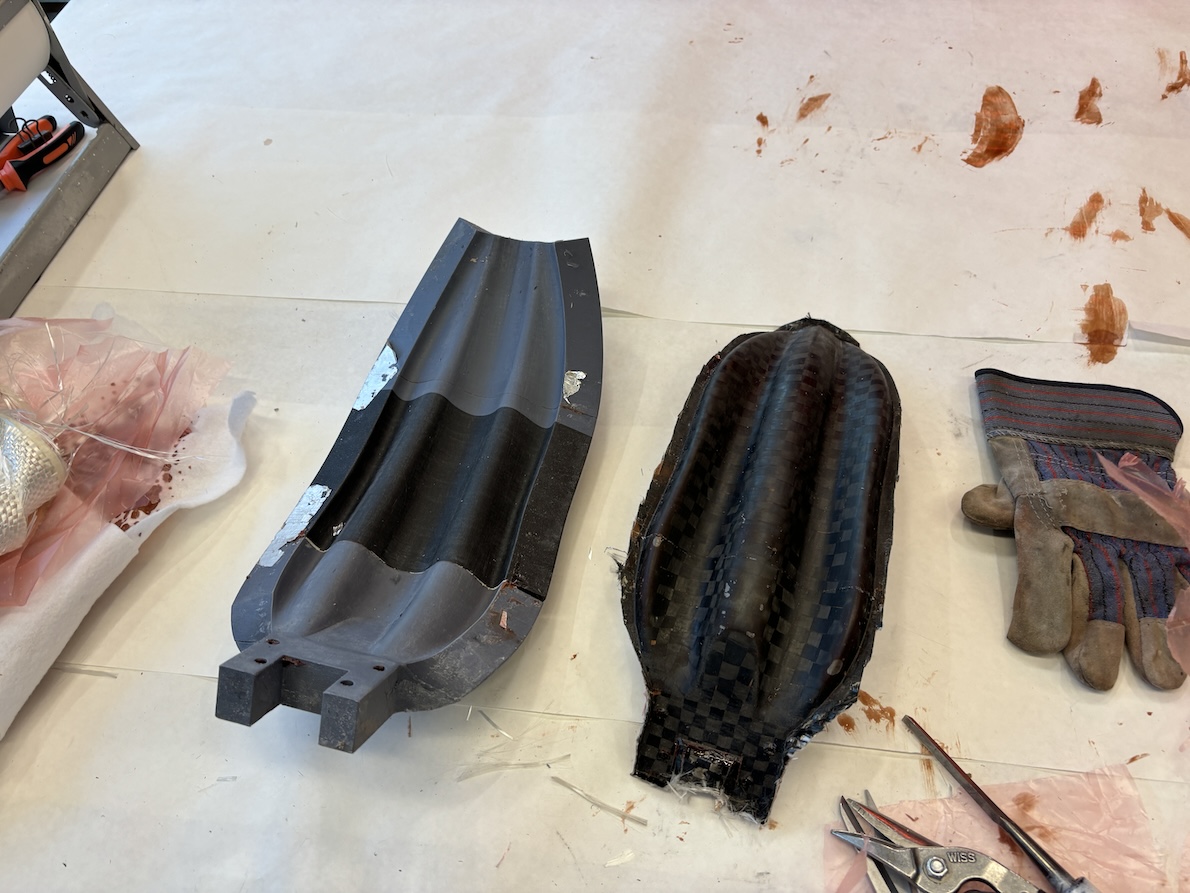
the cured final product after excess fibers were removed
the cured final product after the rough edges were sanded off