Water intake indicating water bottle key chain
made with 3D scanning and printing
To Do
Group Assignment
- test the design rules for your 3D printer(s)
Individual Assignment
- design and 3D print an object (small, few cm3, limited by printer time) that could not be made subtractively
- 3D scan an object (and optionally print it)
Tools
- Software: polycam, Prusa Splicer, Onshape
- Machines: Prusa i3 MK3S+ 3D printer
Materials
- PLA
3D all around
I tested all the design rules listed on the website by running a print of every STL file associated with a rule analyzing each one. The funny thing that I did was turn on supports for every print, so some of the design tests moreso gauge how supports can enable those designs instead of the design rule independent of supports, which I think has value. However, if I were to do this again, I would run some of the tests with no supports.
3D Scan
I scanned my bike helmet because I was curious about its design. The curvature and details have been rigoriously engineered to protect one’s head, so it seemed cool. For fun, I thought about running the scan through fluid dynamic simulations to see how air hits the helmet.
3D Print
Phase 1: Make?
click here for 3D modelI had 3 ideas come to mind: a custom Rubik’s cube built to honor my dorm Simmons, a purely-mechanical timer with an audible alarm, and a water-tracking water bottle key chain for my water bottle.
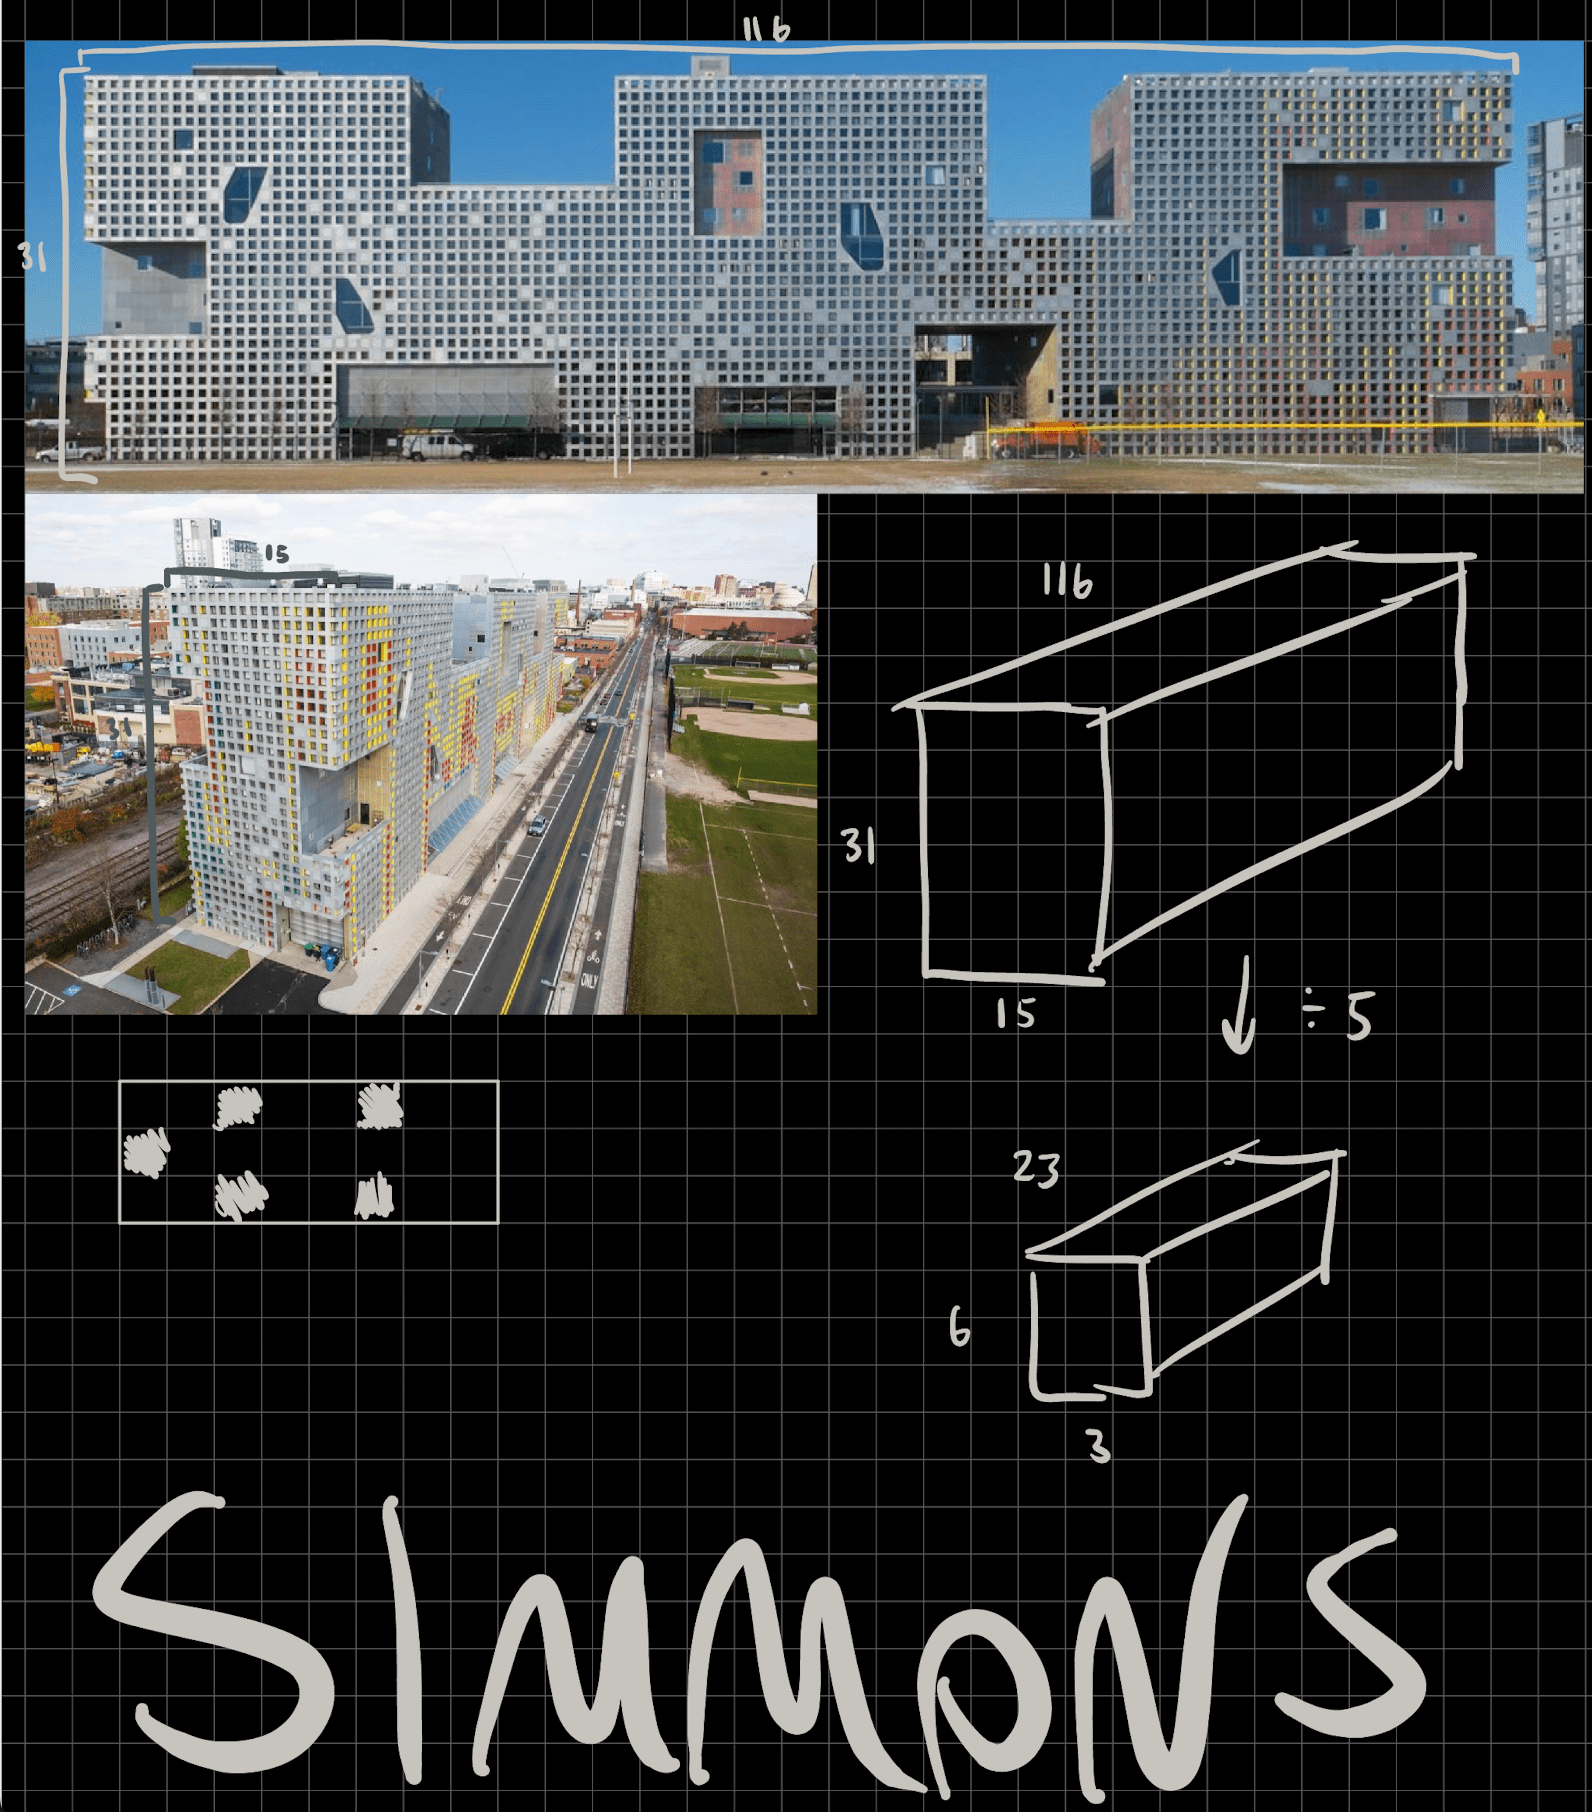
1. Simmons has a strange, unique shape to its building, so my mind was drawn to it for inspiration. It is essentially a rectangular prism, comprised of windows arranged in 15x31x116. Scaling this down by 5, the dimensions would be 3x6x23. That dimension of Rubik’s cube is basically unheard of and both mathematically and physically horrendous. I thought about trying other dimensions that are more common like that of cuboids: 2x2xN and 3x3xN, however those can be quite unstable and didn’t quite capture the essence of Simmons, so I decided to move on to a different idea.
2. I quickly got bored of the mechanical timer because it seemed far from different relative to mechanical kitchen timers and smart phone timers, so I moved to my final idea.
3. Water bottle on a water bottle! I was struck with inspiration to make functional miniature things that can accompany their larger counterparts. Backpack keychain to hold my earbuds and hang on my backpack. Cup tea diffuser to go in my cup of tea. And, of course, a water intake-indicating water bottle keychain for my water bottle.
I often forget how much water I’ve had throughout the day. I aim for 64 oz or so daily, and because my water bottle’s capacity is 32 oz, I drink around two per day. My indicator has a 0 level, 32 oz level, and 64 oz level. So, as I finish water throughout the day, I move the indicator up. At the end of the day or the following morning, I reset it.
Phase 2: Making!
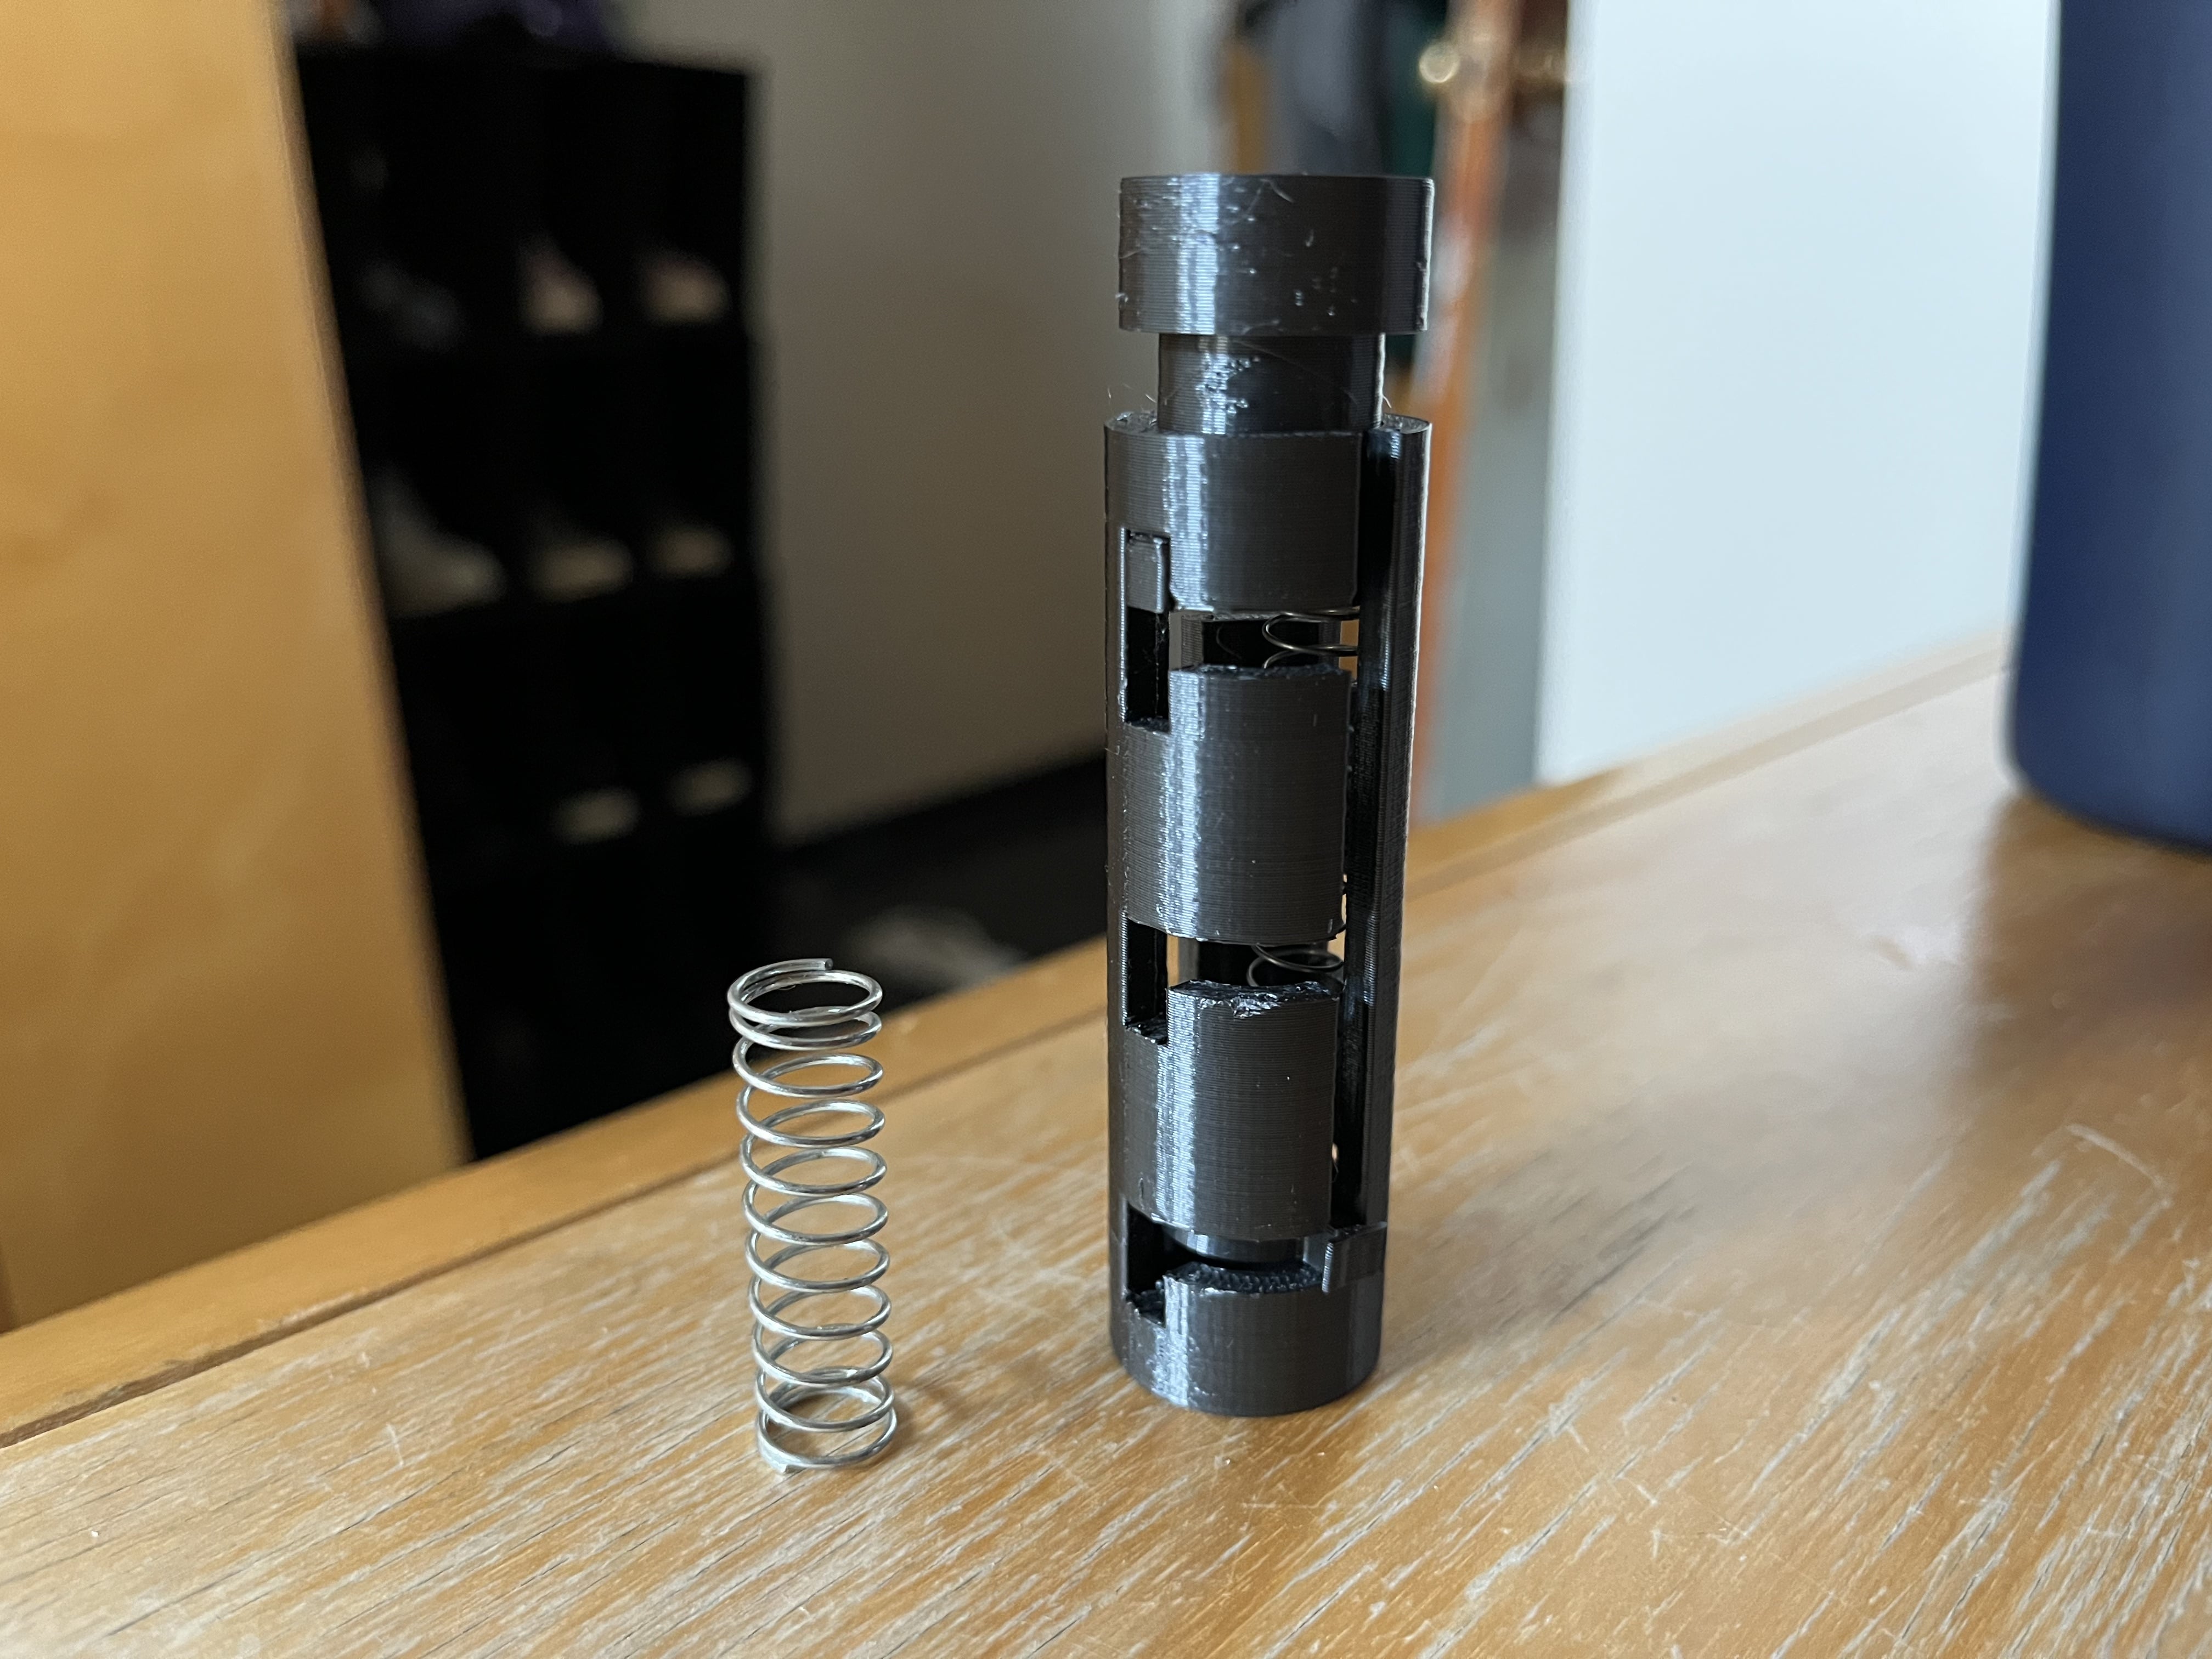
click here for 3D modelI used Onshape to CAD my design. It came in 4 parts: the water bottle base, indicator, cap, and keychain ring. I used an Original Prusa i3 MK3S+ 3D printer.
The first print was quite flimsy, cracked, and unfortunately fell apart. I hot glued it back together and it technically works, but hardly.
I doubled the size of the second print, which proved fruitful.
Phase 3: Made.
Now, my water bottle has a little water bottle friend.