Tensegrity Shelf
made with computer-controlled machining
To Do
Group Assignment
- do your lab's safety training
- test runout, alignment, fixturing, speeds, feeds, materials, and toolpaths for your machine
Individual Assignment
- make (design+mill+assemble) something big (~meter-scale)
- extra credit: don't use fasteners or glue
- extra credit: include curved surfaces
Tools
- Software: Onshape
- Machines: CNC wood mill
Materials
- wood
- screws
Project Work
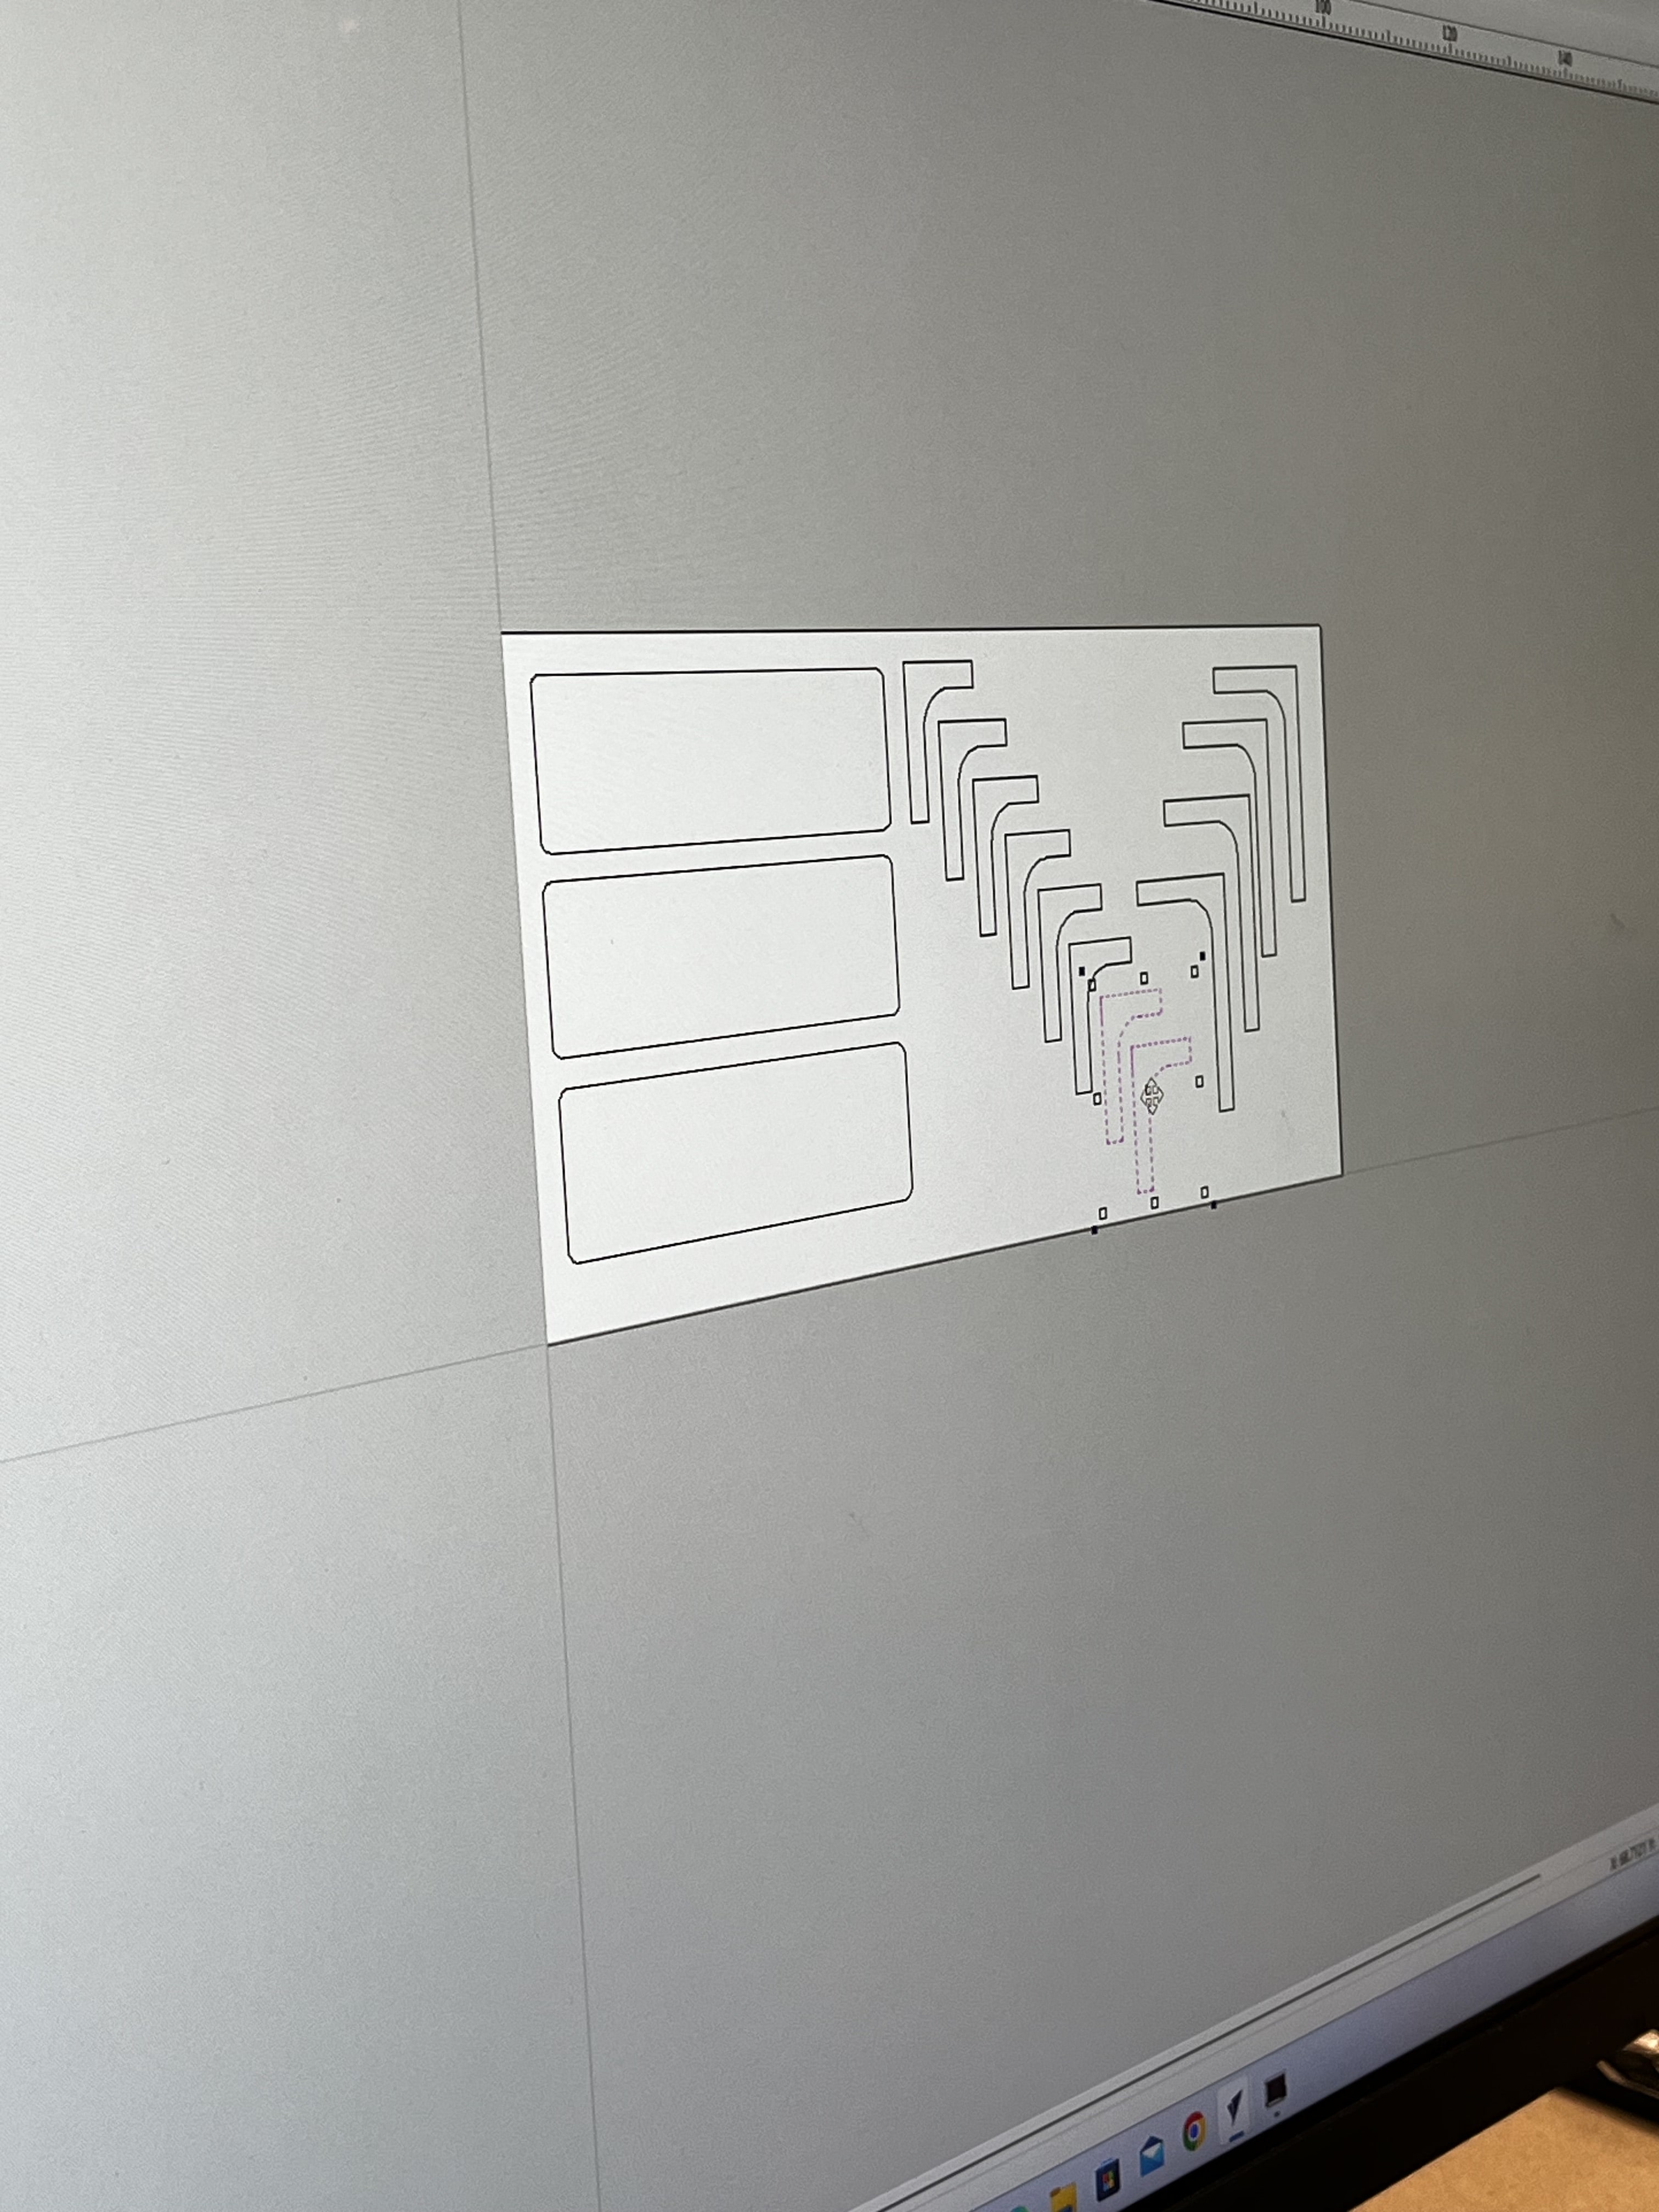
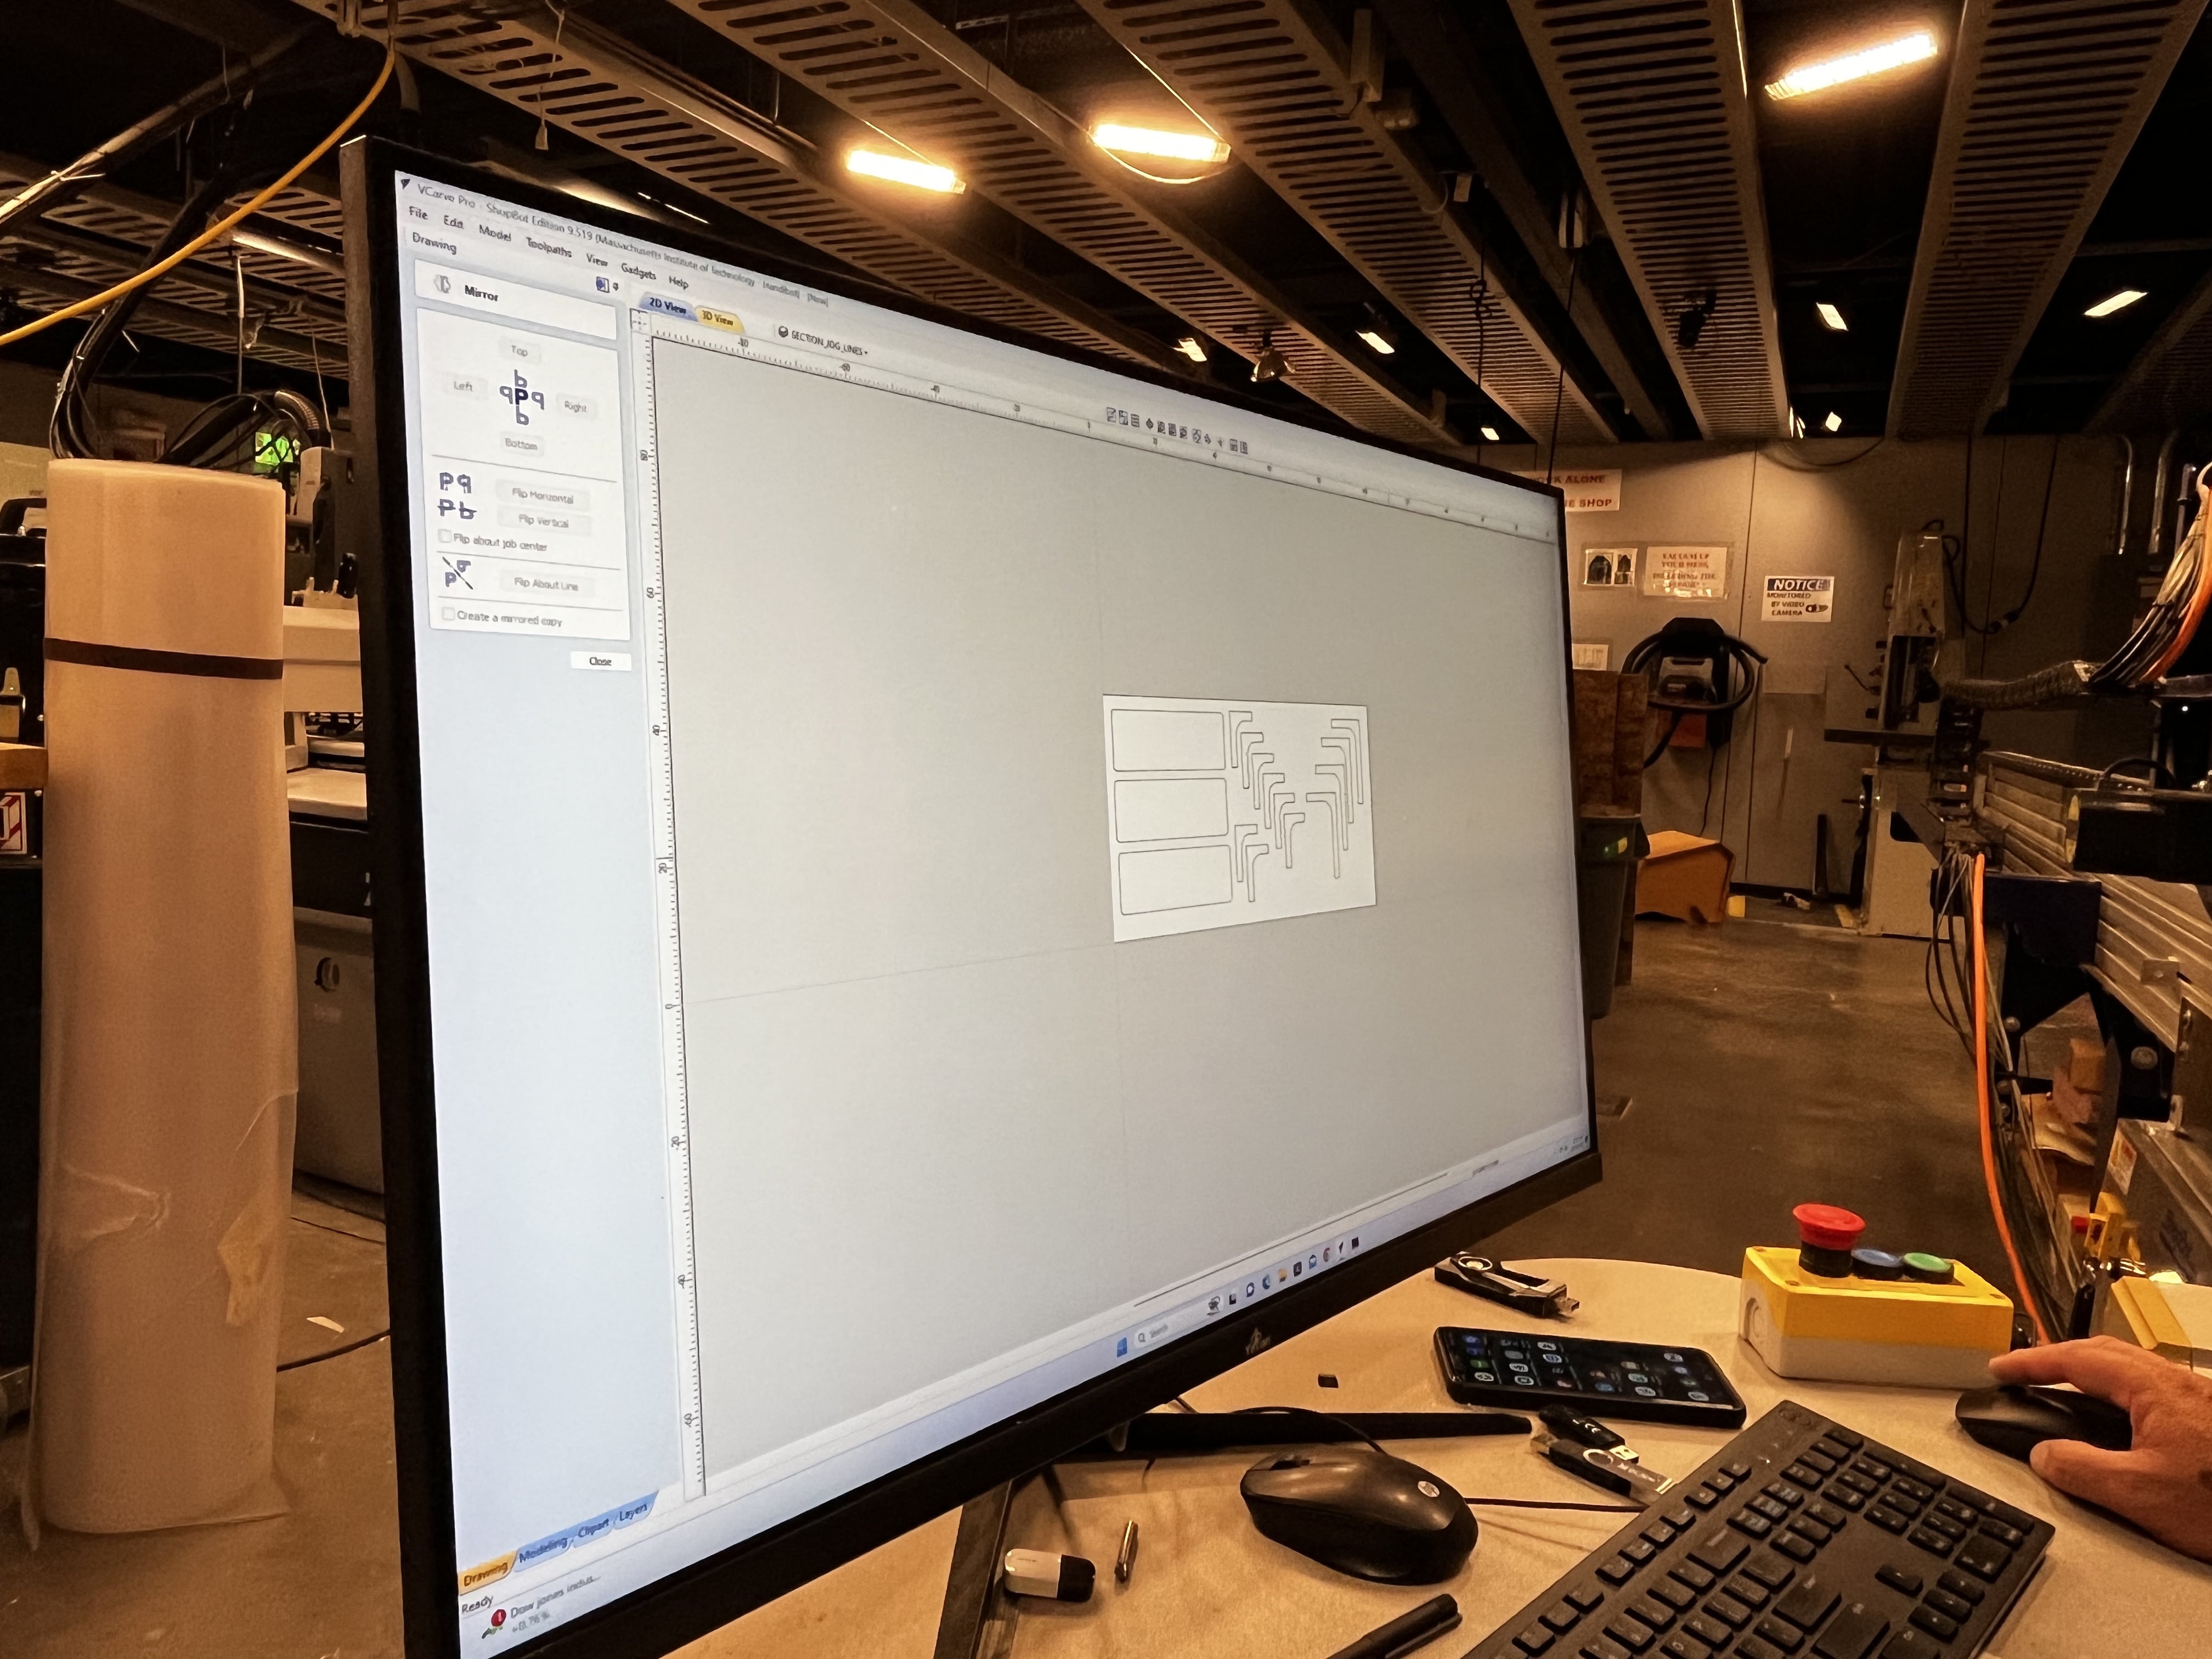
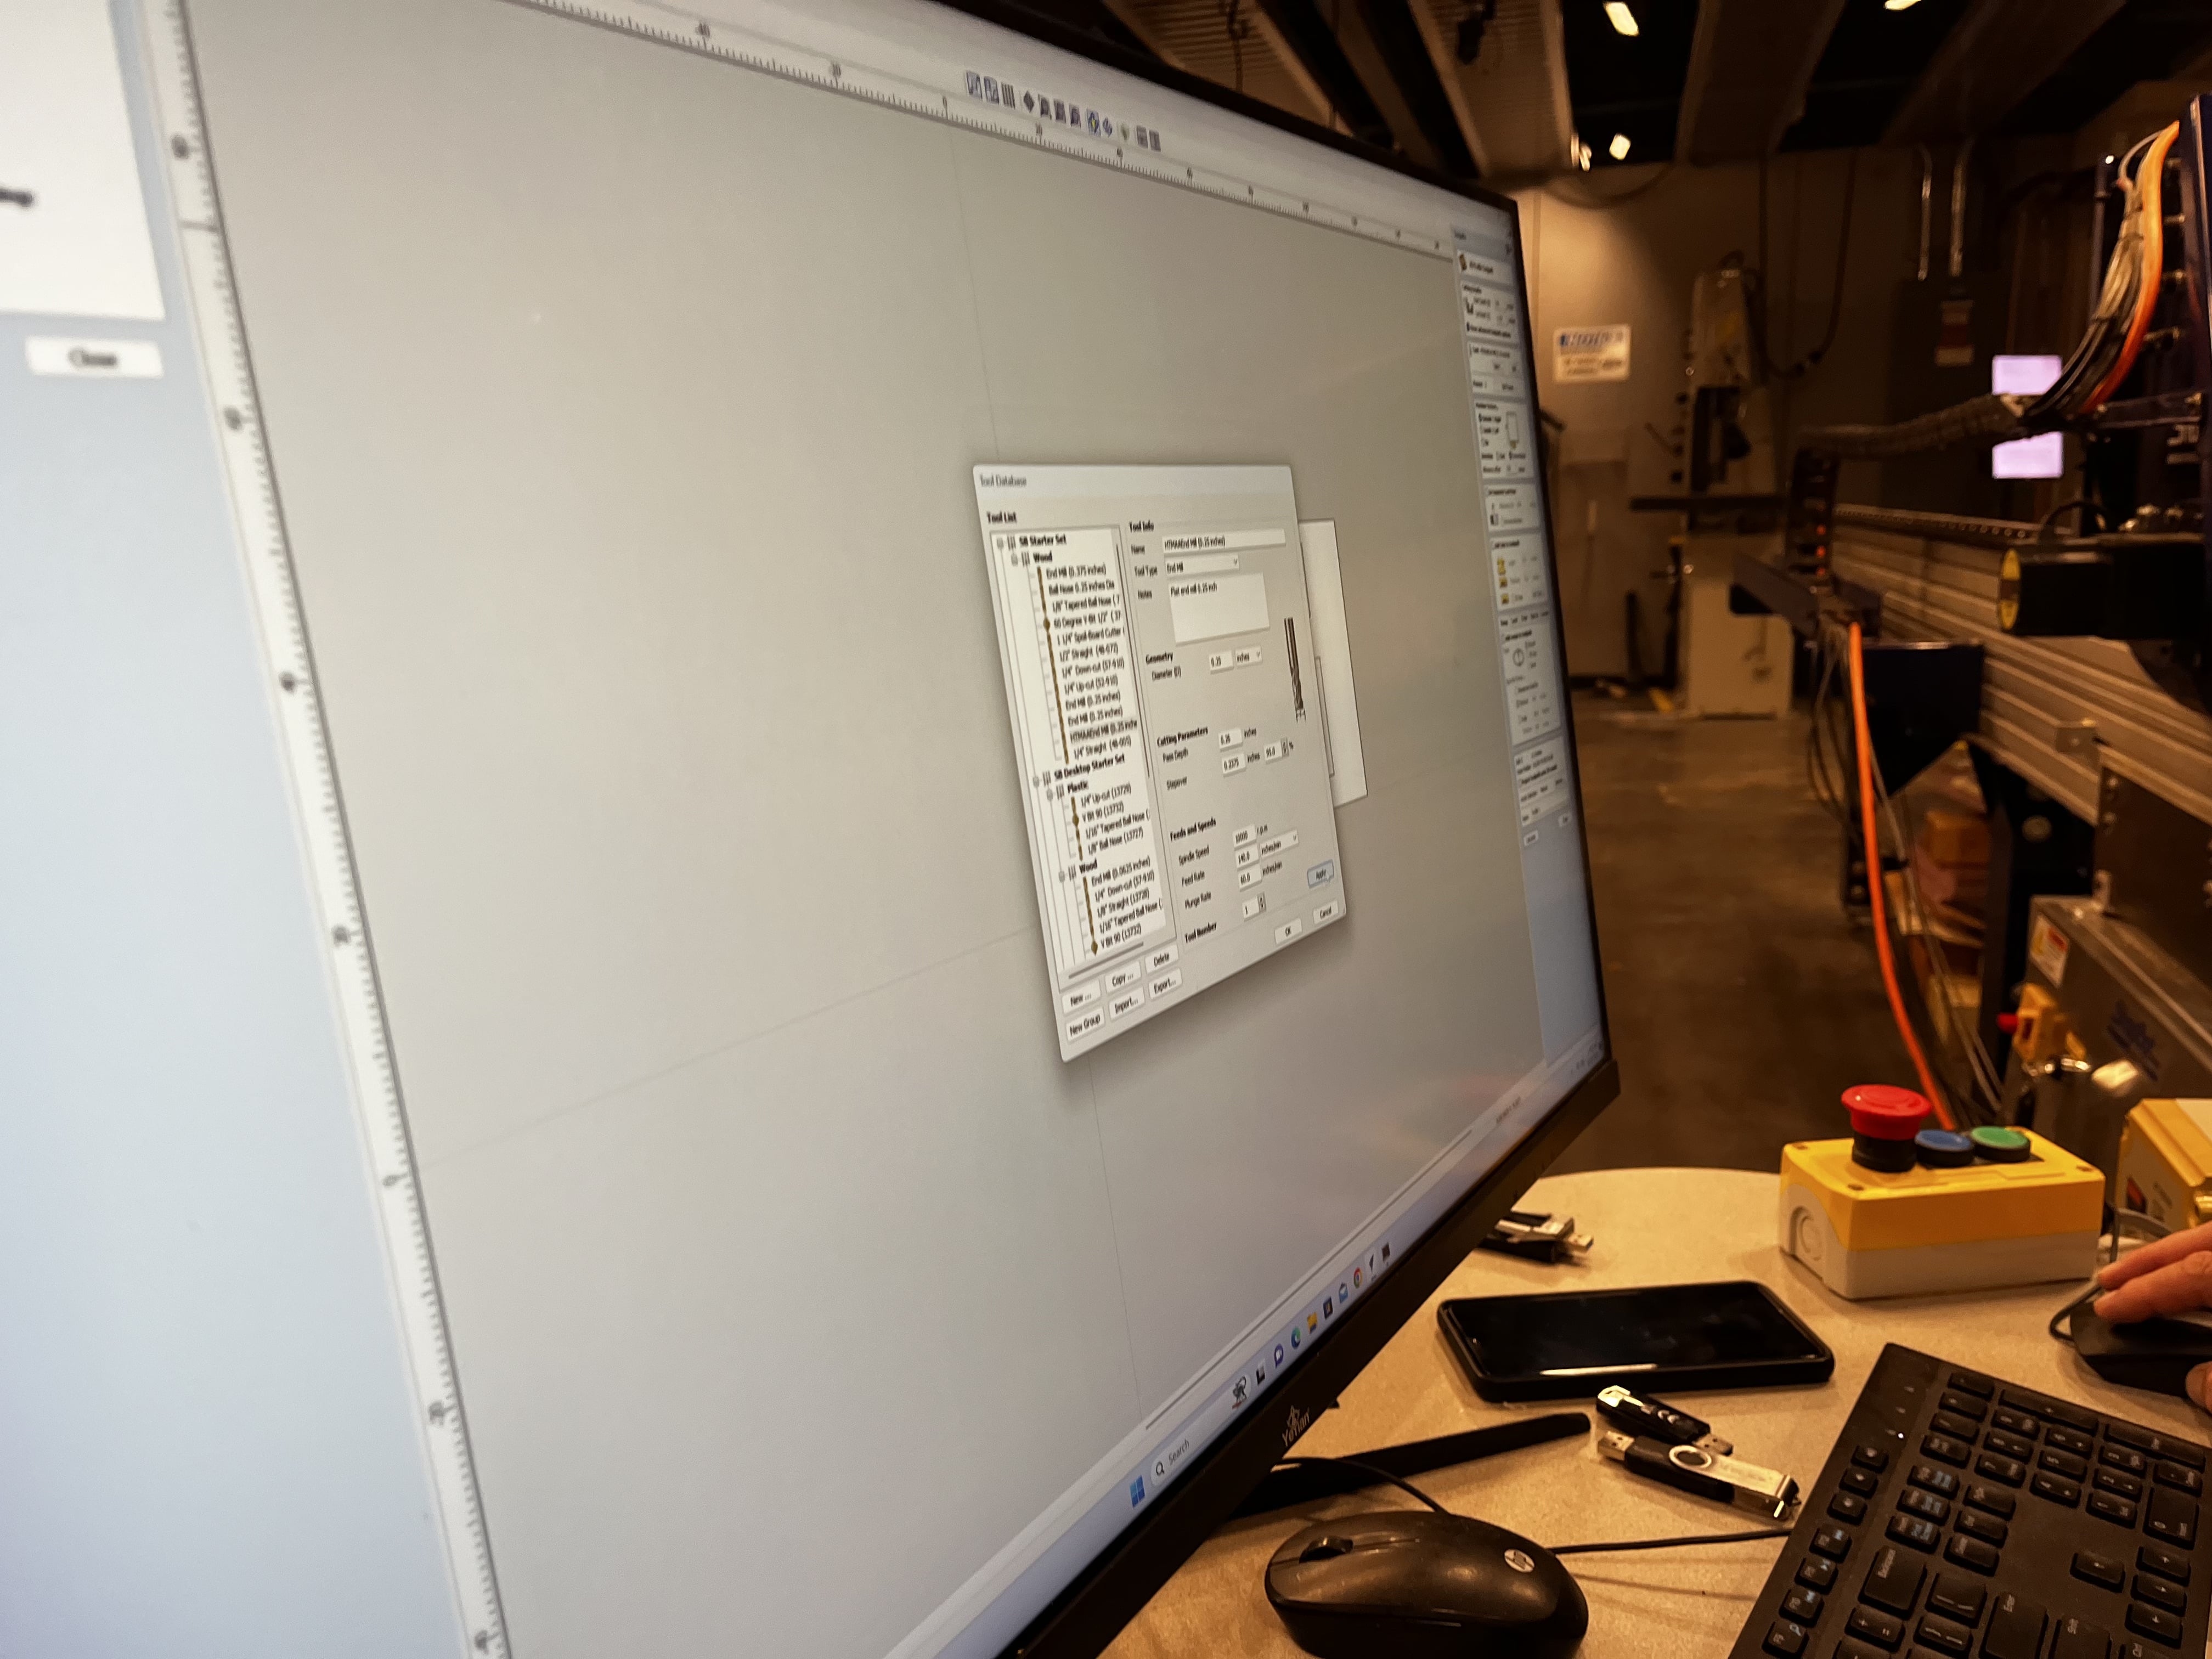
I completed the group assignment by attending a Shopbot training with John. We learned how to properly prepare files, mill, and do post-production work.
We completed the lab's safety training and subsequently learned to test runout, alignment, fixturing, speeds, feeds, materials, and toolpaths for our machine.
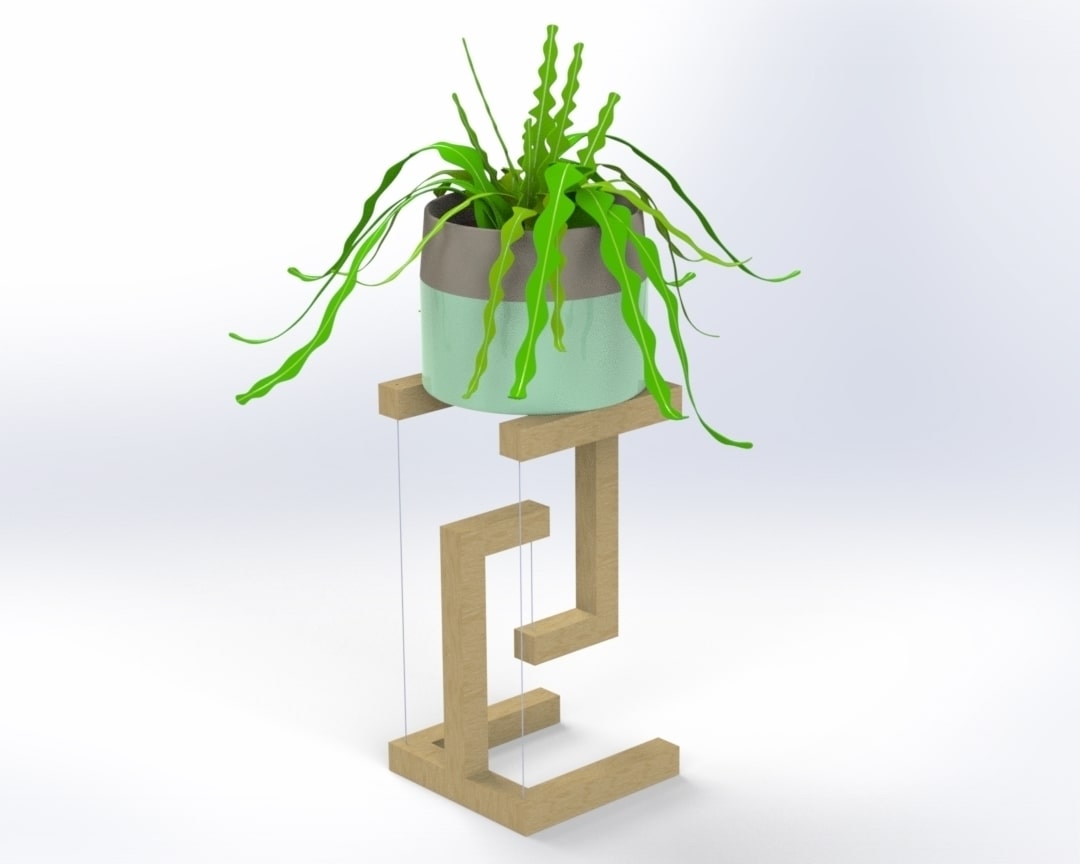
I went through a few ideas, and eventually landed on making a tensegrity shelf. I was drawn to the headturn visual weirdness of it.
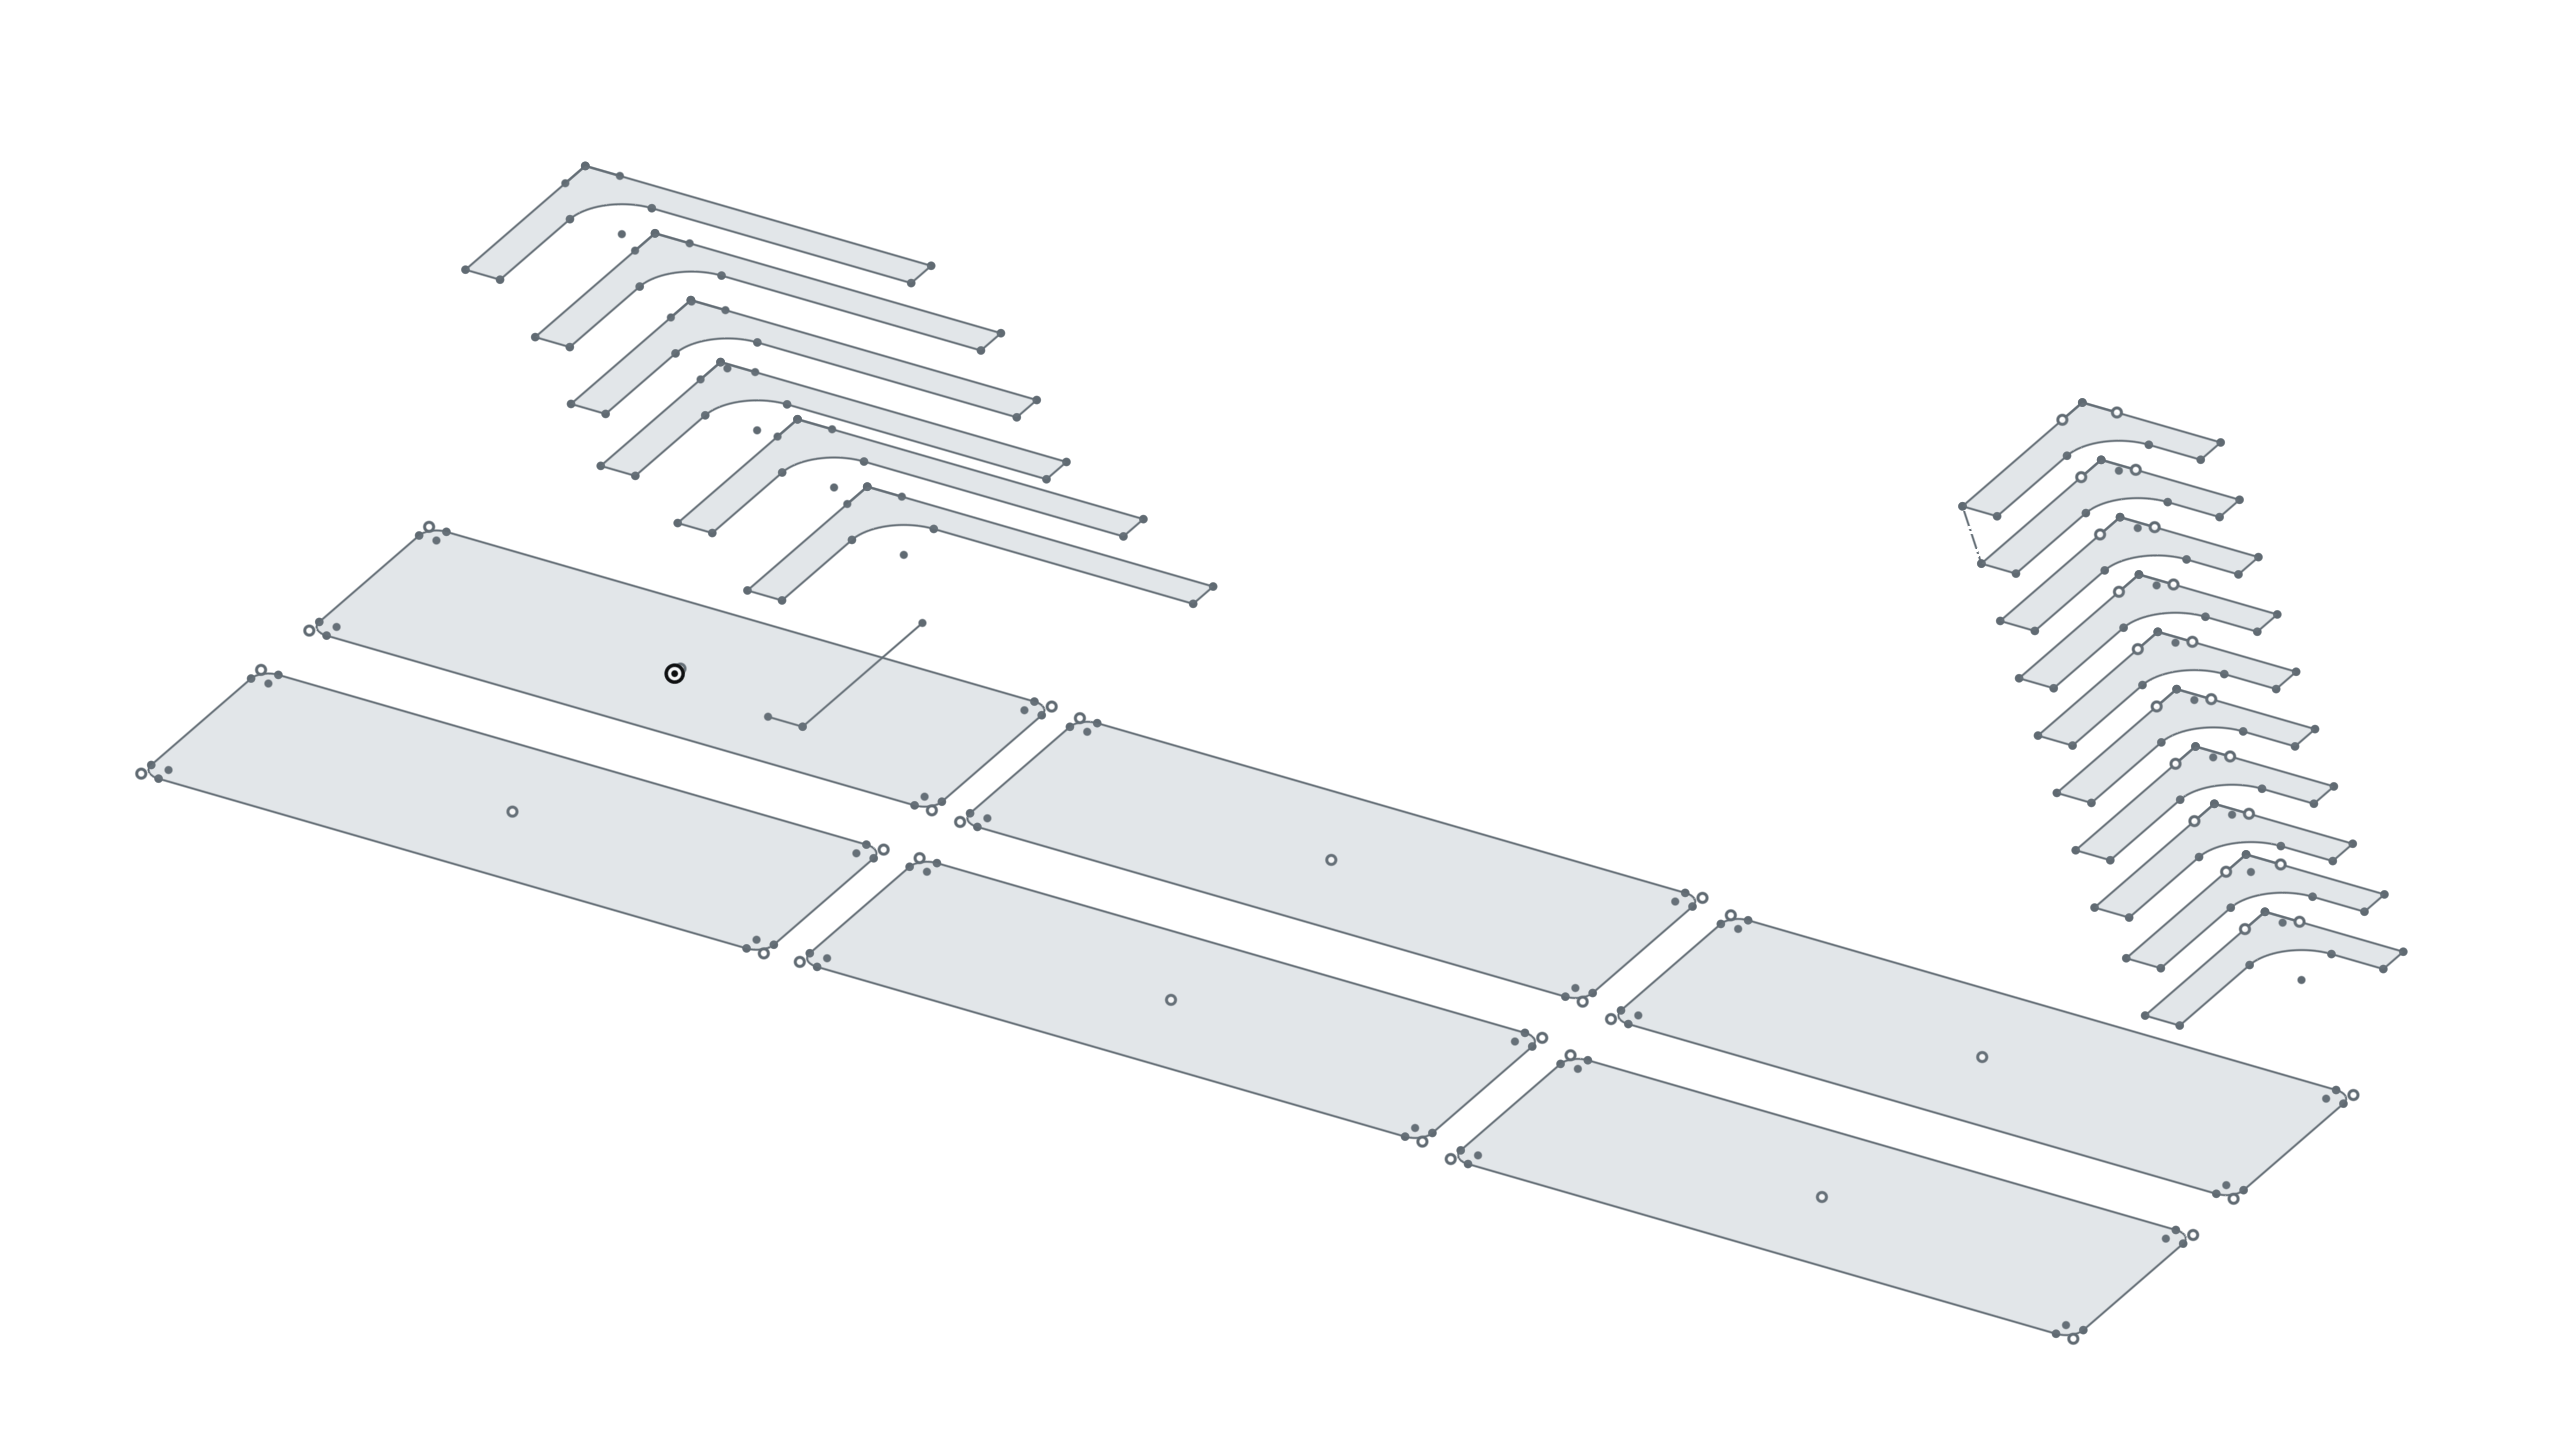
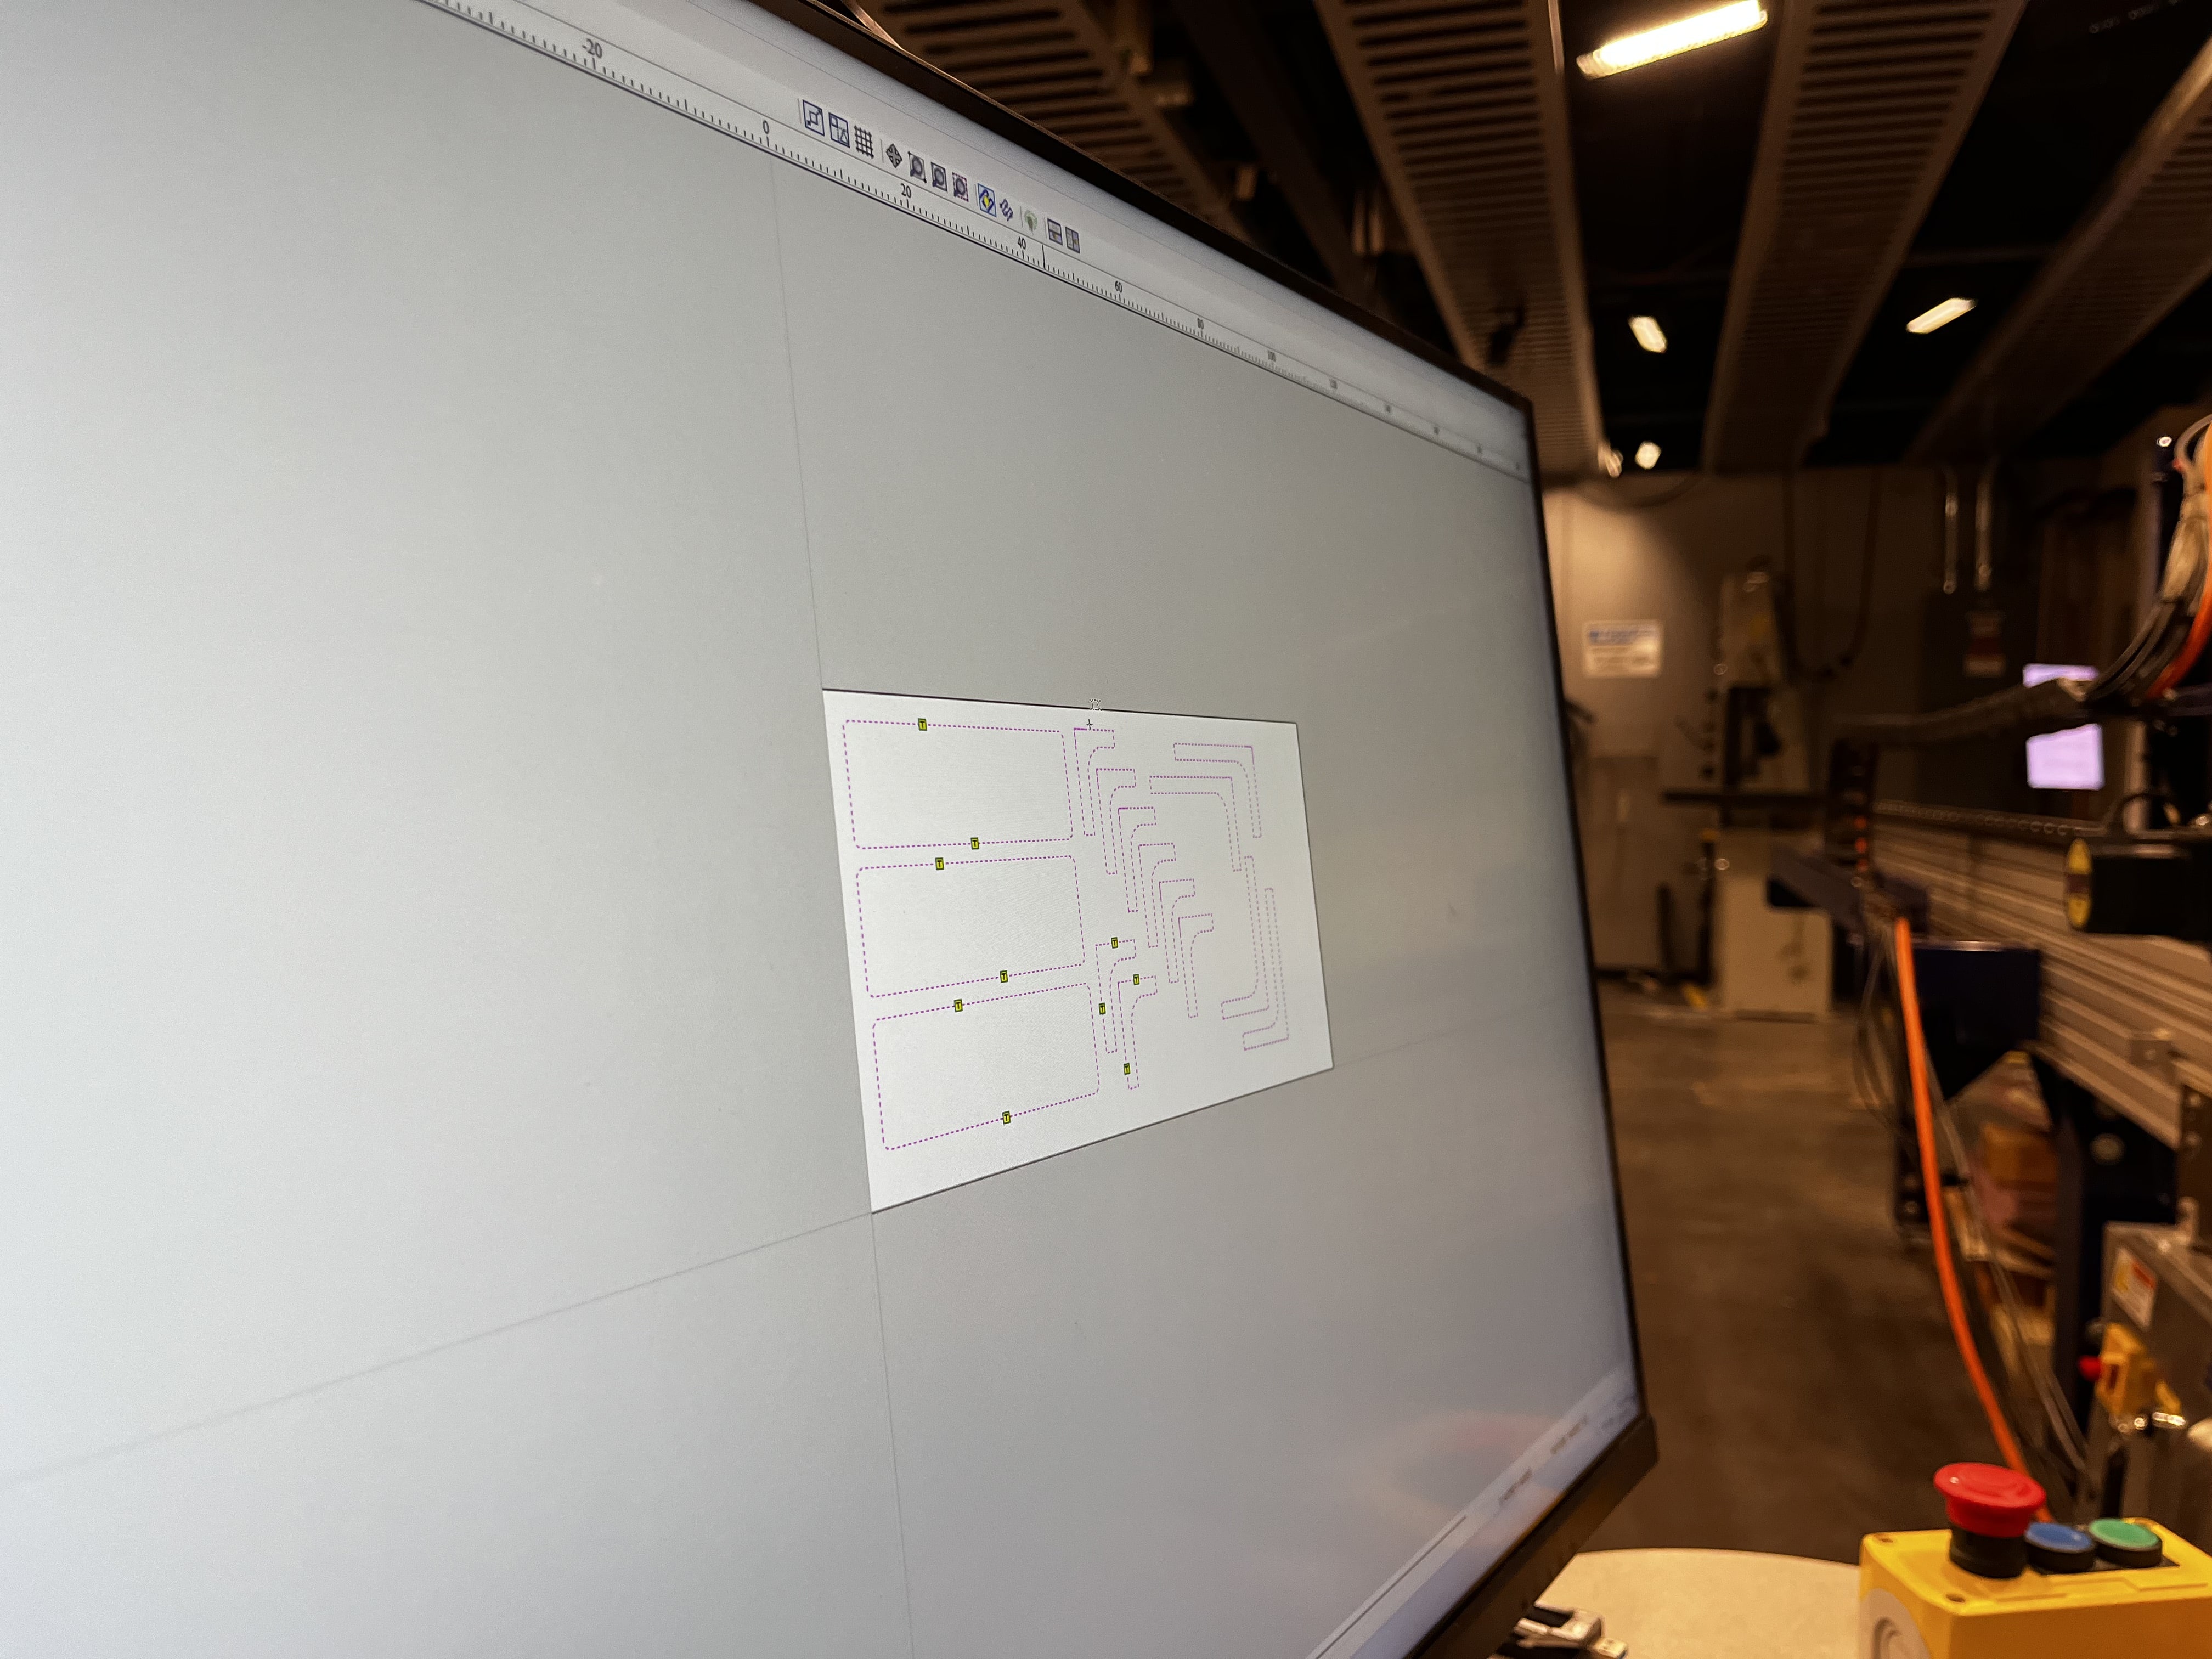
I took measurements of a section in my room and designed accordingly in OnShape.
I created my CAD model in OnShape and milled on the ShopBot. John had to split my design up and scale it down so that we could properly machine it on the alloted wood.
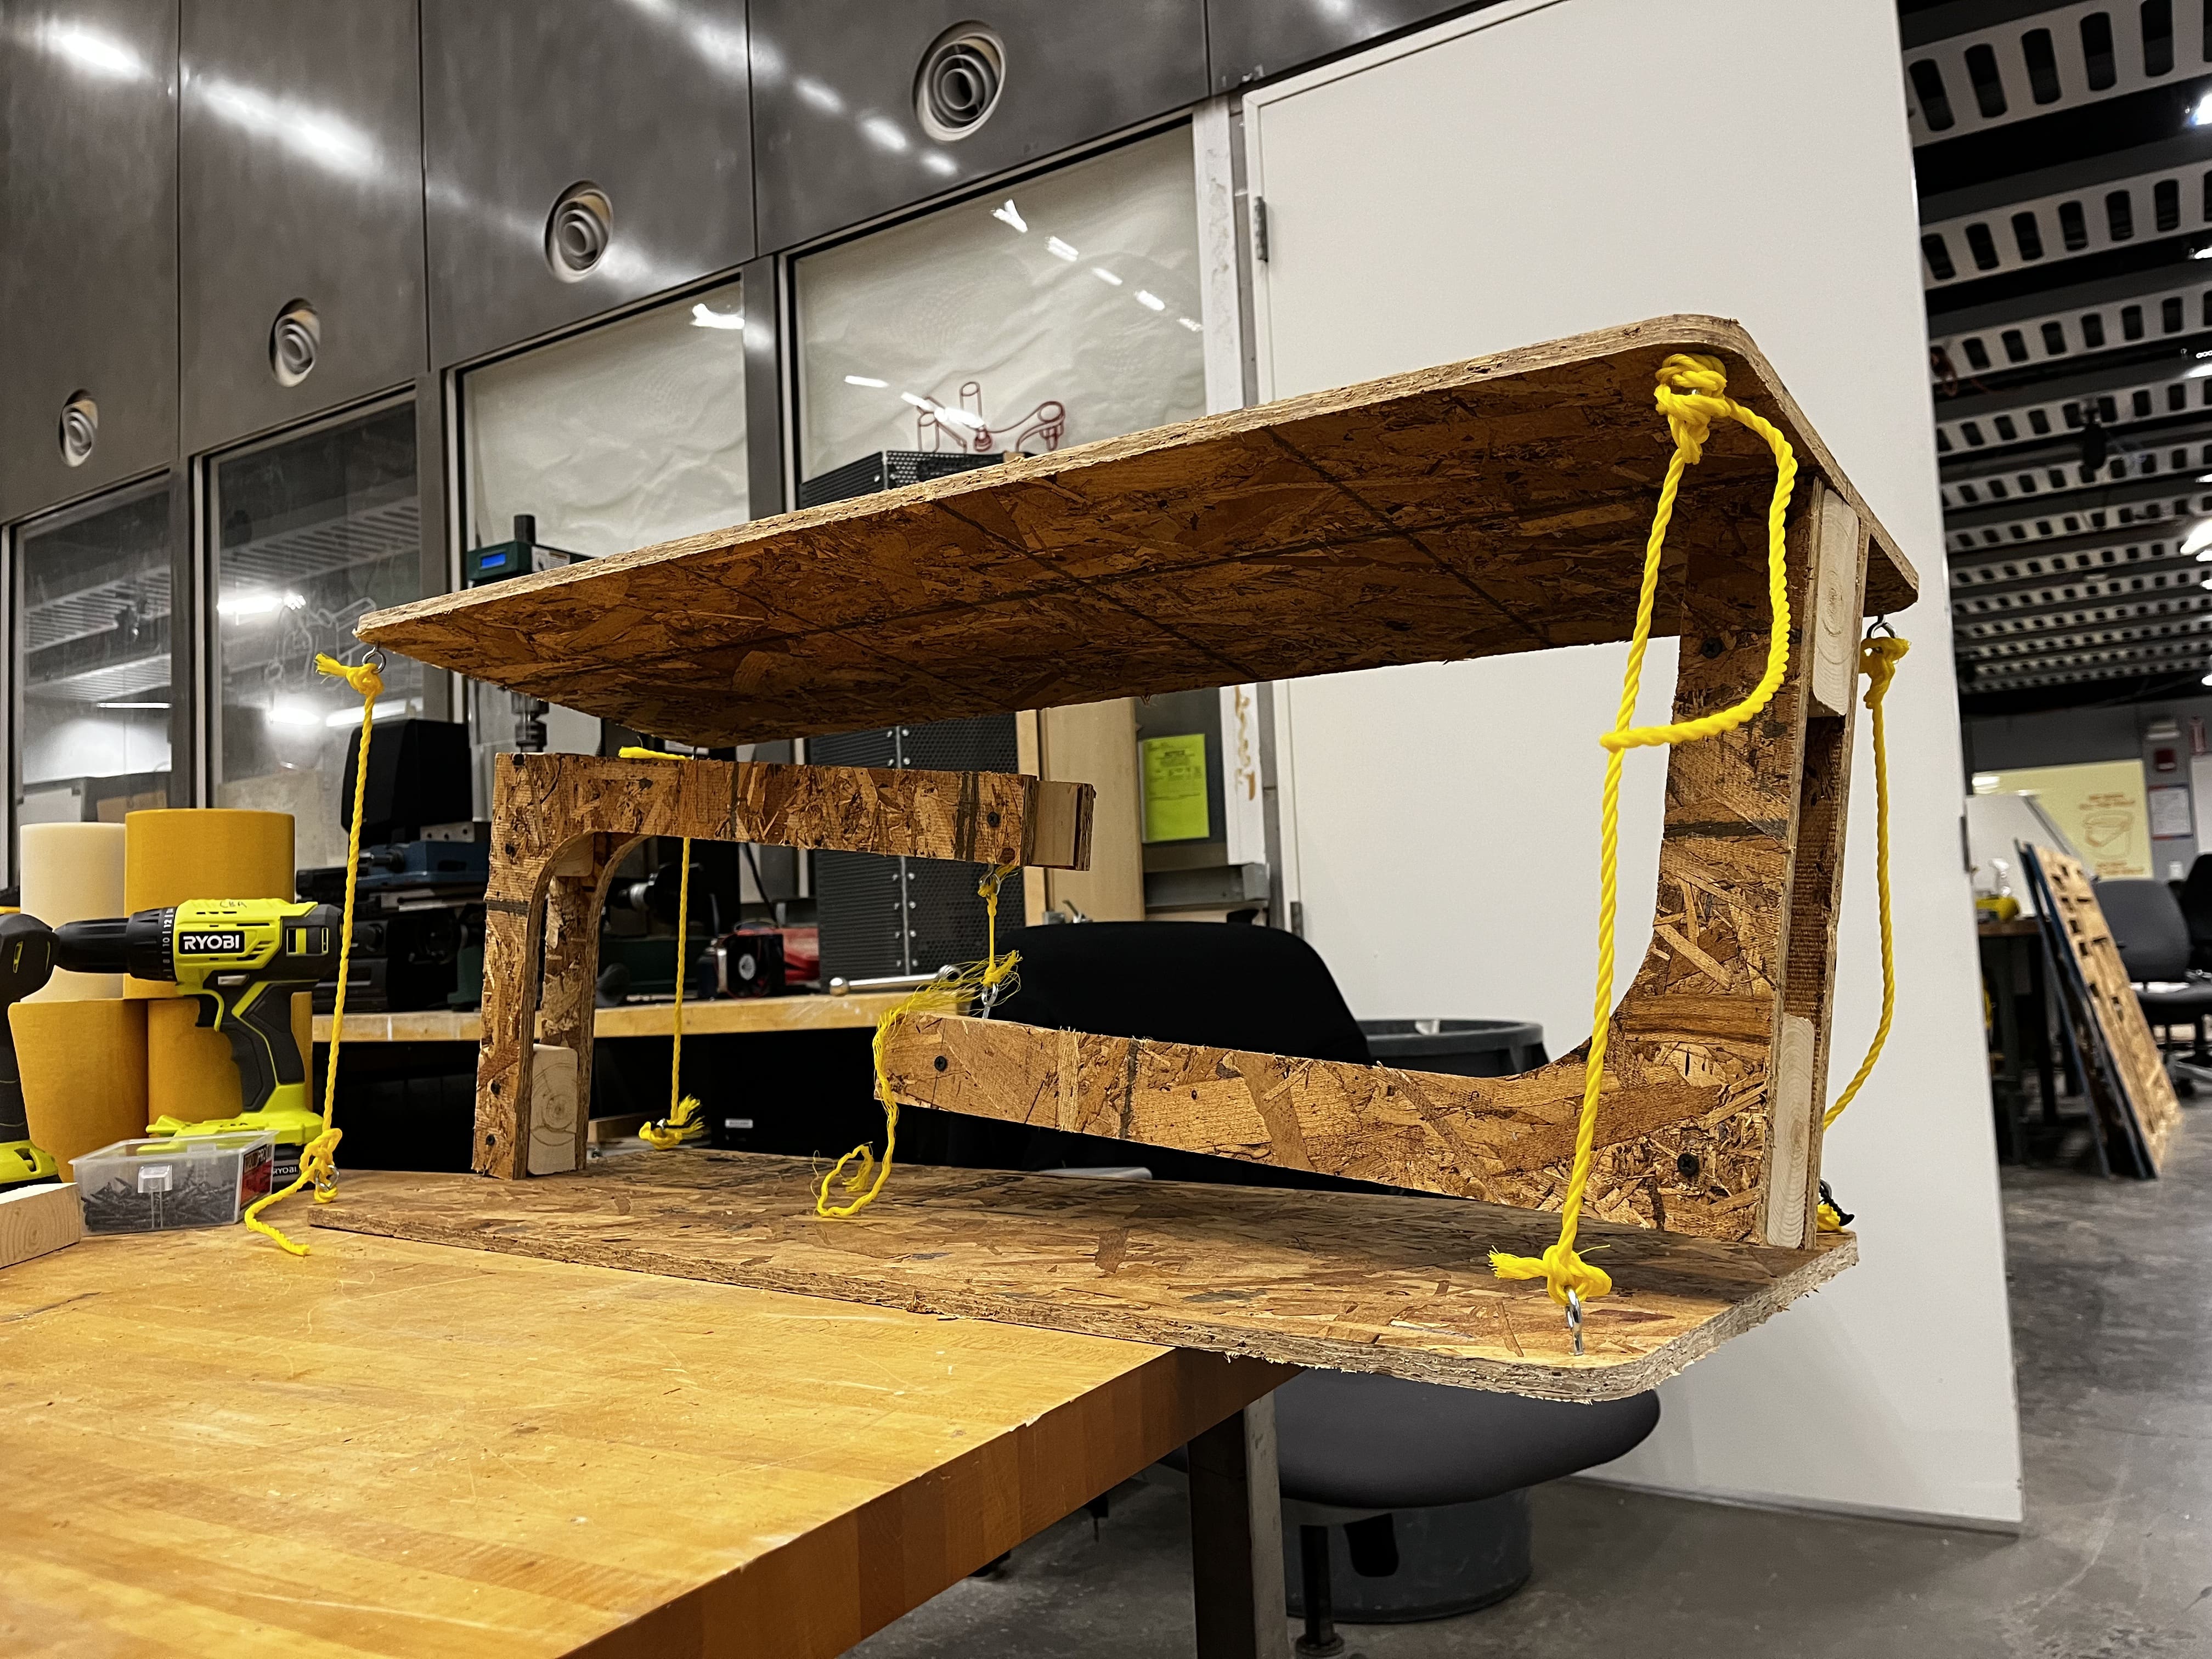
Building a tensegrity shelf was both a challenge and a rewarding experience. From the moment I decided to embark on this project, I was drawn to the idea of creating a piece of functional art that would not only hold my books but also serve as a conversation starter. As I gathered the materials and tools, I couldn't help but feel a sense of excitement mixed with a hint of apprehension.
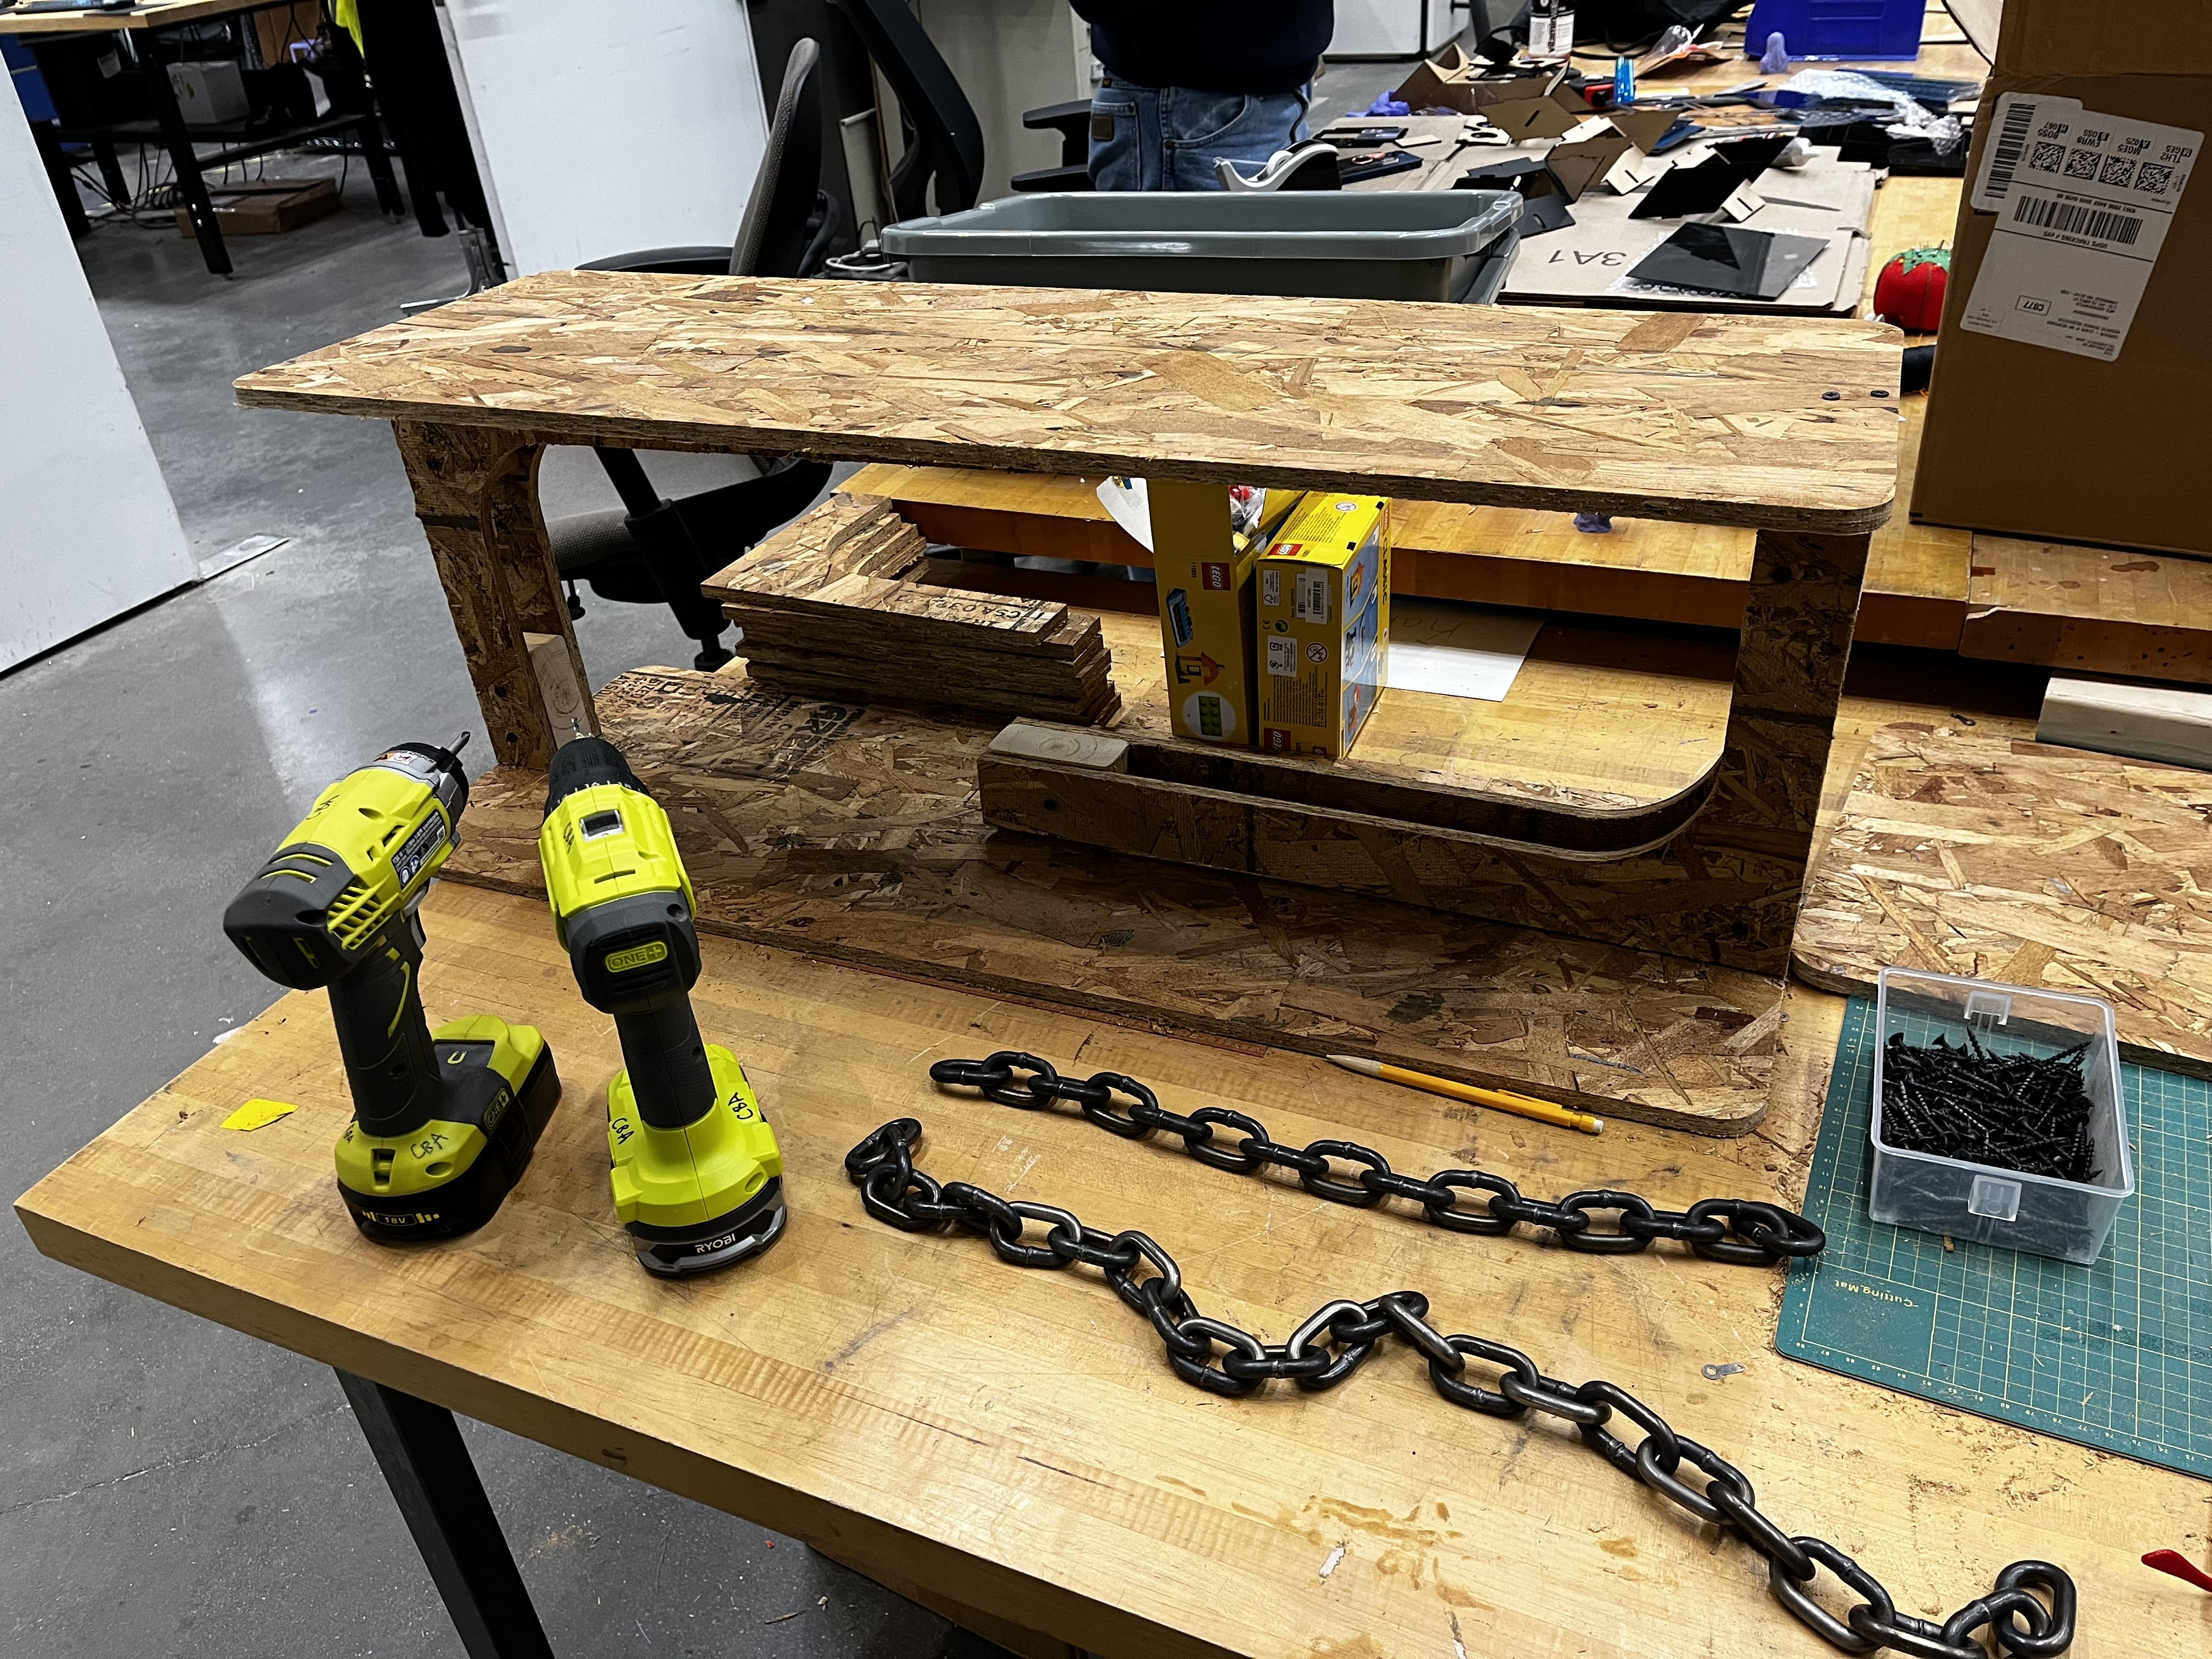
All in all, I milled the componenets, cut out blocks for stability, pieced the wood together, fixed eyehole loops, and spent a lot of time adjusting rope. It technically worked! If I wanted to remake this in the future, I'd have a better system for adjusting rope length.