Week 7:
Wax, silicone, and plaster week. Homework was to design and make a mold, and use it to create a cast object.
This week was a bit more “on rails” than on previous weeks. Take an object, and make a wax mold for it (technically, a mold for a mold, actually). Machine the mold. Use that mold to create a silicone mold. Use the silicone mold to cast your object. Simple and fun, right? The first step was to create the body of the wax mold, which had dimensions 7”x3”x1.5” with 1/4” walls. Easy enough. Then, it was time to add in the object I actually wanted to make for the week. We were also allowed to use a model off the internet for this (shoutout my TA Anthony for telling me this), so I chose to use a model of a space shuttle for this week’s project. It took a few tries to find a model that wasn’t too detailed, since I was told that ultra-detailed models would make the CAM tool path generation take forever. As it turns out, the CAD community is quite passionate when it comes to making space shuttle models as detailed and accurate as possible.
 Once I found a model that worked, I imported it into Fusion and resized it so that it would fit inside the mold boundaries. Since the space shuttle has a rounded bottom, I also had to sink it into the floor of the mold slightly. If I hadn’t done this, the empty space between the bottom of the shuttle and the mold floor would end up as filled space in the actual wax mold since the mill wouldn’t be able to reach under there, leading to a thick-bottomed product instead of nice thin wing features.
Once I was satisfied with my wax mold, I moved on to tool path creation. This was pretty straightforward, as we were taught in recitation what settings to use. My first pass utilized an adaptive clearing path with a 1/4” bit, followed by a finishing pass using standard parallel sweeps with a 1/8” bit and 0.015” stepover.
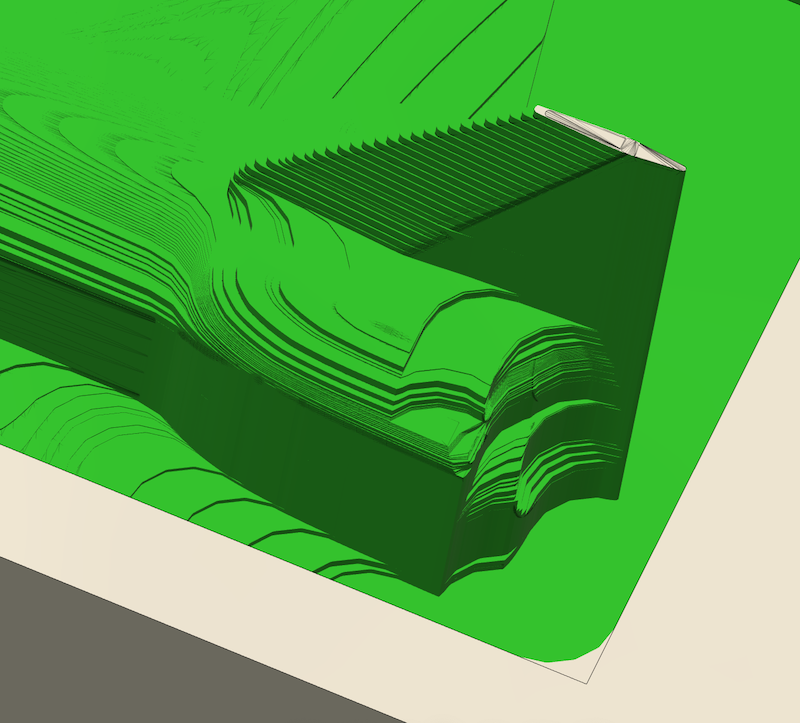 At this point, after seeing the Fusion-simulated machining product, I ran into a slight hiccup. You see, the shuttle’s tail extended a bit behind its body, meaning that machining it would leave a thin column material directly underneath it (again, due to the limitations of 2.5D machining). This was simple to resolve, I just used Fusion’s mesh editing tools to slice off the back portion of the tail so that it existed solely above the shuttle body itself. Once this was done, I re-generated the tool path, and I was in business.
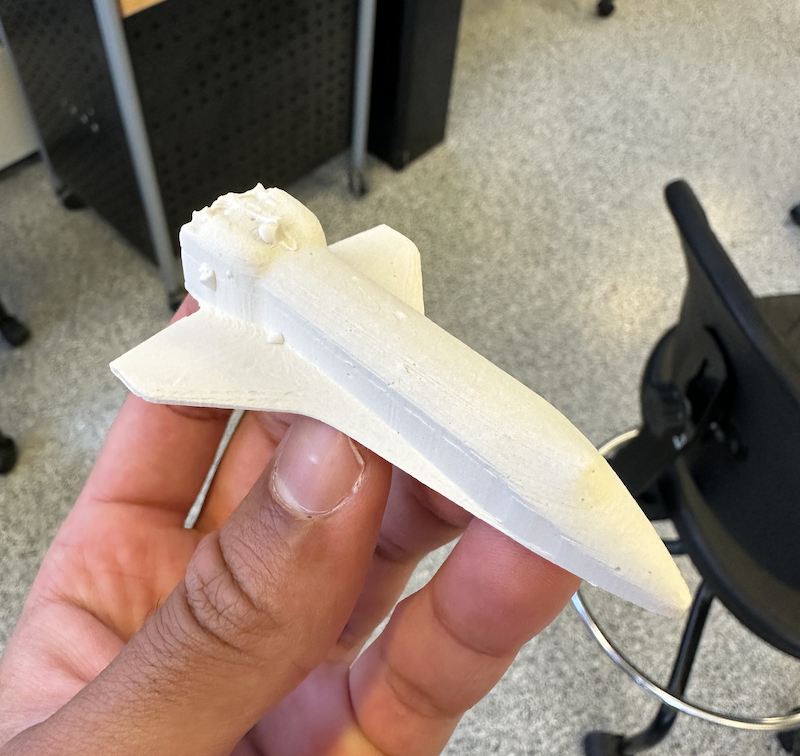
The last stage was production itself. Starting from a 7”x3”x1.5 block of wax, with Anthony’s assistance, I set up and ran the CNC mill to carve out my wax mold. The entire process took about 20 minutes, and turned out pretty well, with the exception of a tiny bit of the tail that broke off due to how thin the feature was. Of course, not to be outdone by the mill, I then decided to “strength test” the remainder of the tail, knowing full well it wasn’t a particularly physically strong element of the model. As you can imagine, it broke off, and I was left with a mold for a tail-less space shuttle. Who needs a tail to fly anyway, right?


To create the silicone mold that would actually produce my spaceship, I filled the wax mold with Oomoo and left it to sit overnight. The next day, I returned to lab, and pried out the silicone mold to inspect it. Some air bubbles, but overall a decent product. Finally, I filled that mold with some drystone, and after another overnight wait, I came back to a nice little spaceship, fresh off the press (mold). The thin features at the wings came out really nicely, as did the surface finish on the smooth curves at the front of the shuttle. The air bubbles produced some deformations on the surface, particularly around the tail and rear of the shuttle. However, given that it didn’t even have a tail, I don’t think our aerodynamics are quite the concern here that they would be for NASA.