Week 2 - Embedded Systems
-
How To Make (almost) Theremin
If you have never heard of Theremin - that's a very unusual musical instrument that emmits different sounds based on the motion of hands around it.
While I wasn't able to build real theremin, I made a close enough prototype. Similar to the original one, it changes sound based on the motion of human hand, however, it uses time-of-flight distance sensor VL53L0X for input. -
Sooo, how to...?
Right, let's look at this system step by step.
The main idea of the system is to be able to emit sounds of different frequency based on the placing of the hand around it. It uses a LIDAR sensor to find a distance from the device to the hand and then converts it to an output signal that goes trhough an amplifier and controls sound. At the end I also added an RGB-LED for fun, it does correlate with the received input, but is not meant to bring information to the user.
For this project I was working with SAMD21 (which I needed to solder to be able to mount it on the breadboard) and Arduino IDE.
It was my first time soldering, and it was very exciting to understand how a plain microcontroller can transform into the one with connectors for breadboard.

-
Board Design
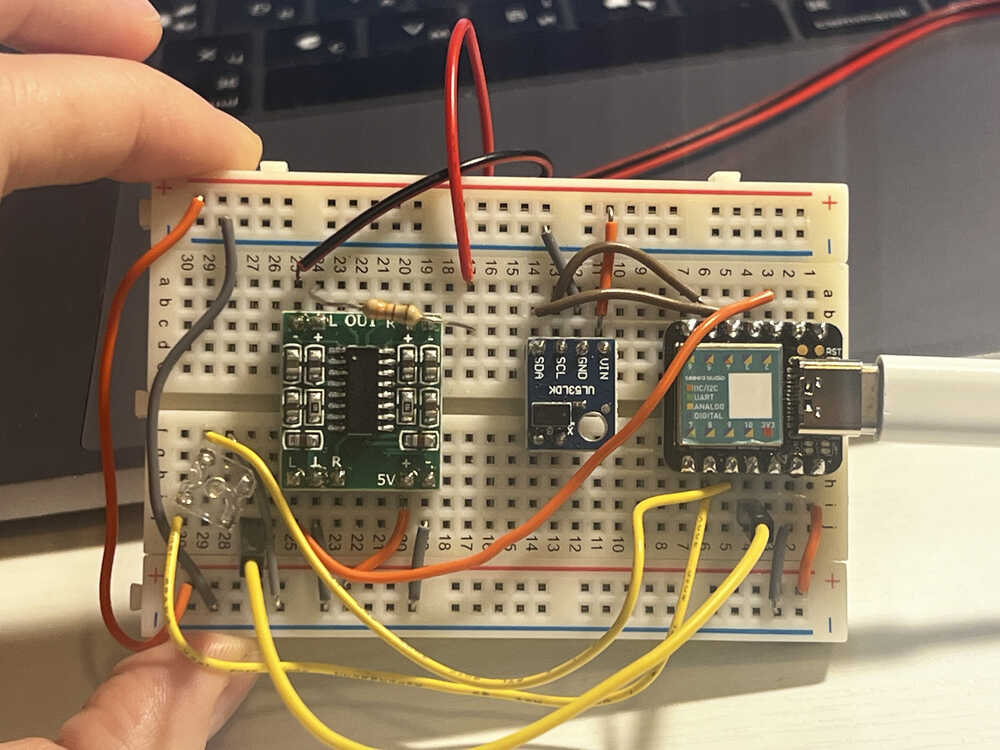
Next step was designing the board. The system needs to have a microcontroller (SAMD21 Seeed Xiao in my case), a speaker, a time-of-flight sensor VL53L0X, an RGB_LED, and an audio amplifier PAM8403. As I was building the system, I also hit the issue of the speaker sound being too loud, so I added one 330 Ohm resistor for sound to be in the range that is comfortable for human ear.
The image on the left side is the final board design, where you can see (I hope) all the connections. My main reference points for design were datasheets for those devices. The wires that get out of the frame of the image are connected to the speaker (already connected by manufacturer). -
Let's code this up!!!
Now that the board is ready, it's time to code. It didn't feel too hard, but still quite some debugging. Important notes:
1. You need to add a specific library to connect this board. The best place to refer is Seeeduino XIAO website, at the very bottom of the page, where it explains how to add it to the boards list. Just looking up the board in the Arduino IDE doesn't work.
2. LIDAR sennor is a little weird, since there isn't a specific pin to read input from. Adafruit_VL53L0X is a great library that has a nice example code to get started reading input from the sensor.
3. Writing the signal to speaker can be done in two ways - by analogWrite() or by tone(). Both are valid options, I chose to do tone() so that I can control the frequency of the sound and make some melodies. Important factor was to figure out the range of the values I can get from the time-of-flight sensor, and the range of comfortable frequencies for human ear. In my case I picked 400-900 Hz, which is rather a small range, but it was enough to make a difference in sound and feels very melodic.
4. If you want to cap the volume - add a resistor. It will save you bunch of debugging in software, your ears and ears everyone around you as you are debugging. 330 Ohm value works great, your neighbours will thank you later.
5. Finally, all the embedded systems at the end of the day are about making the LED blink (anonymous during one of my hardware classes). So I added an RGB-LED (or I just saw it and thought that it looks cool, you decide). The code just controls the brightness of the LED, again, the range is 0-255, so the values have to be mapped accordingly.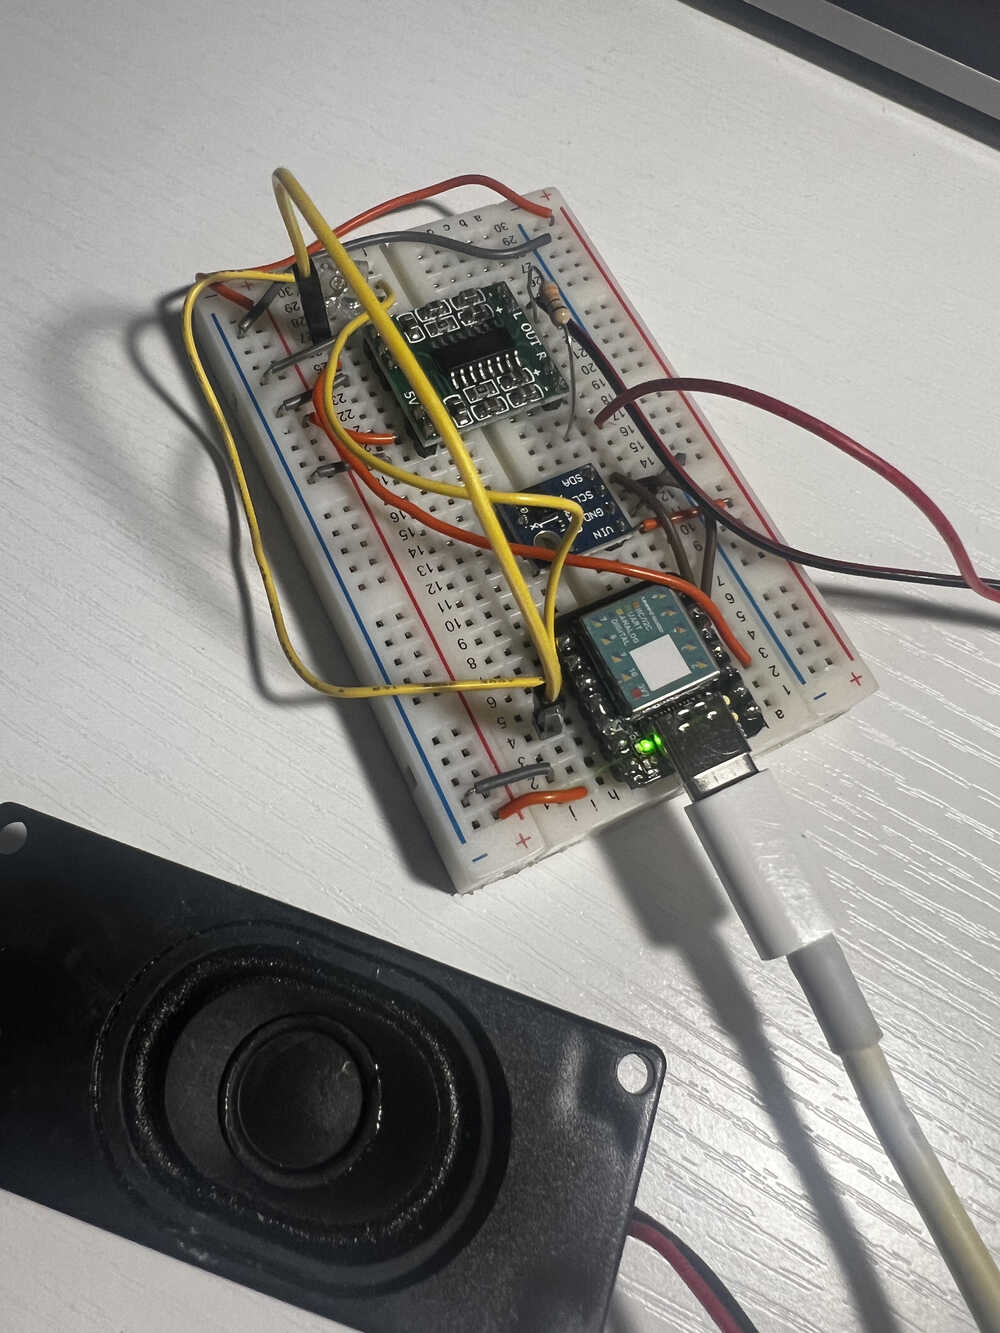
-
Testing and final result
After all of these considerations and a little bit of debugging, the system started making sound. I have tested all parts of the system separately first (made SAMD21 board builtin led blink, tested the code for reading time-of-flight signal, tested speaker, probably annoyed some of my neighbours, integrated the LED).
The video on the top left shows how the system was working before the LED. As you can see, moving the hand above the sensor actually affects sound and makes it feel like a musical instrument.
The bottom video is the final result of the system, with the LED. The code I used can be found here. -
Future work and improvements
I had quite some ambitious ideas, but sometimes it is better to complete an easy version first.
One thing I would do in the next iteration of the project is to make the sensor react on my hand moving in more than 1 axis (I could throw a complicated perception system, or just generate whatever makes some sense from these inputs).
It took a few tutorials, help of Anthony and ChatGPT to figure out how to get it to work, looking forward to keep building!