Week 5 - Electronic production
-
From electronic design to electronic production
To recap, the last week finished with completing the following design of a parrot-shaped system, which in perfect case scenario would have been an earring:
A few issues which already happened:
1. I didn't realize that the board I did for last time is not correct. It didn't have buttons, and had some extra and redundant components.
2. That made me replace bunch of components to those that are available and fit the project, and as a result - rewire everything again.
3. After that I realized, that most of my traces are very close by, and that while I was planning to make the traces cover the whole shape, I decided for a slightly easier approach.
4. One of the annoying things was that once I have set up the shape of the background, it started complaining about 200+ distance violations (some of which are in the components themselves), and became very laggy for any subsequent modification.
5. One of the zero ohm resistors is placed too close under the microcontroller, so I would need to run a wire instead of a trace, since rewiring the whole thing and staying within the shape doesn't seem worth it.
Regardlless, please find my resulting pcb design. This week, let's bring it to life!!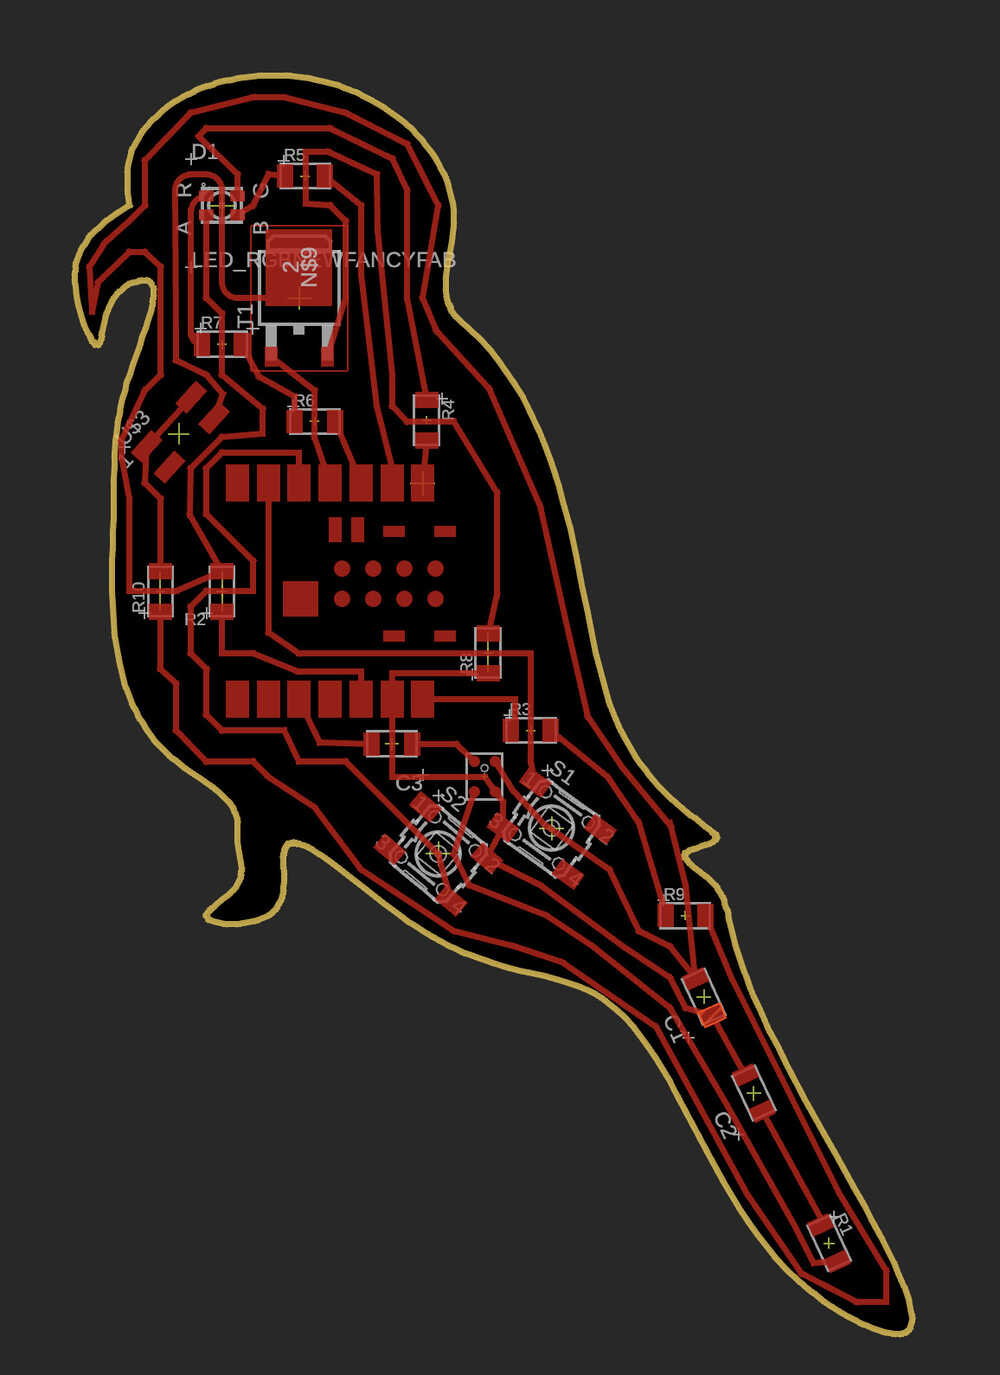
-


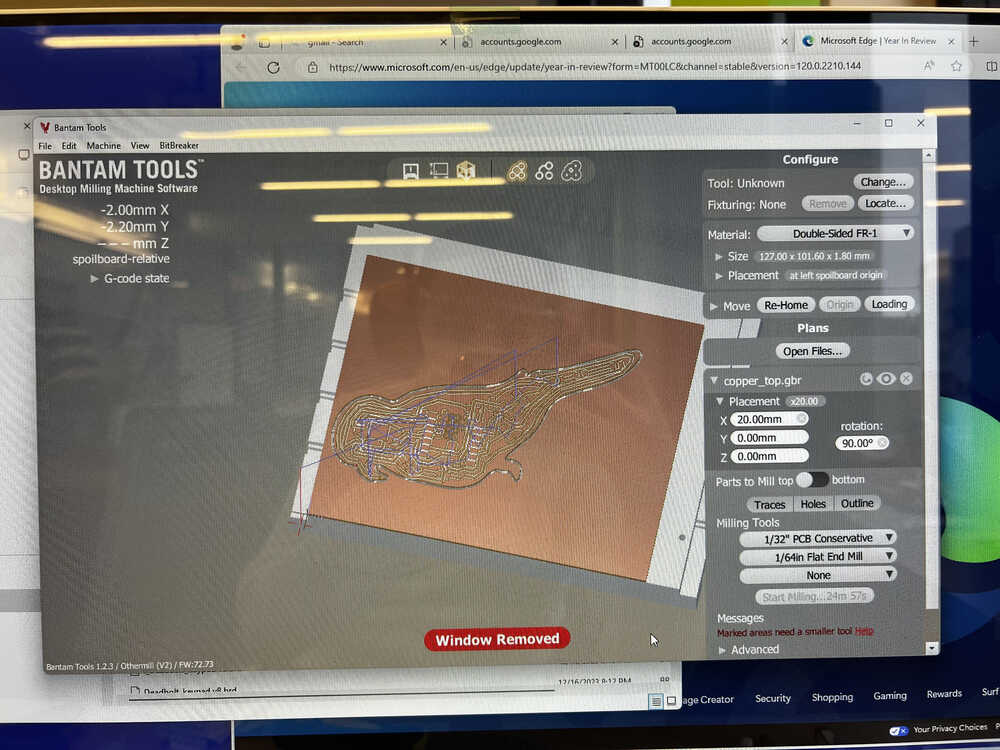
Milling
After days and days of CADing, milling felt like a very straightforward process. (Later in the course I got to use all of the milling machines available in EDS, and each of them has their own specifics, but all have pretty fluent process).
The process of milling took ~20 minutes, with very few traces being done with 1/64 endmill bit, and the majority being done with 1/32 one. The traces were a little fuzzy, but it worked for my purposes. -
Soldering
Next step of PCB production is soldering. This was a long process of placing the elements, them shifting, having to fix them with tweezers, unsoldering, and so on.
Overall it was very exciting and fun, being able to add connections and see the schematic from last week get to and visualize all the connections.
I also got to work with two types of soldering - with a heat gun and soldering iron. On the right you can see a photo through the microscope of a trace that needed to be soldered using a heat gun!
It all feels fun until it doesn't work. Then it's time for debugging!
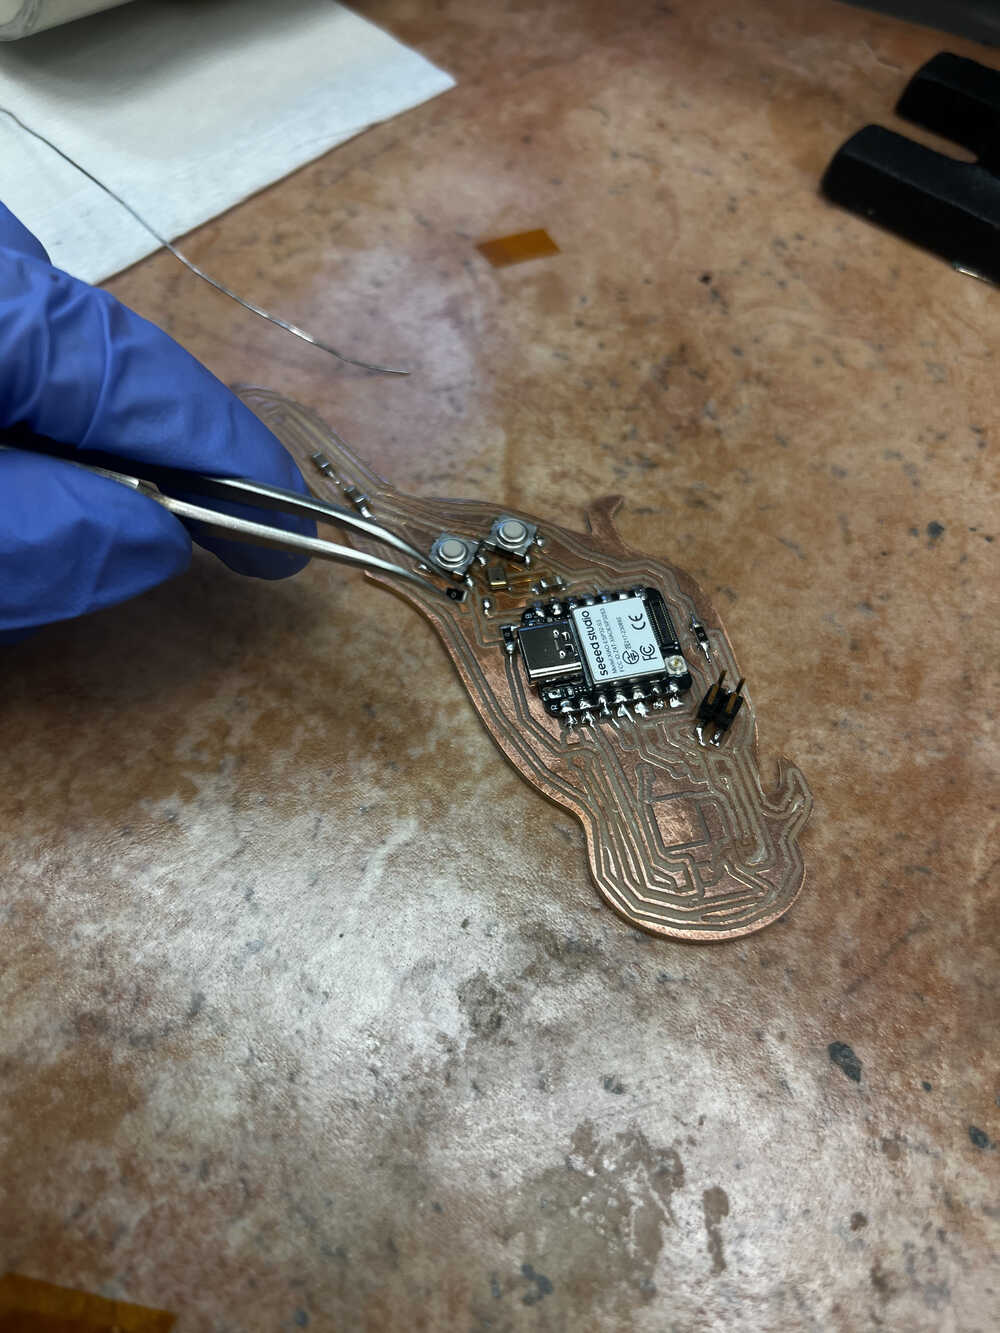
For me coming from Computer Science background, I didn't know what to expect from electronics debugging. It is different and similar in a way. In my case it was using a multimeter to check the traces being connected and having the voltage that is being anticipated.
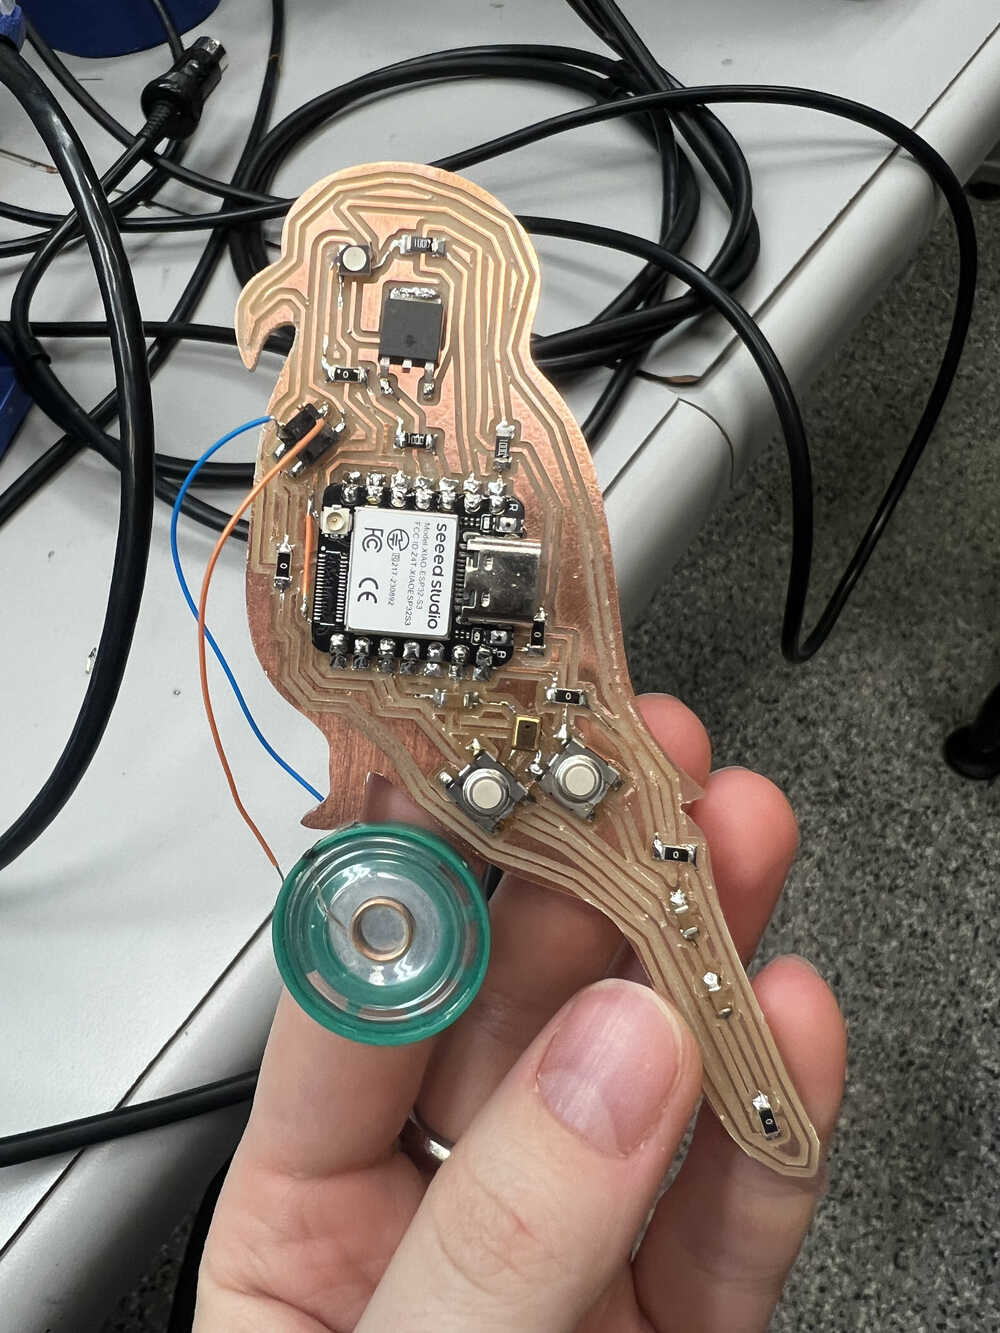
An issue with my board was actually that I forgot about that missed zero resistor that I had to ignore, and I had to run the trace over. The image on the right bottom corner is after one iteration of soldering, before I got to solder an external trace to it and a few more components.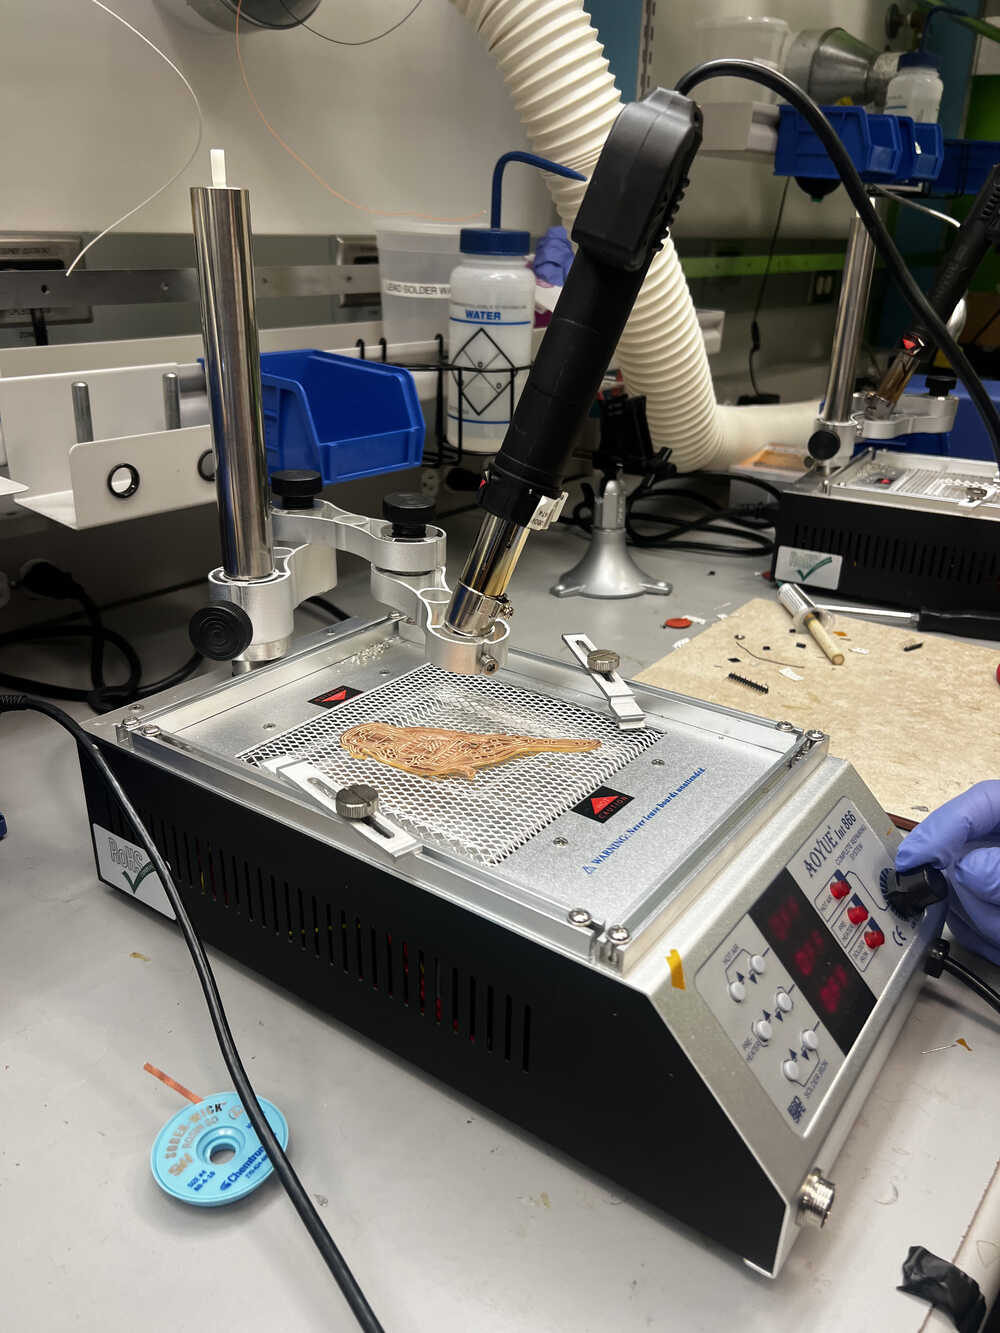

-
Making it work
After the whole milling and debugging, it's finally time to make it do something. (You can see the wire running on top of the board, which I actually had to move because I connected wrong parts at the first attempt).
When I was designing a system, I was pretty ambitious about adding many complicated components to it, in my design it is supposed to take input from a microphone, play it back from the speaker, both controlled through the buttons, and the LED would light up where the eye is.
This week's work of learning how to mill and debugging last week's work took quite some time, so I didn't get to complete all of that. What I managed to test was LEDs working, and I will come back to this project at a later time in the semester.
The code for the board above is fairly straightforward, it sends signals to turn on LEDs of different colors one after another. You can also see it on the video if you don't want to download the file. -
Acknowledgements
Thank you to Alec, Maaya, and Anthony for helping me with electronics and Fusion!
Thank you to ChatGPT for the inspiration!
Thank you to Github Copilot for helping with writeup!
Future iterations of this project is completing the audio part of the project, which I tried working on already, and I managed to melt the speaker :) Regardless, stay tuned, coming back to this project in coming weeks!