Week 6 - Molding and Casting
-
Chess
For the week of molding and casting I chose a project that would actually benefit from repetability of the cast in the same mold.
My initial inspiration was an idea of an expression "the game is not worth the candles", as I was thinking about what would be cool to make, but also what what would benefit from being able to recreate pieces from a mold.
Chess felt like a natural answer - there are so many pieces, all the pawns need to be identical, and they all have pretty simple shapes with no overhangs.
Additionally, my goal maximum was to cast chess pieces out of candle wax, so that you can play burning chess. I don't know why would anyone think it's not a safety hazard, but there's probably a reasonable way to use this kind of chess set.
As expected, I ran out of time, so I didn't get to experimenting with candle wax, but I did the process of molding and casting with hydrostone (and I might still come back to the candle idea later). -
Designing and Machining
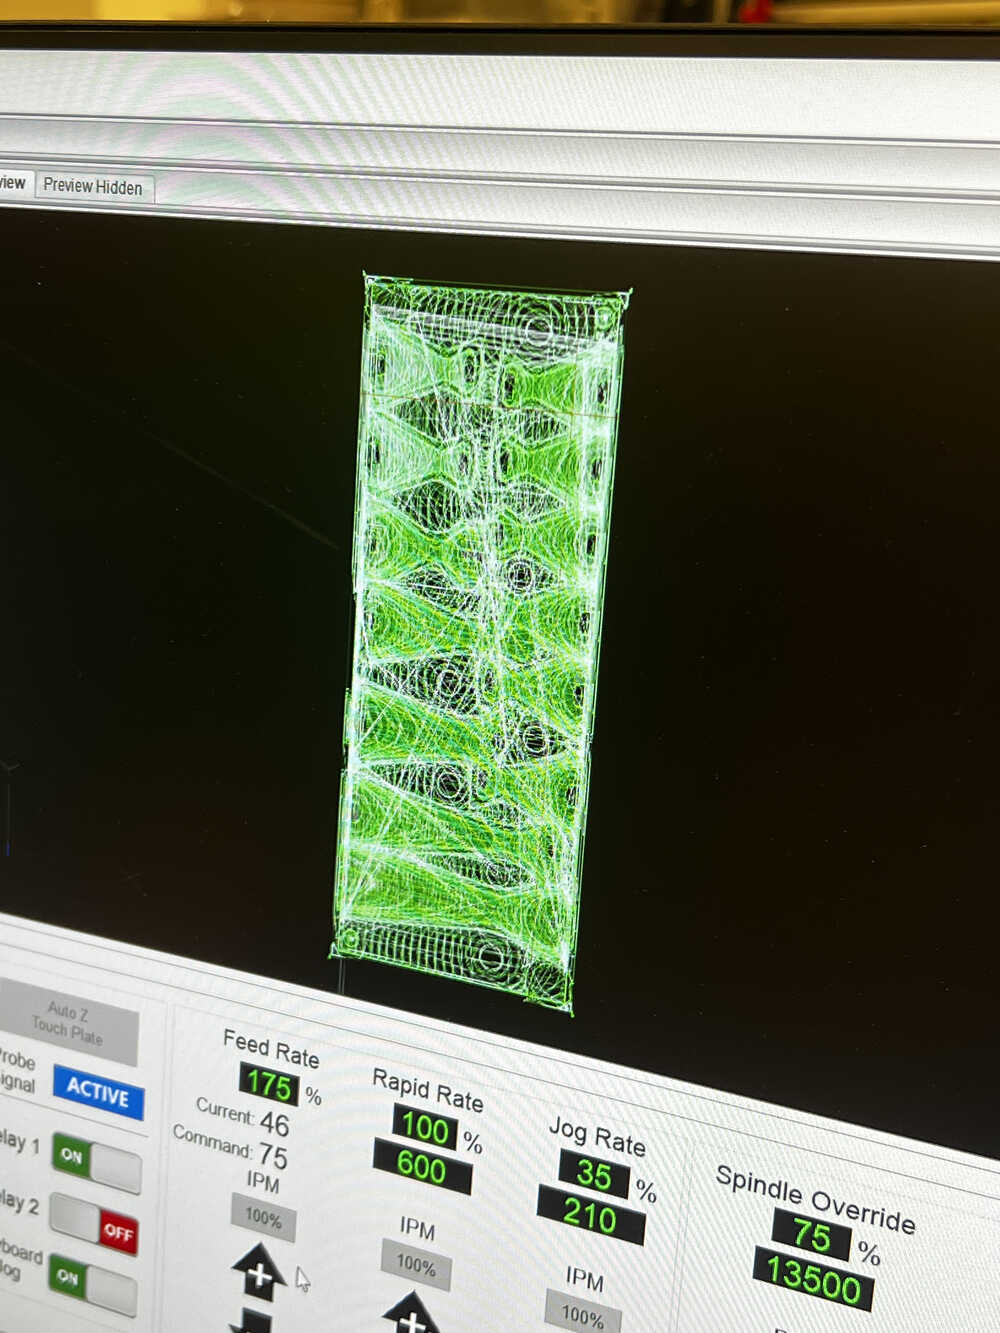
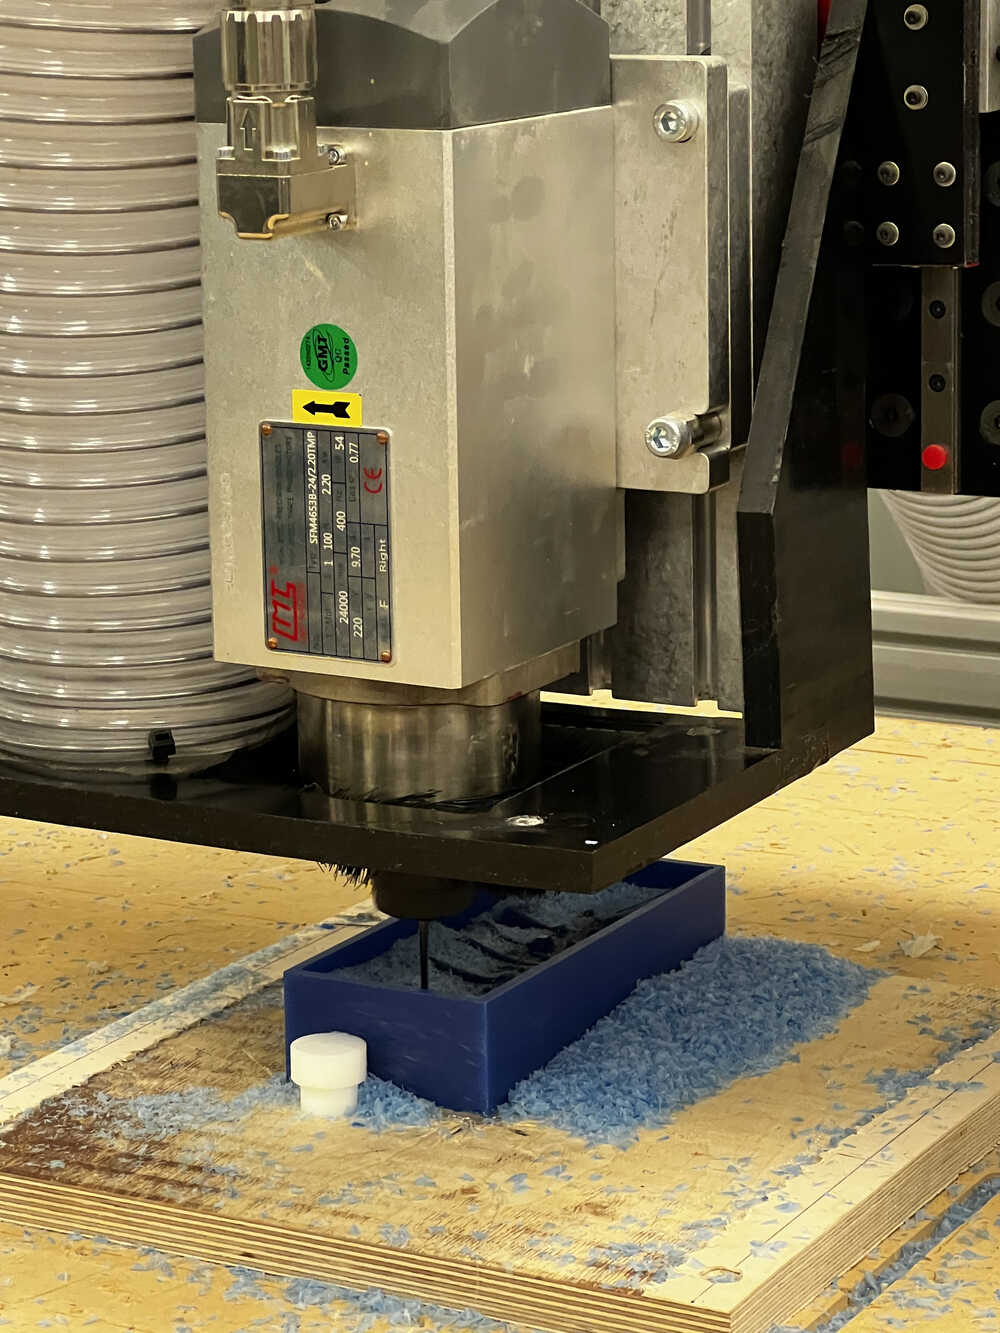
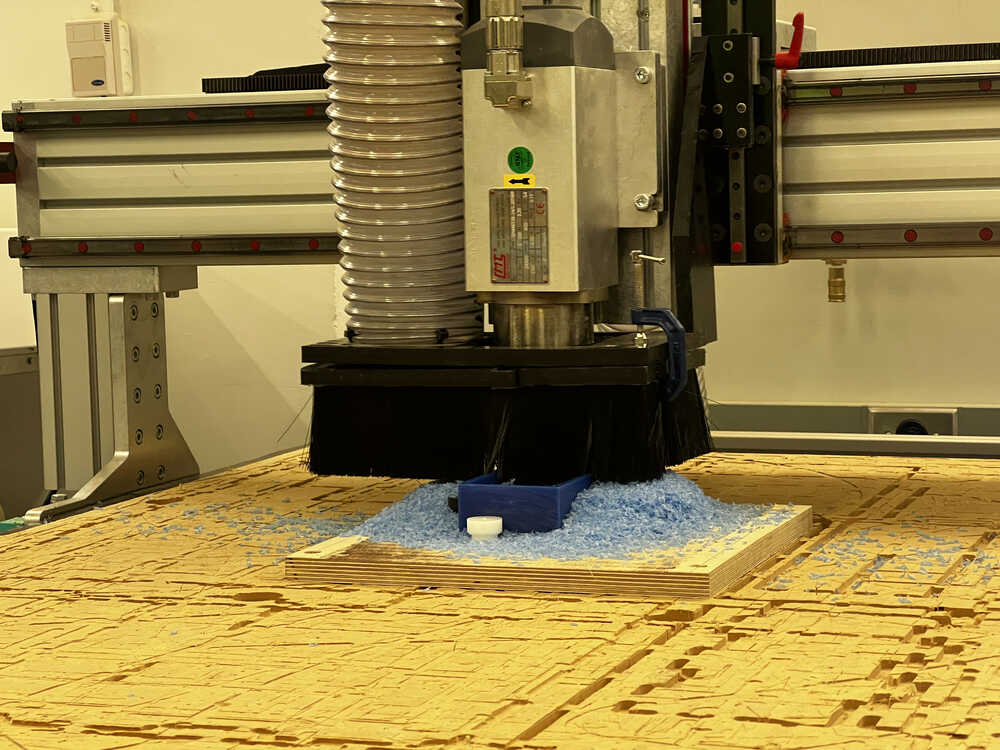
To design my project, I needed to CAD the model in Fusion 360 and then simulate CAM model. It took some time but wasn't too bad, the constraints were that there are no overhangs, so that the pieces could be machined.
The process isn't that new - CADing the pieces is the same as any other week, except now I had to be careful with sizing and start with the shape of the wax block. After that, learning how to CAM took a minute, but the overall idea is that it simulates different passes with different tools and shows, how would a piece look like (pretty good), and how much time would it take (accordinhg to Anthony it takes that amount of time + 50%, because tool cannot go always full speed, sometimes it needs to turn and slow down).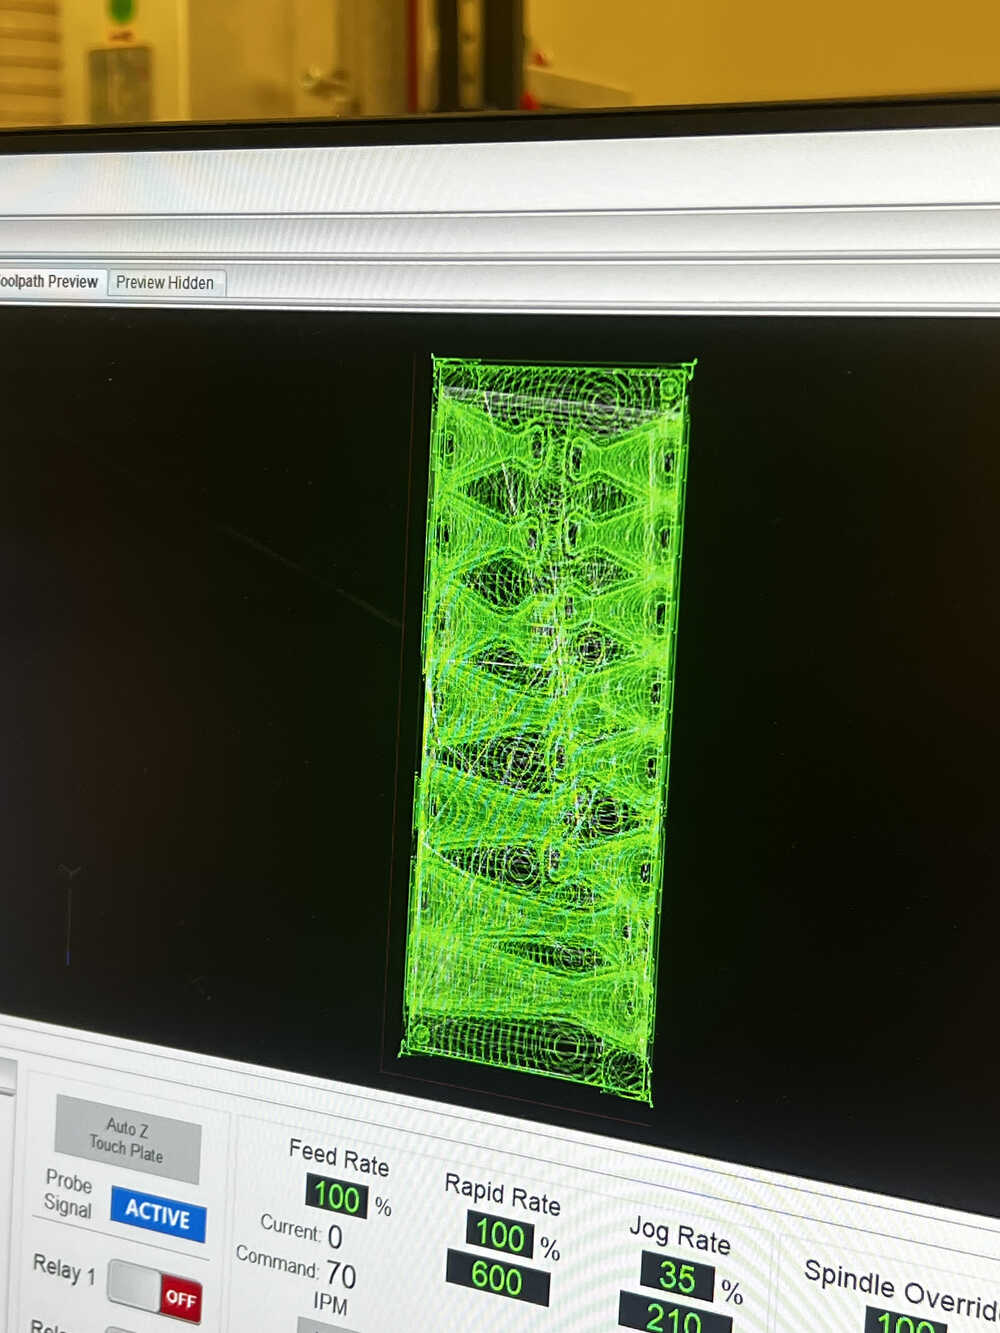

-
Ooopsie
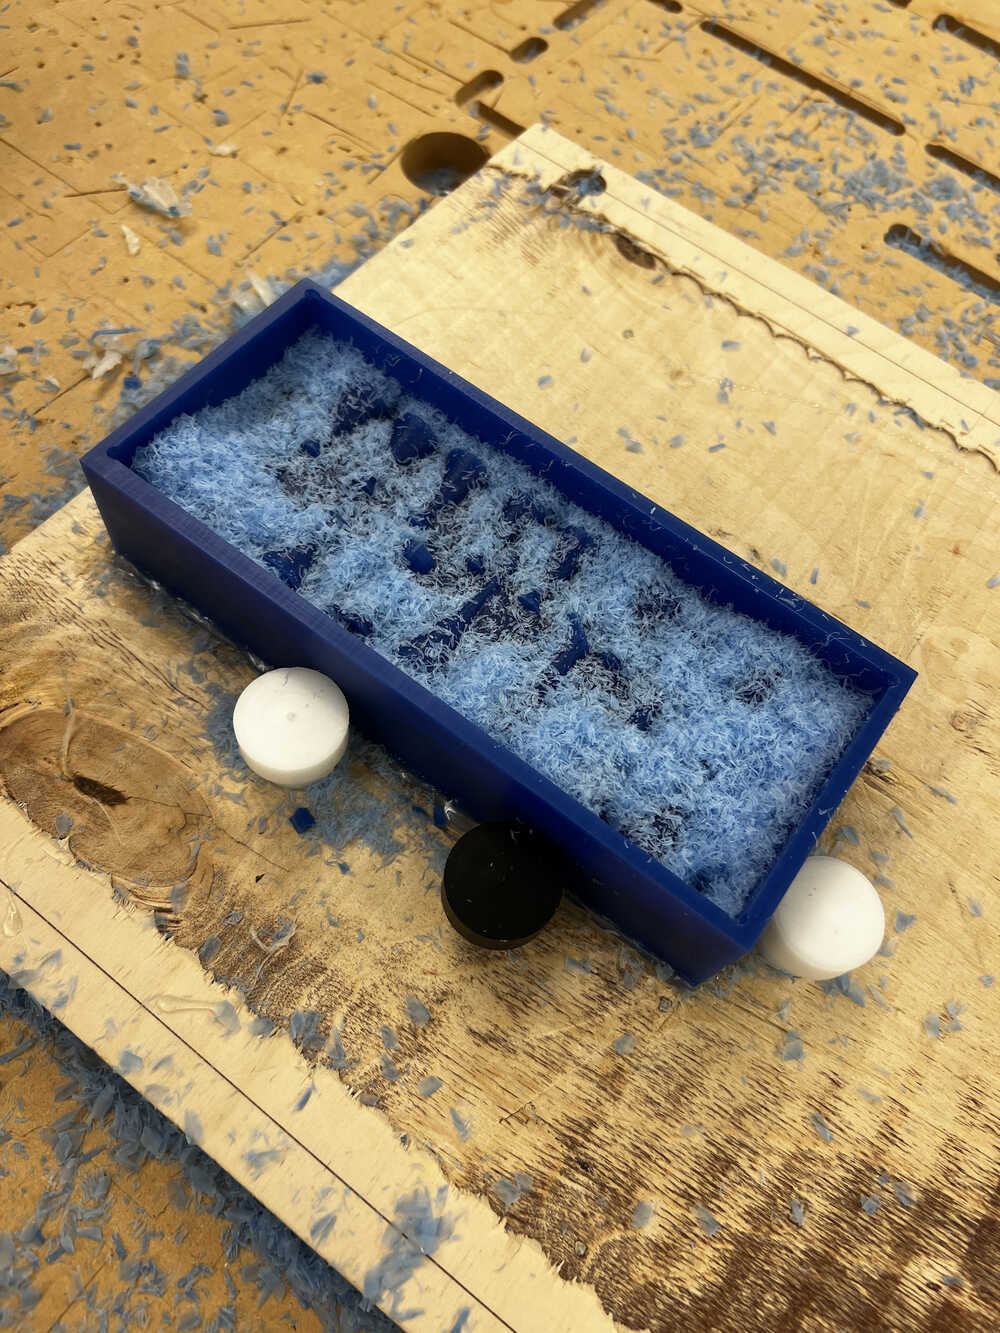
It seemed fine until... I actually machined one side, and realized that the pieces are tiny and will probably break immediately (see the thinnest piece on the picture).
I don't include CAD and CAM of this attempt, since it was a failure, but I do include CAD and CAM of the second attempt, which was a success. -
Attempt #2
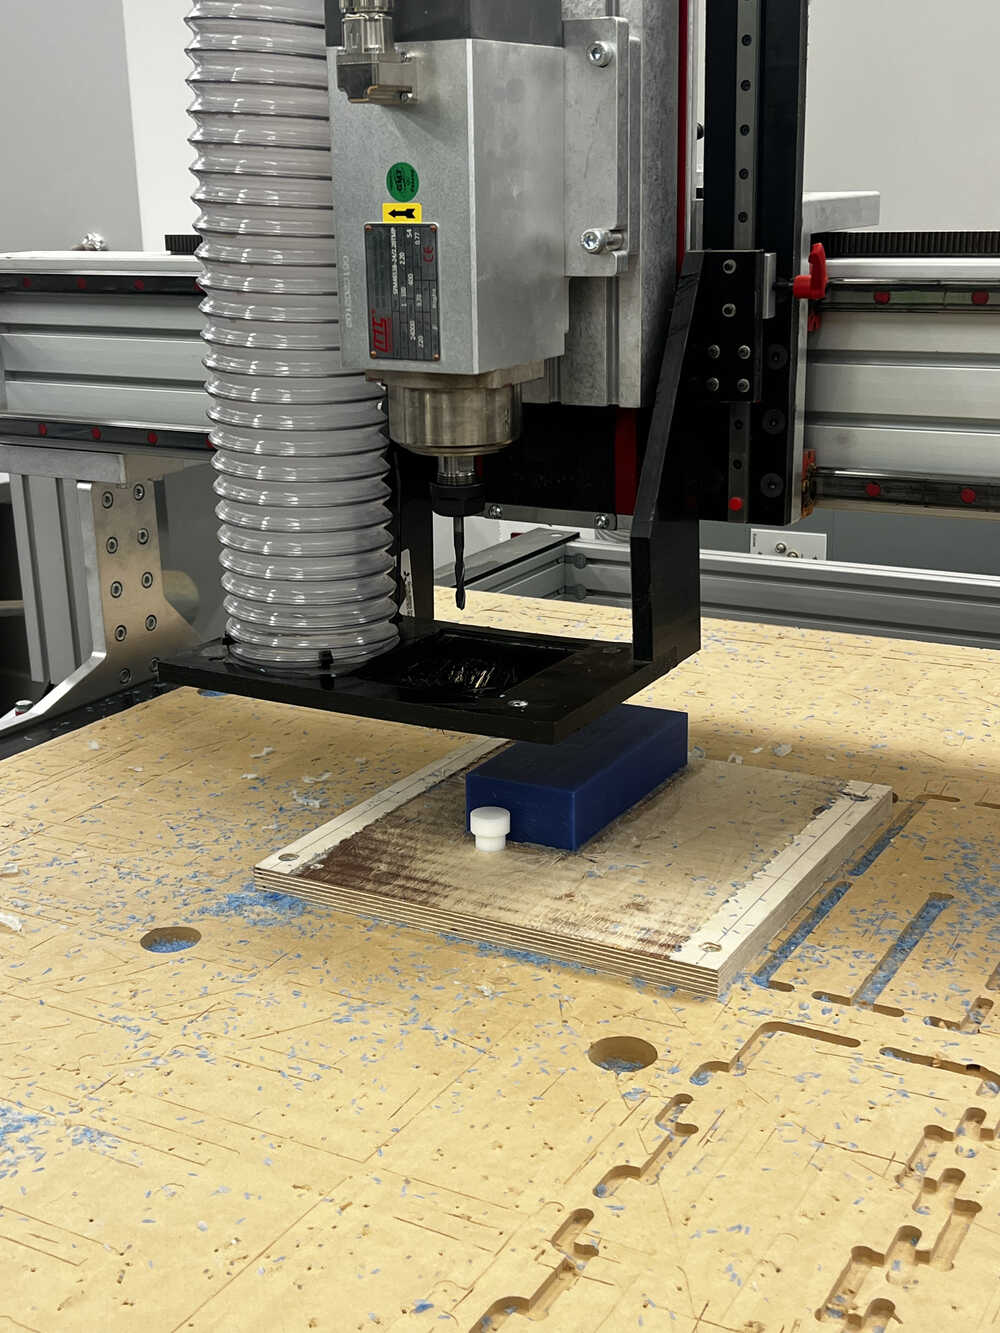
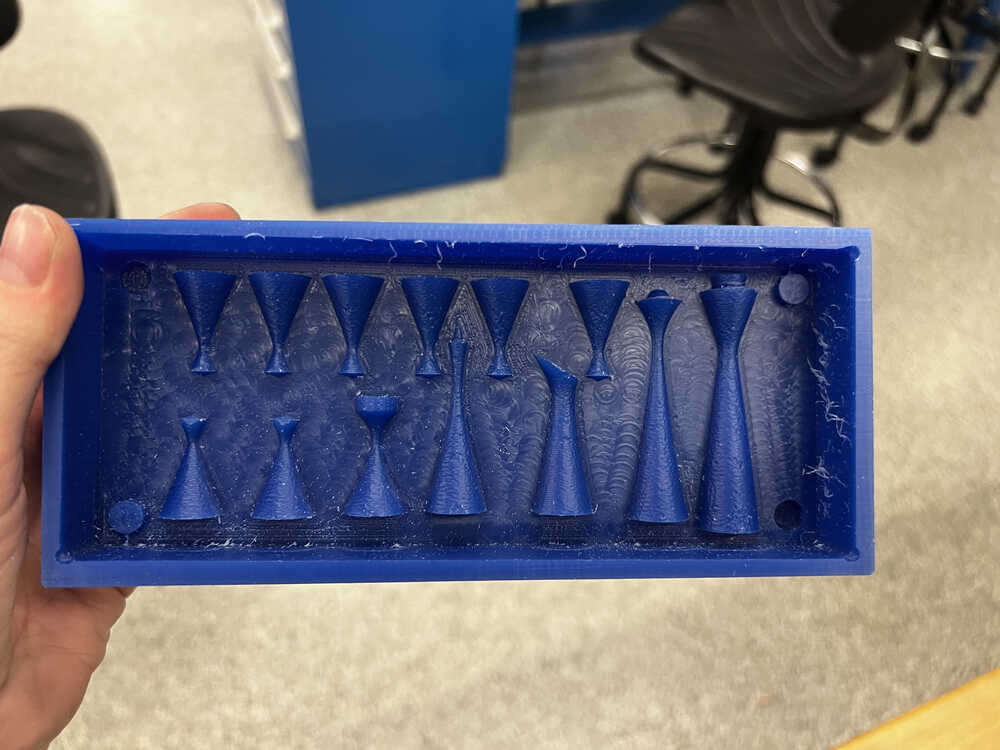
Attempt #2 was a success. It had to wait a few weeks because of the limited machine time, but eventually got milled. Here is a Fusion file (CAD+CAM) of the second attempt.
Every part took a while (every piece of wax was ~1 hour), but it was definitely worth it. It looked perfect, with exception of very small imperfections.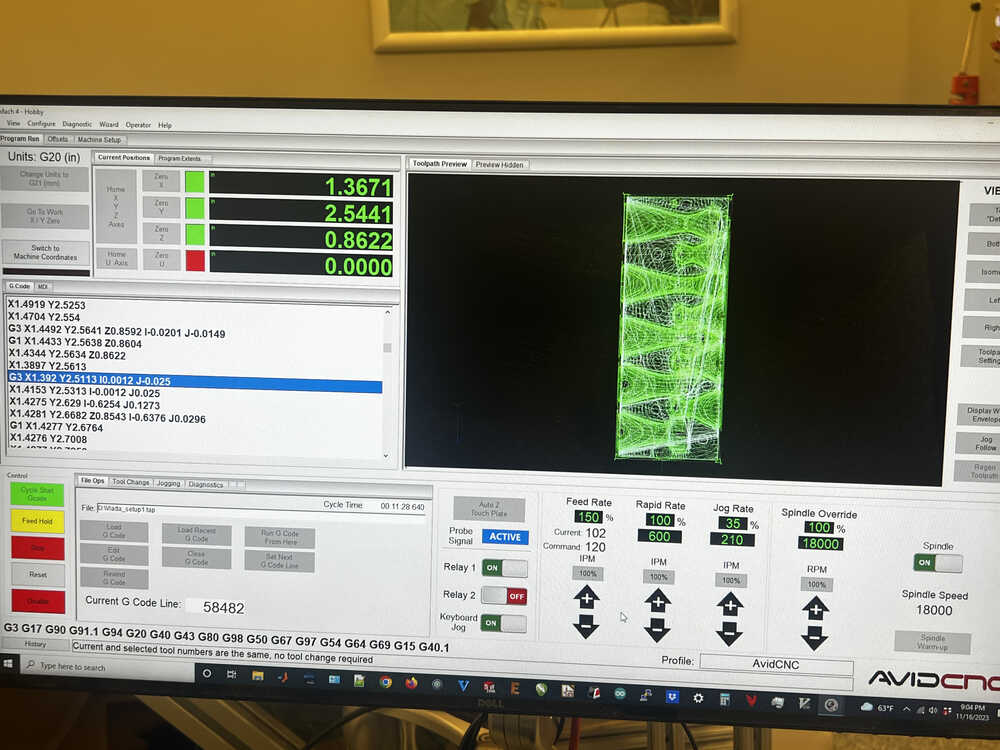

-

Molding
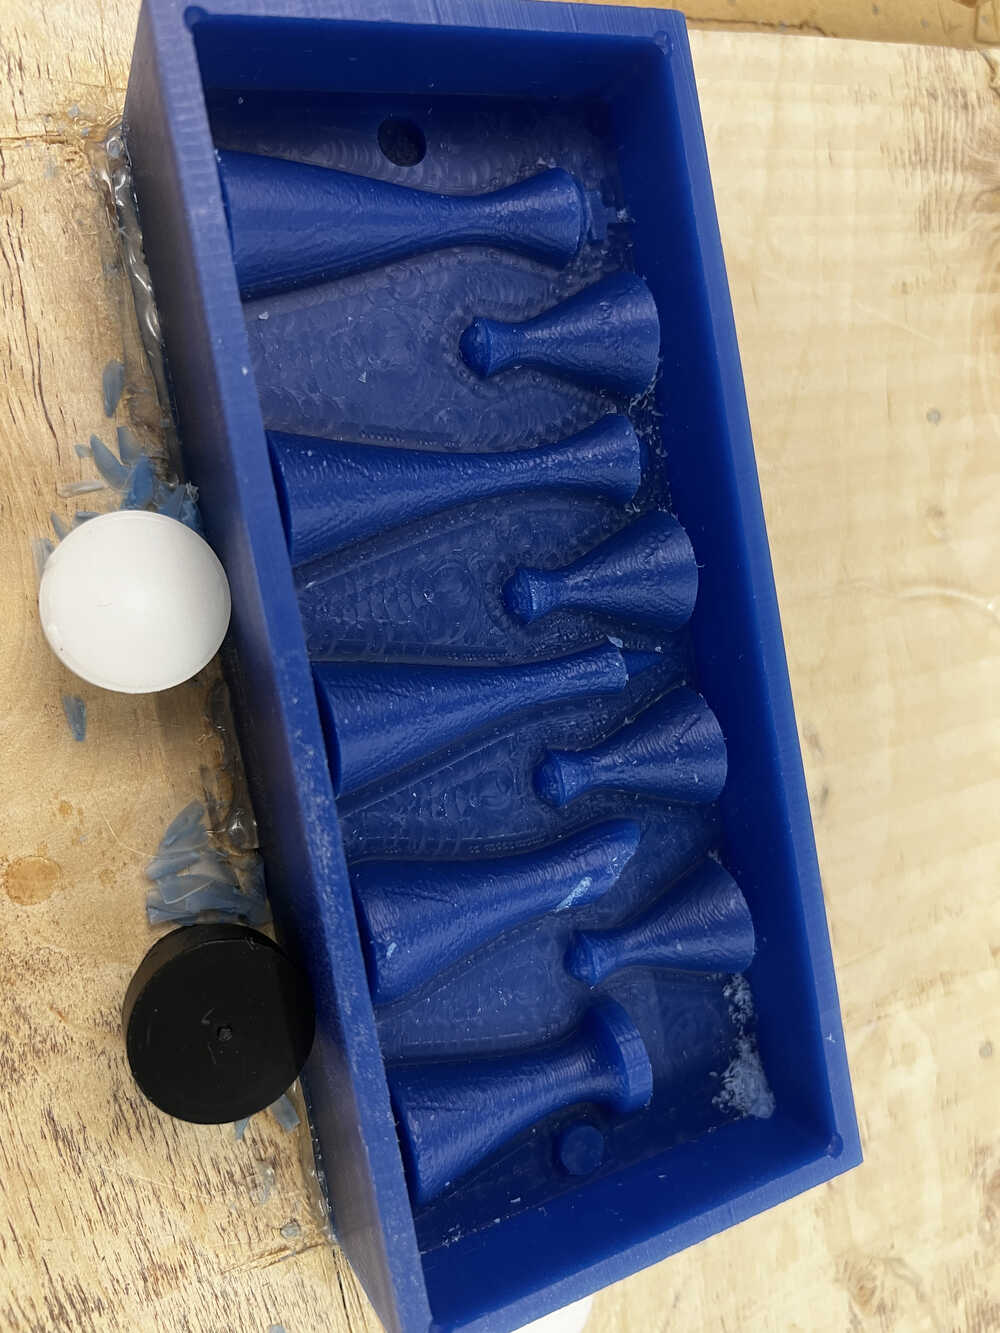
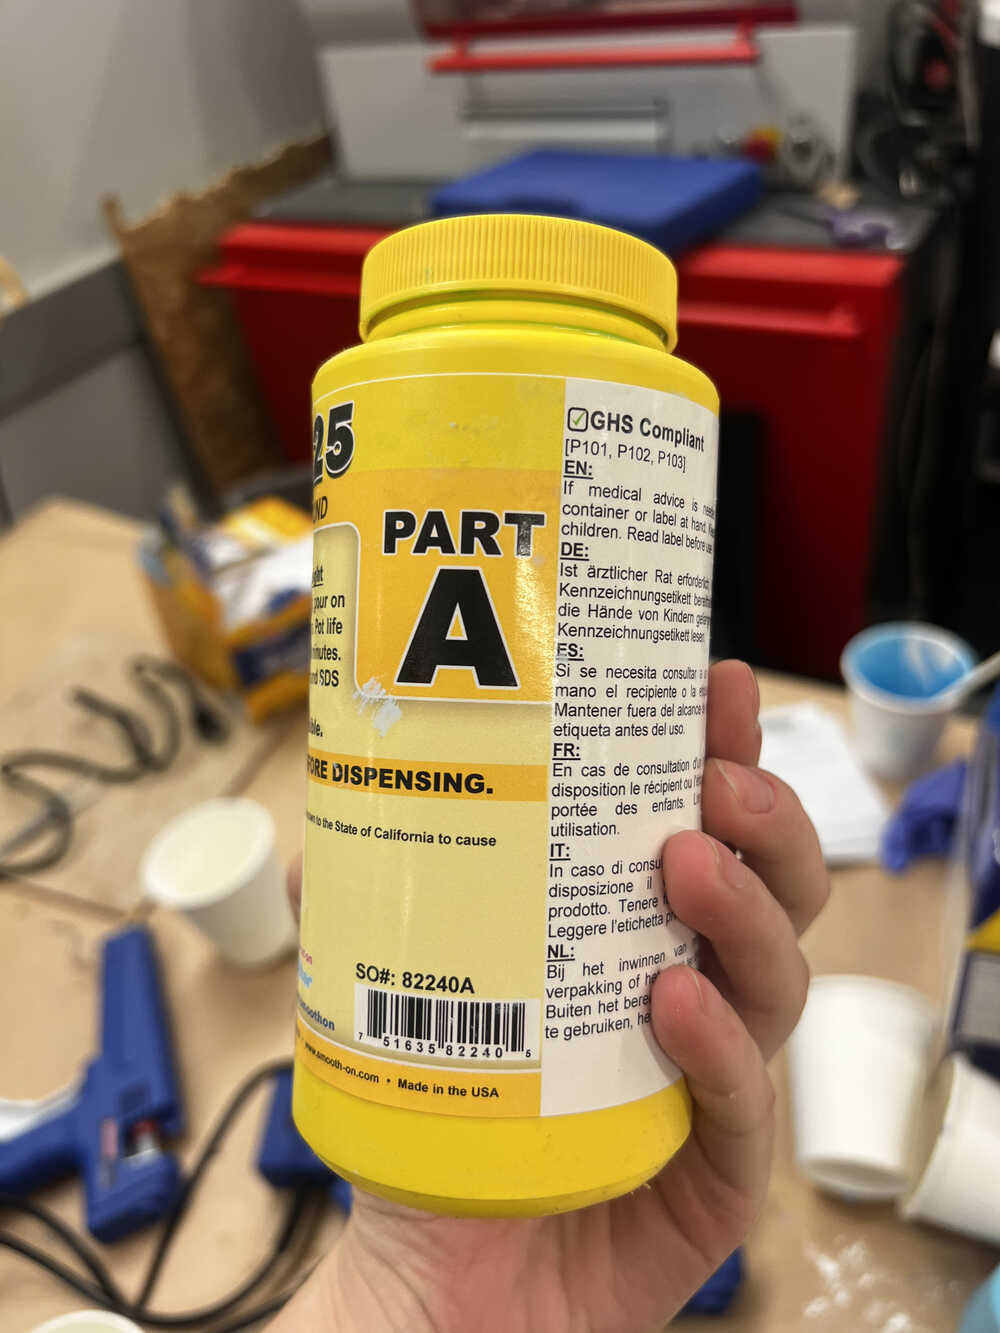
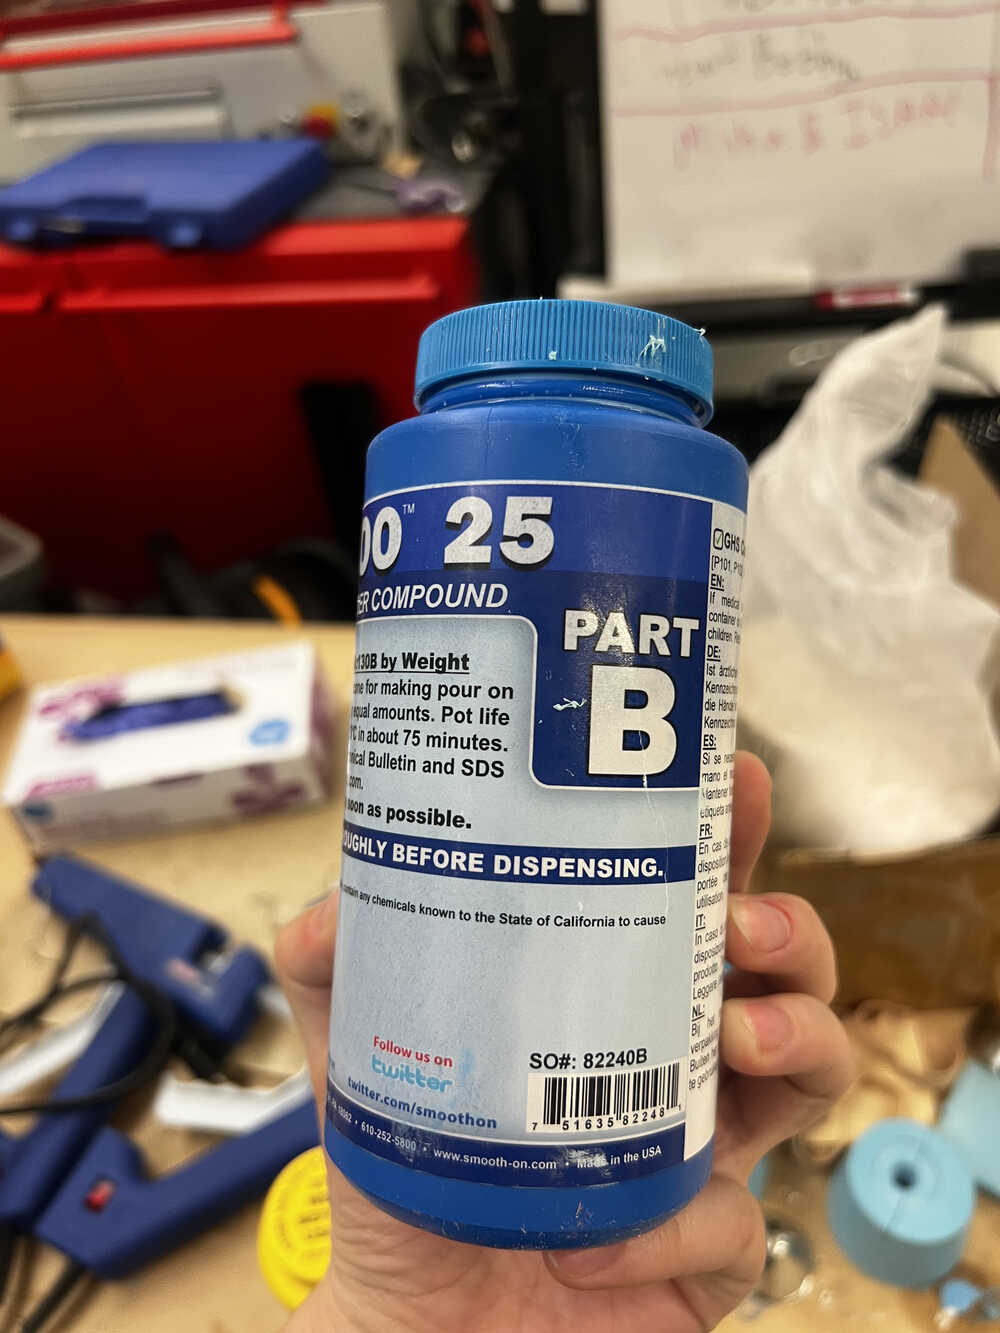
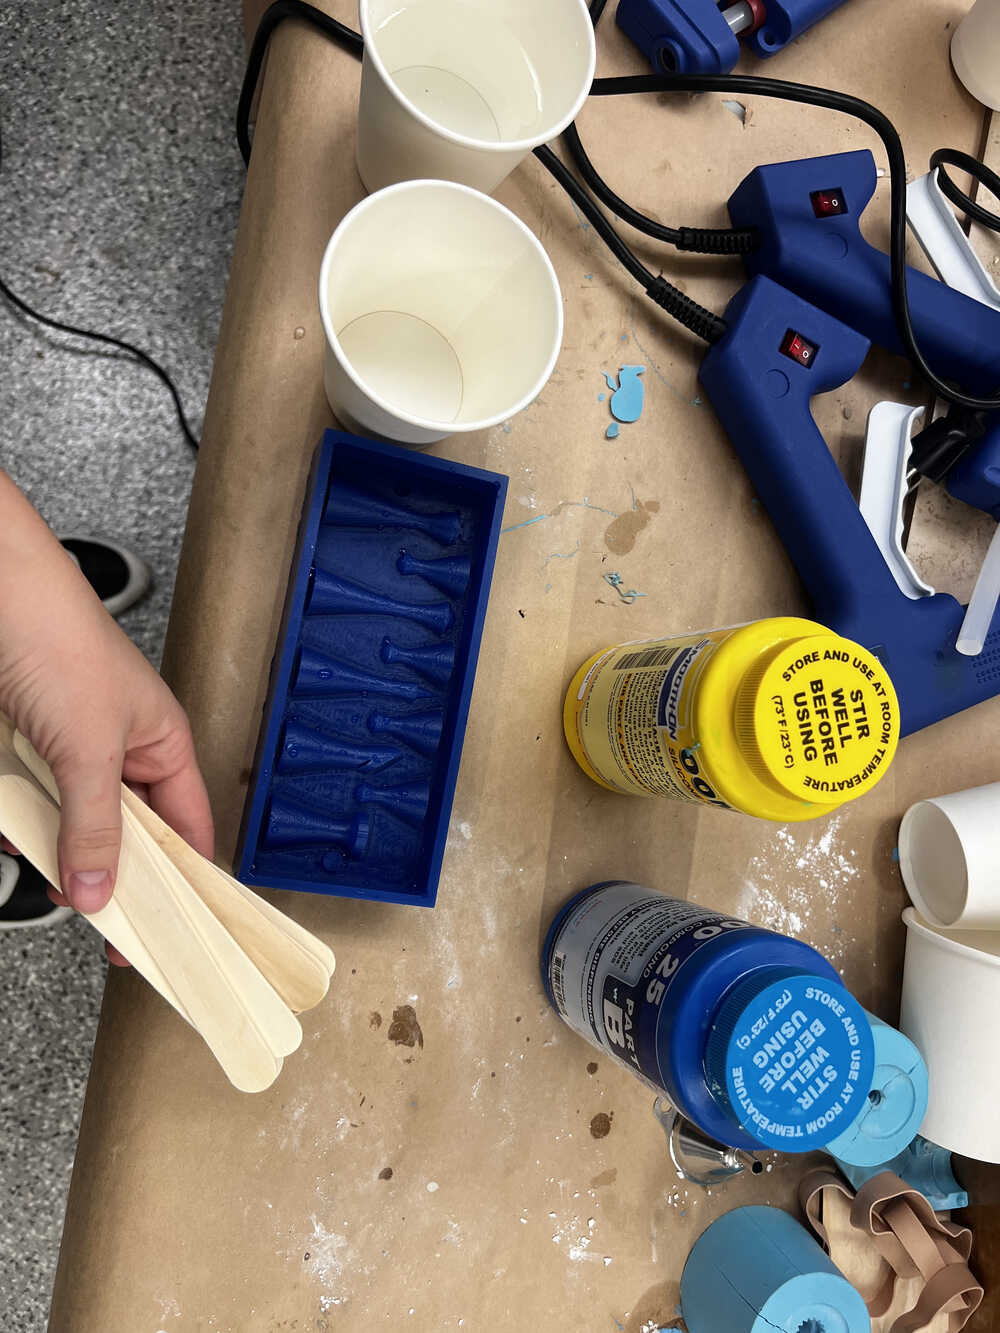
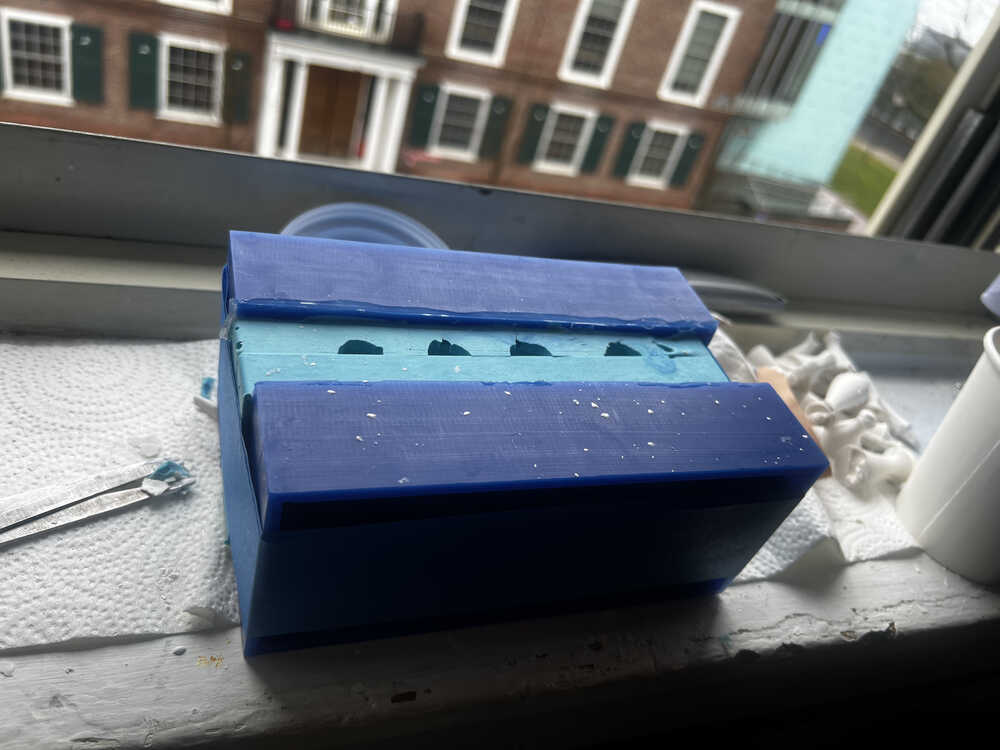
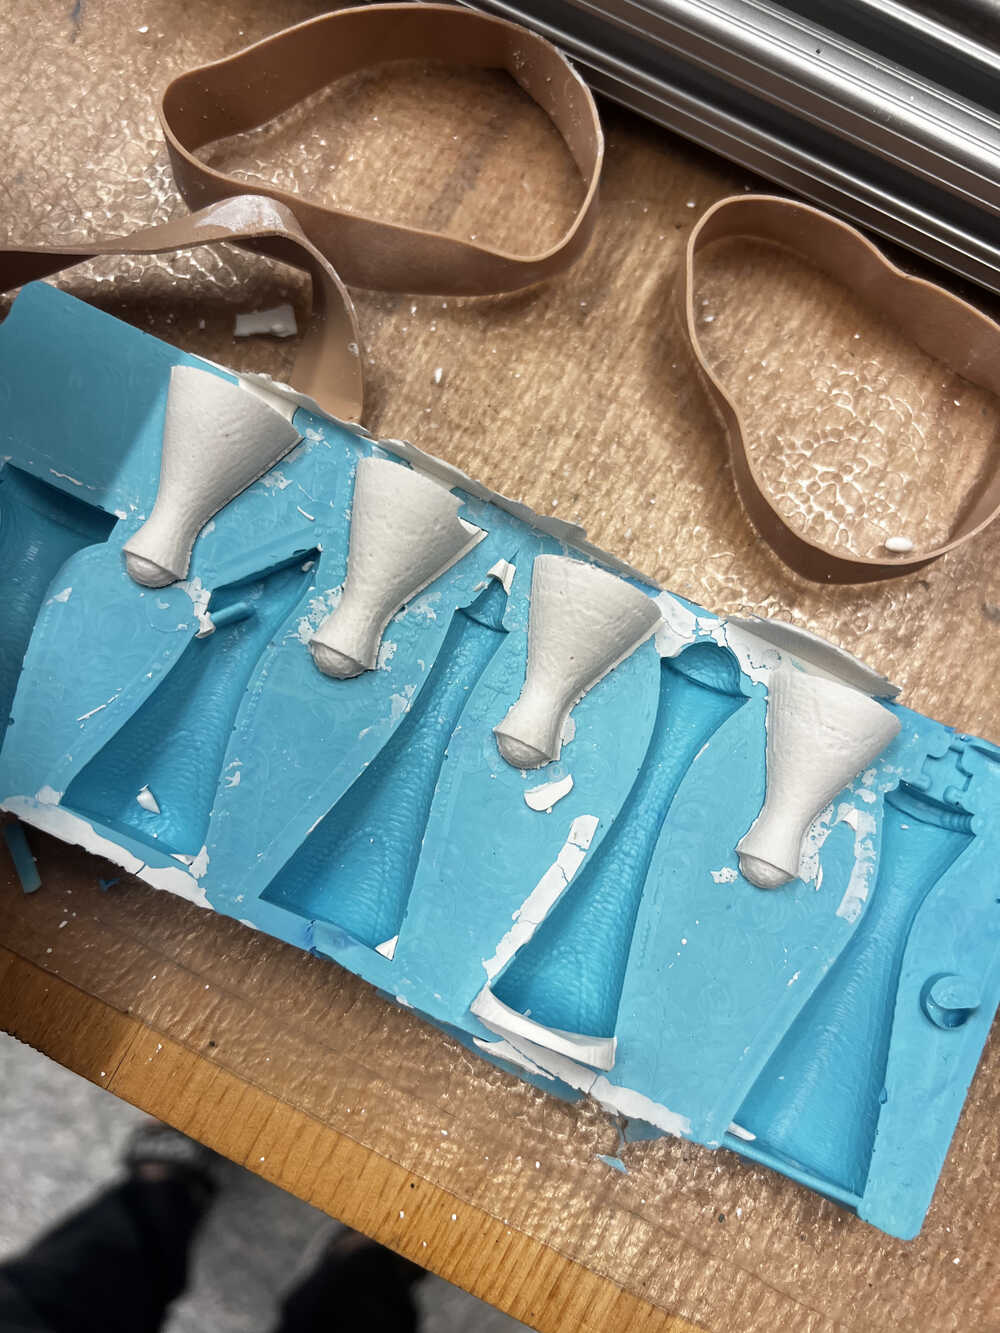
Once machining is done, it's time for molding. Our lab had oomoo available for this week, so that's what I used.
To use, I mixed part A and part B in equal amounts, and then poured it over the wax pieces before it hardened. I was worried about small elements of my product (king cross and knight head), so I covered them with a paintbrush first.
Importantly, use gloves and apron while using oomoo!! The photos have me showing the process before I started mixing and pouring (without gloves, which was fine since I was holding closed bottles), but I used gloves in the process, there are no pictures because my hands were full of sticky oomoo. -
Casting
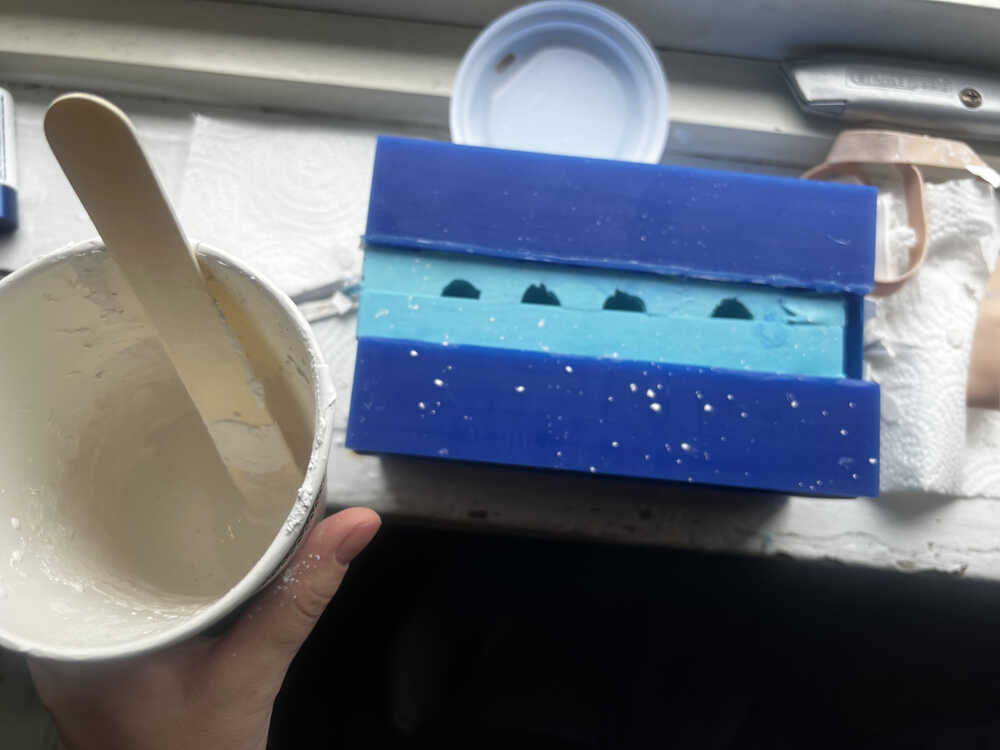
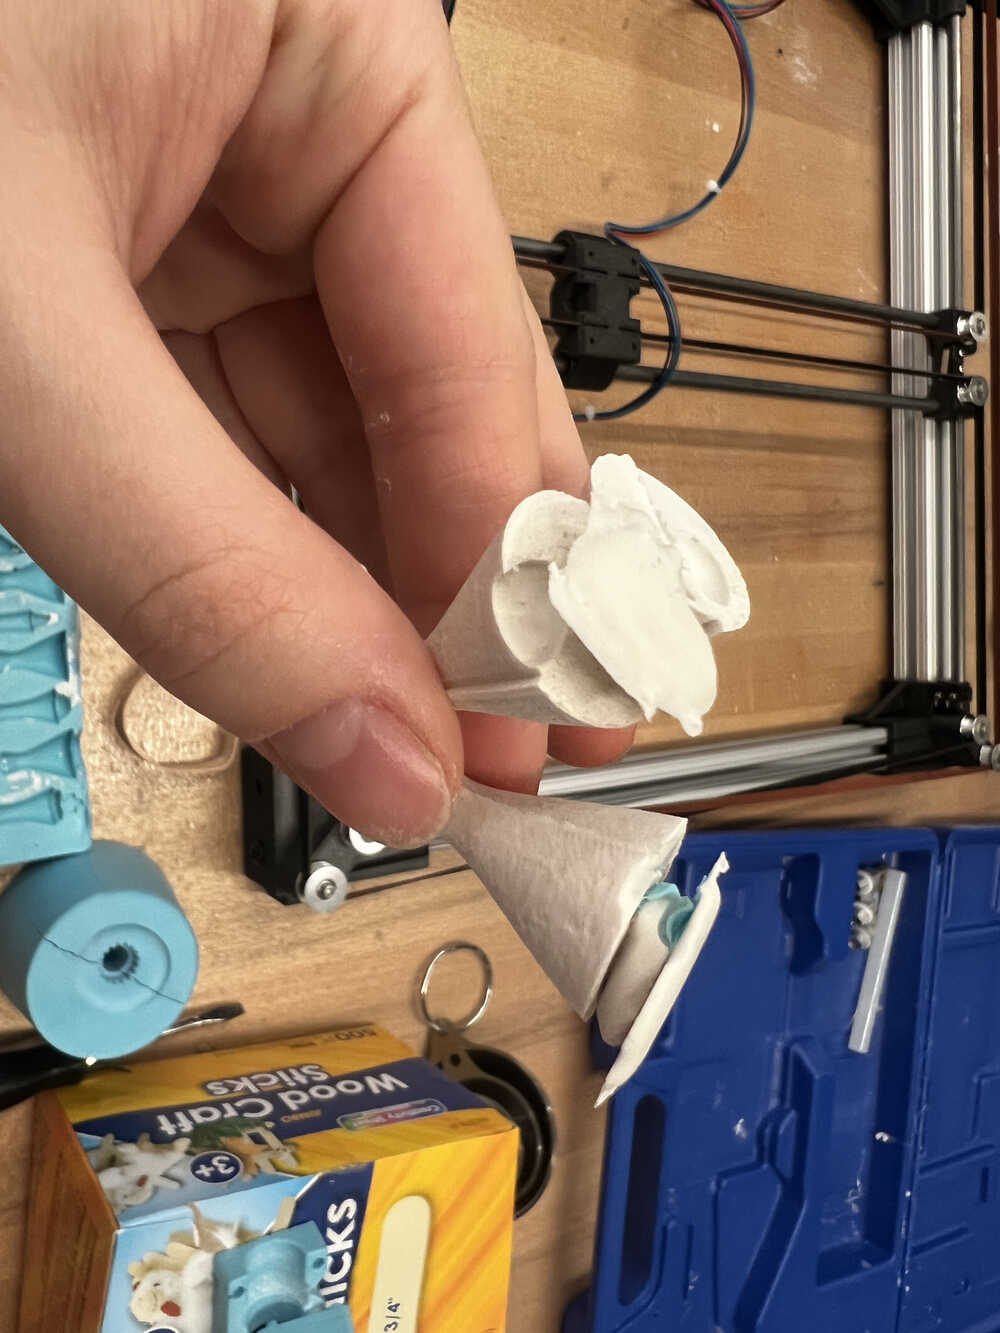
Oomoo hardens for ~2 hours, so I kept it overnight and grabbed the next day. The molds look very neat, so I went ahead with casting.
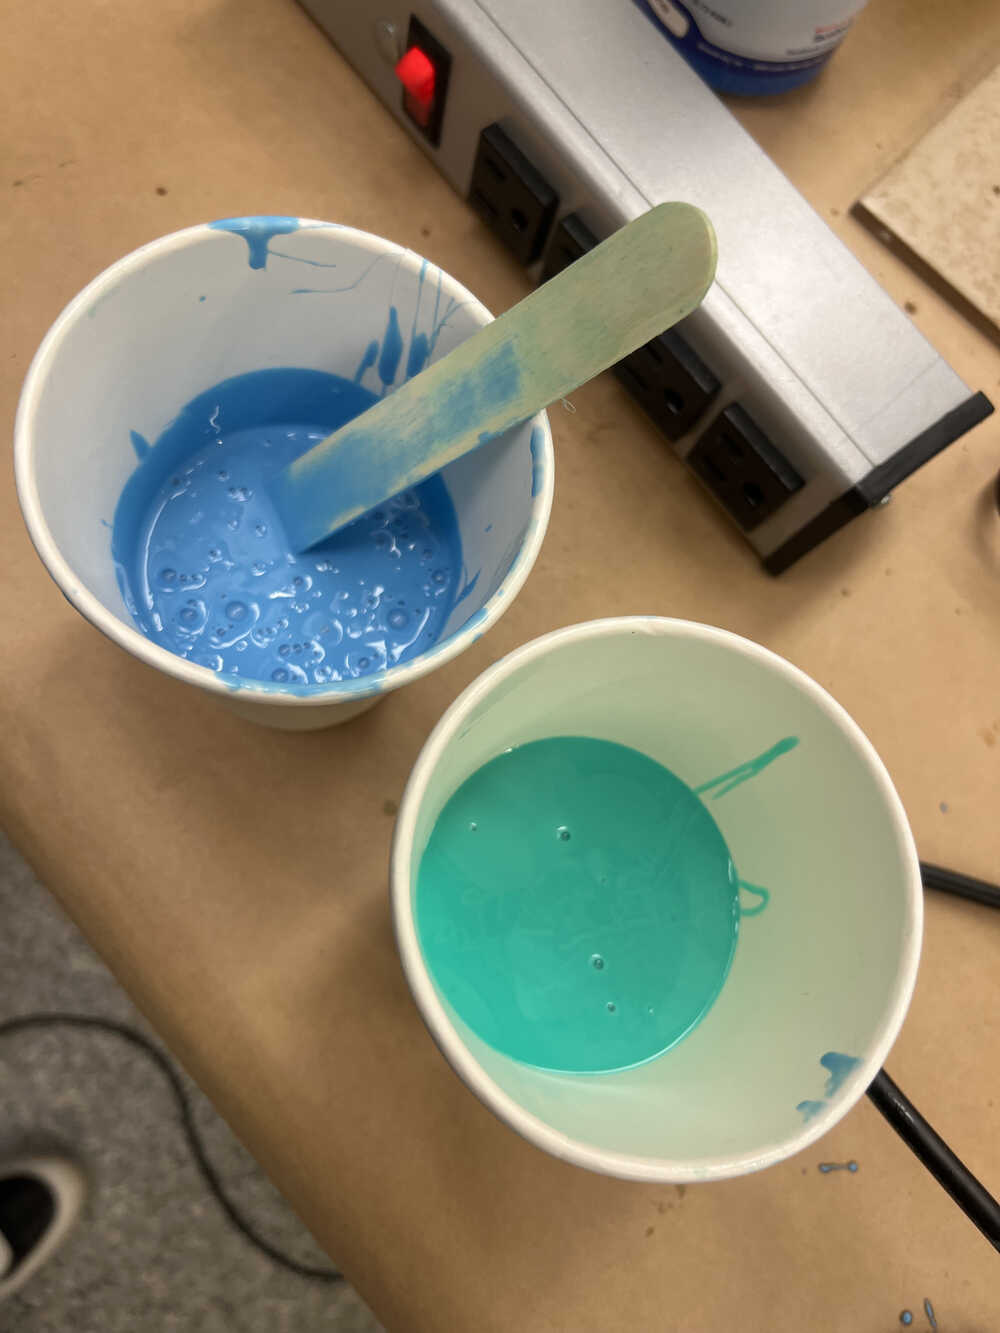
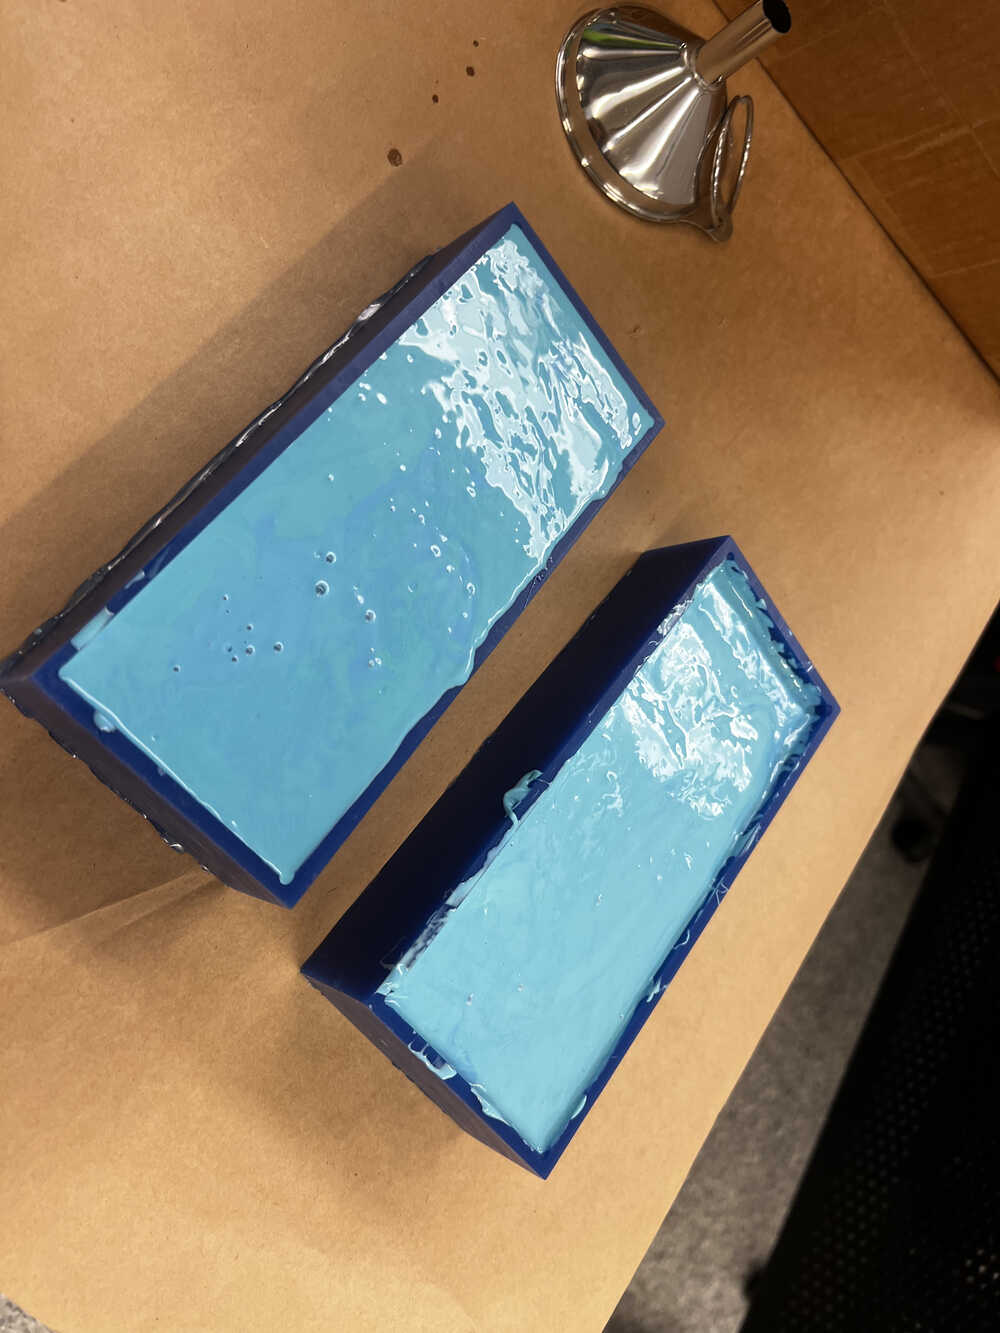
As a material for casting, I went ahead with hydrostone, as a stronger material from the ones available in the lab. I mixed it with water with an eyeballed ratio (until yoghurt consistency, it takes less water than you expect), and poured it into the molds.
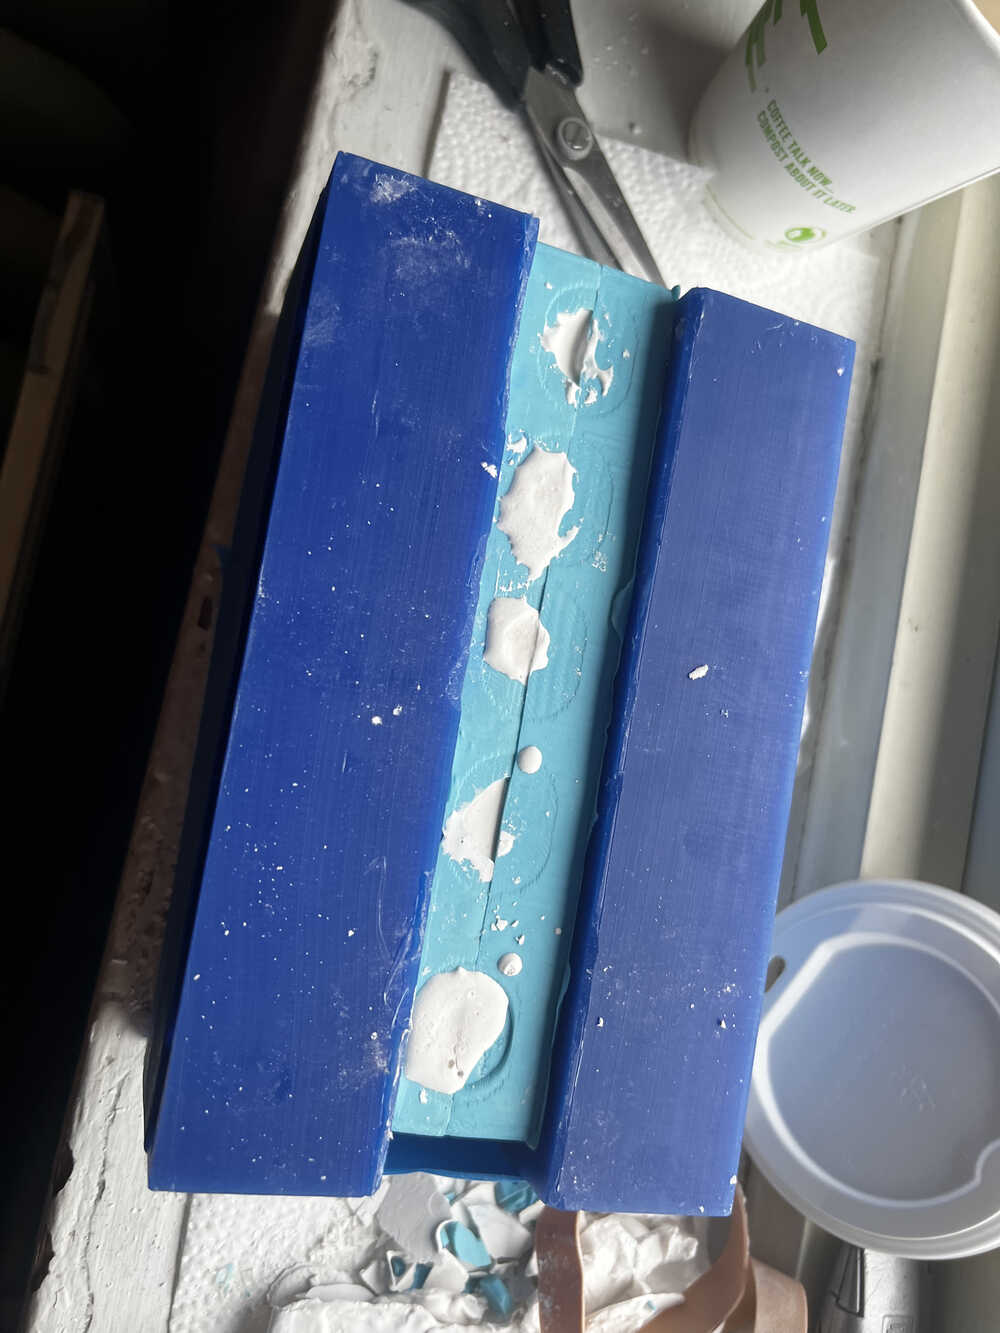
Casting takes practice, and I don't think I have perfected it yet. It's a combination of not having bubles, clamping molds hard ebough so that they don't leak, filling just right amount (post-factum filing is possible, but not great). My biggest learnings are:
1. Make. Big. Holes. It looks ugly, but trust me, it's better than bubbles.
2. Make sure that the mold is clamped well, my life hack was claming molds between the machined parts (so that the sides are straight and tight). Tape worked perfectly to hold it together in my case, of course depends on your piece and mold.
3. File if you need, it's almost invisible.
4. If your cast breaks - you have the mold and can make as many more as you want, that's the whole point of molding and casting.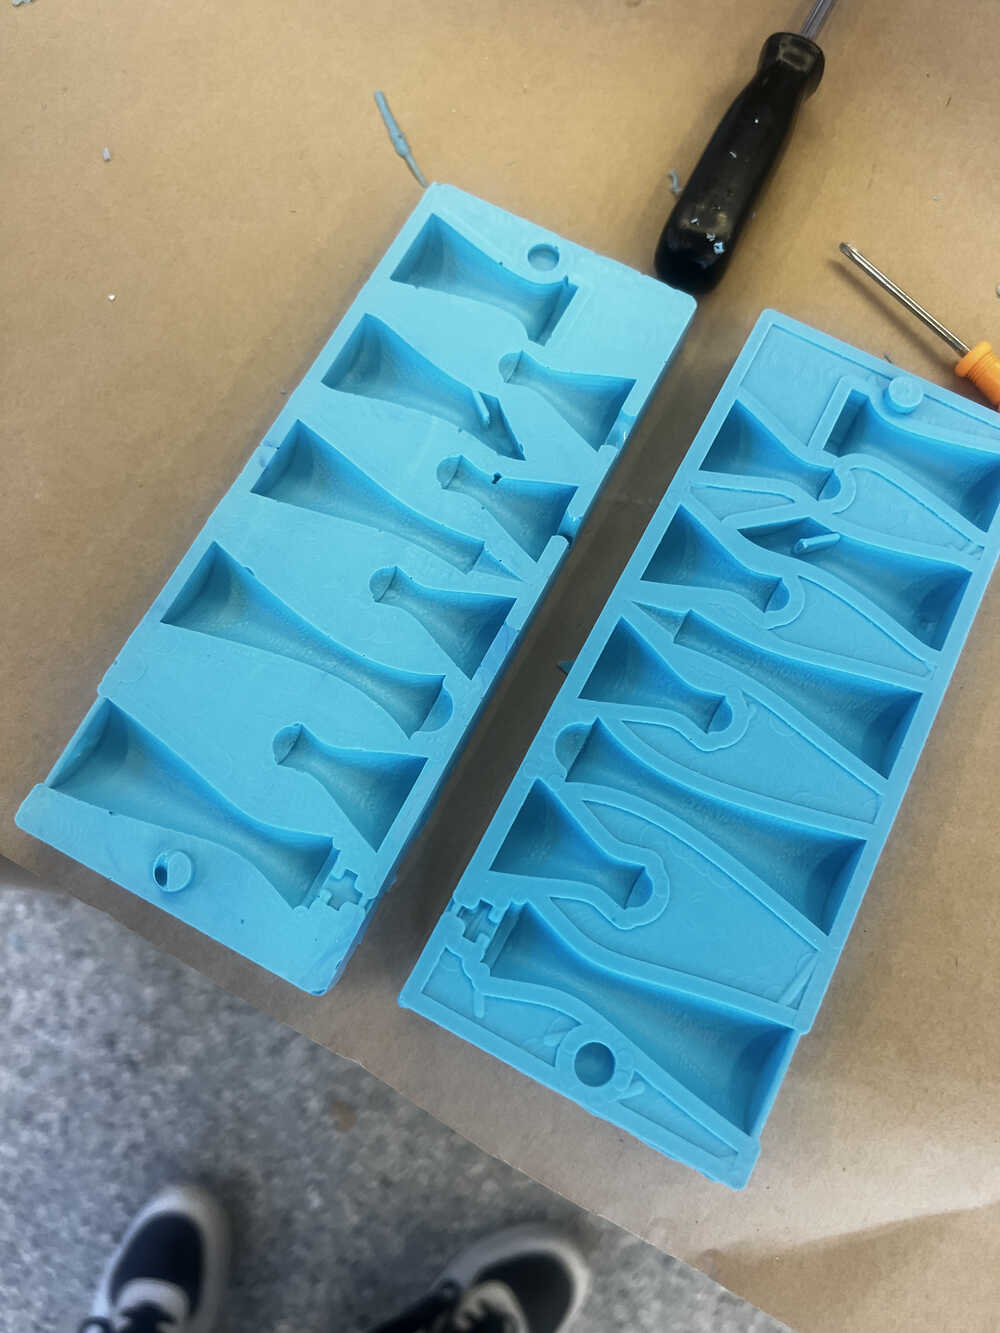

-
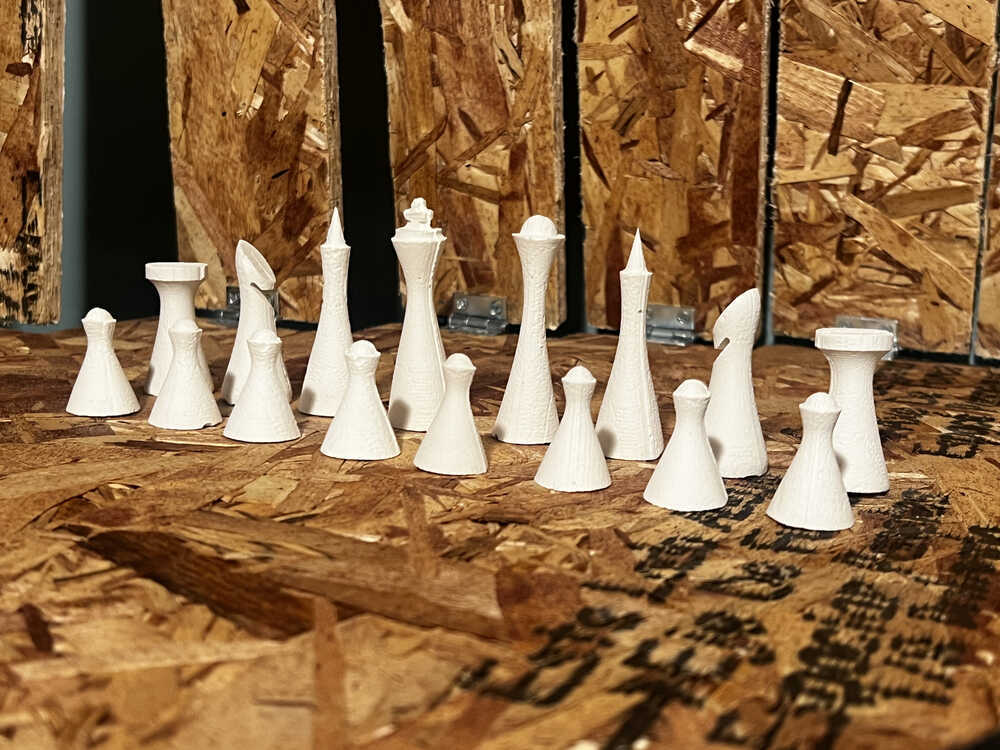
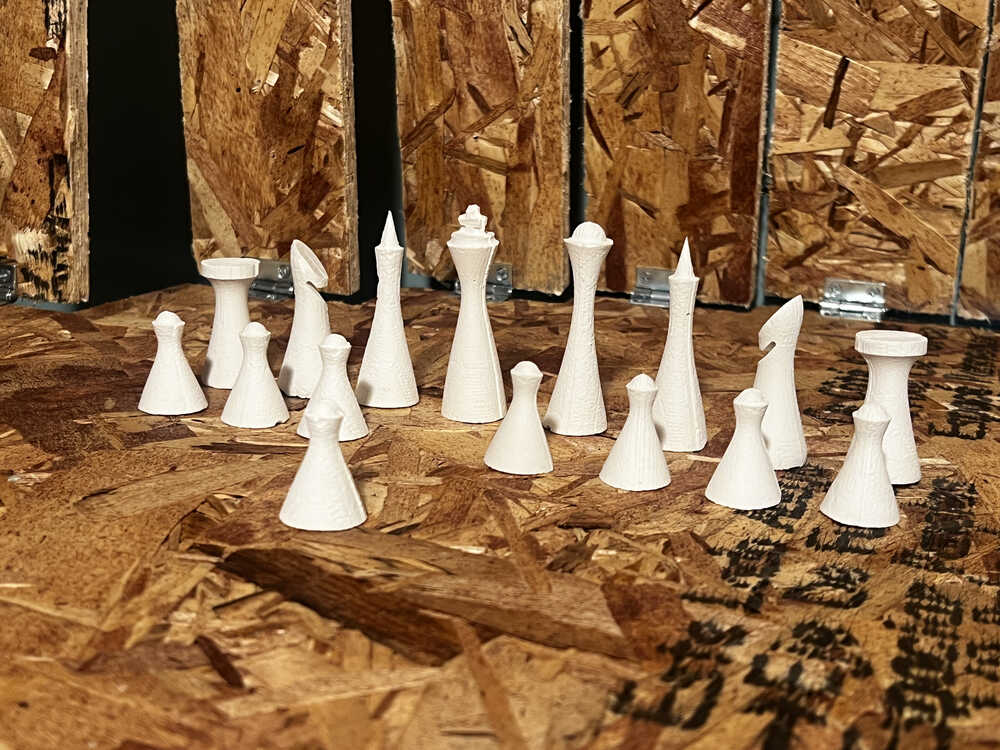
Final result
Despite all the shenanigans with this week, the result looks great to me. Some of the pieces had residual air bubbles, but overall nice and strong. (Yes, they are standing on the table which I made for woodworking week).
-
Future work
There is so much I want to iterate on about this project, that I don't know where to start. I am planning to design, construct, and lasercut the chess board, make a cast set out of wax with wicks, experiment with coloring, work on packaging (plastic vacuum?), automate them and make them move independently.
That's all a lot, I am not sure what from this list I will proceed with, but regardless, the experience of this week was great learning and very fun.
Chess Set