How to Make Almost Anything > John's class Homepage > 3D Printers
3D Printers: lightning fast
|
This
fourth assignment we are to use one or both of the 3D printers and the 3D
scanner. I designed 2 objects, one for each of the printers. ·
The Stratasys: o
A glue-gun disguised
as a sophisticated prototyping tool. o
Allow a day to have
it build something. o
Allow a day in the
ultrasonic bath to let the support material dissolve. o
Make sure you
check what the support material is set to before printing. It seems to often
be set wrong o
Export as .stl. Make sure the object is a mesh with
all manipulations already flattened. With
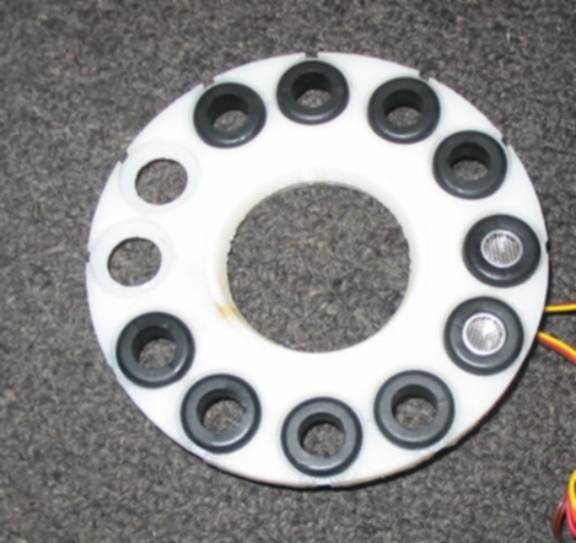
the Stratasys I made a part I needed for a demo: Something to screw into a
microphone that held ultrasonic sensors. I made the file in Blender (which I
stubbornly still use and even like – of course I’ve never used
anything else). I learned some things about Blender: o
Blender uses inches
as its measurement. There might be a way to change this, but I never found
it. o
A cube of size “1” is
actually 2x2x2. o
A circle of size “1”
has a radius of sqrt(2) o
Know the “N”key – the
way to put in exact measurements. o
Build around the
origin. It’s easier for manipulation. o
It’s nice to deform
objects by making lattices and making the lattice the parent <CNTL>P of
the object…but how do you then flatten the object so the deformity stays when
you export to .stl? In
case you haven’t gotten the hint, my piece didn’t come out exactly as I
wanted. I lost some warping I had done. It also broke, because I had an area
with almost no plastic…a result of having lost the warping. Update: in Blender to get lattice deformations
to be part of the mesh and export correctly etc. choose the mesh object and
hit <SHIFT><CTRL><A> as explained at http://euler.aero.iitb.ac.in/docs/Graphics/blender/faq/faq-5.html Here’s
the blender file Here’s
a pic of the result, with some rubber grommets and a set of ultrasonic
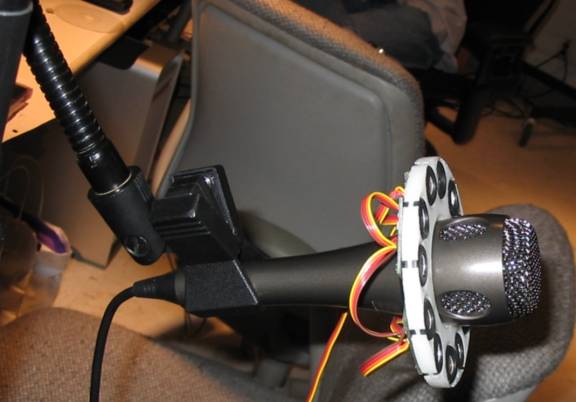
transducers installed: And Here’s a pic of the
object on a microphone: BTW the demo works well.
I’ll post a video soon. ·
The Zcorp o
A great
machine for those who wish they were archeologists. o
A great
machine for archeologists. o
A great
machine for those considering archeology as a trade o
The results are fragile o
Let things sit
overnight if at all possible. They will harden. o
Colors don’t come out
well. o
Exporting as .vrml is
problematic for textures. Edit the .vrml and add the texture by hand ‘cause
the python script in Blender ignores textures. Then load in 3DS max or in the
Zcorp software to see what you have. The only way to change the texture is to
actually change the .jpg itself. Nothing else works, no matter what they tell
you in the .vrml specification. o
Editing the .vrml.
Here’s relevant code. Add what is necessary as necessary: Shape
{ appearance
Appearance {
material Material {
diffuseColor 0.5882 0.5882 0.5882
ambientIntensity 1.0
specularColor 0 0 0
shininess 0.145
transparency 0
}
texture ImageTexture {
url "eyepic2.jpg"
}
textureTransform TextureTransform {
center 0.5 0.5
translation 0.6 0.5
rotation 0.1047 scale
1.5 1.5
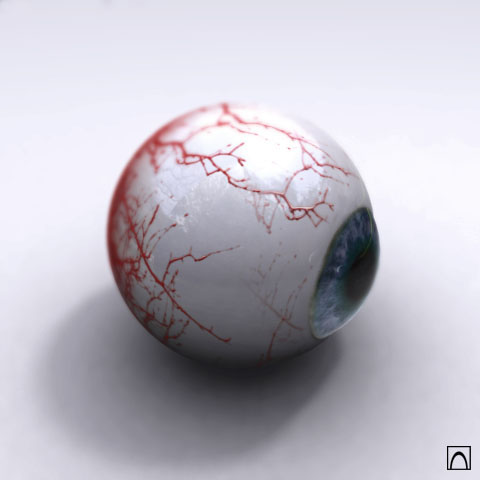
} } I
made an eyeball-like thingy to hold keys and change. My inspiration was Petter Alm’s eyeball, which I found here. I emailed
Petter and got the 3DS file (which is very generous of him) but ended
up using only the .jpg he sent for the texture. Here’s
the .vrml. Steps
for using the Zcorp: o
Clean the machine.
Vacuum all the plaster o
Hit the “spread”
button and spray the distilled water over the cartridge stuff and suction
cuppy thingies o
Dry the suction cuppy
thingies thoroughly. o
Check the levels:
plaster, binder, waste… o
Flatten the plaster
in the beds. o
Make sure the build
bed is below the top and the fill is near the top o
If possible put
something in the build bed (cardboard) so your piece has a platform for easy
removal. o
Choose from
406services in the computer menu “feed bed” or “load bed” or something like
that o
Clean again. Vacuum. My
object came out well in terms of shape, but it doesn’t look at all the way I
intended because the colors are wrong. I need to wax it, then I will post
pics. |
|
|