Week 7: Embedded Programming
Overview
The 7th assignment of the semester was to read the ATTiny44 microcontroller data sheet, and program the board we made in previous weeks. I decided to combine the "Android" that I made for week 6, with the FTDI.io board that I made for week 5, and create a Gmail notifier. This week, I learned how to...- Use interruptions in C
- Load the Arduino bootloader on to custom built boards
- Make the board interact with Gmail

Reading the Data Sheet
As Neil pointed out during class, the data sheet was very long packed with various information. Unfortunately, I wasn't able to fully make sense of what every single word and diagram meant. But I was able to understand how it shows the different functions of each pins, and how we should flag the registers to make them work as we wanted.Programming the Board in C
As for programming my FTDI.io board, I made a simple program during week 6, which makes LEDs blink. As I spent my whole undergraduate days dealing with computer programming, it was not so hard to understand how basic C code for AVR chips works.Setting Up the Arduino Environment
Besides C, I also wanted to explore the usage of the Arduino Environment and the assembly language. However, since I had limited time this week due to the Media Lab sponsor event, I only had the chance to try out the Arduino environment.Surprisingly, I never really had a chance to play with Arduino until this week. So I started off with downloading and installing the software.
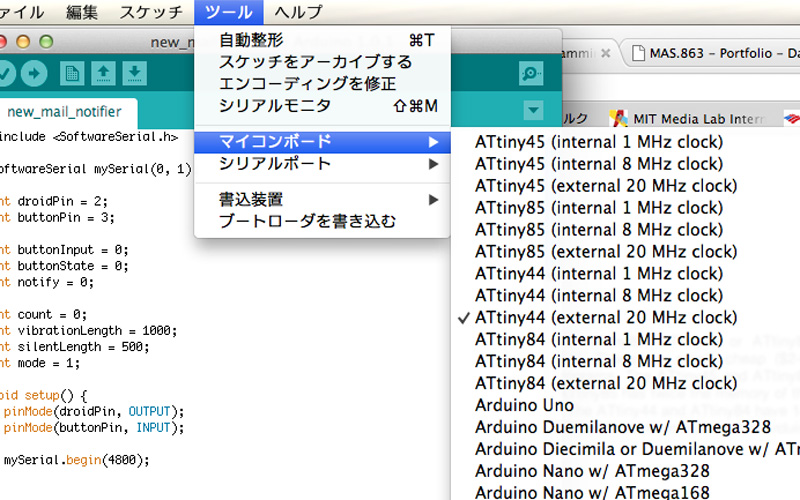
I then refferred to the tutorials for enabling the ATTiny44 chip in Arduino. I downloaded the required files and loded the bootloader on to my FTDI.io board using my FabISP. Everything worked out pretty much fine.
|

|
Design of the Gmail Notifier
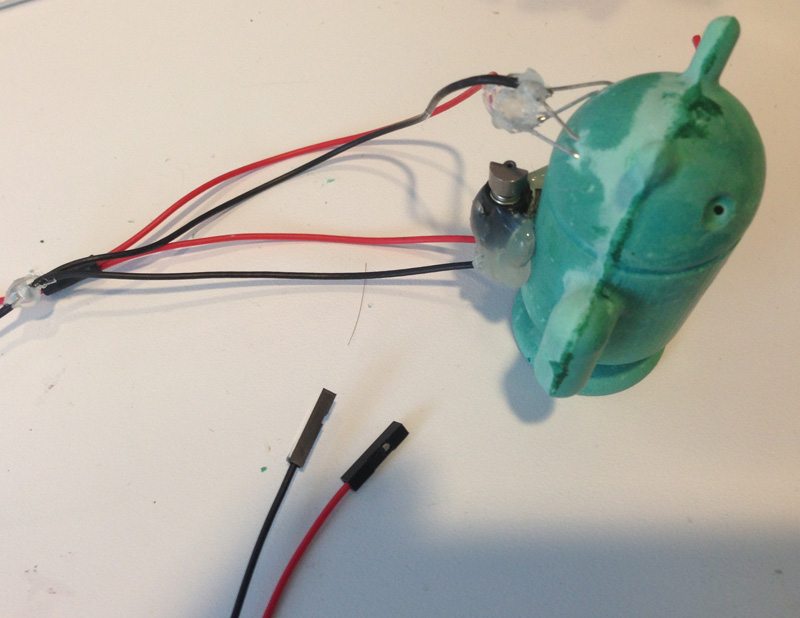
Now that I had my environment setup, I sat down and brainstormed what I wanted to make. As I made "Androids" with LEDs during week 6, I wanted to make it do something interesting. If the character was "Google", why not make it do something when I get new messages in Gmail!The original "Android" only had LEDs. So decided to add a pager motor. I hot-glued the motor on the back and wired it along with the existing LEDs in parallel.
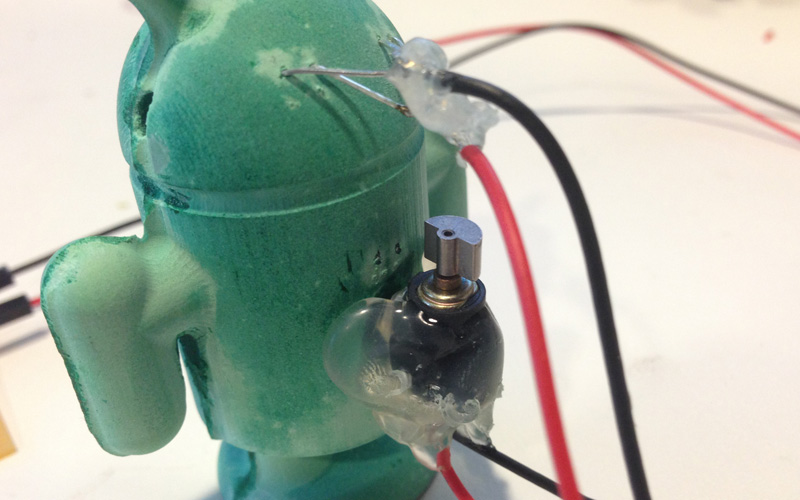
I then connected it to the pin headers on my FTDI.io board. The next step was to write some code that would somehow fetch new emails and activate the LEDs as well as the motor. For fetching the messages, I wrote a python script that would craw through Gmail via IMAP. I also decided to make use of the button to open up the Gmail web site for viewing the new messages.
Crawling Through Gmail
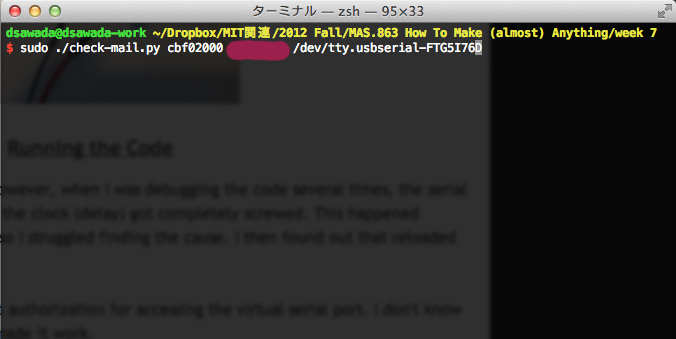
For crawling through Gmail for new messages, I used the imaplib module in python. I wrote a script that would craw through Gmail periodically, and count the number of unread messages. I also used the pySerial module to ping the FTDI.io board when unread messages exist within the account. You can download the code below.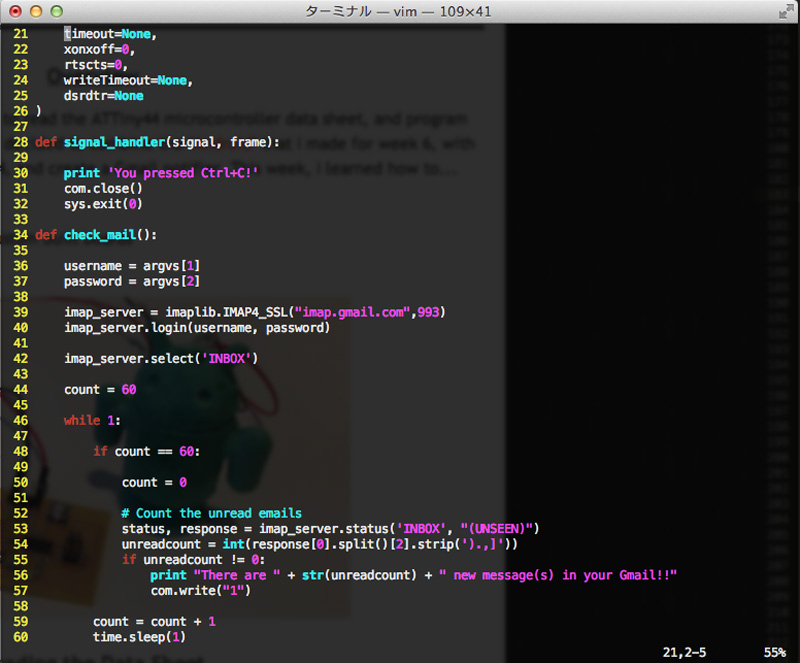
Activating the LEDs and Motor
For activating the LEDs and Motor, I wrote a program that out sets certain pins to HIGH, upon reception of a character message via UART/FTDI. I also made it so that pressing the button would send a message back to the computer for lauching the browser.
When I first tested the LEDs and Motor, I noticed that the LEDs were very dim. This was due to the motor using up too much power. I should split the output from one another, but I did not have made additional pins accessible through headers. The LEDs were dim, but I gave it a go this time, since the motor was enough for notification.
Running the Code
The coding itself was not so difficult. However, when I was debugging the code several times, the serial interface started to act very weird, and the clock (delay) got completely screwed. This happened without chaging the code significantly, so I struggled finding the cause. I then found out that reloaded the bootloader would solve such issues.I also noticed that pySerial requires root authorization for accessing the virtual serial port. I don't know why, but running the code with "sudo" made it work.