Week 7: Molding and Casting
Molding and casting was a great experience. I learnt how to use the desktop shopbot.
I wanted to experiment molding and casting with different materials.
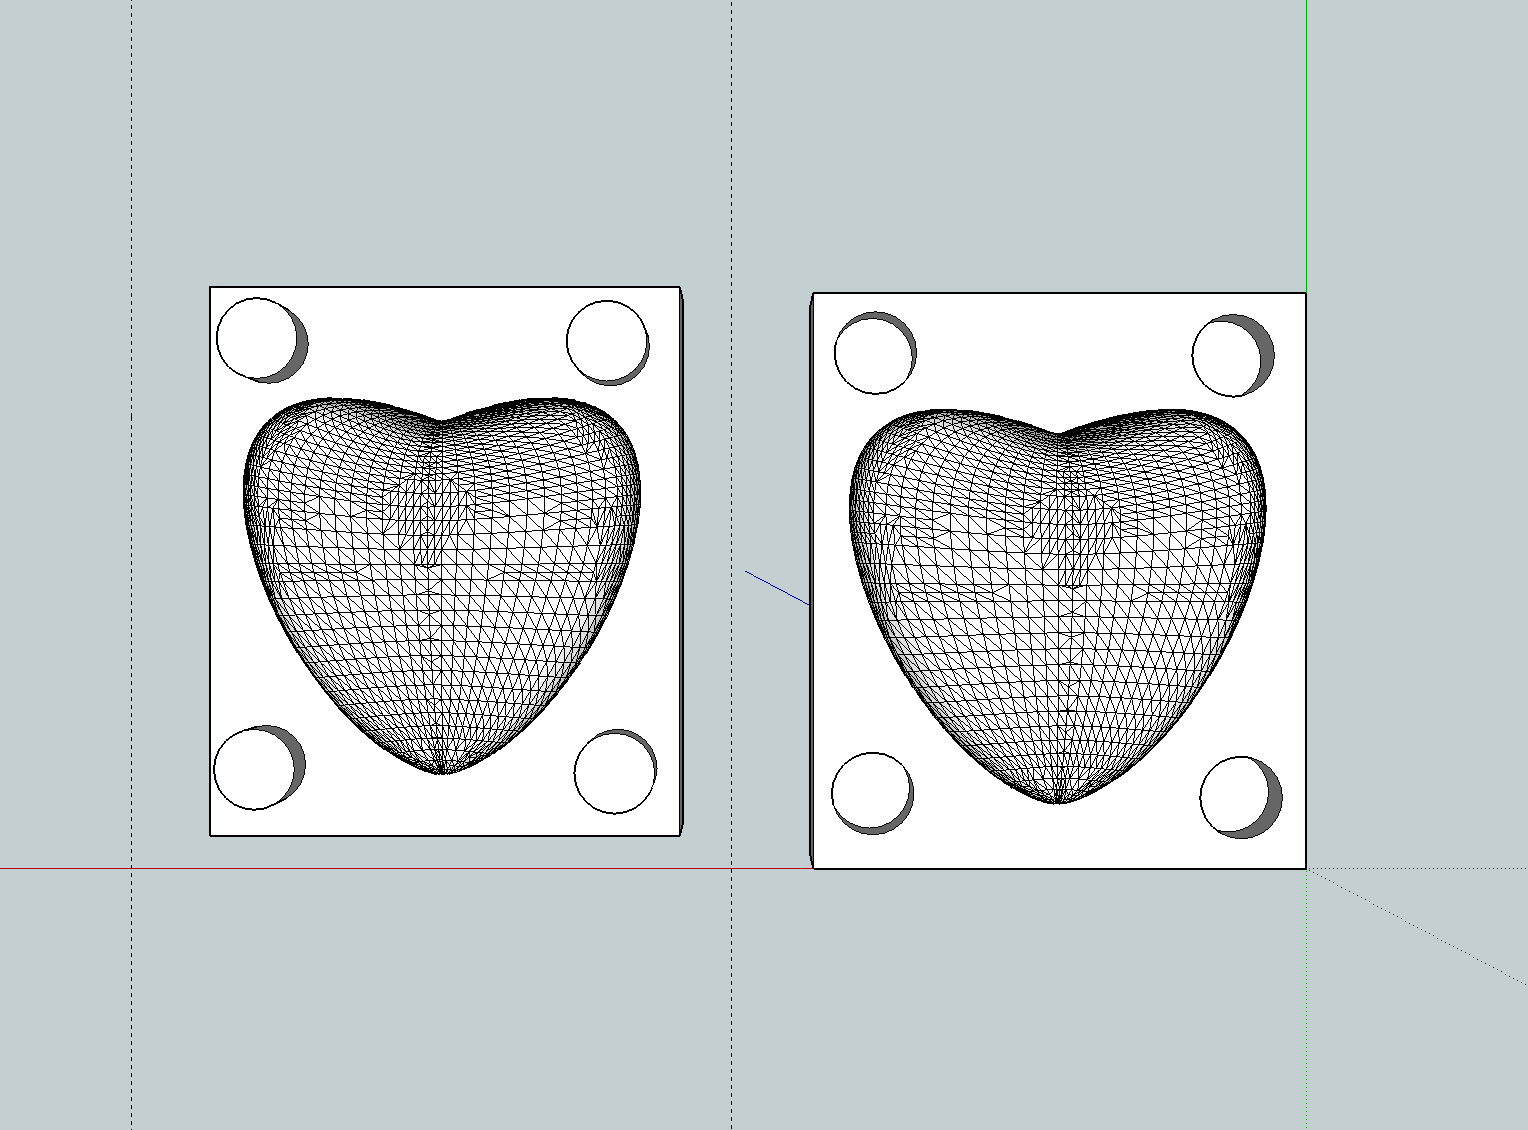
I chose a simple 3D design and created a two part mold.
I got to explore casting with drystone, metal and liquid plastic.
I also tried to mold Oomoo 25 silicone in Moldmax 60 and viceversa but it didn't work.

Creating a 3D model
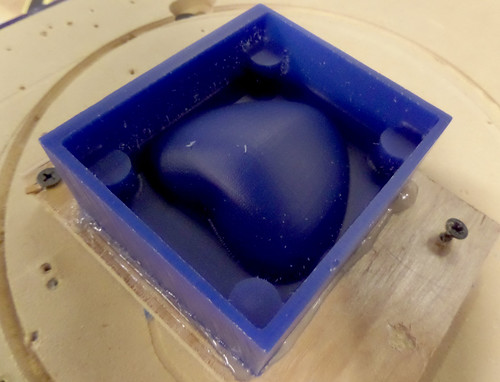
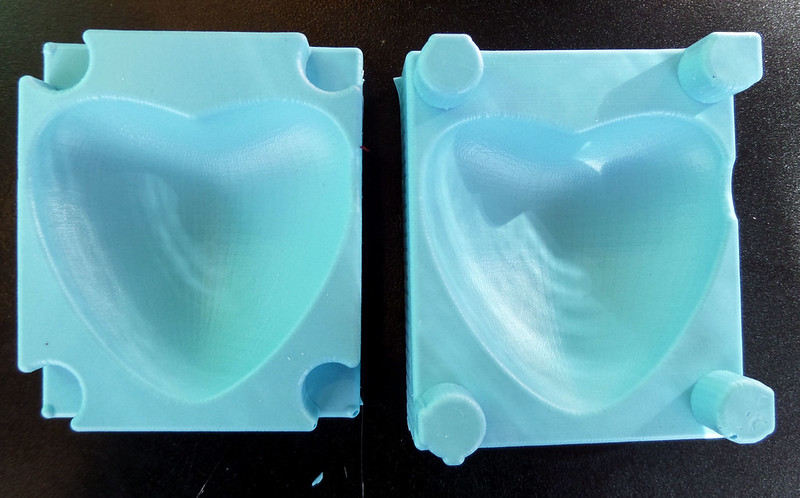
I wanted to try really simple shape which could be molded easily. I made a 2 part mold of a heart and exported the model as .stl files.
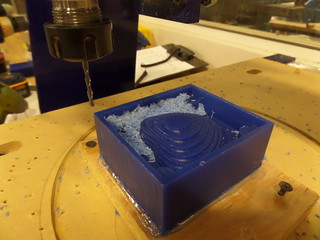
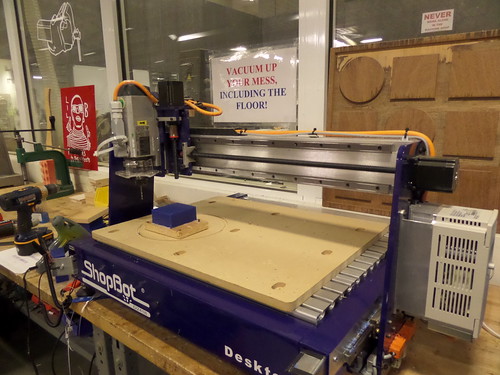
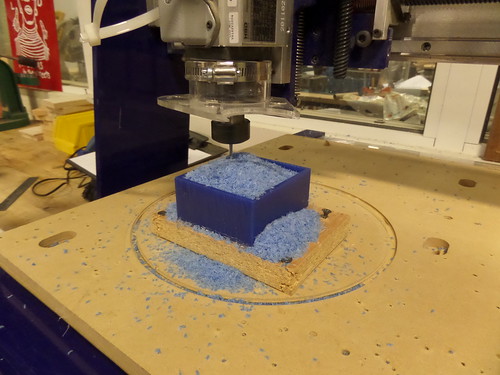
Milling machinable wax to create positive mold
I created the negative mold by milling the machinable was using Desktop Shopbot. I followed Jin Joo Lee's Tutorial to mill the wax block.
The process took way longer than I expected.
My first wax block wasn't glued properly to the sacrificial layer and it started coming out in the middle of the process. I had to hit the pause button and resend the command.

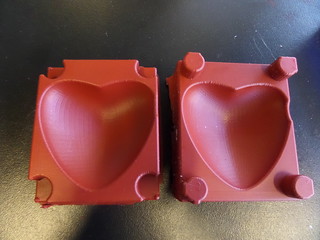
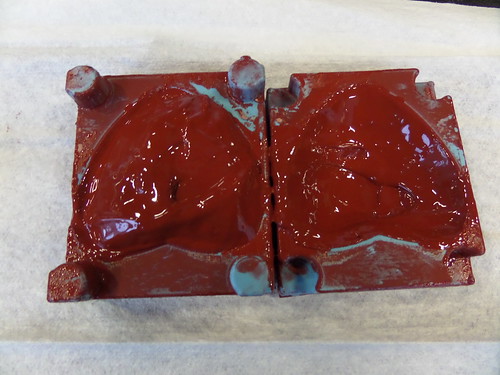
Making the negative mold
I created negative molds using rubber silicone compound. I used both oomoo 25 and Mold max 60 to create two types of negative mold.
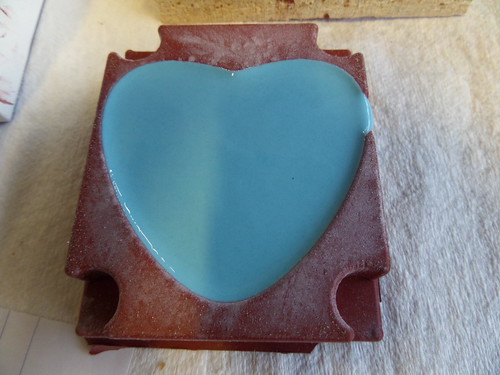
Casting the OOMOO Mold
OOMOO 25 silicone compound has two parts that needs to be added equally to create the molding mix.
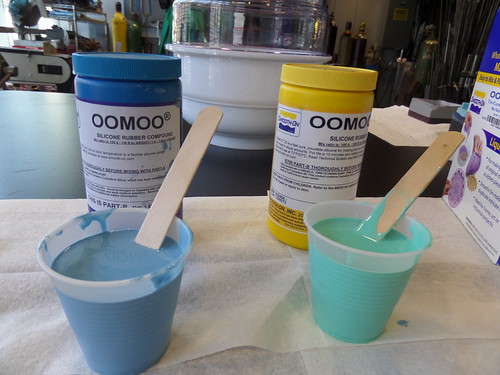
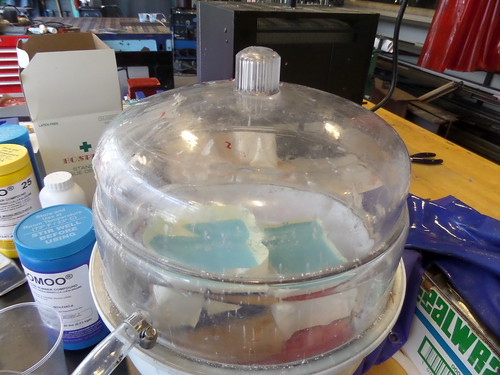
I mixed the two parts and poured it into my wax molds. I left it in vacuum for about 15 minutes to get rid of the air bubbles.
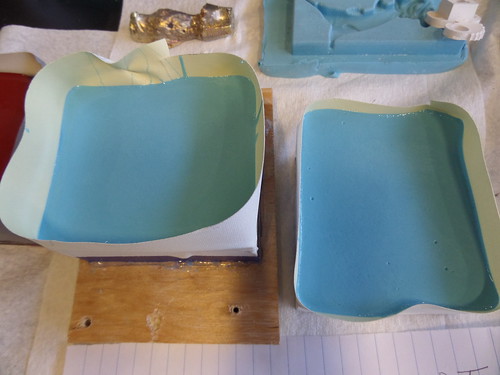
It almost took 3 hours for the silicone to dry. Demolding process was simpler and the molds came out very easily from the wax block.
Casting the Moldmax 60, higher heat resistant silicone
I wanted to try metal casting which needs high heat resistant silicone. I used Moldmax 60 compound. It has two parts that needs to be mixed in 100A:3B proportion. Sam Spaulding and I did this together and used the weighing scale to measure accurately.
After pouring the mix into the wax mold, I left it to dry overnight. The suggested curing time for Moldmax 60 is 24 hours.

Casting the OOMOO Mold
OOMOO 25 silicone compound has two parts that needs to be added equally to create the molding mix.
I mixed the two parts and poured it into my wax molds. I left it in vacuum for about 15 minutes to get rid of the air bubbles.
It almost took 3 hours for the silicone to dry. Demolding process was simpler and the molds came out very easily from the wax block.
Casting the Moldmax 60, higher heat resistant silicone
I wanted to try metal casting which needs high heat resistant silicone. I used Moldmax 60 compound. It has two parts that needs to be mixed in 100A:3B proportion. Sam Spaulding and I did this together and used the weighing scale to measure accurately.
After pouring the mix into the wax mold, I left it to dry overnight. The suggested curing time for Moldmax 60 is 24 hours.
Casting
I experimented with different casting materials.
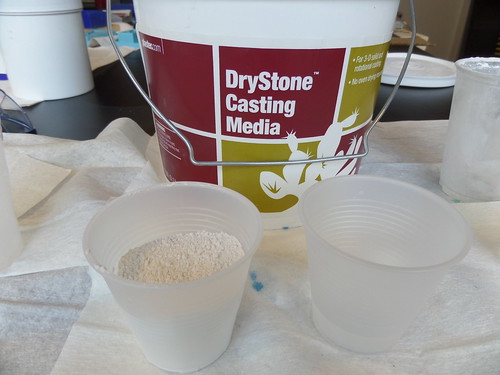
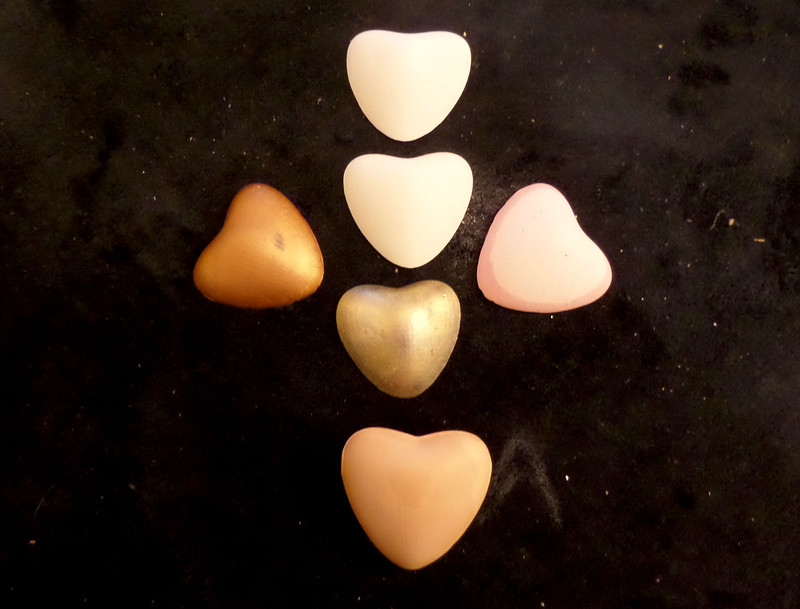
Casting with Drystone
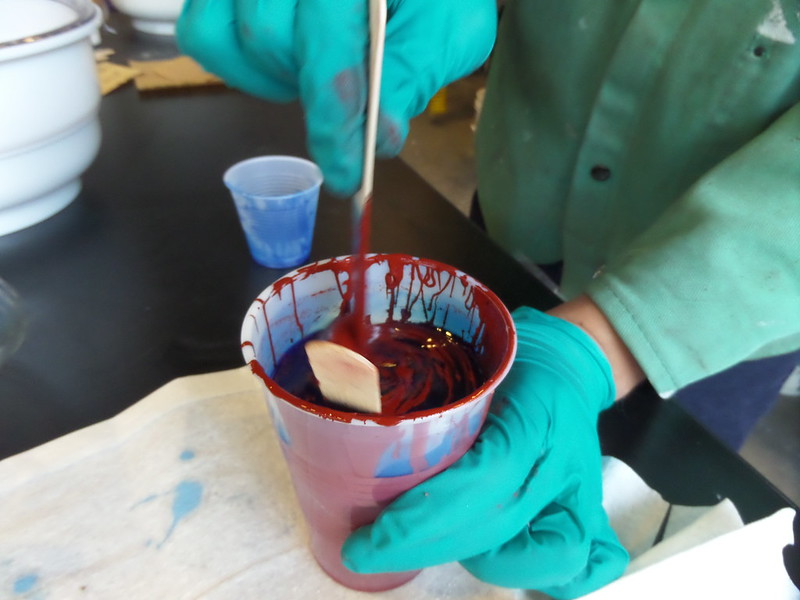
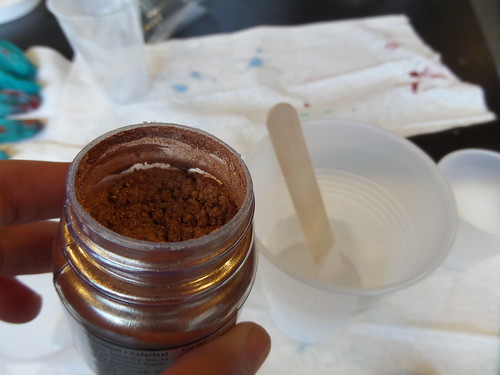
I first mixed 5 parts of drystone powder with 1 part of water. I also added bronze pigment powdered color and had to add a little more water to make the mix.
I poured the mix into two OOMOO silicone molds. I let it dry for 10 minutes, then joined both the parts. I kept some weight on top to allow the two parts to adhere properly.
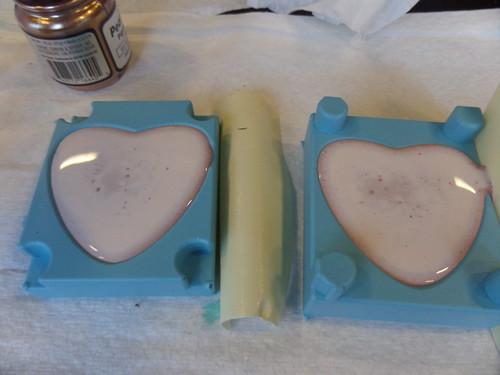
I left it to dry for 30 more minutes and then removed heart from the mold. I also experimented with adding a different pigment color and made a twin color single part heart.
Casting with OOMOO 25 and MoldMax 60
I tried to cast OOMOO 25 in the negative mold made from moldmax 60 and viceversa. None of it worked unfortunately. OOMOO silicone got stuck to moldmax 60 and never came out of the mold. I used powder as the mold release but that didn't work either. When I tried to cast moldmax 60 into the OOMOO mold, it never dried. I guess I didn't mix the two parts in the right proportion this time.
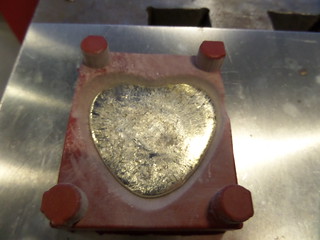
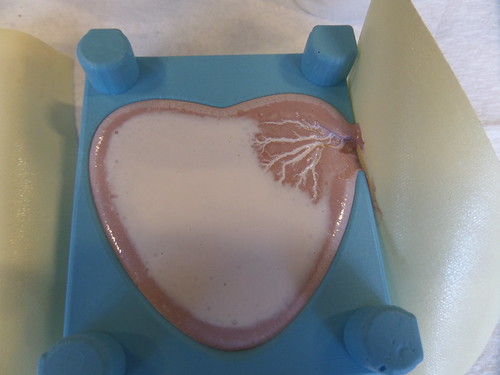
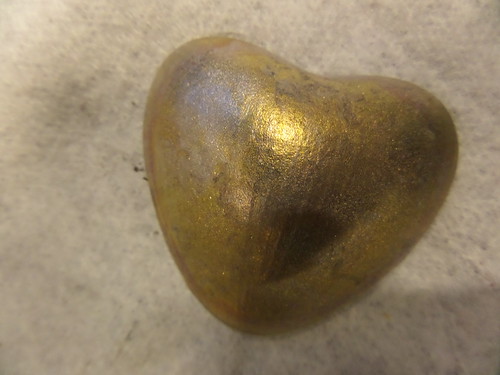
Metal Casting
This was the most exciting part. I never thought I would be able to do metal casting before trying it out. Sam Calisch demoed the process really well and helped us a lot. We used the Vulcan A-550 furnace to melt the metal blocks and poured the molten metal onto the molds made from moldmax 60.
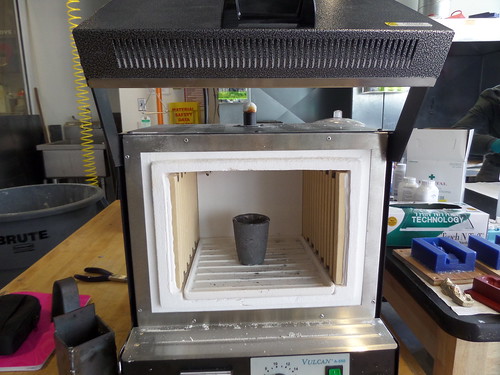
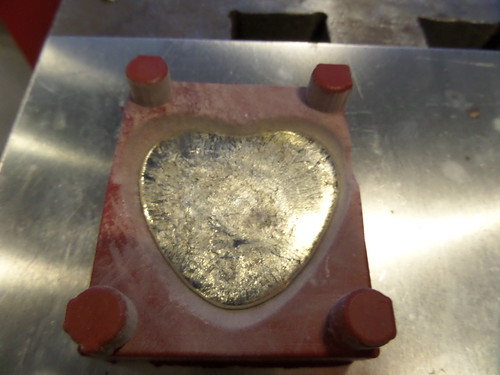
The first trial went smoothly but during the second time I ran out of molten metal while pouring it into the mold. The metal cools really quickly so the process needs to be real fast.
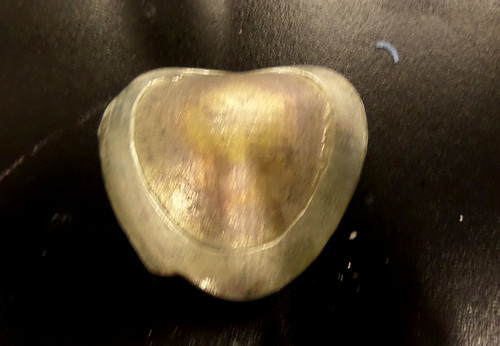
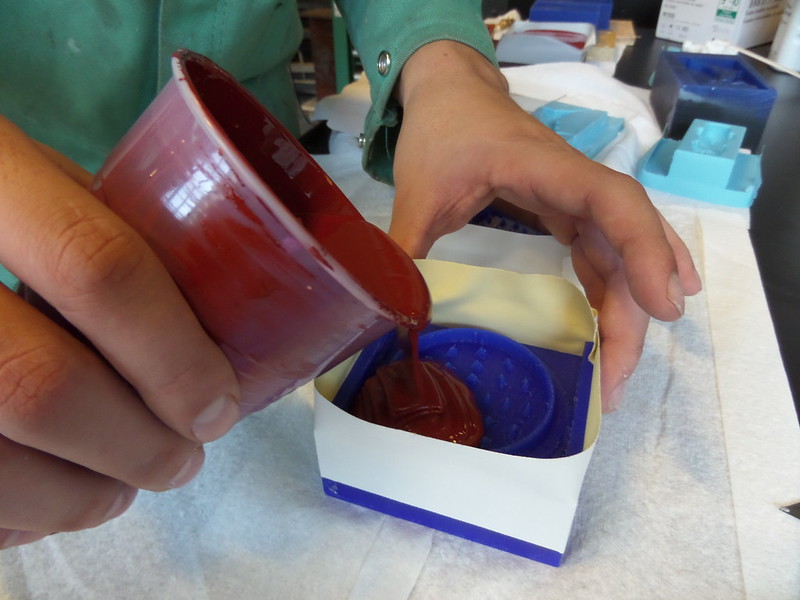
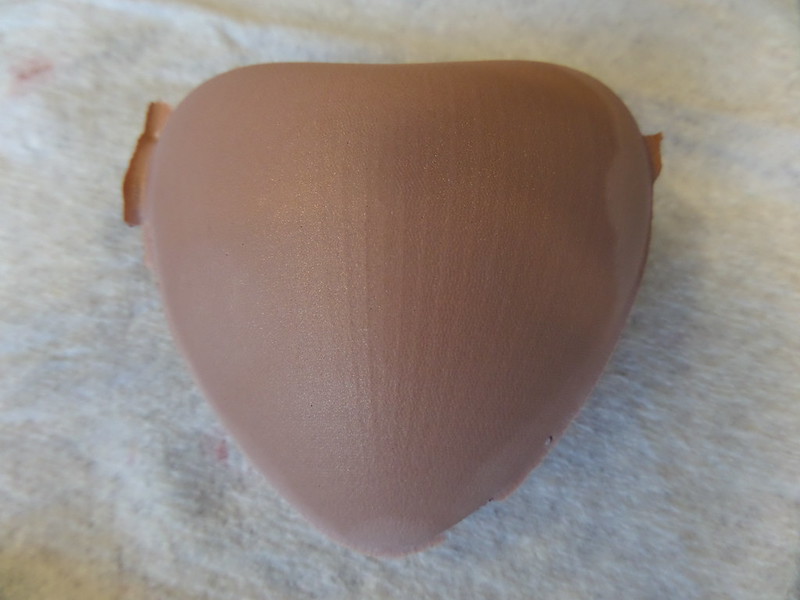
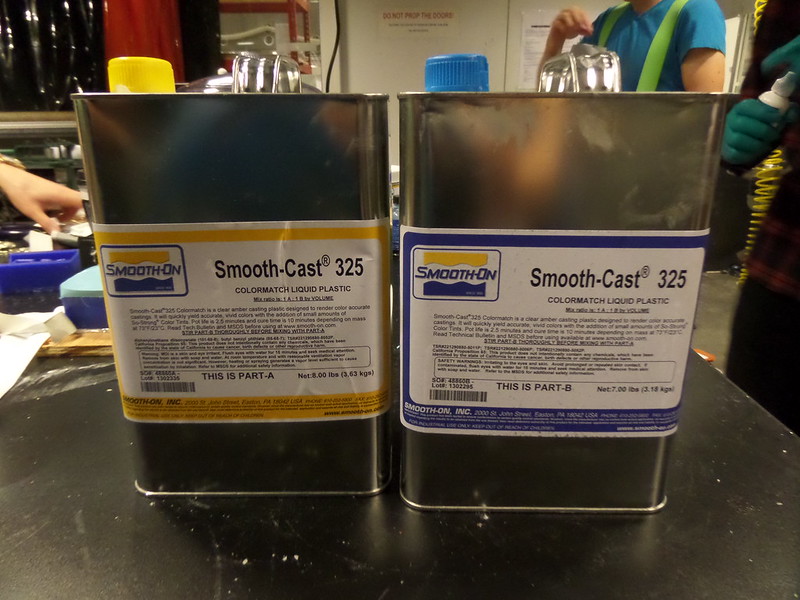
Casting with liquid plastic
Sam Calisch got us smoothcast 325, clear liquid plastic compound that comes again in two parts. We mixed the two parts equally and added bronze pigment color to the mix. The pot life for the mix is just 2.5 minutes so we were to mix the two parts and pour it into molds really fast. I first mixed the pigment color with part A and then added part B. It dried pretty in 10 minutes.
I had several hearts in the end.
Casting with Drystone
I first mixed 5 parts of drystone powder with 1 part of water. I also added bronze pigment powdered color and had to add a little more water to make the mix.
I poured the mix into two OOMOO silicone molds. I let it dry for 10 minutes, then joined both the parts. I kept some weight on top to allow the two parts to adhere properly.
I left it to dry for 30 more minutes and then removed heart from the mold. I also experimented with adding a different pigment color and made a twin color single part heart.
Casting with OOMOO 25 and MoldMax 60
I tried to cast OOMOO 25 in the negative mold made from moldmax 60 and viceversa. None of it worked unfortunately. OOMOO silicone got stuck to moldmax 60 and never came out of the mold. I used powder as the mold release but that didn't work either. When I tried to cast moldmax 60 into the OOMOO mold, it never dried. I guess I didn't mix the two parts in the right proportion this time.
Metal Casting
This was the most exciting part. I never thought I would be able to do metal casting before trying it out. Sam Calisch demoed the process really well and helped us a lot. We used the Vulcan A-550 furnace to melt the metal blocks and poured the molten metal onto the molds made from moldmax 60.
The first trial went smoothly but during the second time I ran out of molten metal while pouring it into the mold. The metal cools really quickly so the process needs to be real fast.
Casting with liquid plastic
Sam Calisch got us smoothcast 325, clear liquid plastic compound that comes again in two parts. We mixed the two parts equally and added bronze pigment color to the mix. The pot life for the mix is just 2.5 minutes so we were to mix the two parts and pour it into molds really fast. I first mixed the pigment color with part A and then added part B. It dried pretty in 10 minutes.
I had several hearts in the end.