| |
|
| |
 |
|
|
|
|
|
|
|
|
|
|
| |
HOW TO MAKE (ALMOST) ANYTHING MIT MEDIA LAB |
|
|
|
|
|
PROJECTS |
ABOUT |
CONTACT |
|
|
| |
|
|
|
|
|
|
|
|
|
|
|
| |
| |
|
|
|
|
|
|
|
|
|
| |
|
|
| |
|
|
|
|
| OUTPUT DEVICES - week11 |
|
|
| |
|
|
|
|
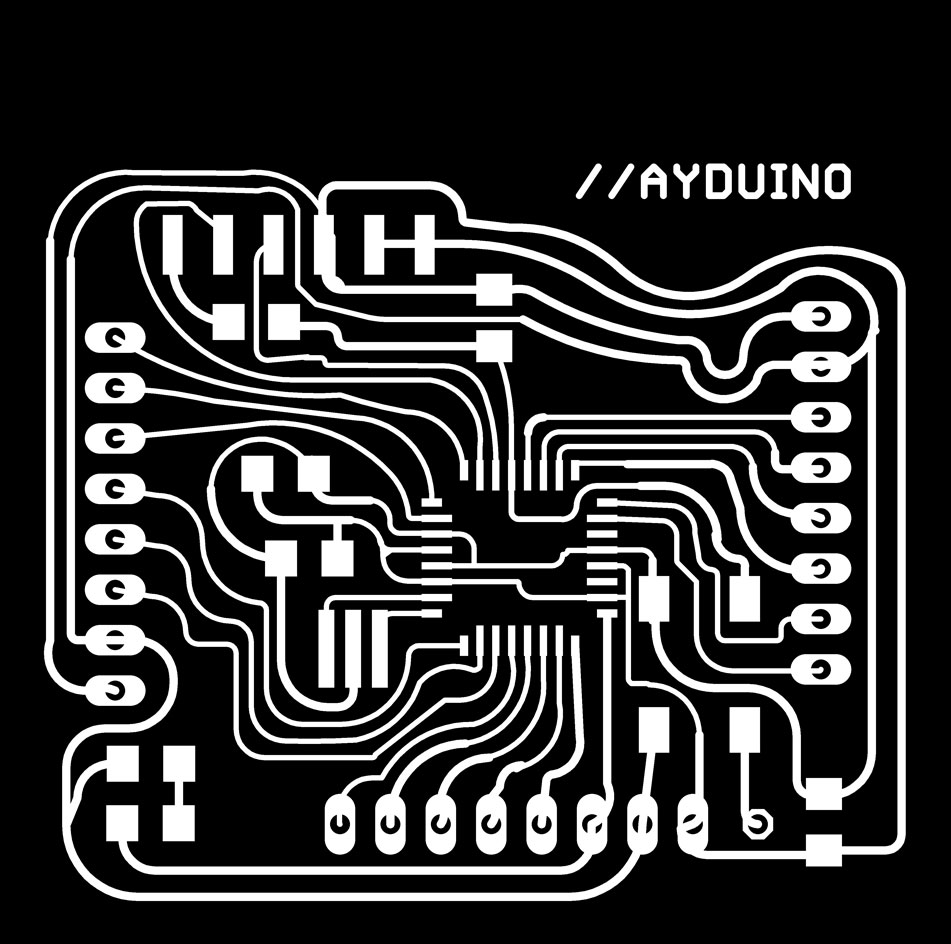
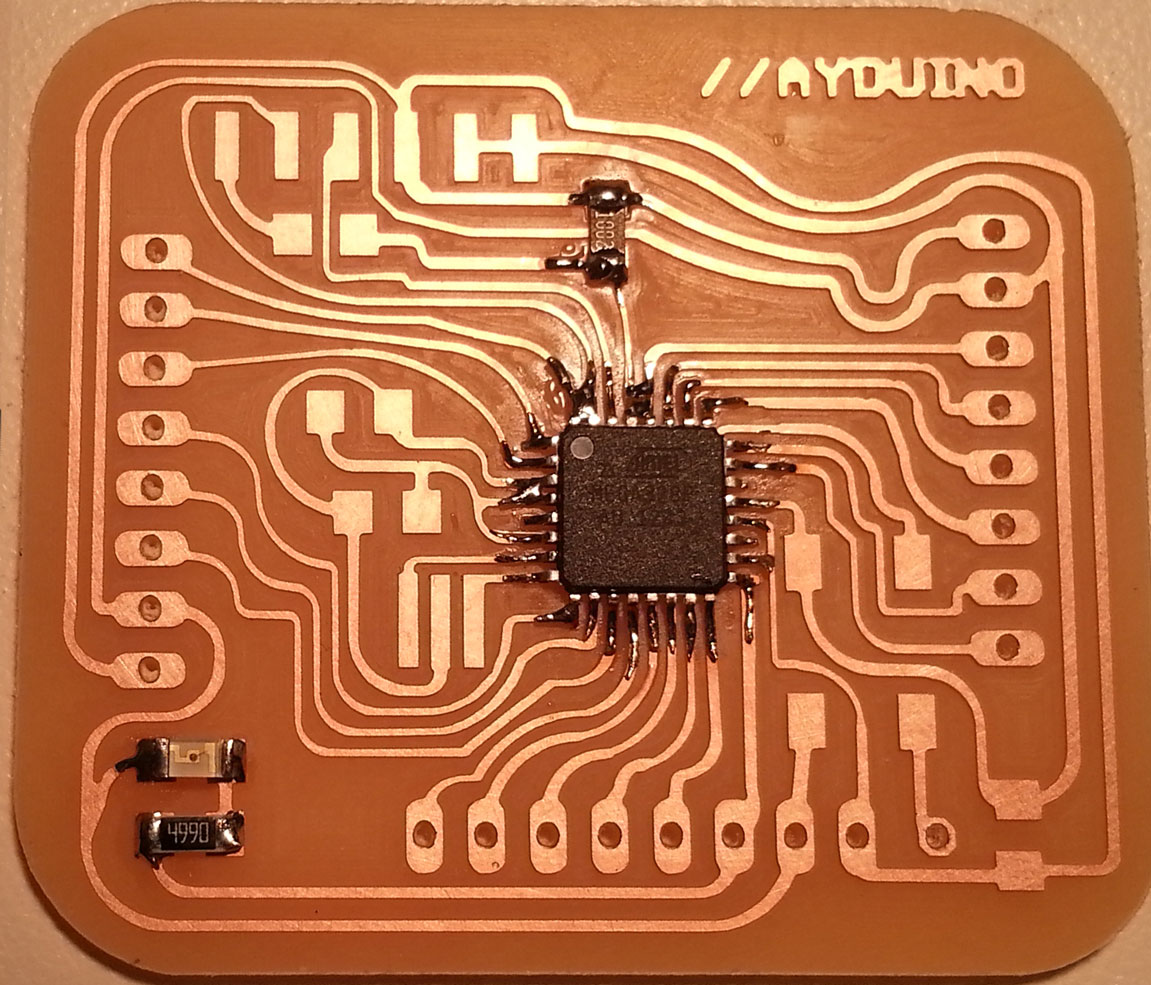
| Fabduino - AYduino |
|
|
| |
|
|
 |
|
| |
|
|
The first task this week was to make a fabduino. These tutorials from previous years were super helpful:
// Ed's documentation
// Tiffany's documentation
// Austin's documentation
In Eagle it was a wonderful discovery seeing that when connecting traces on the board, you can right click to make the lines curvy! I got
comments that it looks both feminine and old school; I'll take it.
Nothing unusual in the modela settings, except that changing the bottom layer made a huge difference in the quality of traces! Thanks Skylar.
As for soldering, the tiny legs of the AT328 were actually not all that bad! Just lots of the ribbon to soak up the excess.
Here are some pictures of the milled traces, and the stuffed board, and the files!
Download AYduino schematic, board traces, holes, and cut out. Make sure you use a board with copper on only one side of it! (All in a zip file
here).
Note that you can use either ATmega328 or ATmega168 with this schematic, it is the same in terms of dimension. But! As I found out, ATmega328 exists in 2 varieties that
we had in stock - one was ATmega328 and another ATmega328P. The "P" apparently was critical for avrdude to understand what part it is! So, if you have
a choice between the parts, go for the one with the P. If you don't, blogs will say what to do, though I couldn't actually understand what the difference
between these two chips is.
Some pictures:
| |
|
|
 |
|
| |
|
|
| |
|
|
 |
|
|
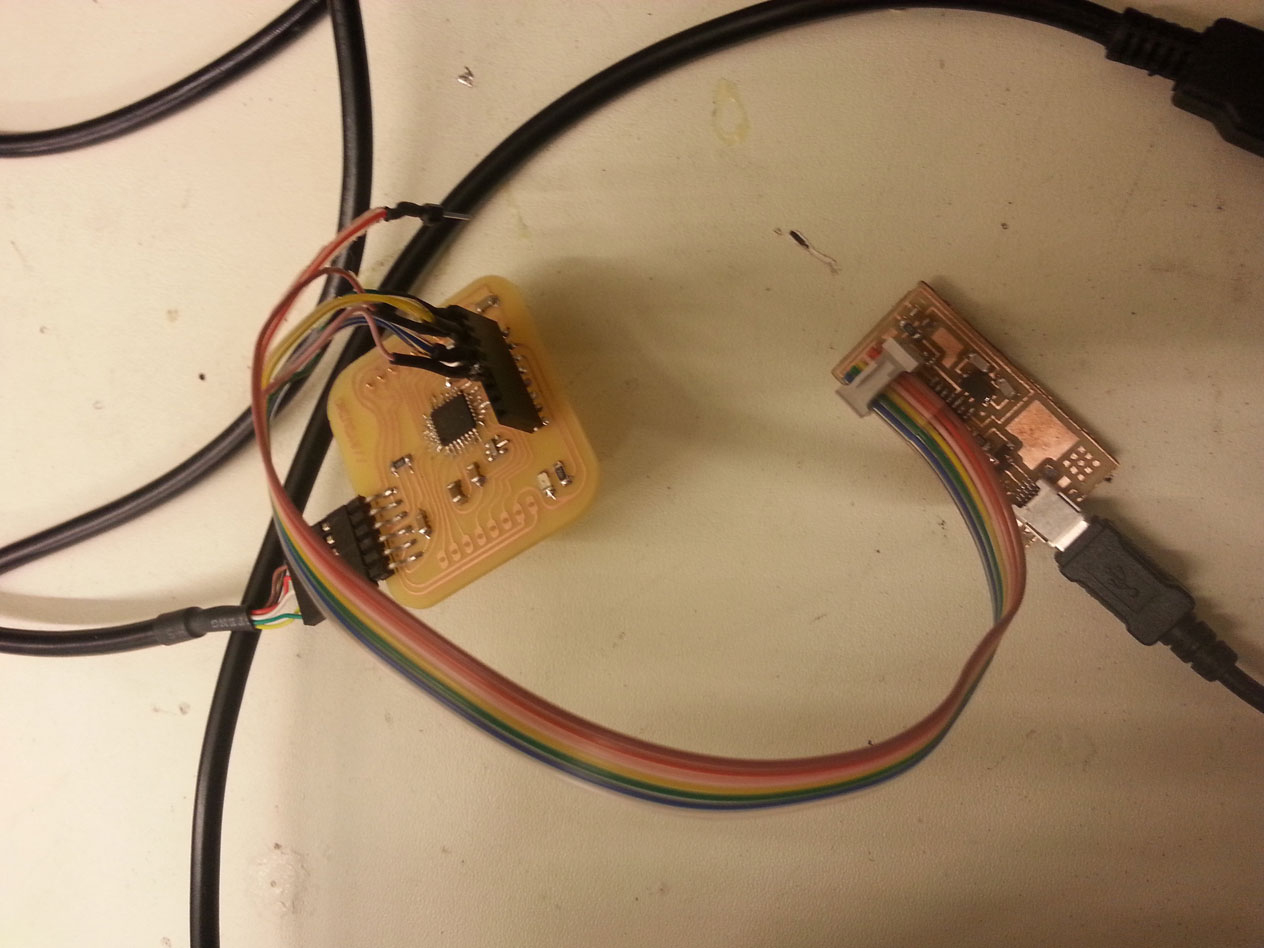
Programming AYduino: connecting the right outputs from FabISP. Made the cable by soldering end pins and using shrink wrap.
|
|
| |
|
|
| |
|
|
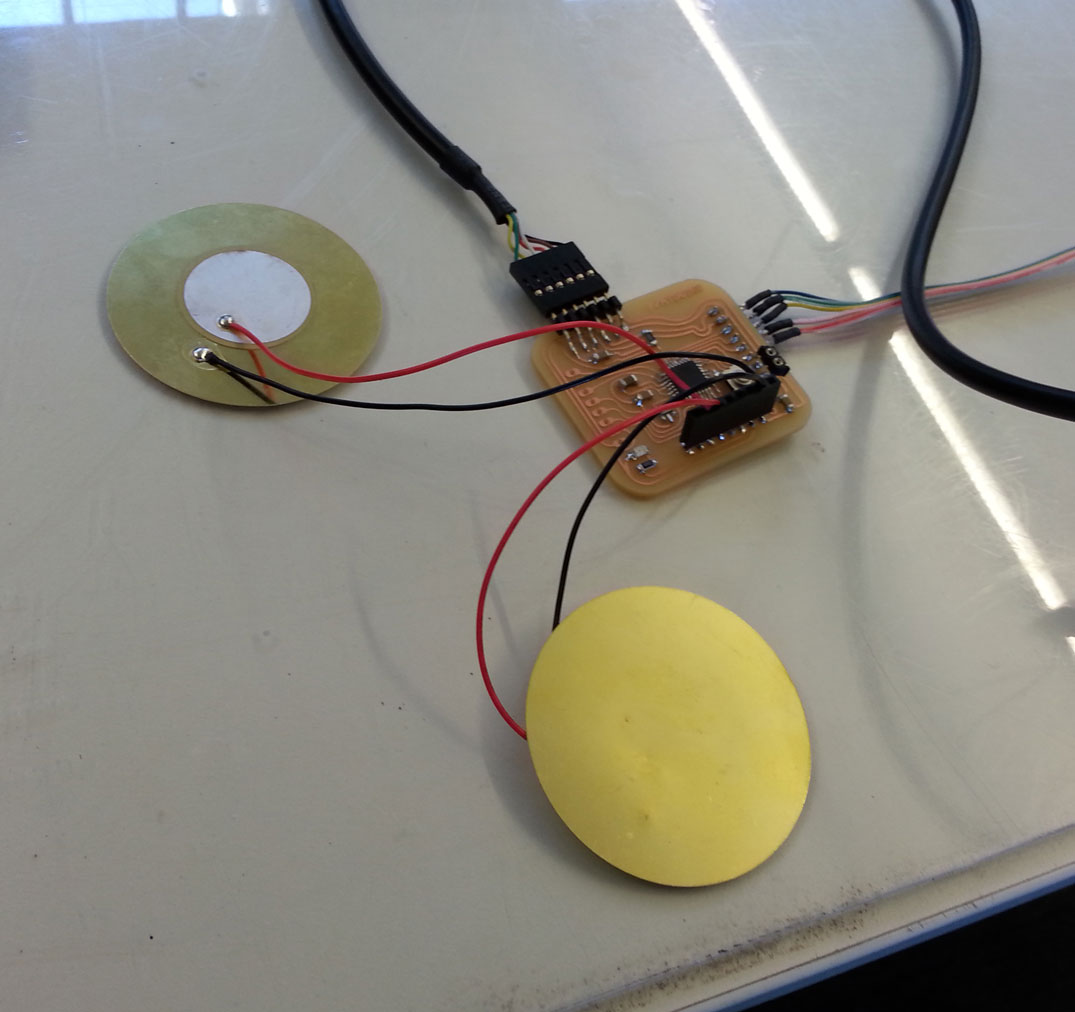
| Piezos |
|
|
|
Inspired by what might happen in the weeks to come, I just wanted to see how to make piezos generate different sounds. This was the very first simple
test, I used the sample Melody code from the Arduino site. Below are links to videos of what I did
with the piezo disks, the code (or links to code) is included in the video descriptions.
//simple piezo
//Piezo plays melody
//Two Piezo play melody together
//Piezo disk plays a note (The last one is actually from a later week, download the code
here used to program them).
I figured out that making a piezo vibrate at a certain rate can produce a pitched tone discernable to the human ear. For this, you have to
calculate the pitch frequency. That is, I'll make them turn on and off with the same frequency that would resemble
an actual pitch tone. Software way of doing something that could also be done in Hardware using the analogWrite function (**thank you Nadia!**).
The equation is: timeHigh = 1/(2 * toneFrequency) = period / 2
ie, if we want A = 440Hz, plug that into toneFrequency and we get 0.00113636363 sec, or 1136 microseconds. That's the number we will tell our code to wait
between HIGH and LOW output of the pin on which Piezo sits. Voila. Oh yes, and look up the frequencies of pitch here.
|
| |
|
|
 |
|
the void loop part of Arduino code
|
| |
|
|
 |
|
|
AYduino with two piezos
|
| |
|
|
| |
|
|
| Lessons Learned |
|
|
|
Start earlier!! I spent so much time on the fabduino (which was indeed exciting, but...) that I had very little time left for *actual* output devices!
I primarily used examples embedded in arduino for the output, and understood a bit more about digitalWrite vs analogWrite. Didn't understand whether
or not pins NEED to be declared as inputs or outputs in the setup() code... sometimes they are and sometimes they aren't, but I doubt it's arbitrary.
Also, modela works much better with a new end mill! The tricky bit was the programming, but refer to the tutorials above for that. Tiffany's especially
lays out nicely which pins to connect, and Ed's lays out nicely the programming part. Also! refer to google/arduino site to see which pins on the ATmega
refer to which Arduino pins -->THEY ARE NOT ALWAYS THE SAME NUMBERS!<-- and, they don't always make sense (yet). The connection between pads on board -- pins on
ATmega -- pin numbers on the Arduino is not trivial. Spending some time with the data sheet worked magic, though. Excited to use this!
|
| |
|
|
| |
 |
|
| |
|
Copyright 2013 by Anya Yermakova |
|
|
| |
|
|
|
|
| |
|
| |
|
|
|