| HOW TO MAKE (ALMOST) ANYTHING MAS.863.12 |
|
PROJECTS | ABOUT | CONTACT | |||||||||||||||||||||||||||||||
 |
|||||||||||||||||||||||||||||||||||
|
|
||||||||||||||||||||||||||||||||||
| OUTPUT DEVICES - week11 | |||||||||||||||||||||||||||||||||||
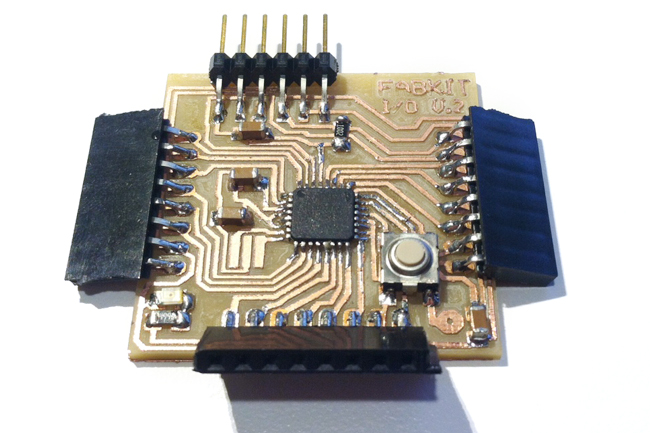
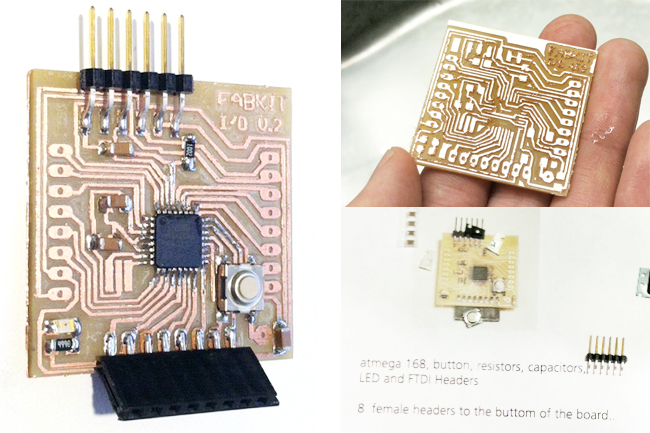
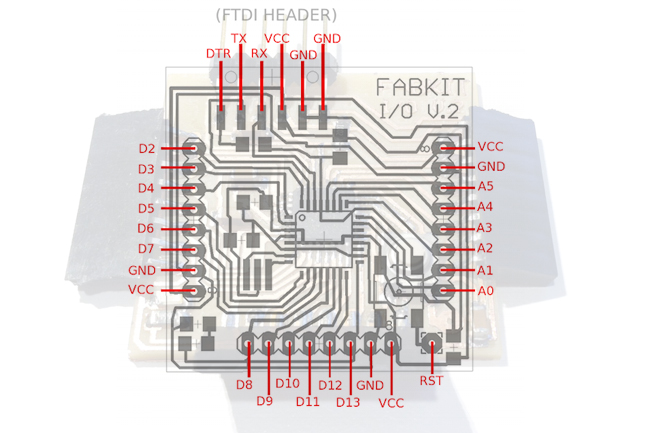
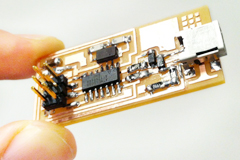
| This week I made a Fabduino, a Fabable Arduino Compatible Board . Fabduino was introduced by Ed Baari. My process this week is based on both Ed and Tiff's online tutorial on how to create a Fabduino board. You can download the Eagle board, schematic files, PNGs for the milling and other required file from this link. When you do the milling, you don't necessarily have to create the holes for the female headers. In my case, I soldered the female headers on top of the board. Make sure that you debur your board as soon as you finish the milling. Then clean the board with water after clearing the path using an exacto knife. Soldering the ATMega 168 can be a bit challenging but other parts are relatively easy. | |||||||||||||||||||||||||||||||||||
 |
|||||||||||||||||||||||||||||||||||
 |
|||||||||||||||||||||||||||||||||||
 |
|||||||||||||||||||||||||||||||||||
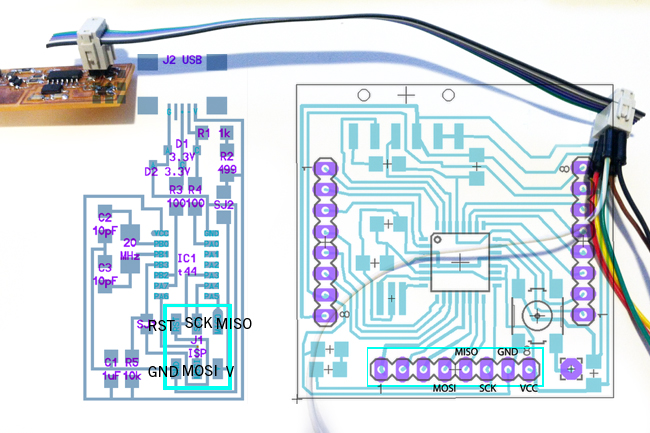
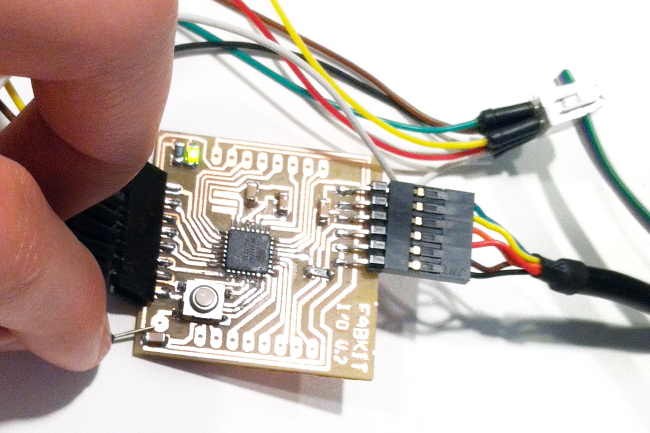
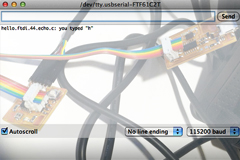
| Programming The Fabduino Using FabISP | |||||||||||||||||||||||||||||||||||
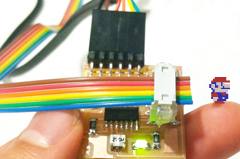
| Ed's website covers very well on how to initially program the Fabduino using the FabISP. First, make sure the boards.txt from the Fabkit.zip inside the sub-folder, "hardware" created inside the user's Arduino sketchbook folder (Mac OS X: Documents/Arduino/hardware/fabduino/boards.txt). Once the board.txt file is installed, restart the Arduino IDE. I connected all of the header, MISO, V, MOSI, SCK, GND, RST and ran my Arduino IDE. One mistake I made was forgetting to connect the RST from FabISP and Fabduino while programming my board. Just hold the wire on the RESET pin while you are programming the board. Then with both FabISP and and Fabduino connected to the computer, go to Arduino IDE's "Tools > Board" and pick the Fabduino w/168(Internal Clock) and then pick "Tools > Burn Bootloader" with "USBTinyISP" selected. | |||||||||||||||||||||||||||||||||||
 |
|||||||||||||||||||||||||||||||||||
 |
|||||||||||||||||||||||||||||||||||
|
|
||||||||||||||||||||||||||||||||||
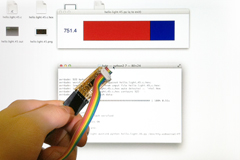
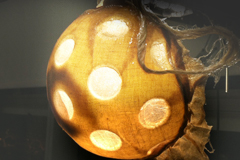
| Using The Fabduino | |||||||||||||||||||||||||||||||||||
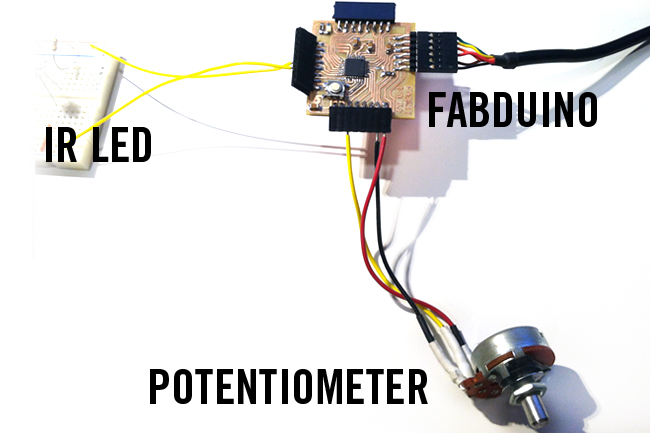
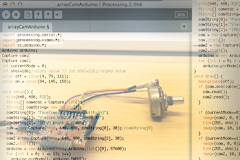
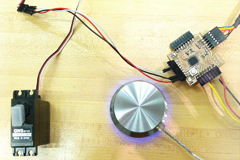
| Fabduino works pretty much the same way as the Arduino. I used potentiometer as an input to change the blinking frequency of a couple of IR LEDs. Here is a link where you can obtain the Arduino example code. You can see the result below: | |||||||||||||||||||||||||||||||||||
 |
|||||||||||||||||||||||||||||||||||
FINAL PROJECT PROPOSAL.
My ideas for the final project- week1 |
PRESS-FIT CONSTRUCTION KIT.
Learn how to make something using vinyl cutter and laser cutter - week2 |
FAB ISP (IN-SYSTEM PROGRAMMER) Learn how to make a custom PCB - week3 |
|||||||||||||||||||||||||||||||||
3D SCANNING AND PRINTING. Learn how to make 3D printed model - week4 |
ELECTRONICS DESIGN. Learn how to redraw the echo hello-world board - week5 |
MOLDING AND CASTING. Learn how to design a 3D mold, machine it, and cast parts from it - week6 |
|||||||||||||||||||||||||||||||||
EMBEDDED PROGRAMMING. Learn how to program a custom board to do something - week7 |
MAKE SOMETHING BIG. Learn how to make SOMETHING BIG through computer-controlled machining- week8 |
INPUT DEVICES. Learn how to add sensor to a microcontroller board and read it - week9 |
|||||||||||||||||||||||||||||||||
COMPOSITES. Learn how to assemble a 3D mold, and lay up a fiber composite part in it - week10 |

OUTPUT DEVICES. Learn how to add an output device to a microcontroller board and program it to do something - week11 |
INTERFACE AND APPLICATION PROGRAMMING. Learn how to write an application that interfaces with an input &/or output device - week12 |
|||||||||||||||||||||||||||||||||
NETWORKING AND COMMUNICATIONS. Learn how to build a wired &/or wireless network with at least two nodes - week13 |
MECHANICAL/MACHINE DESIGN. Learn how to design or modify a machine and automate the machine - week14 |
FINAL PROJECT. My final project for How To Make (almost) Anything - week15, 16 |
|||||||||||||||||||||||||||||||||

MAS.863 Learn about the How To Make (almost) Anything course at MIT |
|||||||||||||||||||||||||||||||||||
| Copyright © 2012 by AUSTIN S. LEE | |||||||||||||||||||||||||||||||||||