Toks Fifo
Student. Builder.
Final Project
Overview
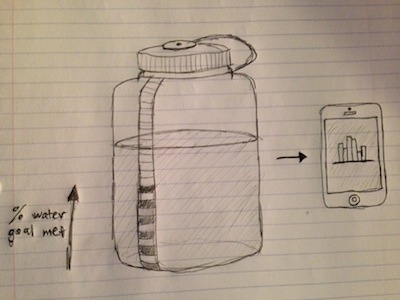
Smart Water Bottle.
Motivation
I figured the most critical module would be measuring water intake (via water level), so I focused on that for this project. Additionally, I opted for an attachable base (and not an included straw, for example) because I want the "smart" part of the water bottle to be very unobtrusive.
Theory
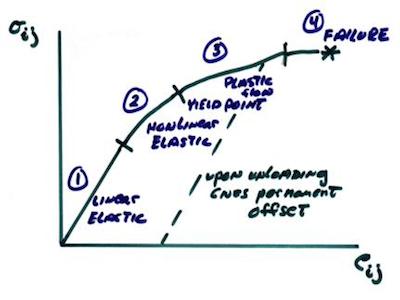
I created a cheap load cell, allowing me to map mass to volume. I decided to use acrylic to create spring like flexures, since acrylic is easy to laser cut.
I need the flexure to always remain in the elastic region, meaning that its deformation is reversible during loading. This is the key to getting consistent readings.
My particular design reached the non-linear elastic region, that is, the stress on the flexure was not linearly proportional to its strain.
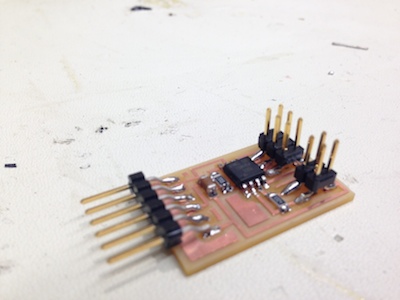
Circuit Design
See Input Devices.
The circuit is essentially hello.load.45. I learned that TXRX (transmit-receive) step response would have worked better than the load step response for my project.
Flexures
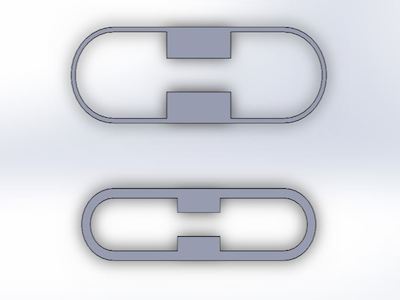
Here are preliminary SolidWorks designs for different flexures. The 1st one is 1mm thick, while the 2nd is 2mm thick.
I included little spacers so that the sensing boards would be closer together, hopefully resulting in better readings.
Flexures Cont'd
Laser-cutting the flexures on the Epilog Laser Cutter, using 1/8" acrylic.
Flexures Cont'd
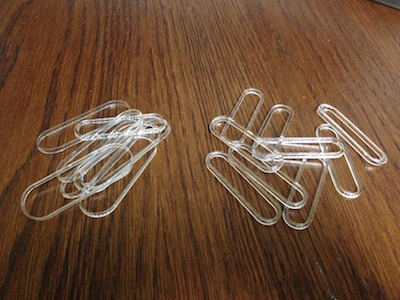
Results. To be used for testing.

Flexures Cont'd
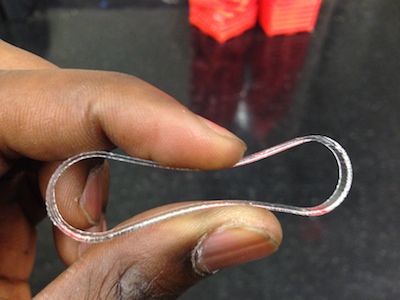
Testing the flexibility of the flexures. The thicker one broke before the 2 spacers made contact.
Flexures Cont'd
I laser-cut more of both types to use for testing. I plan on lining up a few of each kind and then attaching them, forming a plate.
Flexures Cont'd
I noticed that the flexures bulge inwards when loaded. This is something I might want to avoid, since I want my plate to move downwards while remaining flat.
I need to create more flexure designs that might work better.
Flexures Cont'd
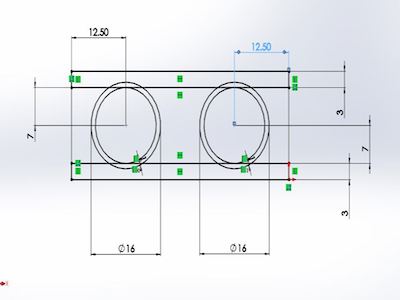
Designing different flexures in SolidWorks. This particular design is meant to compress while maintaining a flat surface.
Flexures Cont'd
Testing didn't go so well...
The compression depth was too small and the flexure failed. I suspect the inner circles are too round, resulting in an undesireable curvature radius. I need something that looks more like an ellipse.
Testing
Group of flexures attached together to create force "plate".
The 2 capacitive board are attached tot the top and bottom of the flexures, such that loading the flexures decreases the distance between the plates.
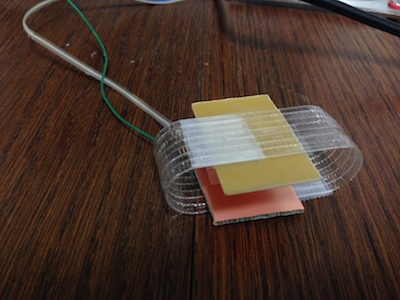
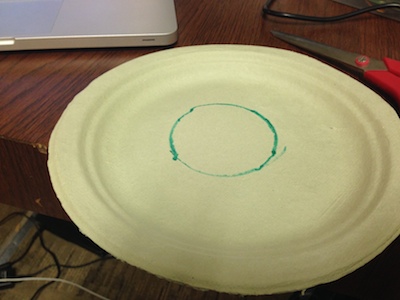
Testing Cont'd
Turns out I need to cut out a piece of an actual plate to use as the top surface.
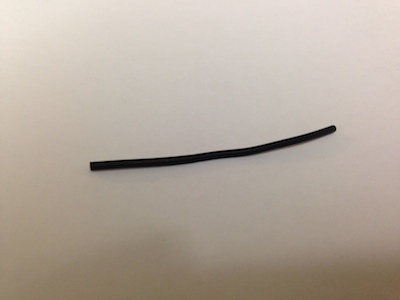
Resistance changing Wire
At this point, Anya saw me struggling and offered me a piece of her project. She had wire that changes resistance when stretched.
I might use this as an alternative if my current methods don't work. I envision pre-tensioning the wire such that compressing the flexures causes the wire to become less tense, changing its resistance. The most difficult part would be attaching the wire correctly and consistently.
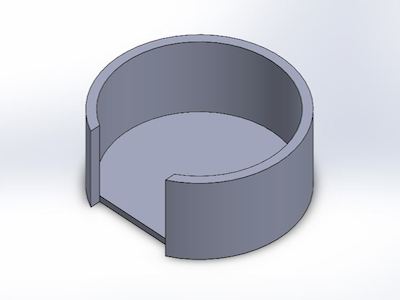
Enclosure
I was happy with the readings I got using the load step response, so I moved forward with the project.
I designed an enclosure for the system. I made it wide enough for the water bottle I wanted to use for testing, and hoped to fit the electronics, flexures, and plates within the enclosure.
Enclosure Cont'd
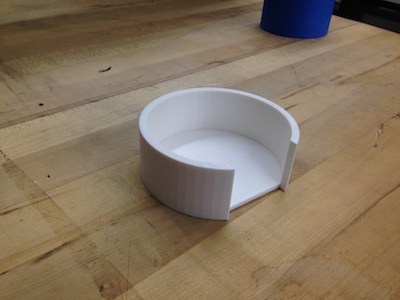
I created the enclosure on the Dimension 3D printer. It was my 1st time using a 3D printer other than the MakerBot. It took much longer than expected (about 3 hours), but there might have been multiple jobs in the Dimension at once.
Enclosure Cont'd
Results. The enclosure feels very solid and of high quality. I'm impressed with the resolution of the Dimension, although I had to sacrifice time.
Nonetheless, it came out exactly how I wanted it to.
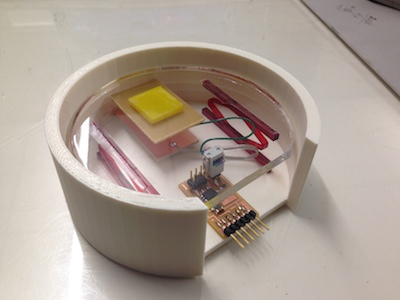
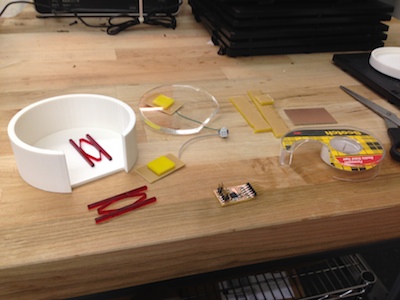
Assembly
Time to assemble all the parts onto the enclosure. I finally made flexures that I was satisfied with, and laser-cut a top plate out of 1/4" acrylic.
I attached one board (and yellow spacer) to the top plate and the other to the enclosure. I also attached the flexures to the enclosure. Lastly, I made all the electronic connections.
Assembly Cont'd
Even the prototype is beautiful!
Interface
I continued to iterate on the output interface in Python, adding a "daily total", "daily goal", and "% goal met".
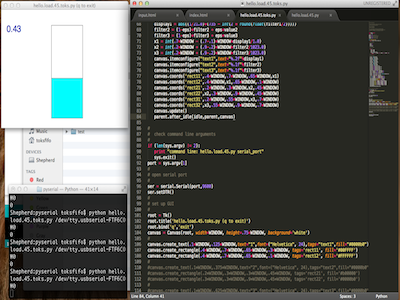
Interface Cont'd
Final video showing my smart water bottle in action.
Moving forward, I'd certianly like to leverage my newfound knowledge to improve on this technology. I definitely want to integrate the sensing system within the bottle, such that it is all one device. Additionally, I'd ideally be able to make the base much smaller, successfully measuring the water level unobtrusively, all for ~$5! (mainly from circuit board and microcontroller)
Lastly, I need to put more thought into how measurements would be made when the bottle isn't upright..