This is a video of the three micro controllers communicating with each other. Lasts 10 seconds!
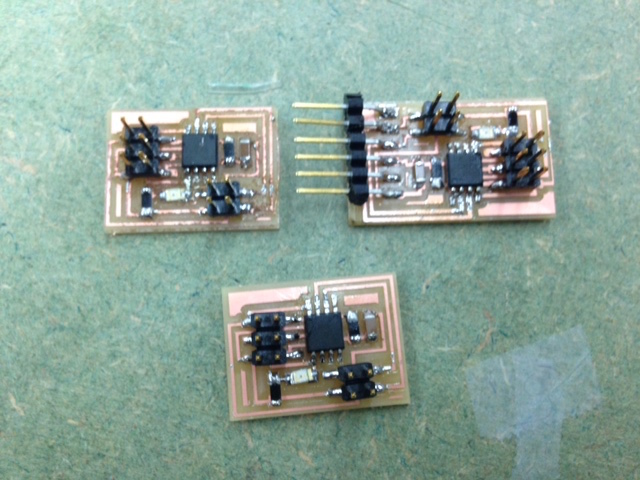
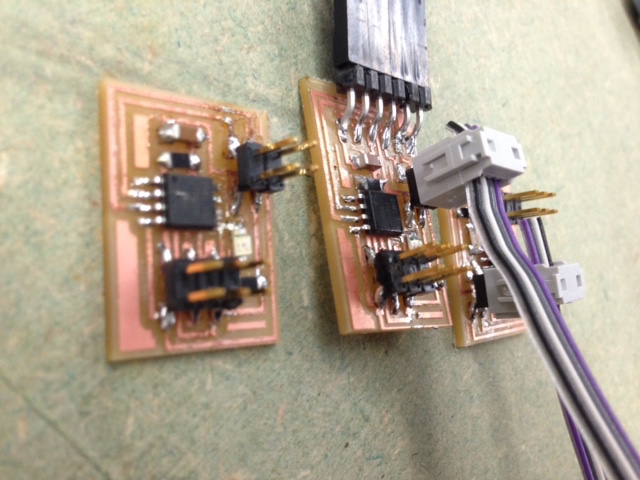
I have now become pretty used to milling. Due to lack of time this week, I used the traces and outline from Neil's website and started to mill them. I realize that a good layout design from Eagle is very important, as by using Neil's traces I was able to solder easily and without any problems at all!
Sweet picture of the 3 processor circuit boards all together! One tip on how to orientate the right LED light (green line should always face cathode), and the AT Tiny 45, the dot should be on "RST". The rest of the components for this week doesn't matter on orientation.
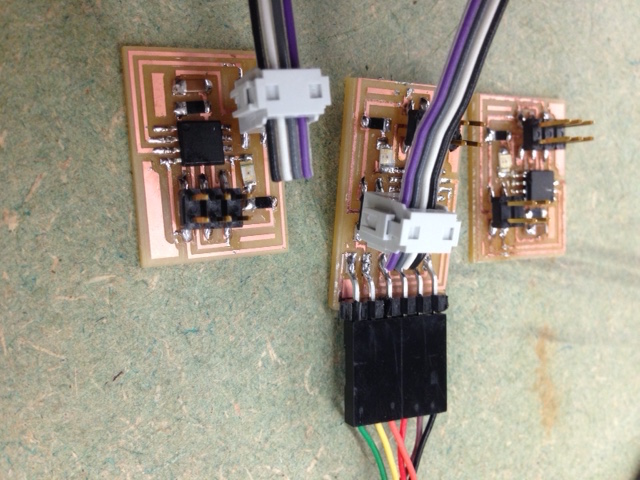
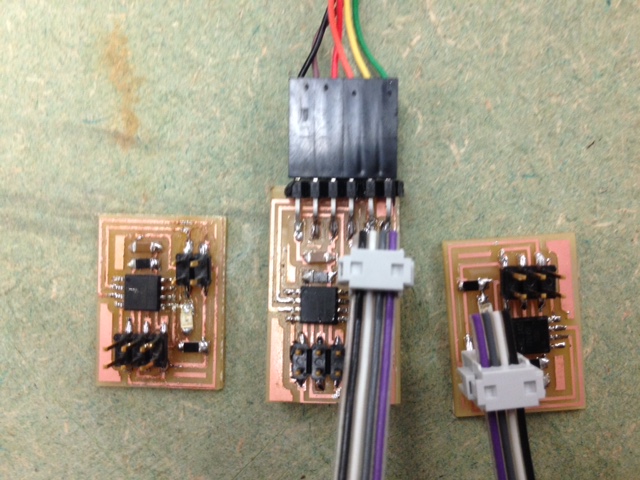
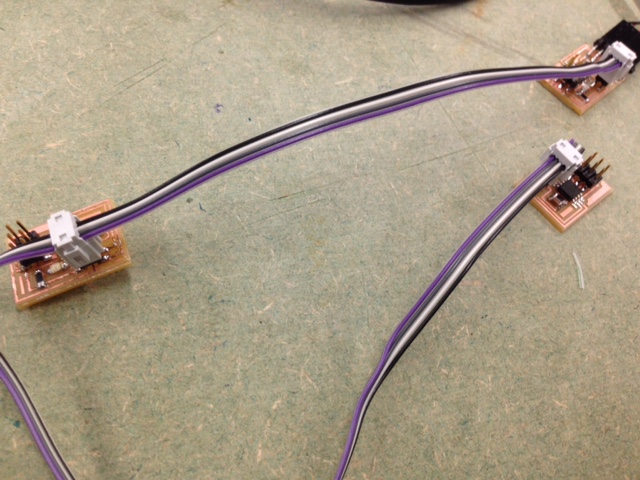
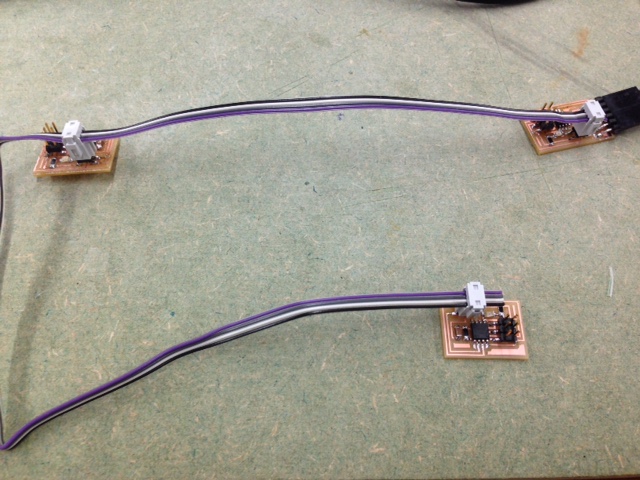
Another nice picture. In order to program, there are several steps which I will like to share here.
Step 1: Refer to Neil's Programming page here where you will be able to find information on programming.
Step 2: The first step is to program the first "bridge PCB". Therefore connect the bridge PCB using the AVRISP2 and the wire (with six nodes).
Step 3: Create a folder on desktop, name it, and download the two files, C file and make file into the folder. Navigate into the folder by typing "cd /Desktop/Folder" on Terminal.
Step 4: Make or Compile the C file (as C is a compilable language) by typing in the code make -f hello.light.45.make (or the name of the file)
Step 5: Now the C file is compiled into "hex". You can type "ls" in terminal to see the file and check that it is compiled. Type $ sudo make -f hello.ftdi.44.echo.c.make.program program-usbtiny-fuses (this step is only necessary if there are fuses).
Step 6: If no fuses like this week, skip step 5, and go straight to $sudo make -f hello.ftdi.44.echo.c.make program-usbtiny to actually program the micro controller.
Step 7: Take out the AVRISP2, and place is on the second node PCB, using a wire to connect the bridge and the node.
Step 8: Program the node PCB using step 6.
Step 9: Repeat the process for the second node PCB using step 6.
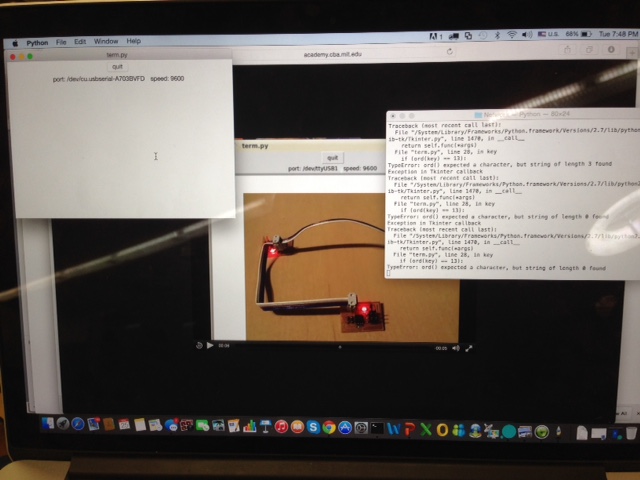
Step 10: If you need to search for the USB port location, you can type in cd /dev to look up all the devices linked to your laptop. Once you find the name of the location, you can then use that name to program both the nodes.
Step 11: Finally, you would need to down the term.py file from week 6 I believe in Neil's website into the same program, and use python to program the file.
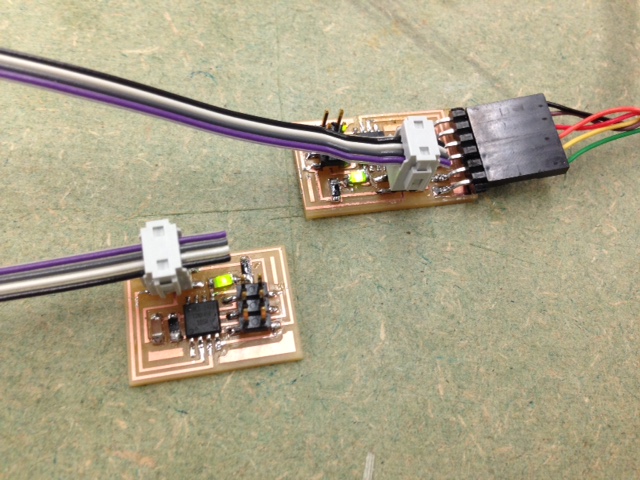
See the green light lighting up! It's cool!
I have now become pretty used to milling. Due to lack of time this week, I used the traces and outline from Neil's website and started to mill them. I realize that a good layout design from Eagle is very important, as by using Neil's traces I was able to solder easily and without any problems at all!
Sweet picture of the 3 processor circuit boards all together! One tip on how to orientate the right LED light (green line should always face cathode), and the AT Tiny 45, the dot should be on "RST". The rest of the components for this week doesn't matter on orientation.
Another nice picture. In order to program, there are several steps which I will like to share here.
Step 1: Refer to Neil's Programming page here where you will be able to find information on programming.
Step 2: The first step is to program the first "bridge PCB". Therefore connect the bridge PCB using the AVRISP2 and the wire (with six nodes).
Step 3: Create a folder on desktop, name it, and download the two files, C file and make file into the folder. Navigate into the folder by typing "cd /Desktop/Folder" on Terminal.
Step 4: Make or Compile the C file (as C is a compilable language) by typing in the code make -f hello.light.45.make (or the name of the file)
Step 5: Now the C file is compiled into "hex". You can type "ls" in terminal to see the file and check that it is compiled. Type $ sudo make -f hello.ftdi.44.echo.c.make.program program-usbtiny-fuses (this step is only necessary if there are fuses).
Step 6: If no fuses like this week, skip step 5, and go straight to $sudo make -f hello.ftdi.44.echo.c.make program-usbtiny to actually program the micro controller.
Step 7: Take out the AVRISP2, and place is on the second node PCB, using a wire to connect the bridge and the node.
Step 8: Program the node PCB using step 6.
Step 9: Repeat the process for the second node PCB using step 6.
Step 10: If you need to search for the USB port location, you can type in cd /dev to look up all the devices linked to your laptop. Once you find the name of the location, you can then use that name to program both the nodes.
Step 11: Finally, you would need to down the term.py file from week 6 I believe in Neil's website into the same program, and use python to program the file.
See the green light lighting up! It's cool!
Another nice picture. In order to program, there are several steps which I will like to share here.