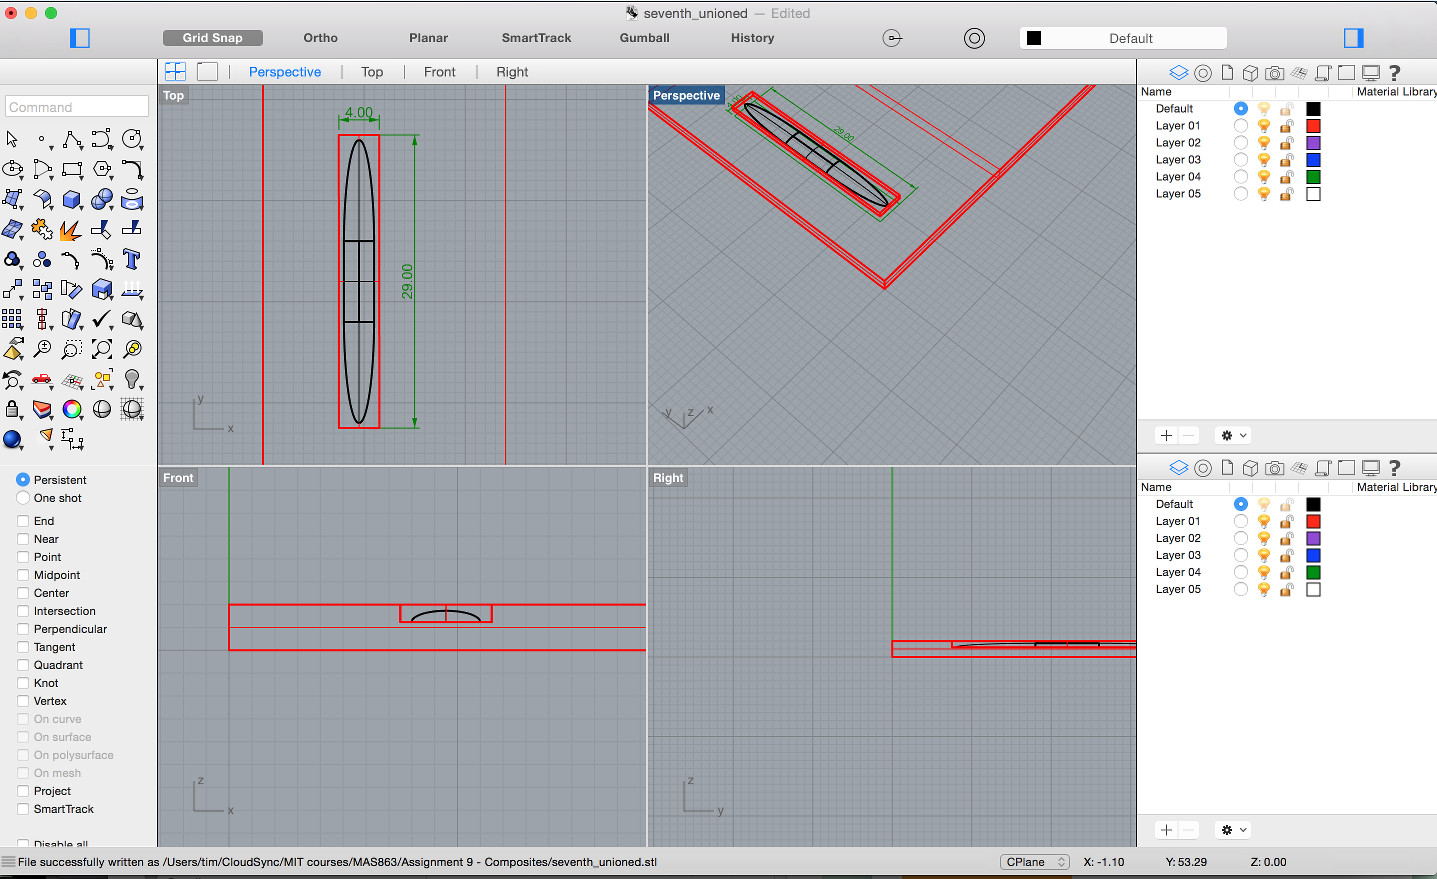
3D modeling a bike fender in Rhino
This week was also the first snowfall of the season. It was pretty awful slushy snow, and after riding through it on my bike for a while and getting spray off my wheel onto my back, I thought that a fender would be an excellent practical project for this week. I went for some very simple geometry, simply some 2 ellipsoids which I then extruded to make an “ellipsoidal cylinder”, which I then used to connect both ellipsoids. Notably in past years other people have made better fenders with more complex geometries. Although I’m definitely getting better with 3D modeling, I wanted to keep it simple to ensure I wouldn’t spend an inordinate amount of time it. The opposite case happened with during molding and casting week, where I got quite hung up on 3D modeling.
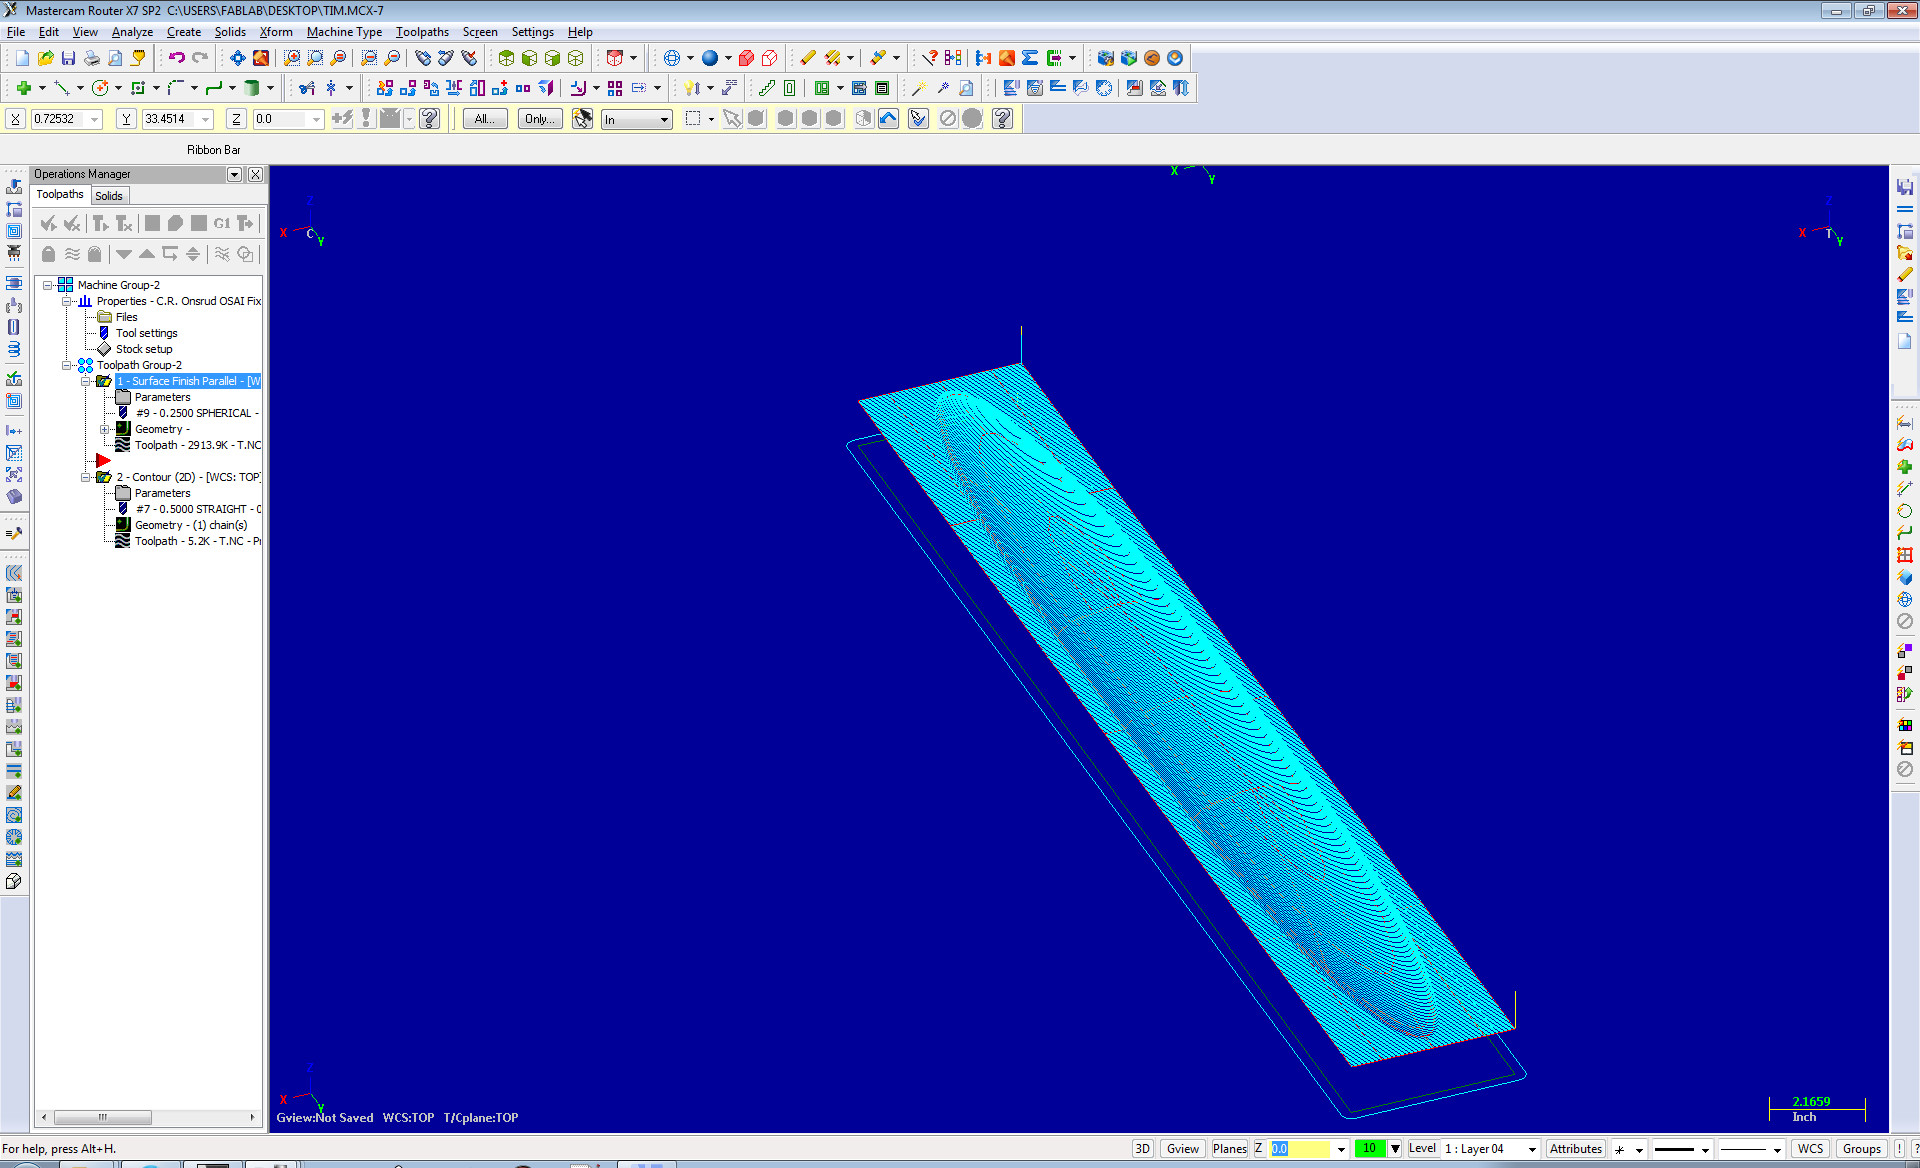
Path planning with MasterCam
This week we were advised to use the Onsrud for our milling, which means path planning through MasterCam. I was greatly helped by Austin Smith who is a real whiz at MasterCam. Thanks Austin! In my case, I ended up with two toolpaths: 1. A 3-axis "finishing cut" using the geometry of my model as the drive surfaces, and 2. a 2D contour cut following the outline on my piece which cutout my piece at the end. For the 3D milling I used the 0.25 ball endmill, whereas for the 2D routing I used a 0.5 inch flat endmill. Since I was cutting foam, theres really no need for a rough cut to remove material as the machine can just breeze through multiple inches of foam in a single pass. For both toolpaths, my parameters were as follows: Feed rate 600, Spindle Speed 18000, Plunge rate 200, Rapid retract checked. The feed plane was set to 2 inches, and the retract height to 2.25 inches. Total tolerance was 0.005, and max stepover was 0.05. Zigzag was on.
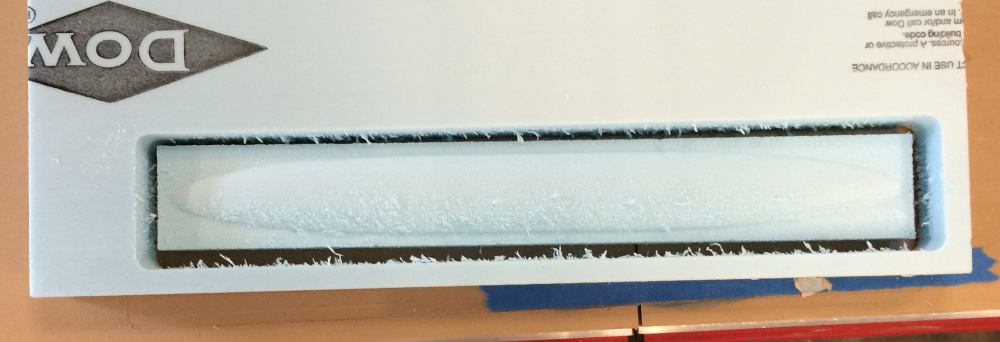
Part successfully milled
MasterCam said this part would take 3.5 minutes to mill out, but it actually took 20. It seemed to be pretty furry on one side, not entirely sure why. I wiped the fuzz off just by rubbing with a piece of paper, then sanded it lightly to smooth some of the scalloping.
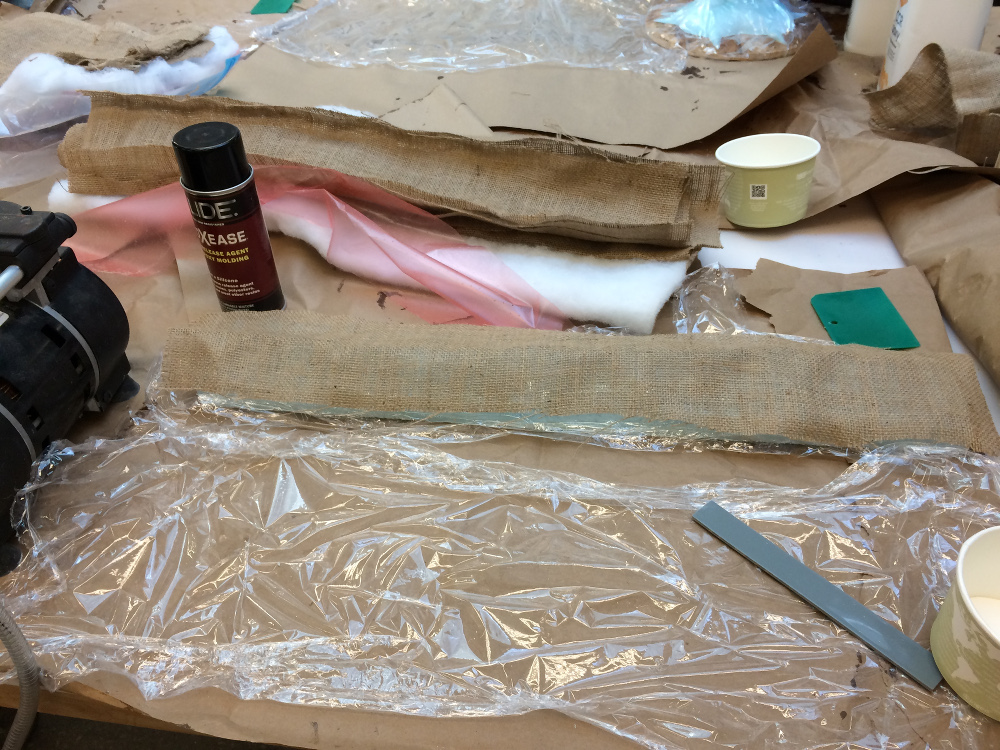
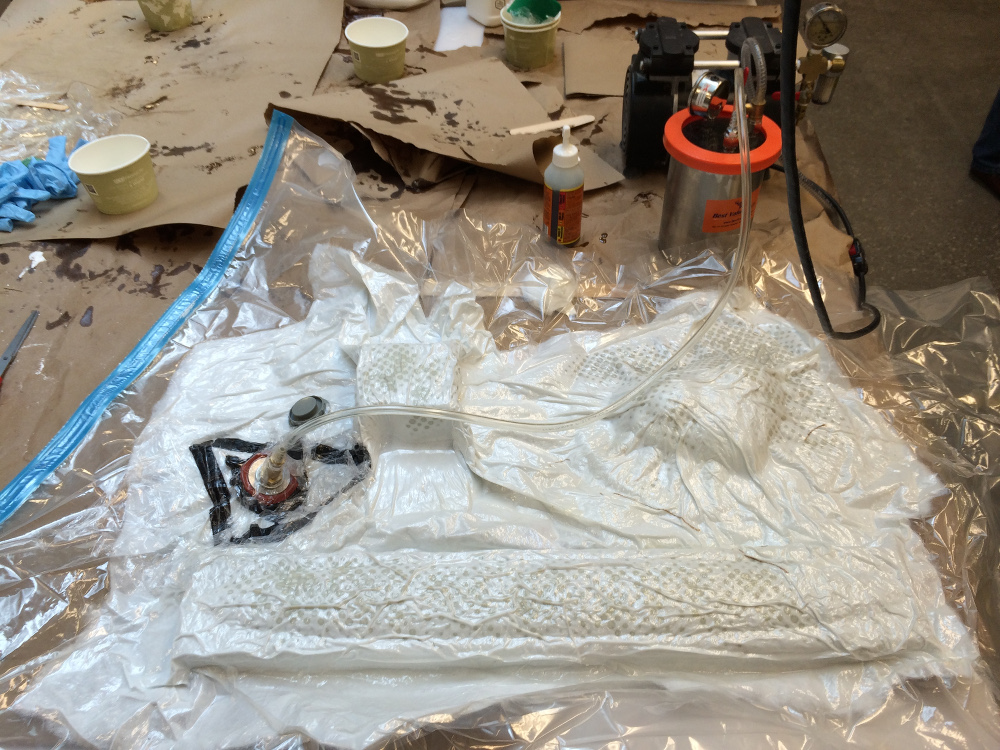
Preparing to apply resin and stack burlap
This picture shows the setup just applying resin. My setup was this: Positive foam mold -> saran wrap (prevents epoxy sticking to foam)-> 6x layers of resined burlap -> Red plastic with holes -> Bleeder/breather white fuzz. Then this all went into the vacuum bag for 4 hours. Also pictured, the paper cups for mixing epoxy, and the green spreader for spreading resin, and the saran wrap underneath where resin will be applied (otherwise it just turns into a complete gooey mess instead of a partial gooey mess). Mold release, while pictured, wasn't used at this stage, but was instead sprayed inside the vacuum bag to ensure things wouldn't stick to the bag. Gloves were worn as even this "High Bio" (whatever that means) epoxy can lead to sensitization if you handle it with bare skin. There was a near miss in setting up the epoxy. Initially the "clear" epoxy was mixed, which has a 24 hour cure time. After a quick double check, this was realized and the 4 hour cure time epoxy was used instead. Notably myself, Morgen, and Jeff all ended up using the vacuum bag at the same time so we applied resin at the same time as there is only a 20 minute window from when you apply resin to when the part need to go in the bag. Morgen was kind enough to wait for myself and Jeff as he was ahead of both of us. Thanks Morgen!
The vacuum bag in action
3 parts successfully in the vacuum bag for a 4 hour cure.
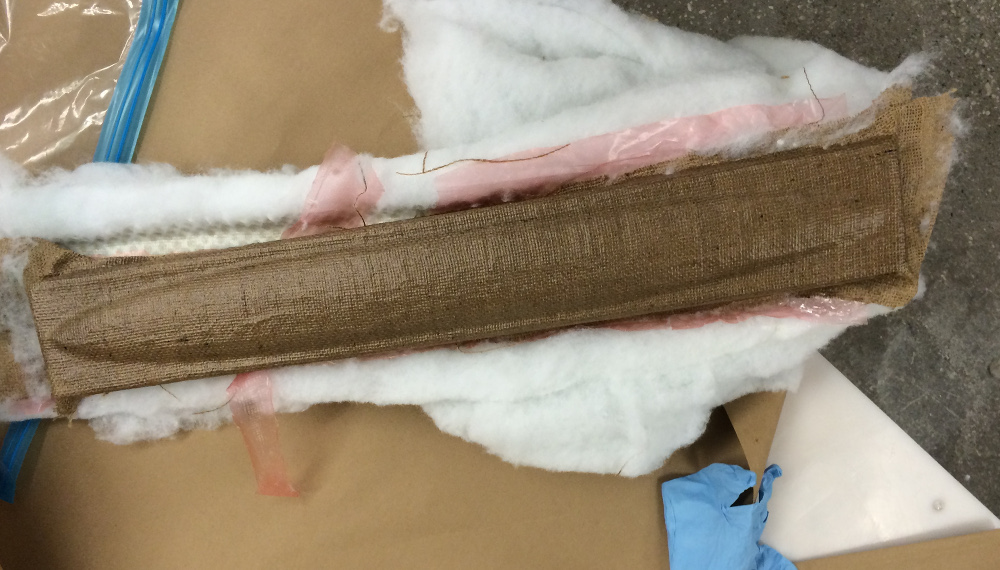
The part revealed!
After some peeling, the part is released from its fuzzy prison. A little bit of fuzz was caught to the burlap around the edges, but the core curved bit of the piece was totally fine.
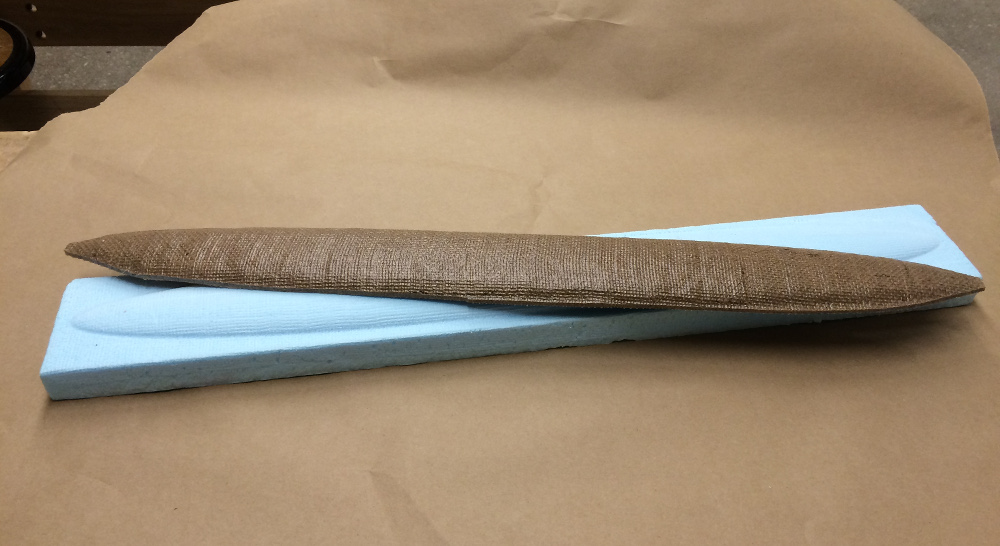
A finished part
After some finishing on the bandsaw in order to remove the unnecessary edges of the part, I ended up with a curved bike-fender like shape. The physical properties are quite good! It does have some flexure, I was able to torque it with some difficulty, but it is quite strong. I whacked it around a bit and it was totally fine. Next steps will be to see how to attach it to my bike, and also see how well it stands up to the weather.