Week 1 - Project Management and Computer-Controlled Cutting
Task: design, make, and document a press-fit construction kit
Cuboid-Curved Stackable Modular Origami
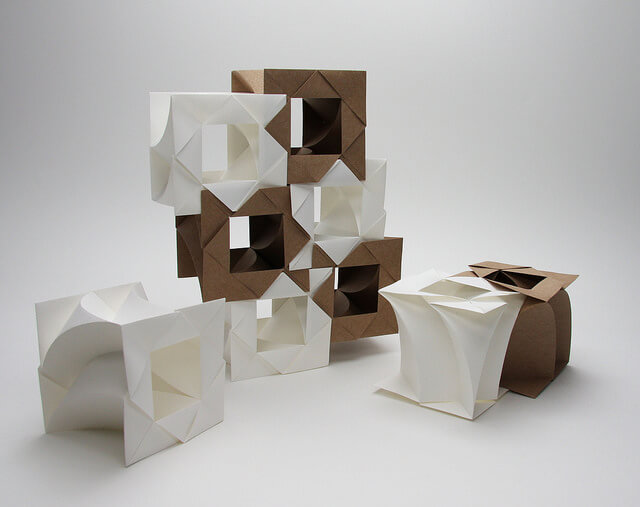
One of my greatest inspirations is origami. Recently, I discovered this artist Jun Mitani, a professor at a university in Japan who researches in Computer Graphics, Computer-Human Interface, and, of course, Computational Origami. His origami work is characterized by elegant lines and curves that form geometric structures. Flipping through his Flickr photos I saw this beautiful model, simply titled "Stackable Origami" (as far as I can tell). I decided to reverse engineer it to its crease pattern, and score the folds into cardboard, hopefully creating several units for a construction kit.
Inspiration
When I first heard the assignment, I thought of modular origami, that is, origami models composed of smaller "modules" or units, that could be put together to form many different types of models. Sounded like a construction kit to me. But I had the trouble where the method of attachement for modular origami often had to do with inserting part of a unit into another, something less do-able in the much more 3D cardboard. Stupid thickness.
As I was contemplating how to modify some of my favorite modulars, I stumbled upon Jun Mitami's work while flipping through an origami book. Instead of being modular, it "stacks" to combine the units; the pieces curve around each other and the parts could be tucked into each other at the corner to hold it even more stably. The model in question looks like this:
Coming up with the crease pattern
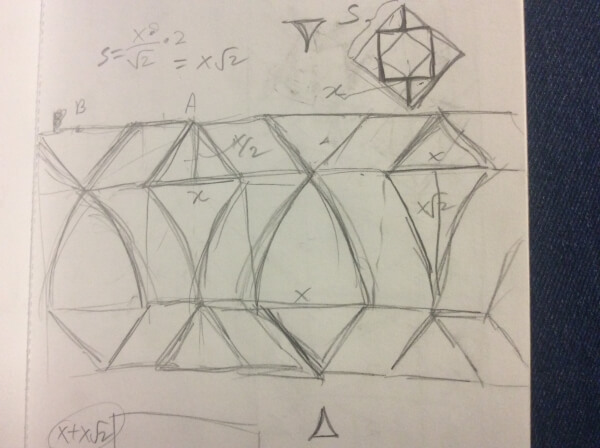
Luckily, although Mitami only had one picture of this model, it included the units from multiple angles. Jackpot. I decided to try and reverse engineer the crease pattern. Here's my first attempt:
Trying to fold from the crease pattern...
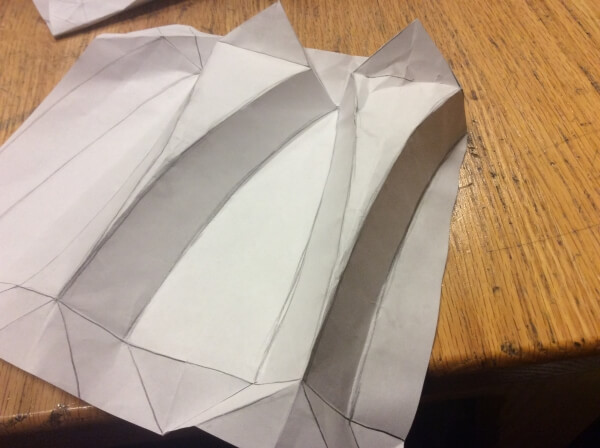
Yikes! I realized I had messed up and needed a few extra creases. Second attempt...
Success! I now knew where I would need the cardboard to be scored.
Modelling in Rhino
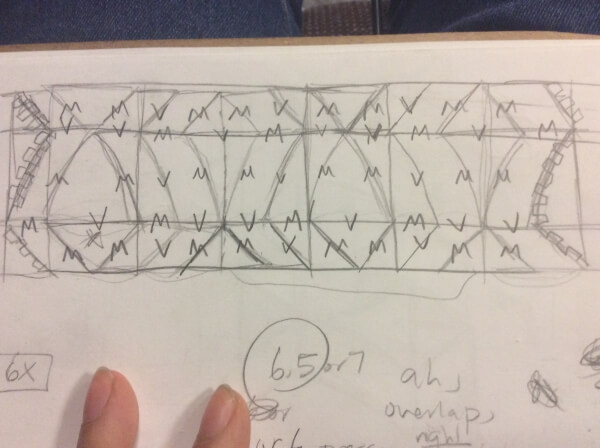
The first step to getting a proper model in Rhino would be to figure out which lines needed to mountains and which needed to be valleys (that is, whether the paper would crease towards or away). In order for the cardboard to fold properly, it would need to be scored on only the mountains. I referenced my folded paper model for this (these are marked already).
My next question was about height. From my deductions it seemed like the overall height wouldn't effect the "right-ness" of the prism, that regardless of the height the two end square faces would be exactly vertical to each other. I stared at the model a bit and then convinced myself this was true, though I have yet to prove this mathematically. At any rate, the next decision was for the overall height. If I made a long unit perhaps I could make legs of a table, or something else along those lines. In the end I decided to go with square/cuboid units since the size of the cardboard would mean I could probably only make a single long unit per cardboard piece. Did some fancy calculations and modelled the piece in Rhino.
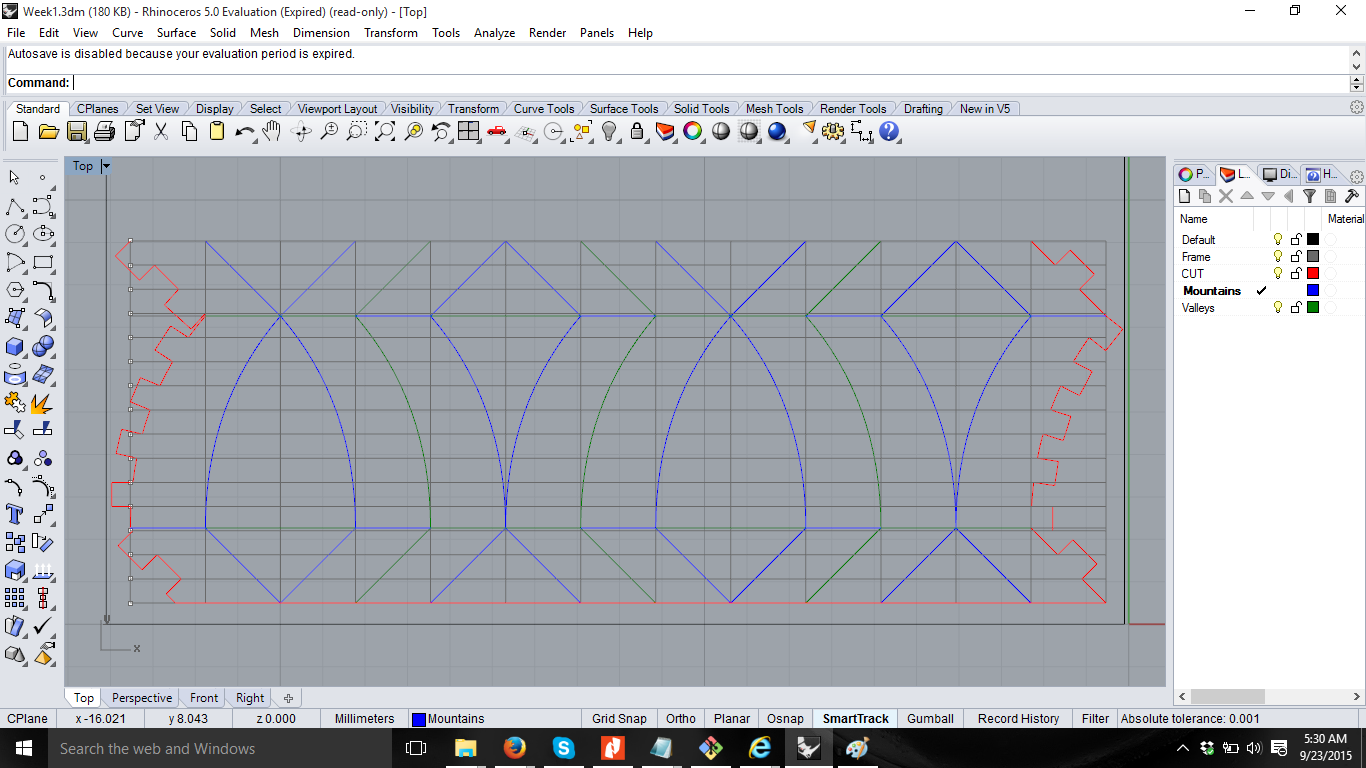
To make the press-fit edges I split the edge of the guide rectangle into 15 sections and made the rectangles alternate between them.
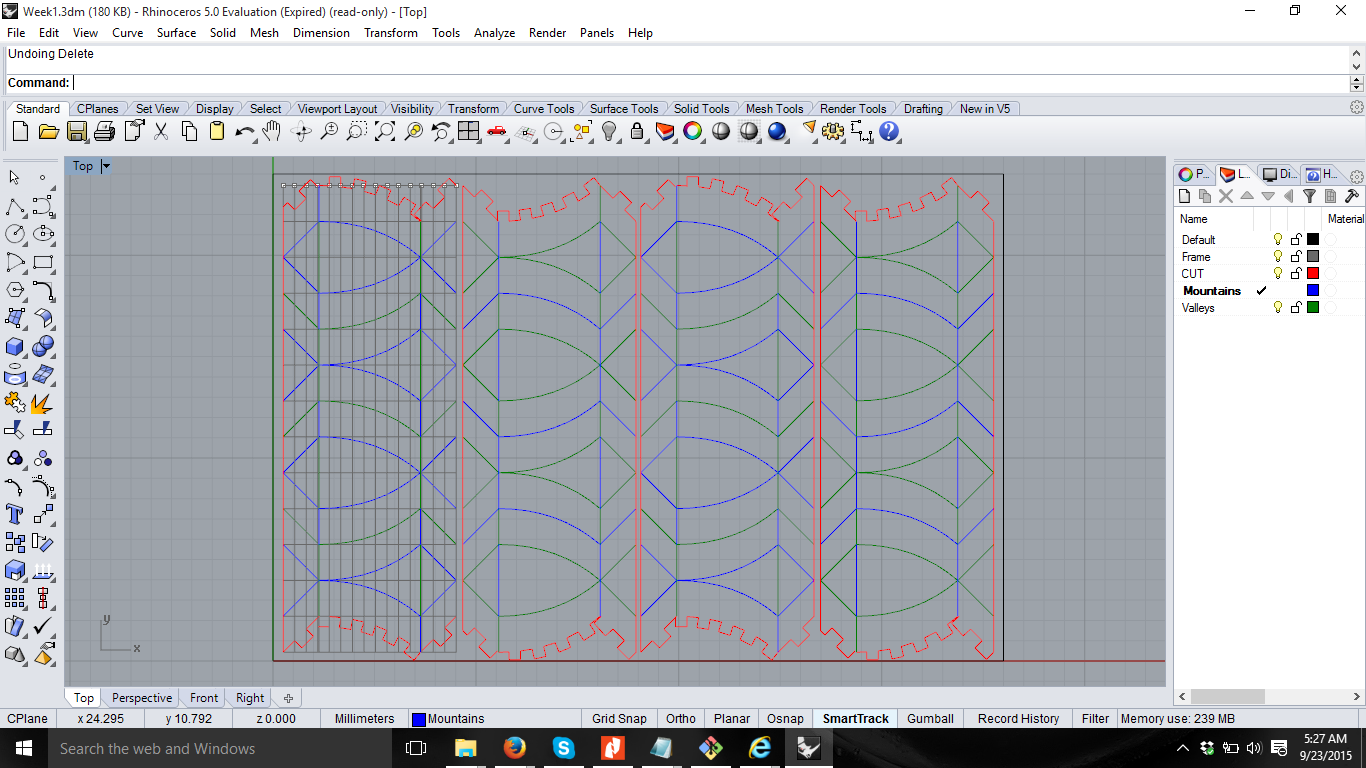
In order to cut both mountains and valleys, I would need to flip the cardboard at some point to get the rest of the cuts. But flipping also changes the orientation of the creases (compared to the CAD file) and there would be no guarentee that the flipped piece would be put in the correct/calibrated spot. To remedy this, I flipped the orientation of two of the pieces and switched which lines were cut, from valleys to mountains and vice versa. Thus, I could, after cutting out the pieces and scoring the mountains, take the cut pieces and flip them, put them in the outline of one of the opposite type cuts, and score only mountains again--I didn't even have to have another CAD file! Plus the pieces would be reasonably in the right place...
My finished model in Rhino.
Laser cutting! and putting together :)
On to laser cutting! This went mostly well, with a few trial and errors. To start with, the recommended settings were not powerful enough at all. Instead of the 60/5 speed to power ratio, I ended up using 60/15 for scoring and 60/20 for cutting (with two passes for cutting). Also, despite only telling the printer driver to cut the red and blue lines, it also started to cut the green "valley" lines. Yikes. I thought perhaps the driver recognized the green since it was too close to the blue, and to be safe I just made that level invisible. I also started printing once only to realize I had forgot to switch the mountains and valleys on the flipped version (I had changed some things and re-mirrored and copied, but forgot to switch them this time around). I also in the final version missed switching two mountains into valleys, so two of my final units have a corner missing (cut from both sides). Lastly, as I flipped the pieces into position between cuts, the cardboard frame that remained didn't stay perfectly in place, but luckily the cardboard sheet was about the same size as the laser cutter's bed, so I could use that to generally make sure the pieces were at the right positions. The error would be minimal/not matter too much for construction.
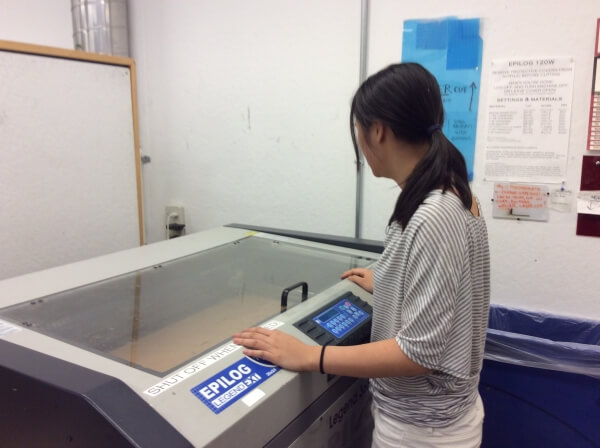
Here's a picture of me watching it get cut:
I had some real struggles assembling the pieces. My complaints:
- some peeling of the cardboard's paper from its ridges. I tried to tacky glue them back together but it didn't work that well
- the cardboard had bad curving ability. I probably should have "convinced" the cardboard a bit by curving it before I started folding but I didn't, and thus it peeled and now can't really curve. If I made the pieces longer/not cube-shaped this might've been less obvious/important. This also gave a bit of trouble at the press-fit edges...
- "press-fit" issues. The edges didn't really fit together well. The stronger curved section wouldn't come together very well. I wonder if I should've used a different fitting mechanism. Slots? Buckles?
- holes. As I was folding a lot of times I would push holes through. They're not super visible since they were at vertices but still suboptimal.
- general inexactness of folds from the paper part of the cardboard. Often due to the peeling, the paper part of the cardboard wouldn't want to fold along the cut line but instead at a softer angle
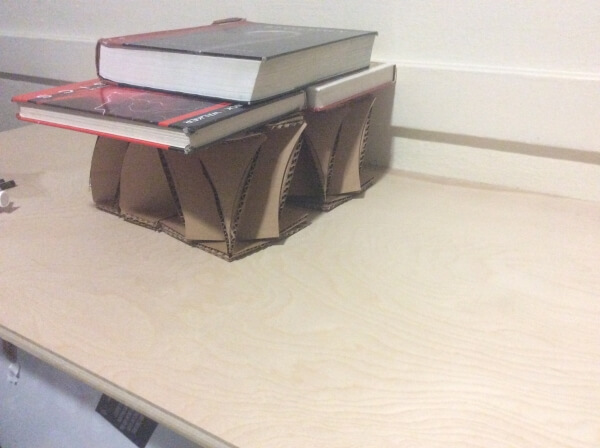
- not flat. Well, I sort of expected this because cardboard does indeed have thickness which I chose to ignore and believe it would be okay. It is still relatively fine but I used books to weigh it down so it would have sharper folds. (Theoretically it should still be flat since it has the same number of layers of cardboard but some folded more than others).
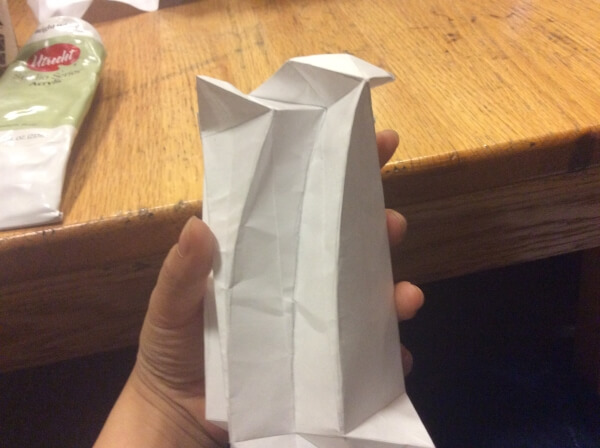
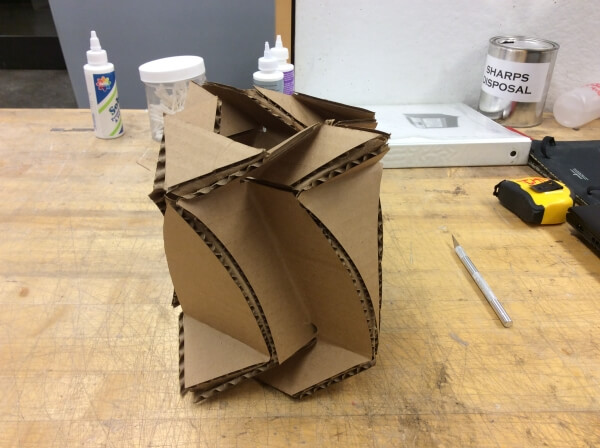
Despite these troubles I still got some decent looking units :) Here's the first one put together:
and the rest of them, being squished by textbooks.
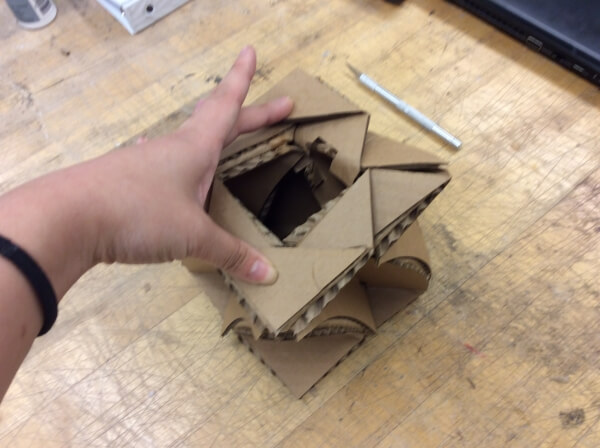
Attempt to fit/stack them together:
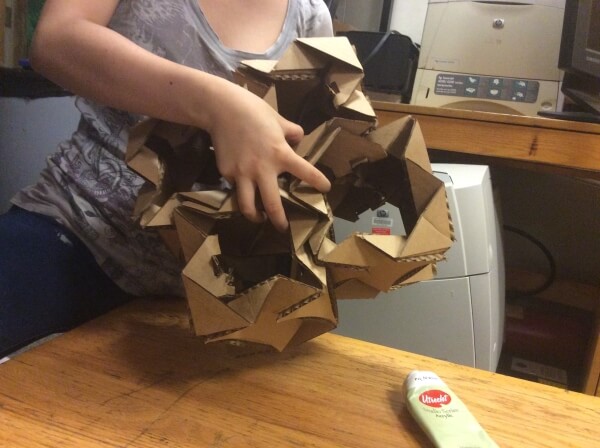
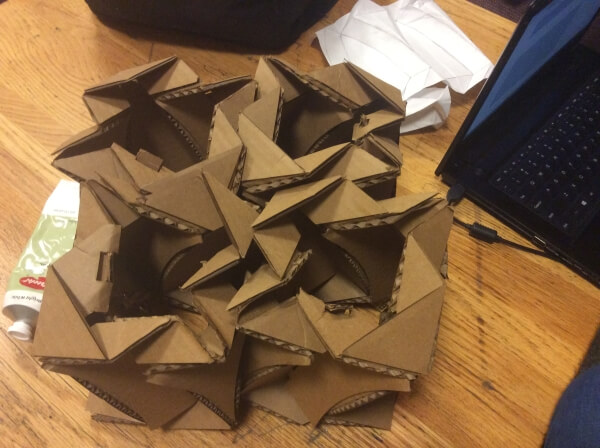
Transformer! B)
![]()
Where to go from here
After making my working paper model at some point I got back to playing with my "failure". Turns out, it might not have been a failure after all! Instead of making the nice corners desired for a square base, ommiting a set of folds would let the pattern continue in a "straight line" — I could make the bases rectangles if I desired to. Or if I varied the length, I could make a spiral. Other ideas included:
- trying to make different angles, for other shapes for bases.
- connect/insert the pieces end-to-end to make a large curved structure, or perhaps a circle if it came back around. It wouldn't be all that structural, but interesting to look at.
- instead of having the end-flaps, perhaps making a press-fit joining structure, and make other interesting long units.
- would it be possible to have the interesting curvature on the other two faces too? Then a more interesting 3D connection
- the type of curve I chose was somewhat arbitrary, I just had it tangent to the sections. I couldn't think of a reason why any other curvature with that property wouldn't work as well, maybe explore? It seems like we could get weird wonky curves on the side
In general, it seems like there still are a lot of possibilities with this design space. In the future I might make a parametric model and play around some more, or actually model the folded/3D structure in CAD (I don't have those advanced capabilities quite yet :/). This project is far from done and there is definitely more to explore!