Week 3 - 3D Scanning and Printing
Task: design and 3D print an object that could not be made subtractively and 3D scan an object
Scan a Scorpion and Polygonal Mobius Rings
I've always been intrigued by Mobius Rings. These are rings based off the Mobius Strip, in which there is only "one side", twisting around the form to make a 3D ring. If you follow along the side with your finger on the surface, you eventually get back to where you began. I made 4 rings this week, each twisting around a different number of times and the degree of twisting. I also used the Sense3D scanner to scan a scorpion sculpture I cast out of metal for a previous class.
Scanning
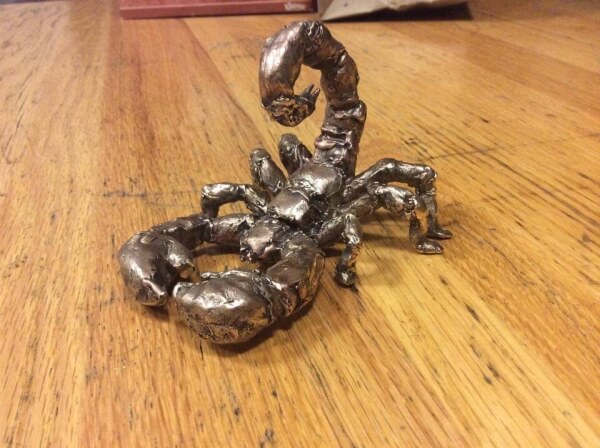
To start I wanted to use the Cubify Sense to scan this scupture:
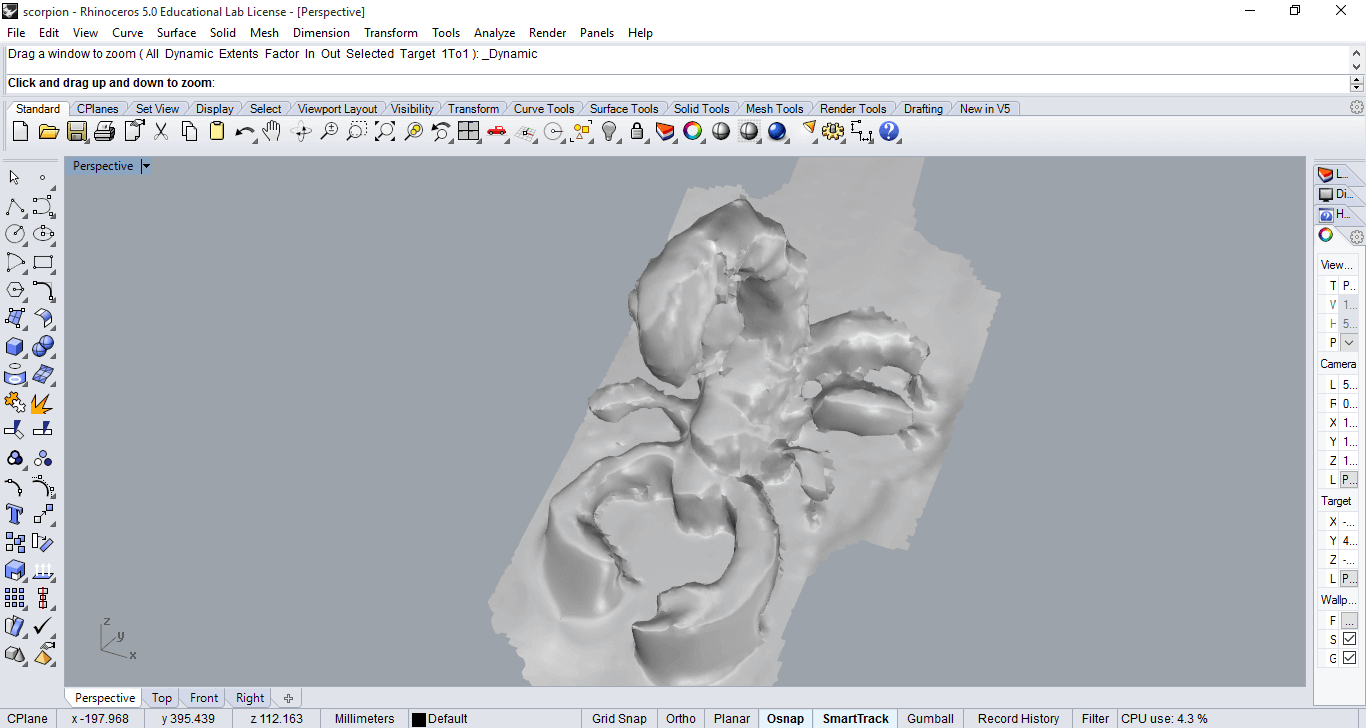
Unfortunately, things weren't as easy as it seemed. The 3D scanning technology isn't very reliable and the program kept on crashing/failed to detect surfaces without getting confused. Eventually though, I was able to get a decent scan after restarting the computer and program a couple times.
3D Printing
Parametric Modelling with Grasshopper
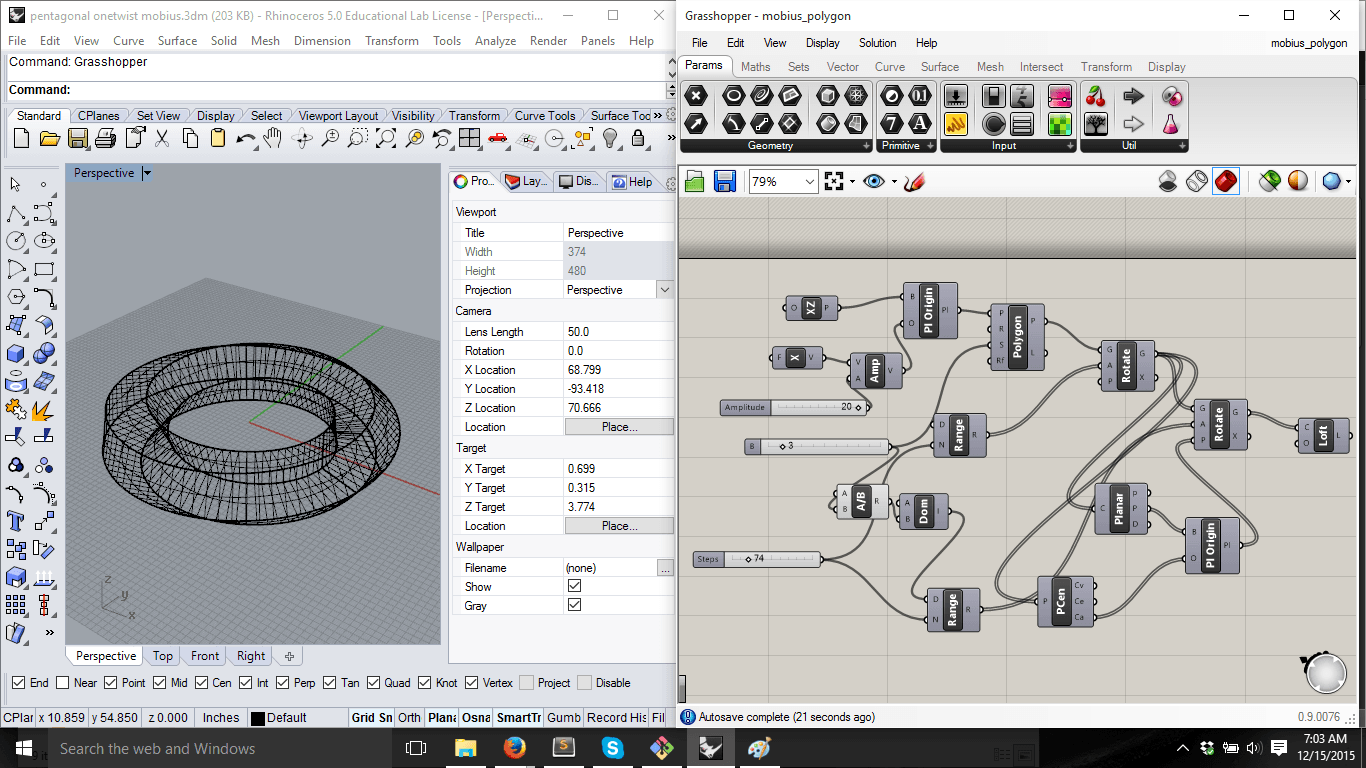
Since I wanted to make multiple variations based off of the concept of a Mobius ring, I turned to Grasshopper, a plugin for parametric modelling on Rhino. Youtube videos and help from a friend taught me some of the basics. Here's what the grasshopper looked like + my pentagonal double-twist ring.
Printing!
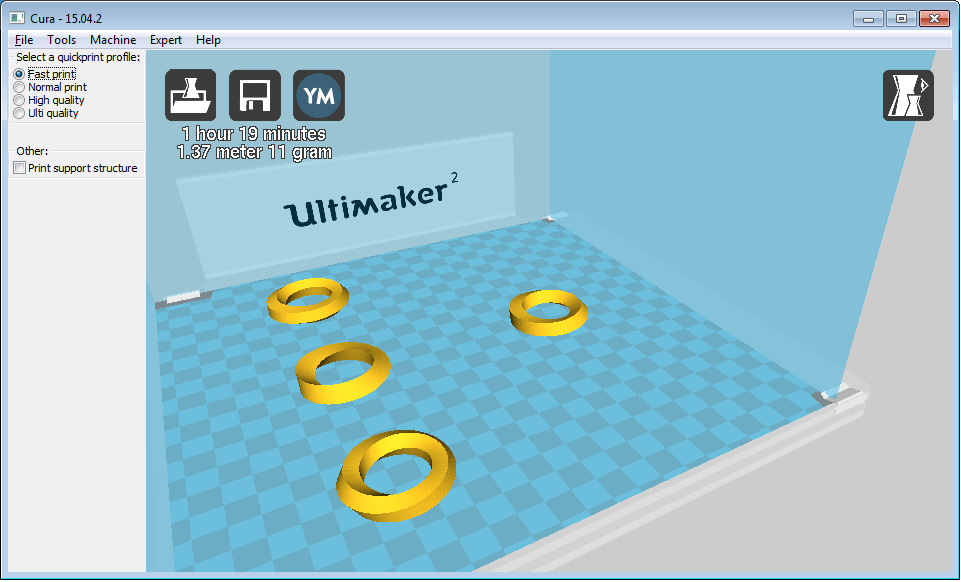
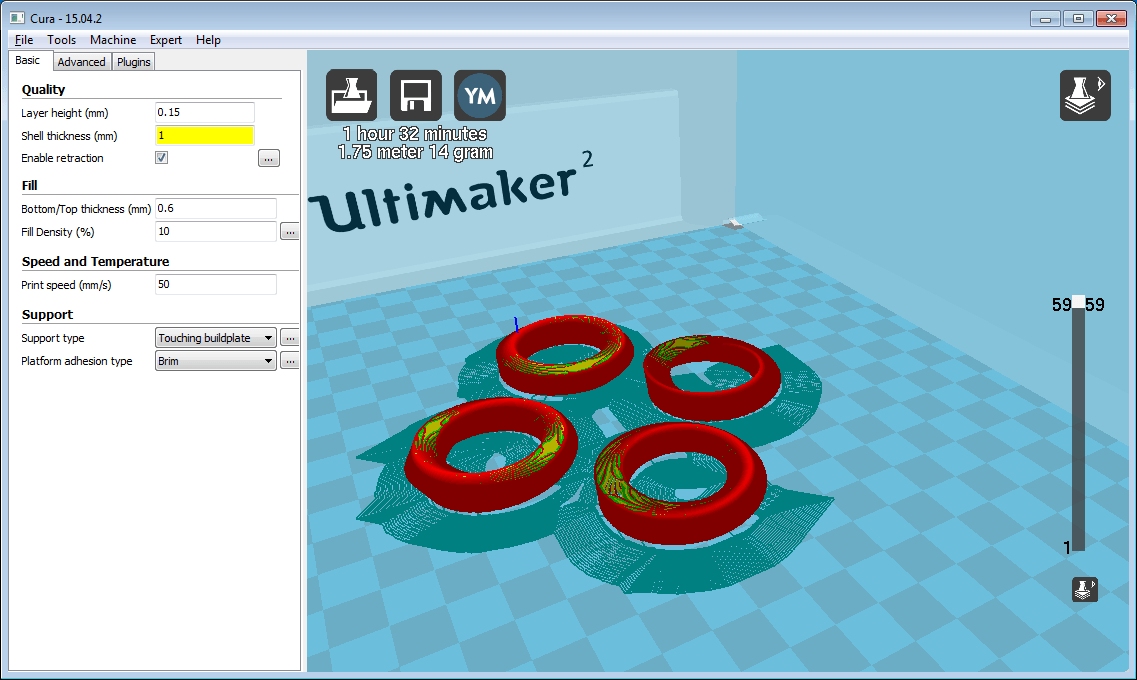
In order to go from model to printing, I neede to convert the file to .stl and then to cura to make the paths for the Ultimaker to understand. Protip about Grasshopper: Remember to "bake" the resulting figure! I hadn't done this thinking when I saved with a specific model on the screen, the file would save as is, but not so, it only saved a blank file. Here's me resizing so the 4 rings (triangular, square, pentagonal one-twist, and pentagonal two-twist) would fit and the overall printing would take less time.
I started to print... then quickly realized I messed up, forgot to add build plate.
Made a new cura file, changed to print at once instead of one at a time (lessens time), as well as add build plate and support
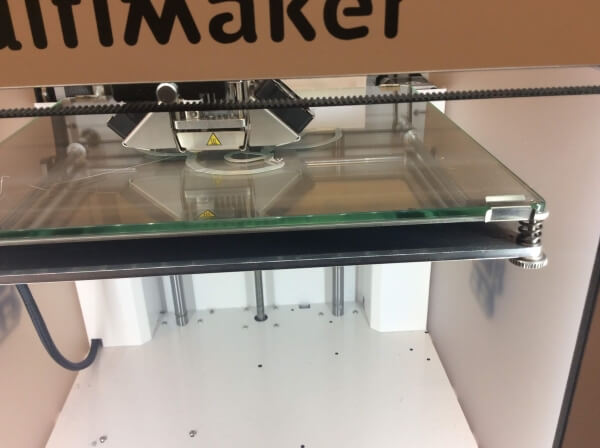
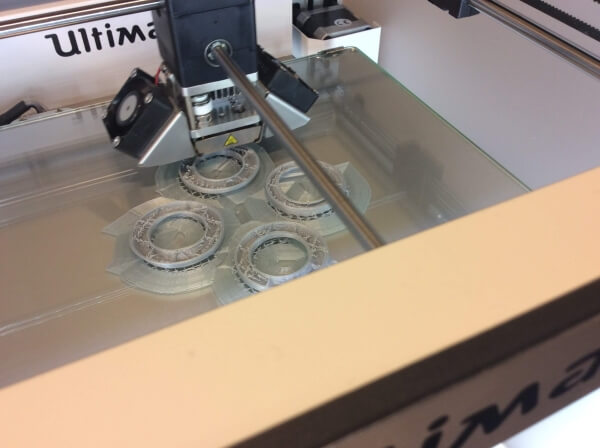
It's finally working~ Some pictures of it printing
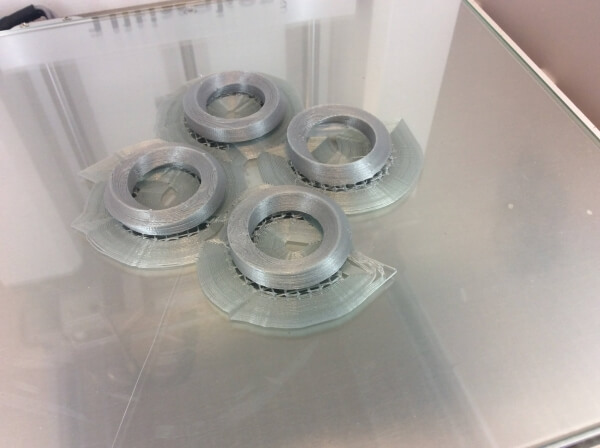
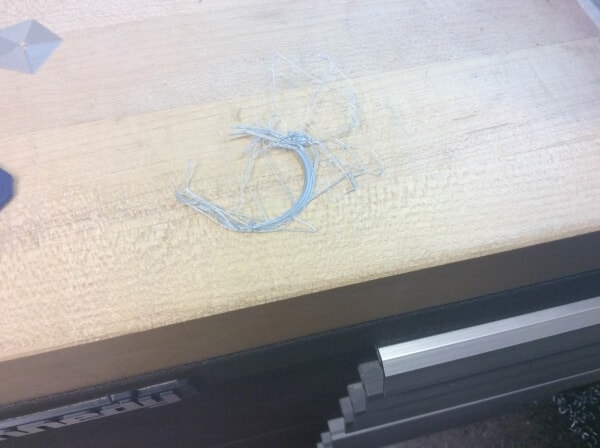
Done! removing the support
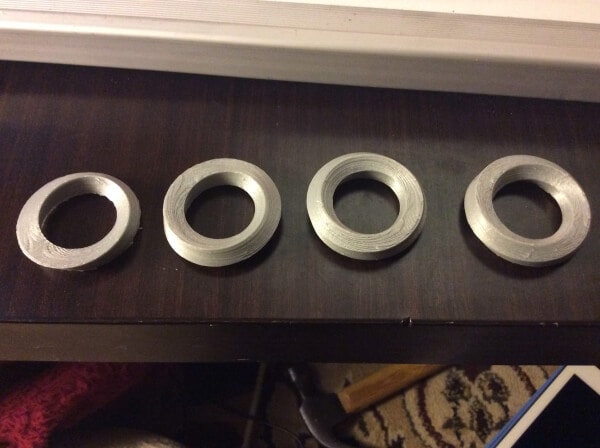
Looking at the final product, I'm relatively satisfied. Since the printer prints layer by layer, some of the sides of the twist aren't very smooth, but others have these cool lines where you can see the paths and thus the layer-slices of the irregular form.
Where to go from Here
Now that I know how to 3D print, I can't wait to print more things in the future, especially more mathematical objects! :D