2. Modeling
Before I could begin designing the costume, I needed an accurate model of my body. Though for the final project I would like to use the Sense 3D Scanner, with the time limitations (and the fact that this doesn't need to fit perfectly), I decided to go with a more brute force approach.
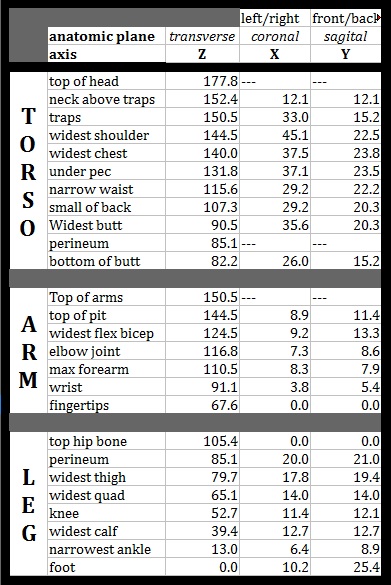
Using just a tape measure and a flat wall, I used a chart to record the x and y dimensions of my body at various heights off the ground. The heights I picked aligned with important maxima/minima of the body. My thought was that I could plot the z coordinates of these slices in Rhino, and use the x and y measurements to define a bounding box. Within that box, I would apromixate the body shape as a simple elipse (far from perfect, but I hoped it would do).
Taking the measurements themselves was quite challenging, as I lacked a straightedge and I was taking these measurements on myself. I found myself wishing I had a large pair of calipers, and realized making them on the laser cutter would not be very difficult at all. Maybe next time.
|
|
Data table for body measurements. If someone wants to buy me a bespoke suit for Christmas, look no further. kthx
|
|
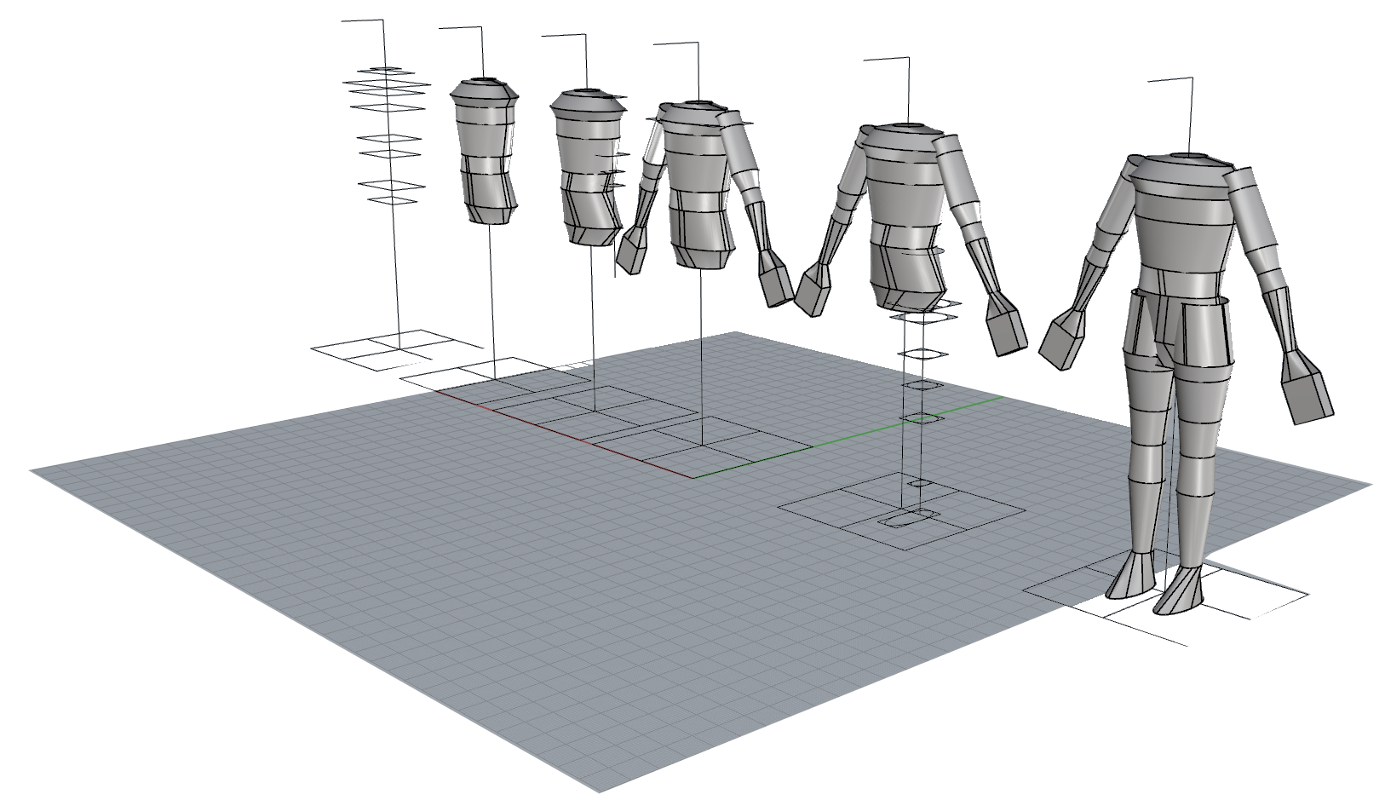
With this data, the next part was relatively simple: I created the bounding boxes in Rhino and adjusted them to the approprate height along a central axis. Once again, this model is not perfect, since of course the human spine is not a vertical axis but is curved. Once again, I was hoping that this would not be a big deal with this costume, but it did make me consider the possibility of building a different tool than a large pair of calipers for body measuremnts. I envisioned two vertical planes at 90 degree angles, with lots of notches for inserting rods into. A person, ideally with assistance, could insert a number of rods into the planes to create the bounding boxes around their body, but these boxes themselves would have x/y coordinates, and could be aligned properly with the changing position of the central axis, as well as having the proper dimensions.
With the measurements input into Rhino, I created the elipses within the boxes and then sequentially used the loft command to draw surfaces between them. The results weren't half-bad.
|
|
Creating a body model from rough measurements. Not too shabby.
|
|
Modeling the Costume
Modeling the costume took a very long time, and called upon a large range of the Rhino commands I've used so far. A very useful command I leanred (the likes of which I had been searching for sinch I first used Rhino) was the Orient3Pt command. This command lets you reorient an object so it is in the same plane as another object. When dealing with complex geometry and all axes of rotation, there were many occasions where I just couldn't get a model back into the orientation I wanted. Hopefully that will no longer be a problem.
The other novel thing I tried in this project was importing images as Background Bitmaps and using them to trace complex shapes which would be difficult to model. I did this both for Joffrey's crown (which is patterned with antler-like patterns), as well as my sword (I added the Lannister Lion sigel to the crossbars and pommel).
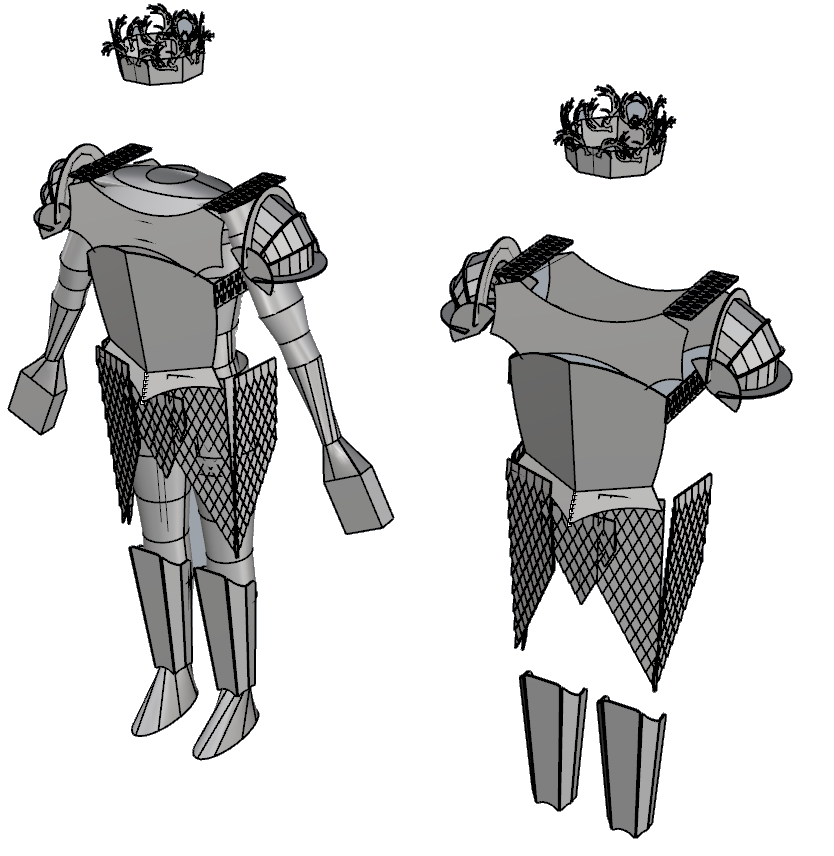
I have included all models on this page - feel free to download them and explore if you would like to know more about the design of the costume. The final result of the modeling is below.
|
|
Final costume model, along with Joffrey's crown.
|
|
Making Decals with the Vinyl Cutter
I also wanted to include some of the filligreeing from the armor, and decided that the vinyl cutter would be the best way to accomplish this. I found a few images (made by others) on google image search. Most were very fuzzy due to jpeg artifacts, so I used Photoshop to trace their rough outline and create crisp PNGs. Using the vinyl cutter proved quite simple, and I was pleased to finally use it for the first time. Click the following links to view the decals: Crown 1, Crown 2, Filligree 1, Filligree 2
Go to next section, 2.Cutting
Download Schematics