The first step was to figure out how to build a sphere, and think about how to map Earth's terrain on to its surface. After doing research into sources for global elevation data, most of what I found was only available in the ever-useless Mercator Projection, which maps terribly onto a spherical surface. If I had to rely on using a flat map and then converting it to mesh data (with a heightmap), then the best projection for reducing distoriton is the "Fuller" or Dymaxian Map, which breaks apart the Earth into a 20-triangle isocahedron. At most, this causes terrain at the endge of the triangles to be somewhat exagerated, and terrain near the center to be compressed, but this distortion is negligable comapred to other maps.
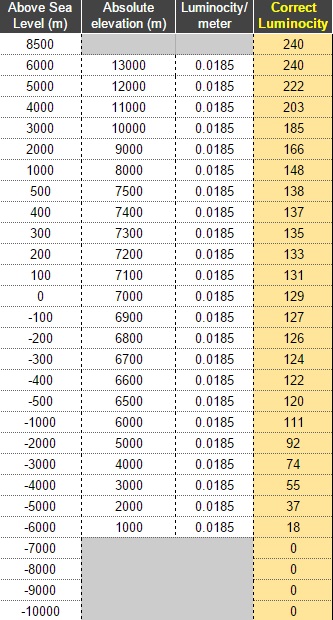
In order to convert the map into data, I needed it to be greyscale, so that Rhino could process the heightmap. The problem is, it's not a simple matter of saving a color map to the "greyscale" format. Firstly, the colors chosen on nearly all color maps do not correspond to luminosity values, and instead follow chrometric gradients human eyes are suiited for processing. Moreover, the HeightField function in Rhino directly maps the luminocity value (from 0 - 240) proportionally with the height you specify. For example, if you are creating a heightmap from an image, and specify that you want the maximum height to be 10 centimeters, then at value "240" (pure white) the heightmap will generate 10cm heigh points, at value 0 (darkest black), the heightmap will generate 0cm heigh points, at 119 (halfway) the heightmap will make 5cm heights, etc.
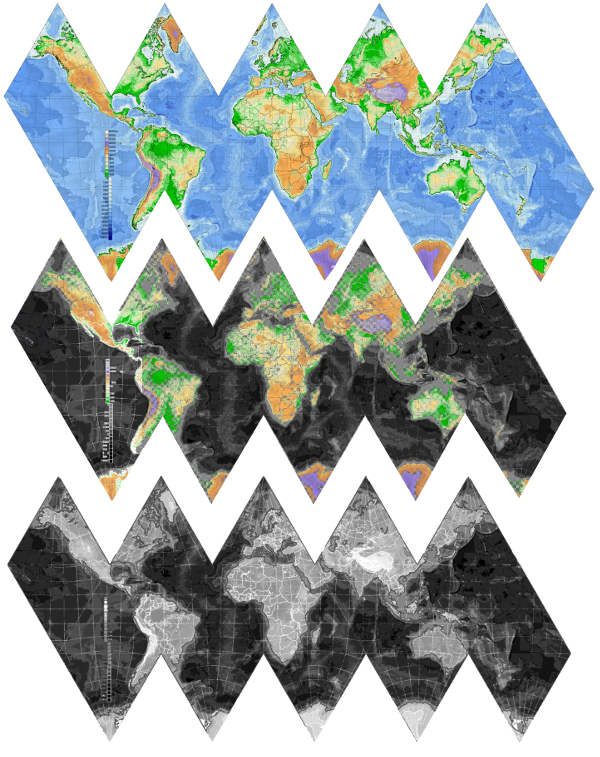
Lacking any good primary data, I decided to convert a color map to greyscale the hard way. First, I needed to find a crisp map which used solid colors at contour boundaries, rather then gradients which blended boundaries together. This way, I would just have to select all instances of one color, and replace it with the corresponding proportional greyscale value. I eventually found a good map, and used Google Sheets to quickly tabulate the proper greyscale luminocity values for each color to be replaced with.
With that done, I opened the map into GIMP, which has become my go-to image editing software since I do not have consisted access to PhotoShop any more. Plus, GIMP has a handy feature in the main toolbar which makes this entire process possible, the Select By Color tool. Rather than selecting contiguous regions of similar colors (like Photoshop's Magic Wand tool), Select by Color selects all values everywhere in the photo which have that color (and which occur within the tolerance range you specify). This would have taken 5 seconds, but the map image wasn't as crisp as I would have liked - there were still some gradients and blending, which might have crept in during the map's original conversion to JPG. You can see in the middle progress photo below some of the grey checkers seeping through the background, where there were no colors creted and transparent pixels started to crop up. Still, I figured this was as good as I was going to get at this point, and moved on.
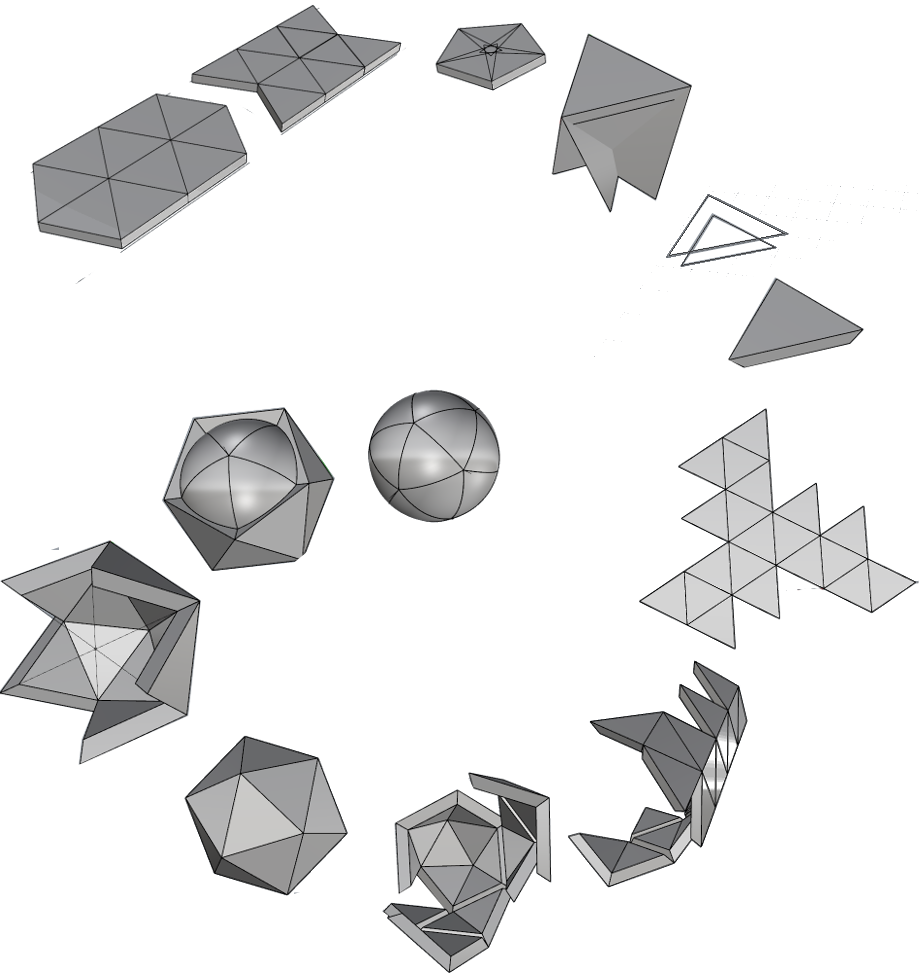
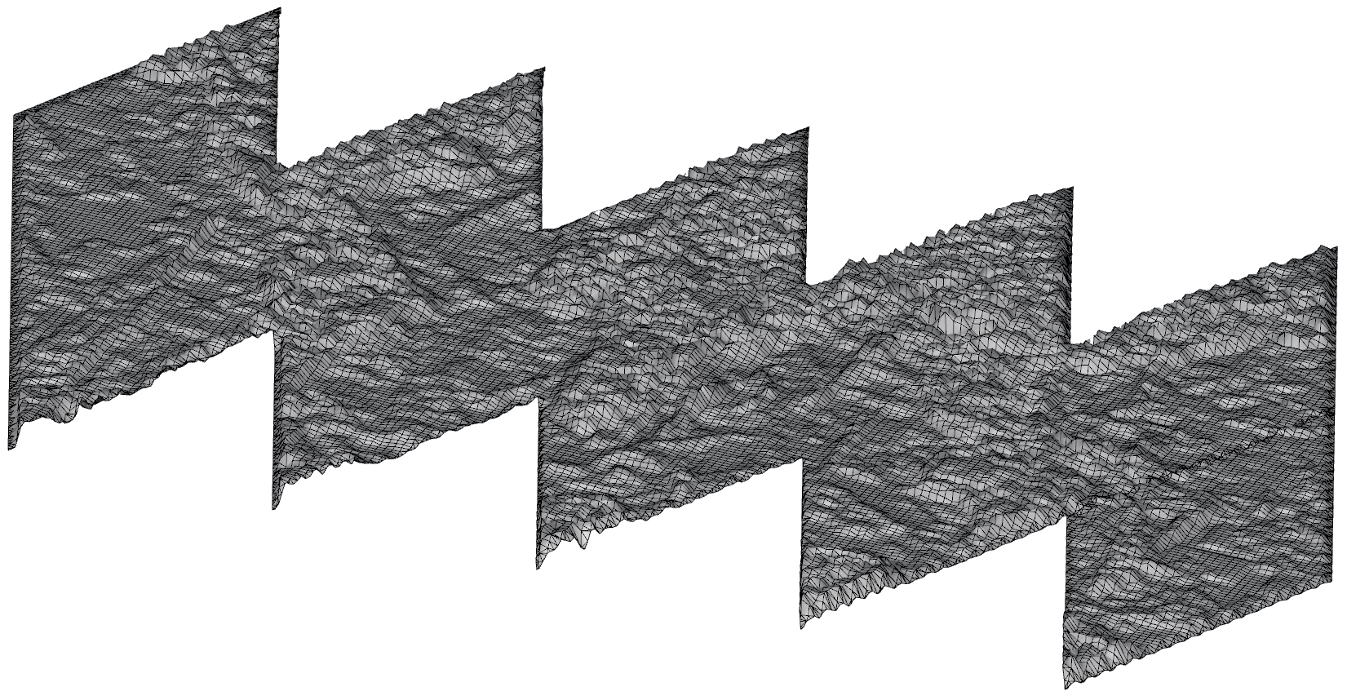
An entirely separate saga evolved around creating the model for a sphere. It needed to be made from 20 decomposable pieces, which could be milled from 2" thick foamboard and still have enough thickness to be structurally sound at the corners (where they would be thinest), and not create holes as the elevation varies over the already curing surface of the piece. I decided to pick a maximum range for the variance in terrain at 1 inch, which would probably mean the terrain would not be visible at this scale, but I first wanted to make a working model before I troubleshot the issue. I then began working over the pieces, trying to loft and trim and arrange them to get the right parameters.
As much as the diagram below might make this look like an easy proces, I logged about 18 hours in Rhino this week making the model and learning how to use the program in general. I mostly gained experience using the CPlane tools (construction plane) and getting used to Rhino's way of rotationally manipulating objects, which is very different from Sketchup (in Sketchup the 3-axis are fixed, but in Rhino the CPlane (x/y axis) can be rotated to any orientation or position. Desspite the long hours and pulling yet-another all-nighter, I was happy when I finally got the the solution!