1. Modeling
To begin, I needed to generate a model of the terrain I wanted to mill. I found a website which did this by generating an STL file from terrain data extracted from Google Maps: Terrain2STL
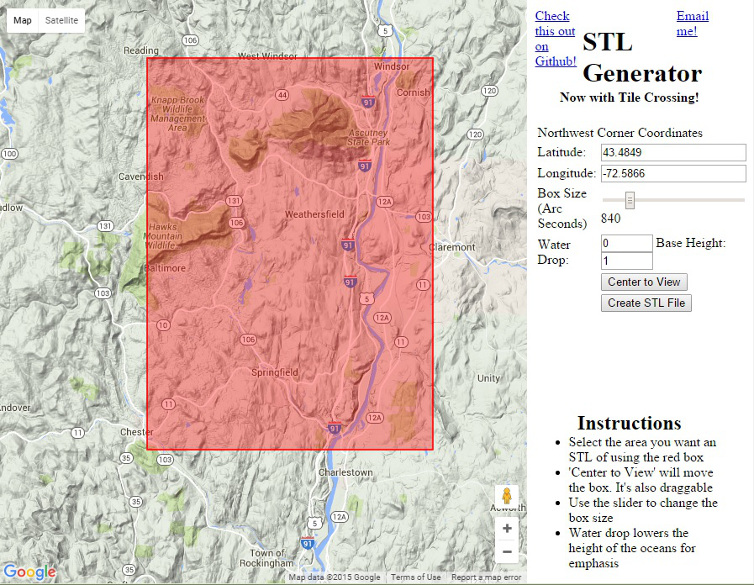
The app is easy to use, simply drag the red box and adjust the parameters to select an area, it will then be exported to STL. I do wish the app would allow the user change the aspect ratio of the box. As far as I can tell its relative proportions are fixed, and the user can only adjust the area. This function would have allowed me to pick a shape that maximized usable surface of the wax block we were given (which has a greater aspect ratio and would require a narrower box). No matter, I picked an area which included both Mt. Ascutney and my hometown of springfield, and exported the STL.
|
|
Terrain2STL - area that was selected for modeling.
|
|
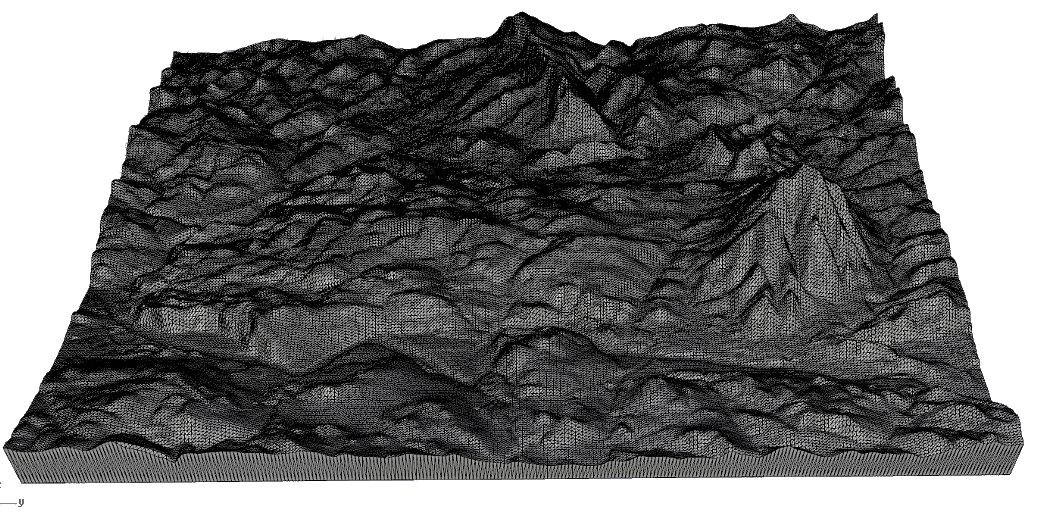
Opening the STL file in Rhino, I could tell immediately it would make a nice model. I suspect the terrain height is exagerated, because the slopes of Ascutney looked far more steep than I remembered (indicating the height was scaled up), but I decided to leave the scale as-is because it would make a more interesting model. If I chose to, I could have exagerated the height even more to take advantage of the 1.5" heigh block, by using the Scale1D function in Rhino.
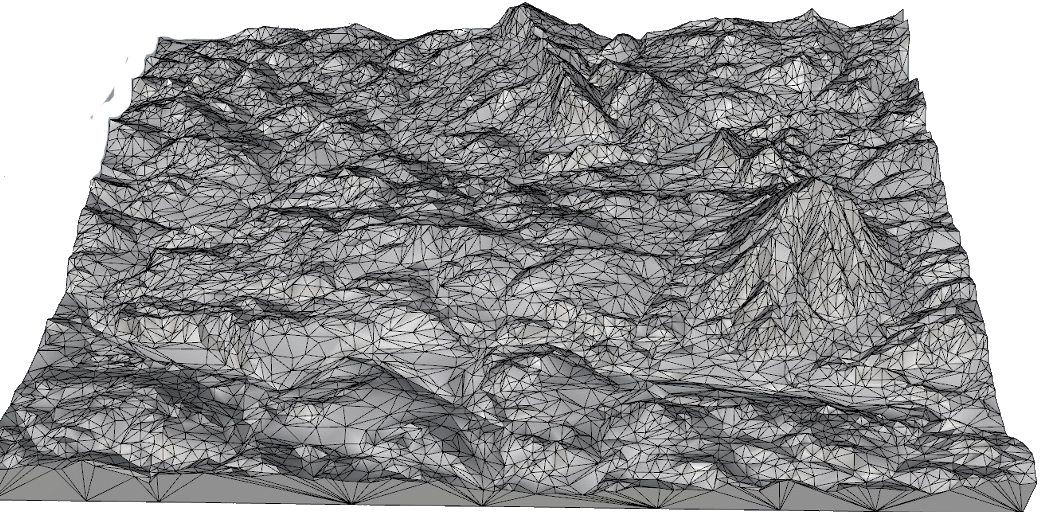
The number of polygons looked huge, and when I attempted to generate toolpaths in FabModules the website essentially froze. I used the ReduceMesh function, which revealed the mesh was composed of 150,000+ polygons. I reduced this by an order of magnitude to 15,000, and the resulting model was still more than satisfactory.
|
|
150,000 polygons.
|
|
|
|
15,000 polygons.
|
|
This process in the next paragraph ended up being entirely unnessary, due to a convenient function in the shopbot software, but I will provide details because I still ended up learning from it.
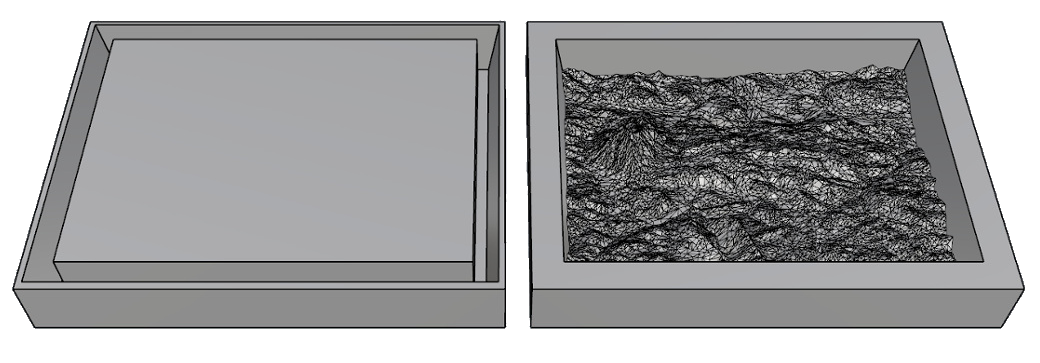
I realized I neede a trench around the terrain mesh so that the final model would have a base of some thickness (otherwise, the lowest elevation point would have a thickness of 0). I made a model of the wax block dimensions of 12"x6"x.15" (I got permission to use a larger block to take advantage of the more favorable aspect ratio, provided I would chop away the unused portion of wax block to be used later). I scaled the terrain mesh to fit within the size of the wax by using the Scale function. I scaled it smaller than necessary so there would be room to dig a trench around it. The trench needed to be relatively thick, since it would eventually become the walls of the oomoo negative and those walls needed to be sturdy enough to contain the liquid hydrostone without flexing much. I made the walls of the trench tapered at about 10 degrees outwards, to allow room for the endmill to dig all the way into the trench without colliding with the wall. This whole process ended up being fairly tedious, but eventually I achieved the proper shaped box and trench. I moved the mesh into the center, and used the TrimMesh> function to remove the excess bits of the mesh going through the tapered walls. I was unable to get the mesh to join with the box using various boolean commands, and so I ended up deciding I needed cut two models in the same peice of wax. The first pass would mill the terrain and the inner tapered wall, and the next pass would dig the trench and dig the trench and the outer wall (with a block in the middle to instruct the ShopBot to totally avoid the milled terrain). I was keeping my fingers crossed that the ShopBot would not mind the fact that everything was not single joined object, since the box frame and the mesh were touching at every point.
|
|
(Right) second milling process (left) first milling process.
|
|
In the end this all turned out to be unnessary because the ShopBot 3D toolpath software allows you to put a trench around your model simply by inputting specifications for width and depth. So I ditched my model and simply exported the original 15,000 polygon mesh as an STL into the software (after scaling the model to the correct dimensions to fit on the wax block). This means the process of going from an STL terrain file to the milling machine can take literally a few minutes (you just need to use ReduceMesh in Rhino and scale it), making the turnaround on generating different terrain molds quite quick. With this, I was ready to finally mill.
Go to next section: 2. Milling