
Assignment
The assignment this week was to learn how to use the CNC machine. After the training, it seemed like the CNC was one of the harder machines to get used to and time was limited, so I decided to keep things simple and use the opportunity to test press fit joints with wood.
Acquiring pretty wood
I needed a stool at home, so thought I’d give myself the challenge of creating a stool that could easily be press-fit together. Stefania, Ariel and I went to Home Depot to get some nicer wood. I ended up buying some 1/2 inch birch plywood.


Modeling
I then used Fusion 360 to create a 3D model of my stool. I tested the joints by creating an assembly to make sure everything would fit. I also used a parameter for the slot width so I could change it later on as needed. I tested a few different joint ideas and ultimately landed on this one since it had a minimum number of pieces and seemed simple.

Testing slot widths
I started off the machining process by cutting a couple slots with different widths. The exact thickness of the wood was 12.7mm. I tried 12.2mm and 12.5mm slots. Ultimately a width of 12.2mm seemed to work. In order to make sure the endmill could get through the inner corners, I used a T-bone filet.

Making the stool
 Out of all the different machines we have worked with, this was definitely the hardest and scariest for me! I think a large part of this was all the steps that had to be remembered. Luckily Tom was around for a while and could help guide us through the steps. Stefania also helped me debug and go through the process.
One of the important things I learned was making sure to filet the inside corners. I had a bunch of these in each slot so I made sure to make each a T-bone filet. The other tricky part was making sure to place the origin appropriately to ensure all three pieces could and the CNC was oriented correctly.
Finally, I got all my pieces cut and ready to go. I slotted the two leg pieces together and they fit perfectly. I ended up hammering the top part in just to get it in tightly.
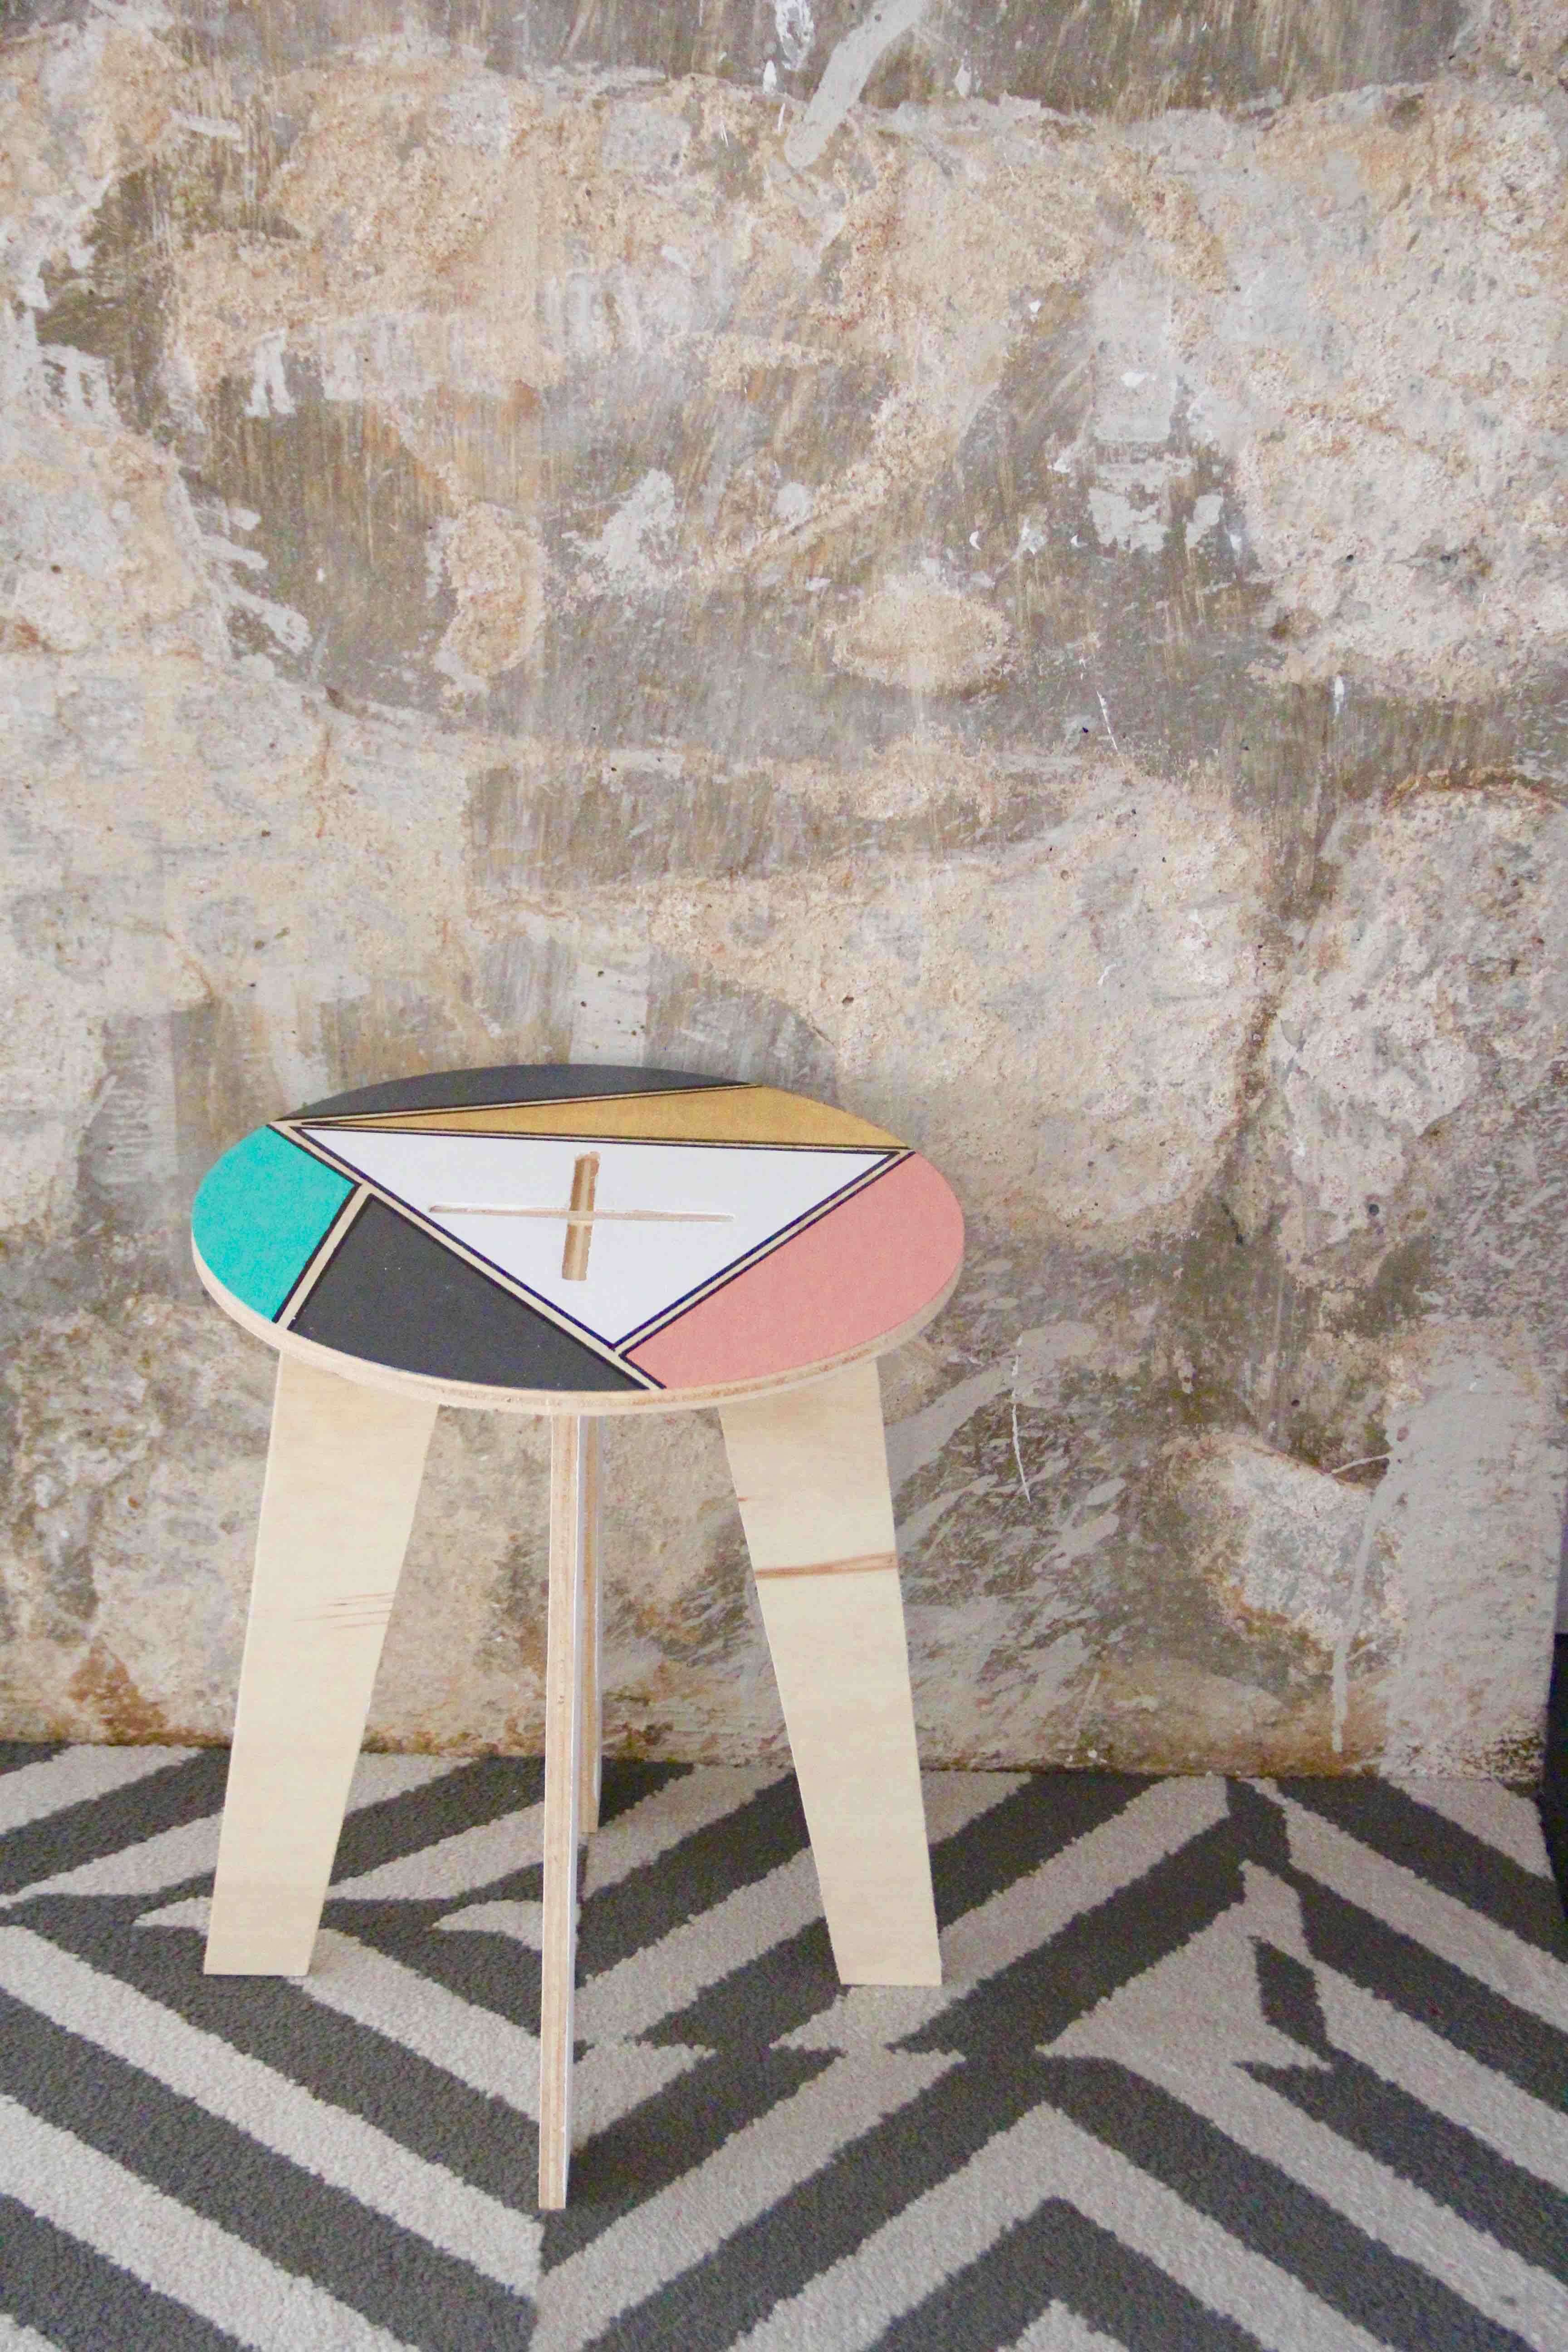
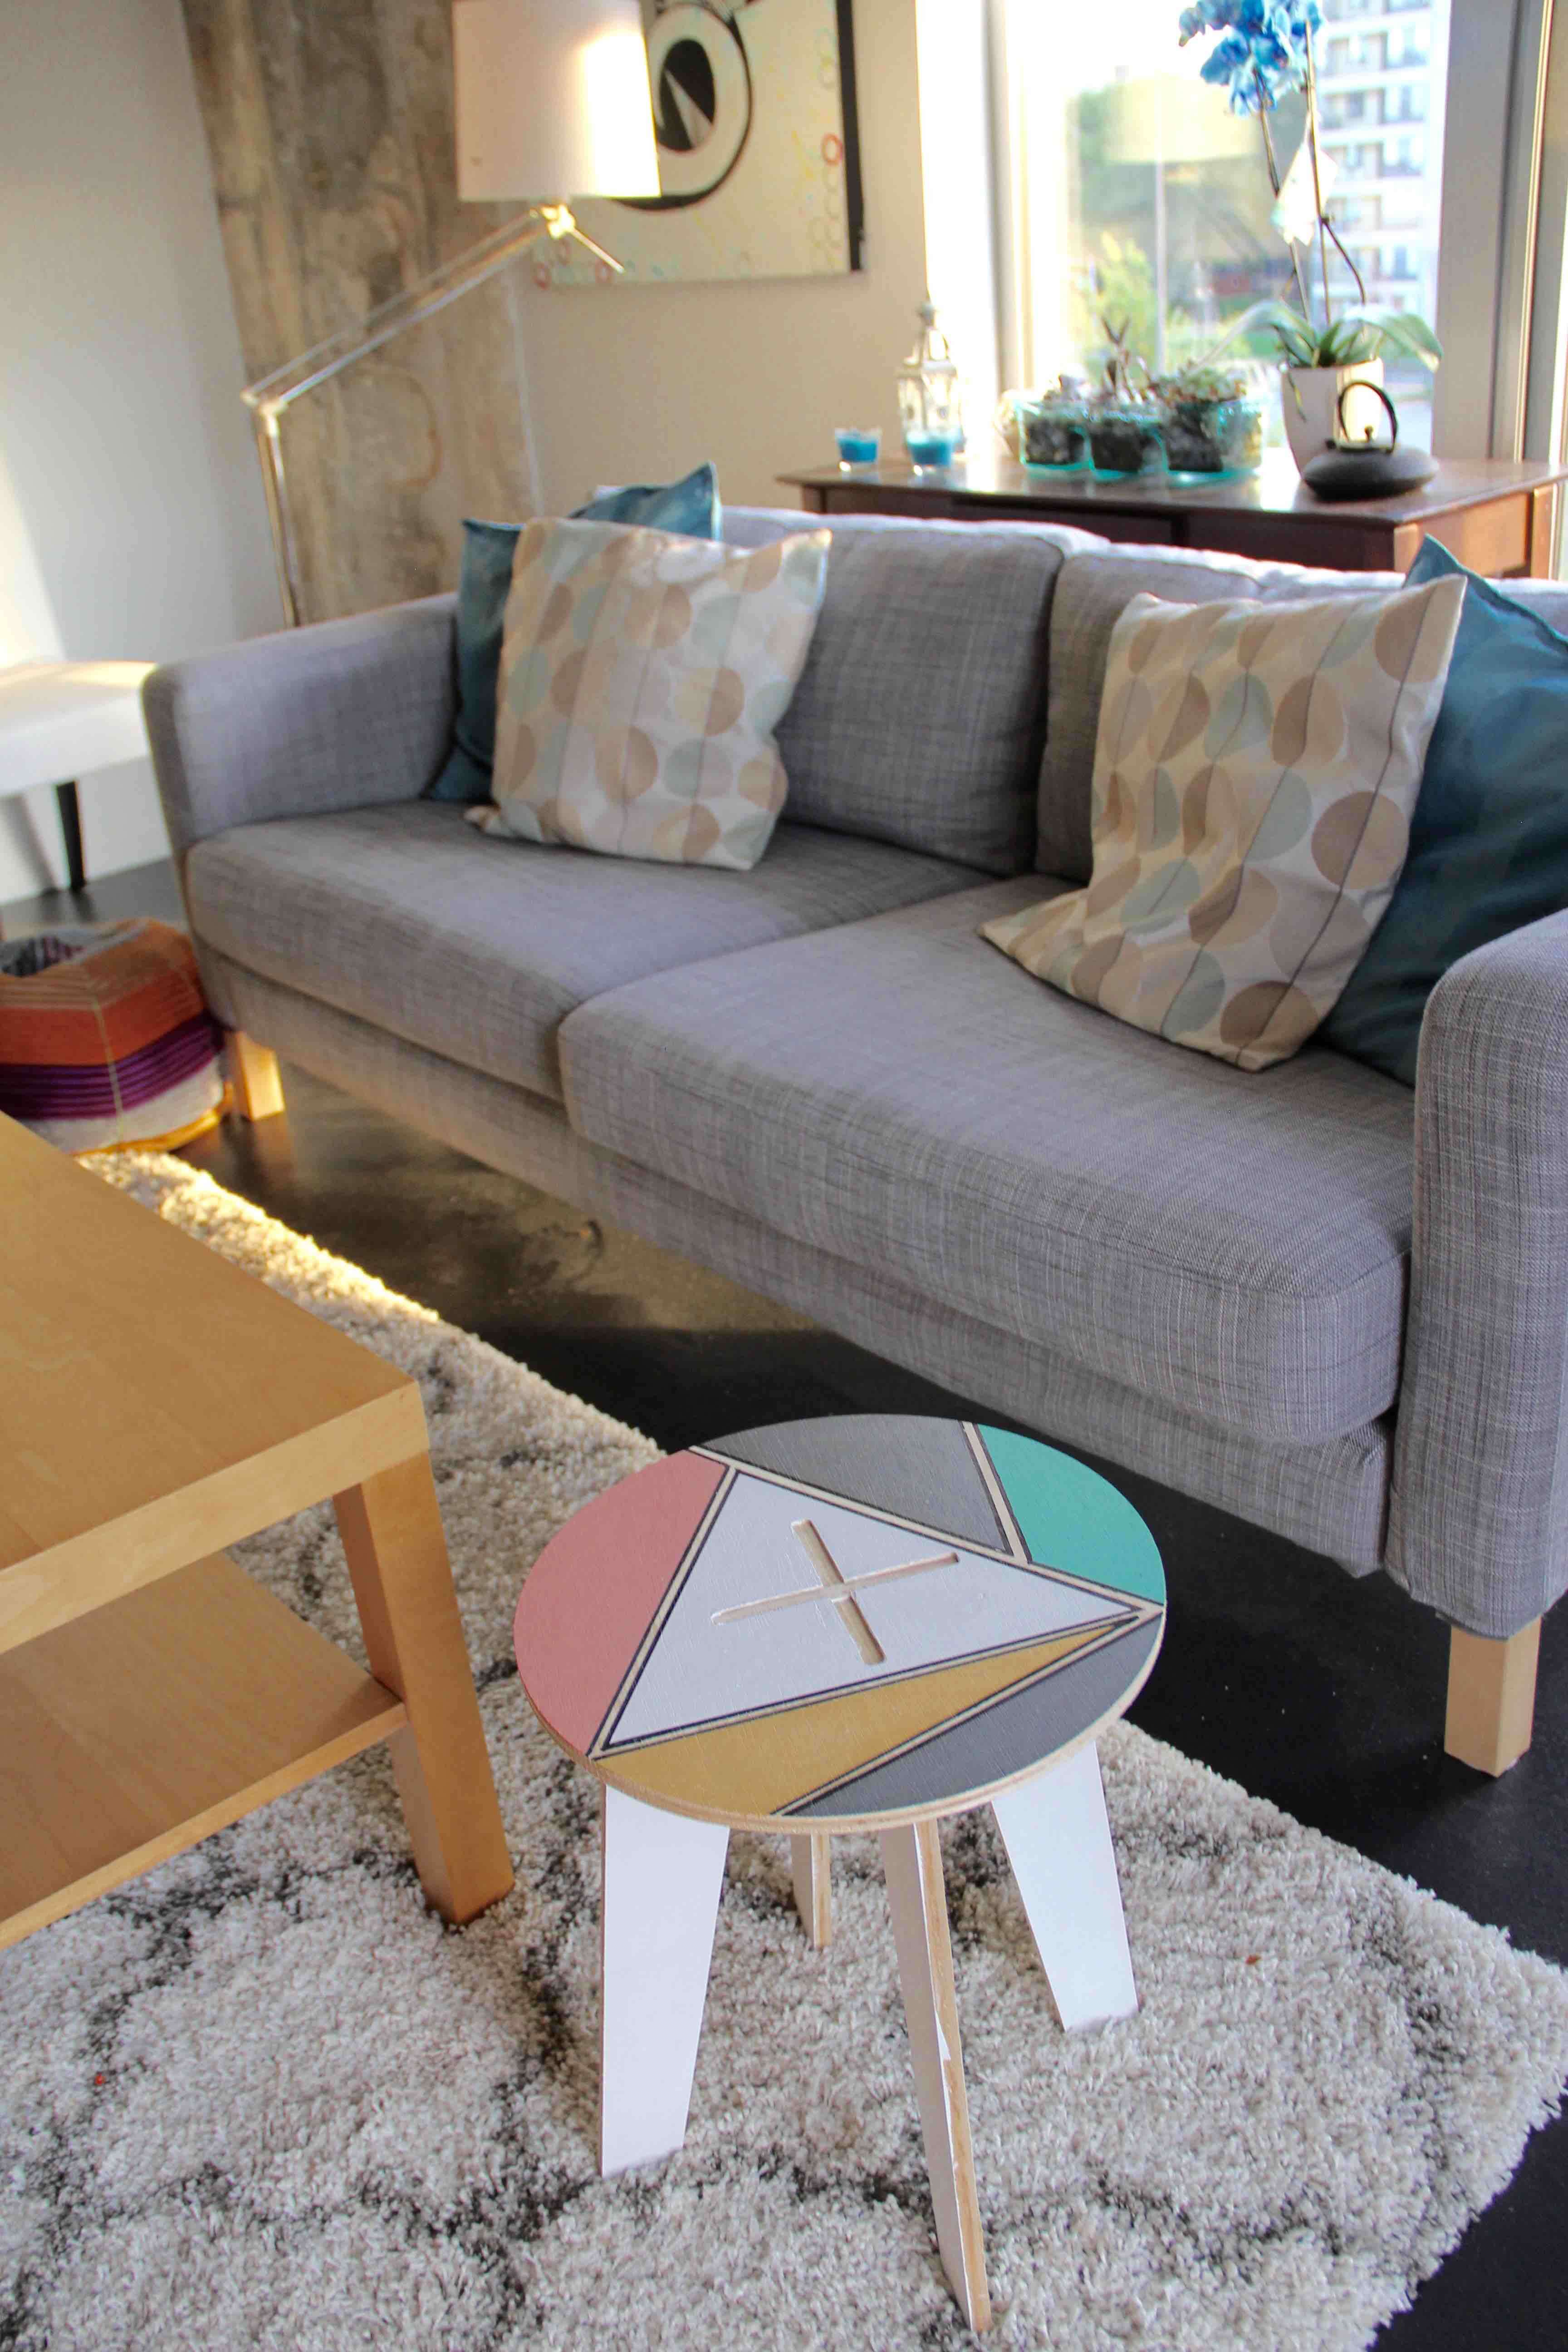
Finished stool
I originally had ambitious plans to cut a laser cut pattern for the top of the stool but I decided to settle on painting in the interest of time. I used matte finish paints and painted the top and alternating legs. The stool can actually support a fair amount of weight — my roommate and I both tried sitting on it and it did not collapse!
finished stool
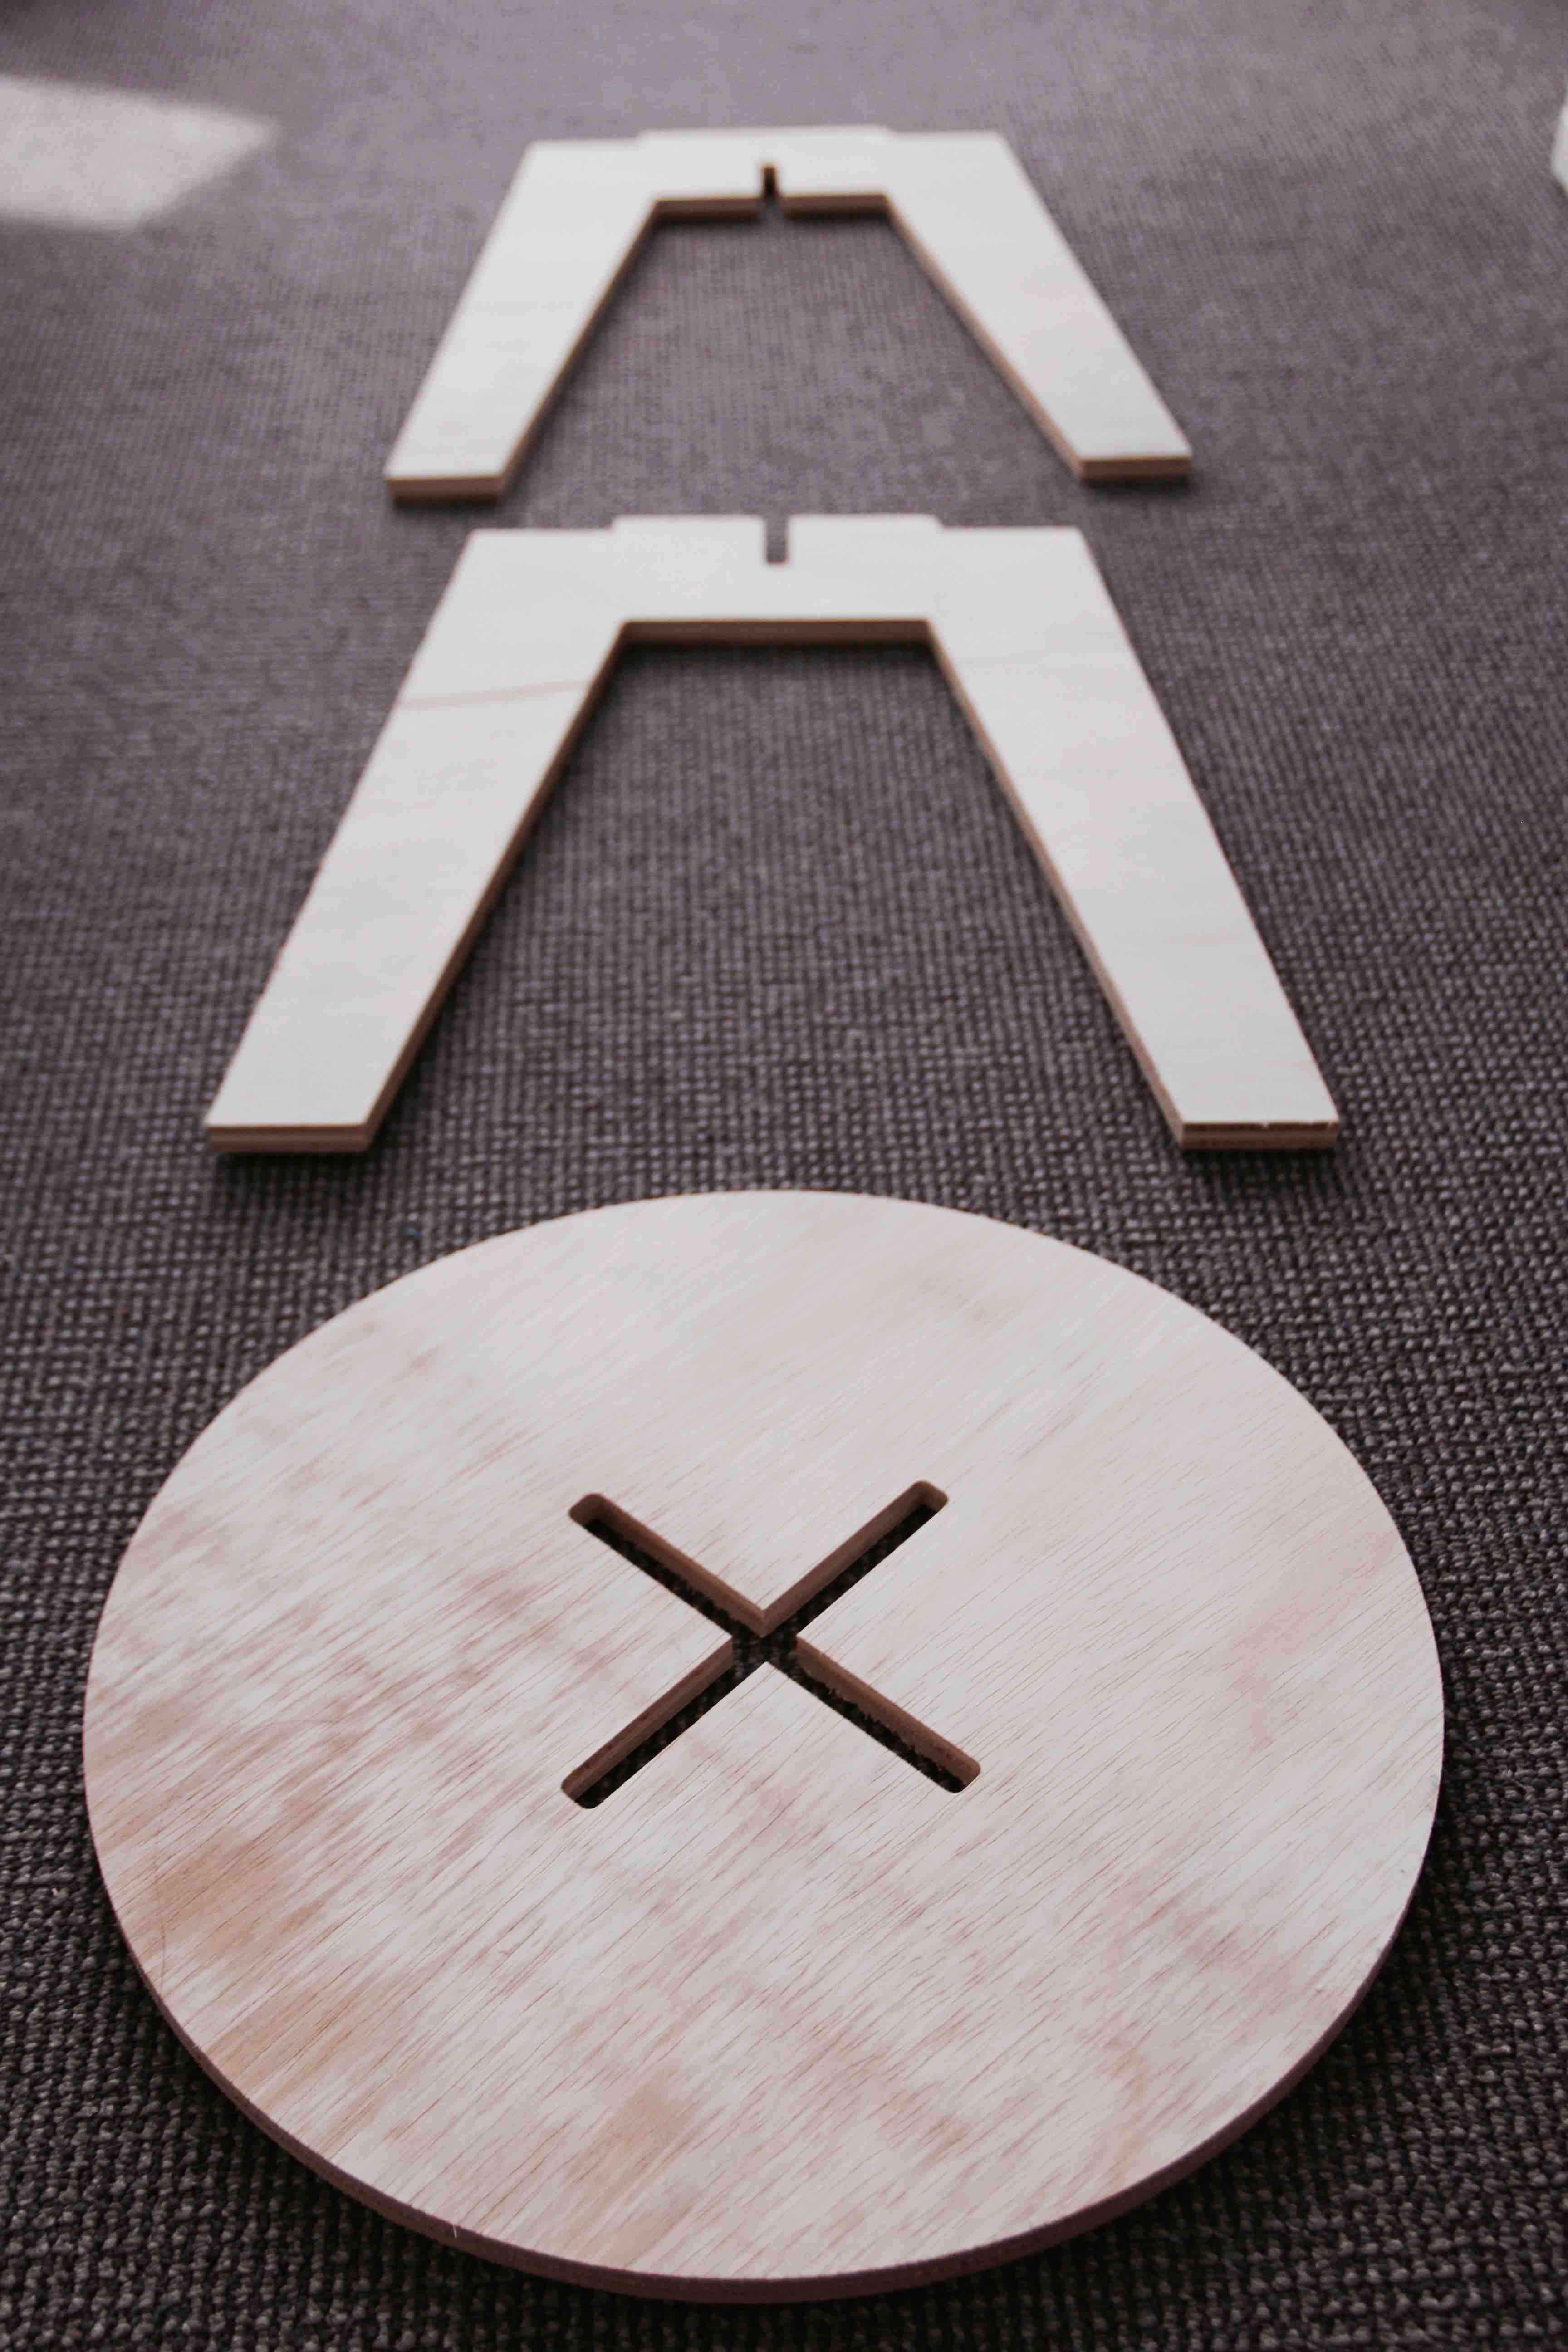
cut pieces
finished stool