Week thirteen: networking and communications
This week I made a Barduino and a Bluegiga BLE112 breakout board. I followed Luciano's guide to build the Barduino and Maria's guide to making a breakout board. I ran into a lot of problems:
- I had to use a 20MHz crystal on the Barduino instead of the specified 16 MHz
- I plugged in the Barduino and it started smoking - this means there was a solder bridge on the microcontroller
- I tried to program an older board and connect it to the BLE112, and FabISP stopped working
So this week was kind of a bust.
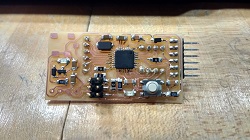 Barduino
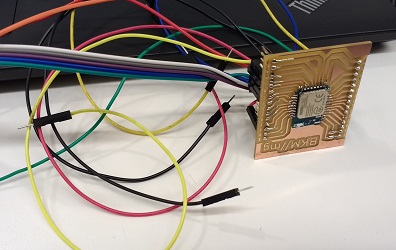
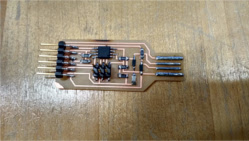 FTDI Board
I tried to make the Fab FTDI so that I could have my own FTDI board and Fab ISP. At first it did not work. I received an error message whenever I tried to set the efuse to 0xFF. For whatever reason, when I tried it again later it worked and set my FTDI to ttyACM0. Awesome sauce! Maybe it was a soldering issue that just needed time to cool/sort itself out?
But then...
I came back in the next week and used the HM-10 as well as a Fabduino to finish the assignment. I ended up making the microcontroller smoke again (dang solder bridges!) but ended up getting the Fabduino to work. Apparently this is a difficult thing to do because several people had problems with it later in the week. Here are some hacks I did:
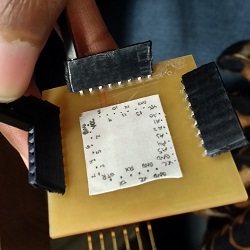
- Milling: The website reports that it is not compatible with the current mods and it is correct. I had to decrease the tool size in Neil's mods to make the Modela solder all of the traces correctly. They are super small traces! Be careful about checking them before you mill. Despite my best efforts, I still lost a trace that went between the microcontrller and one of the GPIO pins.
- Soldering: The ATMega 168 has super tiny pins. So I used the "make a mess and clean it up" method to get it on. This is likely how I ended up with the solder bridge, but it definitely worked. I checked under a microscope to make sure that everything was soldered down well.
- Burning Bootloader: I had trouble burning the bootloader (Ubuntu 14.04, Arduino 1.6.12) because Arduino updated the way that boards.txt files are written. So the one on the main Fabduino page did not work for me, neither did the updated one provided by Massimo Menichinelli. I received an error message saying "no boards were found in fabduino folder". So I did an Internet search and stumbled upon the MiniCore library. It has an awesome readme file and worked like a charm. (Just how I like it).
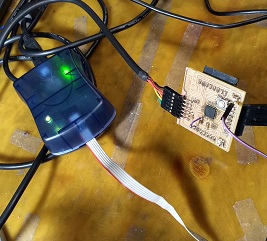
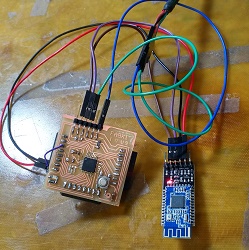
Speaking of good documentation, Sunfounder did an amazing job with the HM-10 software. I had the board up and running in moments. One of the HM-10 boards I used was not working so remember that when you connect it to VCC and GND the red LED should start blinking. I used the nRF Connect app recommended on the class website and I was able to run all of the demos on my Fabduino. The second example was an echo where you could send message back and forth between the Bluetooth device and your phone/computer or whatever you're connecting it to.
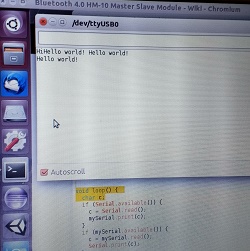
The app was pretty weird looking, so I decided to write my own terminal program for connecting to the HM-10 on my computer. I wrote it in Python so that later I can use VPython or Tkinter or something to write an interface for controlling my robot. I found Bluepy which is a HORRIBLY documented API for connecting to bluetooth devices from Python. I wrote a program for connecting to the device and constantly reading from it.
This is how you set up what is basically a listener for information from the bluetooth device. Delegate is like a service dedicated to waiting for data from the bluetooth controller. So later in the code you can use waitForNotifications with a timeout to check for a new notification.
class MyDelegate(btle.DefaultDelegate):
def __init__(self, params=None):
btle.DefaultDelegate.__init__(self)
def handleNotification(self, cHandle, data):
print data
...
while True:
if conn.waitForNotifications(1.0):
# handleNotification() was called
continue
The address is the MAC address of the bluetooth device and the UUID is the address of the serial on the bluetooth module. I got both of these values from the nRF Connect app. Running scanner.py from bluepy also gives a lot of information about connected devices.
address = "60:64:05:d1:43:ed"
addrType = "public"
uuid = "0000ffe0-0000-1000-8000-00805f9b34fb"
conn = btle.Peripheral(address, addrType)
service = conn.getServiceByUUID(uuid)
...
conn.disconnect()
Reading and writing to the bluetooth device works as follows. I really don't like the read much since waitForNotifications is available. It's a better way to get all of the data without worrying about empty messages (if you call read and there's nothing to read it returns "0x00" which is pretty annoying).
char.write("Ready...")
received = char.read();