Week six: Computer-controlled machining
When it grew up...
Seriously, just make a stool...
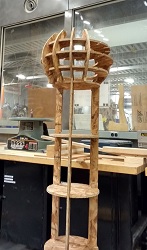
This week our assignment was to make something big using a CNC milling machine and very large pieces of plywood.
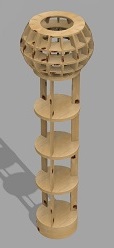
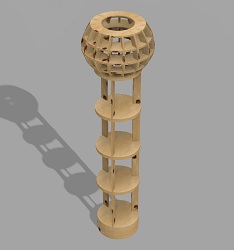
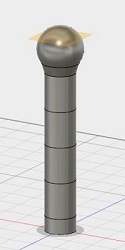
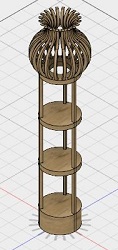
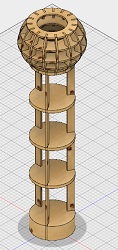
I designed my lamp in Fusion 360. Originally, my idea was to make a solid object and then use 123D Make to create an interlocking layer version of it. However, it turned out to be easier to use parametric design to make everything by hand.
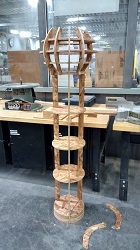
It is important to remember to use dog bones on the joints so that the tool can cut them out properly. I did not do this and it came out...okay. I also used .45 inch cuts on .4 inch wood. I think making the joints a little smaller would have resulted in a a better fit and less wood glue.
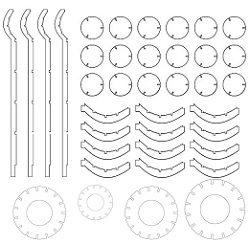
Setting up the toolpath
- Within VCarve, input the size of the piece you are working with, 4' by 8' in my case, and press 'OK'.
- Import your design as vector files using File > Import > .DXF
- Align your vector files on the bed as you would like them to appear.
- In the toolpath tab (right side of window), set the Z to go from 0.0 inch to 0.5 inch deeper than the thickness of your material.
- Check the tool setting, you should cut with a pass depth less than the diameter of your tool.
- Set stepover to be 95% the diameter of the tool (so 0.2 in for a 1/4 inch endmill)
- The Feed/plunge rate should be 120 in / minute.
- Back in the Toolpath menu, set the Clear Path to be Offset and Cut Direction to be Conventional.
- Press Calculate to show the Toolpath.
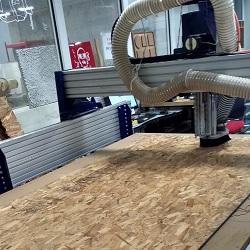
Setting up the machine
- Turn on the machine.
- Hit the blue Reset button on the panel next to the computer. If it is pressed, release the Emergency stop button by twisting it.
- If you need to change the endmill then disengage the shopbot and retrieve the wrenches. Then:
- Unscrew the collar holder from the spindle.
- Pull the collar out of the collar holder.
- Place the endmill into the collar such that the shank (no flutes) is not visible.
- Place the collar into the holder and tighten it by hand back into the spindle.
- Place the wrench on the spindle and the collar wrench on the collar holder and rotate in opposite directions to tighten.
- Take the wrenches and key and rengage the ShopBot
- Adjust the RPM of the Shopbot (10,000 is good).
- Drill clearance holes through your material for when you secure it.
- Move the tool out of the way, and place your material on the bed of the Shopbot.
- Drill screws into the material to keep it fixed to the sacrificial layer.
- In the Shopbot driver, zero the x and y plane of the tool by moving it half on/half off the material and hiting the respective 'Zero X/Y' button.
- Place the alligator plate underneath the tool.
- Go to Cut > CZ > zero z-axis to plate to zero the z-axis.
- Go to File > Part File Load to import your toolpath.
- Put on the dust collection brush.
- Turn on the dust collector.
- Turn on the spindle using the Green button on the panel.
- Get ready to hit the Emergency Stop button, and then start the Shopbot.
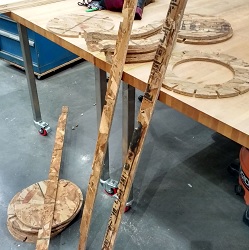
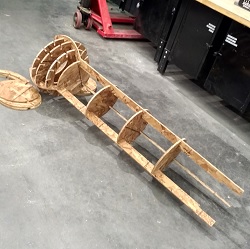
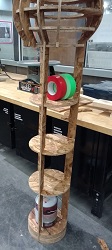
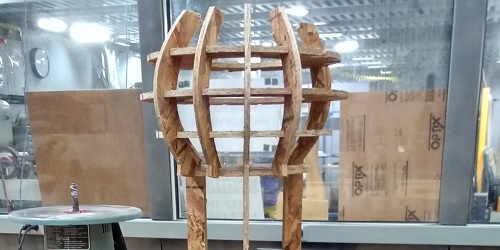
So, OSB is not a nice wood. I tried to be optimistic (and cheap), but it really does not work without a lot of filing AND some paint. Even after sanding the joints it still took me three hours to assemble. Nothing is free in the world of press-fit furniture. I probably will not use these shelves, but it looks pretty cool.