Week 8: Molding and Casting
Molding
Since the Interesting Pear from Week 4 was such a hit with my friends who'd found the original pear, I decided to make a mold of it so they can fill their lives with pear-shaped things. This was also an interesting exploration of what can easily be milled vs 3D printed. To start with, Tom recommended that we all mill out one-piece molds to get the hang of the process. Since the pear is rounded, I had to figure out which part of the model would work best as a mold-- that is, which half-or-so of the fruit didn't have any undercuts that the 3-axis mill wouldn't be able to handle.
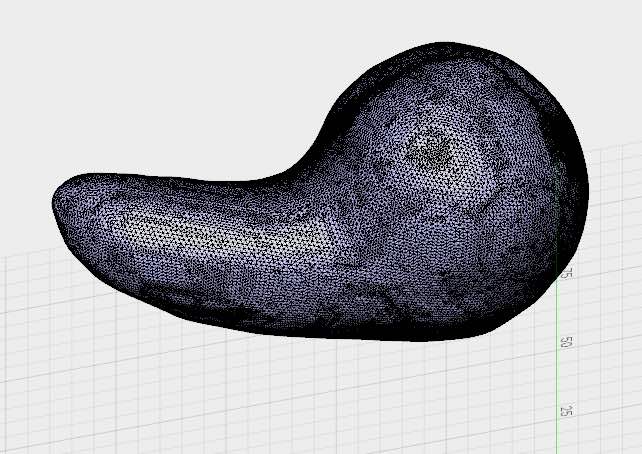
Here's a reminder of the original shape (the age restriction is an inside joke-- it's honestly just an unadulterated 3D scan of an actual fruit):
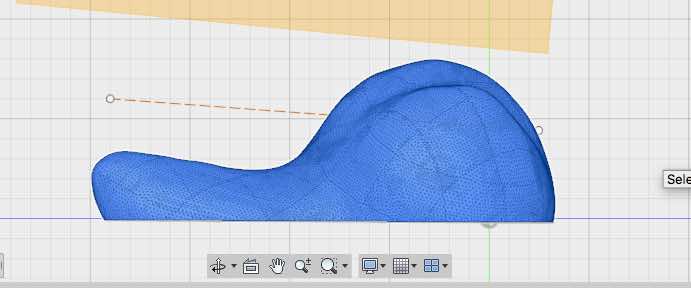
After some extensive rotation and consideration, I settled on the side view of the pear.
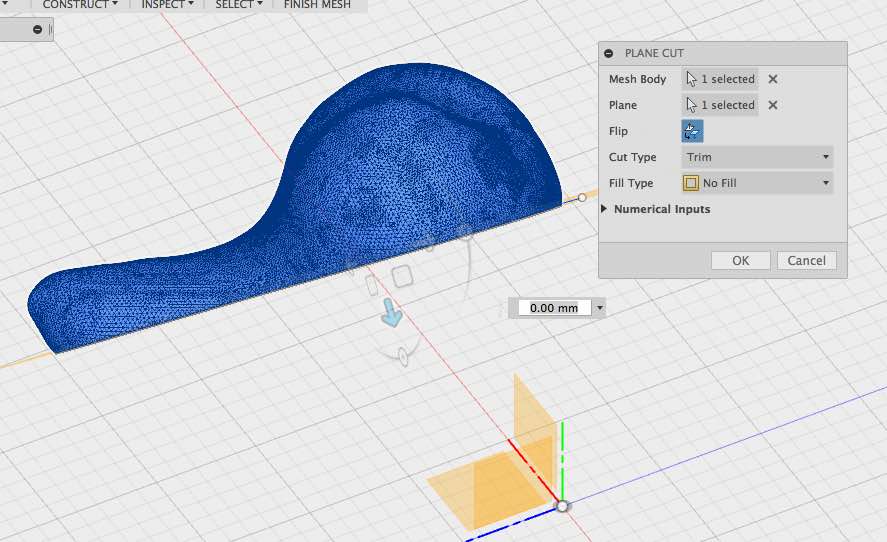
In Fusion 360, I drew a line across where I wanted to slice the pear, turned that line into a plane, and sliced through the pear.
When I first loaded my half-pear into the Shopbot 3D software, it was sideways! I had to go back to Fusion and rotate the pear along both the X and Y axes so it would lie flat in the mold.
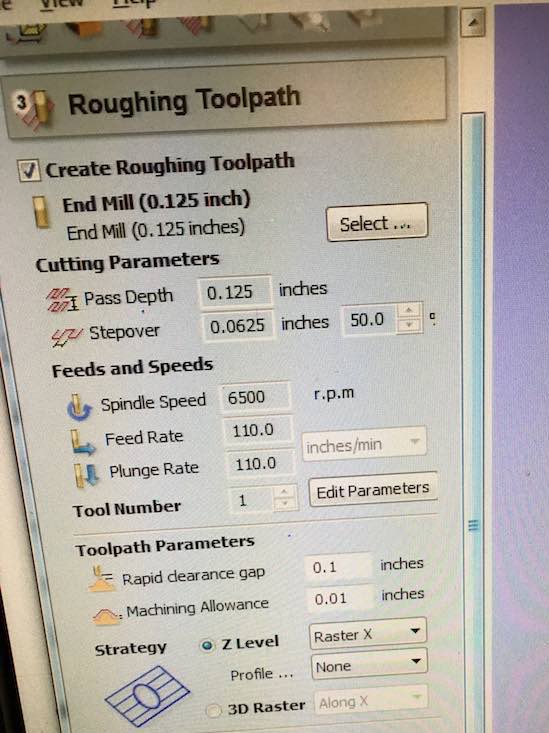
I followed Tom's recommended settings to create the roughing toolpaths, with some slight initial confusion due to the fact that the default Feed and Plunge rates were set to units of inches/second rather than inches/minute. Once Tom sorted that out, the estimate milling time for the full mold went from a totally unreasonable 2 minutes to 15 minutes for both toolpaths.
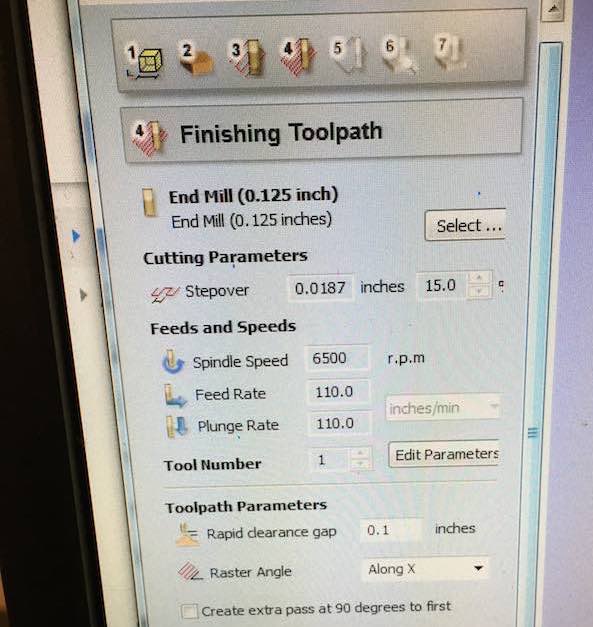
I mostly followed Tom's settings for the finishing toolpath (shown here), but decided to decrease the stepover from 15% of the tool to 10% to get a slightly better resolution.
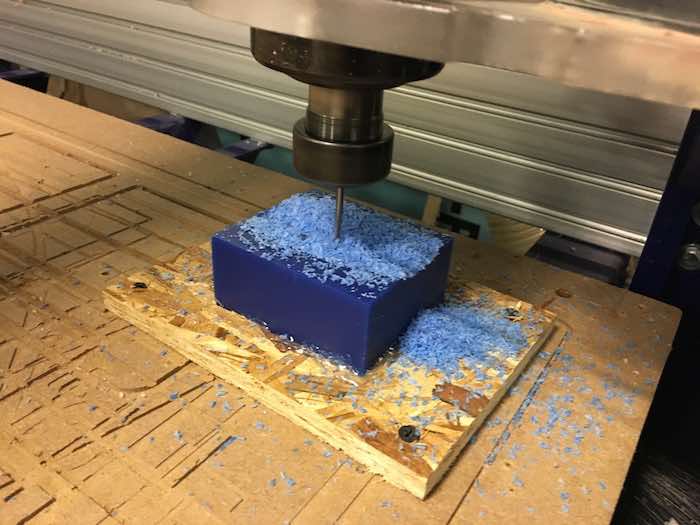
I loaded up the Shopbot software, zeroed my X, Y, and Z axes, and got the job started... but the Shopbot started milling to the side of my machinable wax! Turned out that I'd zeroed my X and Y on the wrong corner of my wax block, since I was on the big Shopbot and the axes are non-intuitive. Tom pointed this out, and also had helpfully labelled the machine-- which of course I forgot about until it was too late. At least the Shopbot just milled some extra air rather than destroying my machining wax. I re-zeroed and tried again with my roughing toolpath...

...and my half-pear turned out exactly as anticipated!
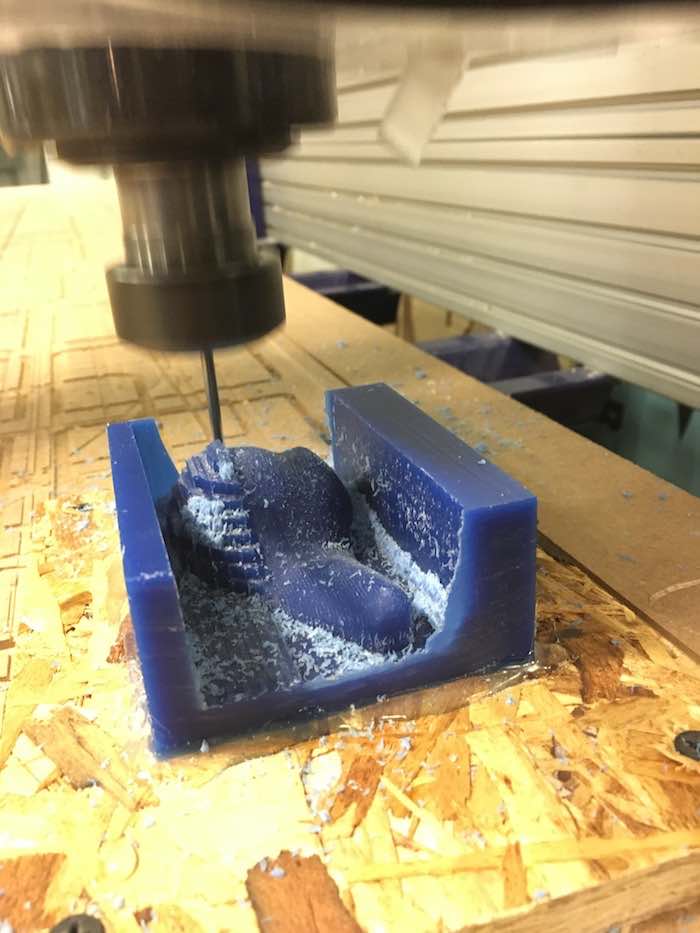
I then loaded up my finishing toolpath and started milling that, vacuuming frequently.
After some hard brushing and jamming a metal spatula into the crevices to get out the debris, my final mold came out with lovely resolution. Looks like I chose a good angle, since it's hard to tell where the mill was unable to make undercuts. (But if you look really closely, you can find a straight drop under the nose of the pear.) I didn't quite leave enough margins on the sides for proper walls, so Tom recommended taping cardboard to the sides before pouring in the casting material.
Casting
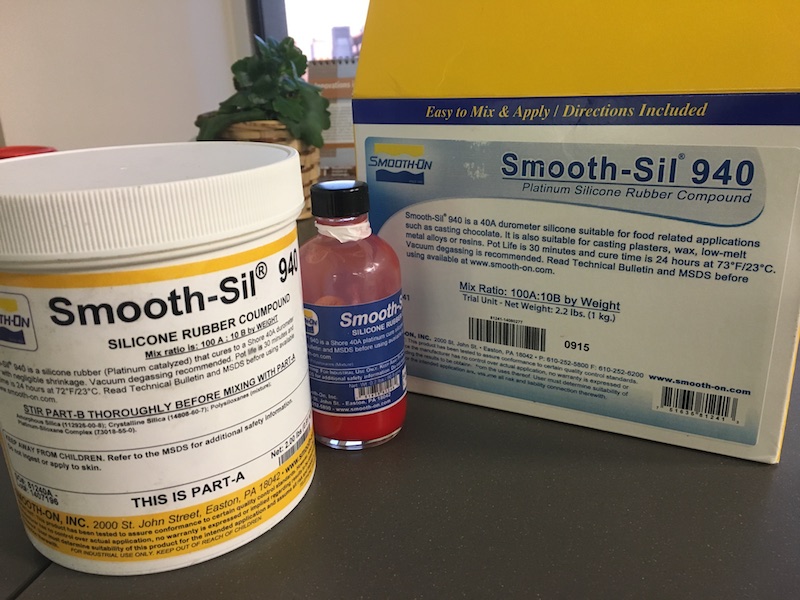
For casting, I borrowed some Smooth-On Smooth-Sil 940 from our Lab for Chocolate Science, which is a food-safe silicone molding material that takes a full day to cure. Unfortunately my hands were too sticky to take photos during the casting process, but it was fairly straightforward-- we followed the directions and mixed these two substances on a scale with a 10:100 ratio by mass. Safinah and Pinar joined me, and we all made negative molds which we would later use to cast chocolate positives. The large container was full of a thick putty that required a lot of stirring to integrate in with the red liquid. It was helpful to mix it in a clear plastic cup so we could see where the unmixed bits were on the bottom. After a bit of a struggle, we got a uniformly strawberry yoghurt-colored putty.
We stuck this mixture into the vacuum chamber to get out the bubbles, and turned on and off the vacuum at least 6-7 times; there were tons of bubbles and it was a bit worrying. Finally we gave up on sucking out all the air, since our 30 minutes of working time was running out and we worried that the silicone material was hardening. I then scooped the mixed silicone (which was now about the thickness as Greek yoghurt) into my mold, and de-gassed the poured mold in the vacuum chamber for another 5-6 iterations. The bubbles kept coming, threatening to overflow the mold. It turned out these bubbles were normal, though-- here's our fearless TA Grace demonstrating the process:
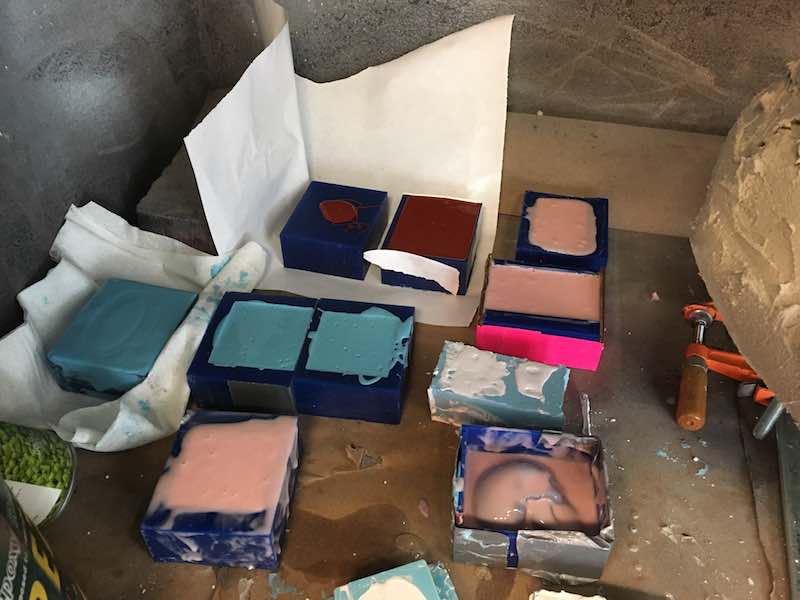
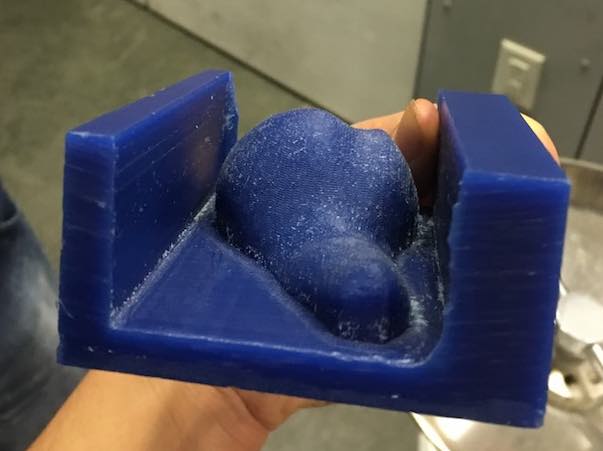
I bounced my mold on the table a few times to pop the bubbles on the surface, and then stuck my mold under the fume-hood for a day with all the other drying molds. You can identify the pear mold by its snazzy hot pink gaffer tape.
A day later, Safinah, Pinar and I came back into the lab to take out our negative molds. Mine was a bit tricky to peel out of the wax mold, so the cardboard really came in handy-- I just untaped one side of cardboard and then used that side to pull out the rest of the mold. It appearently worked!
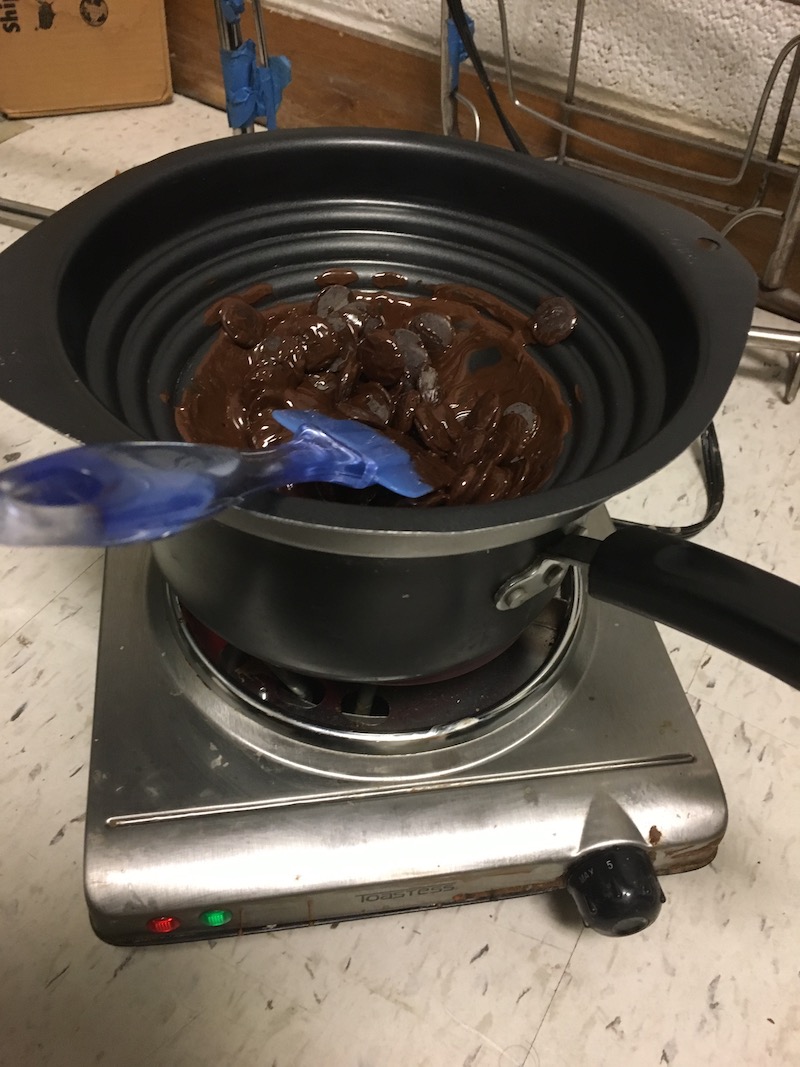
Safinah and I headed across campus to the Lab for Chocolate Science (which is really just an office in the Student Center) to get some double boilers for melting chocolate to cast. First we washed our molds well, then we carefully melted and tempered the chocolate. I melted a cup of dark chocolate in this double-boiler to ensure that the temperature never got hotter than 120˚F-- otherwise it burns and won't re-soldify into the right crystalline structure. Tempering is very important if you want chocolate to stay in the shape that it's cast, and if you want it to melt in your mouth but not in your hand. Epicurious has a helpful explanation of chocolate tempering, which in my experience is more complicated than necessary. After melting the chocolate thoroughly, we cooled it down to about 82˚F by placing the double boiler in a cold water bath and stirring constantly. We used a candy thermometer to watch the temperature. Then we heated the chocolate back up to 91˚F by placing it back on the burner, and finally all the bad crystalline structures were melted and we were ready to pour.
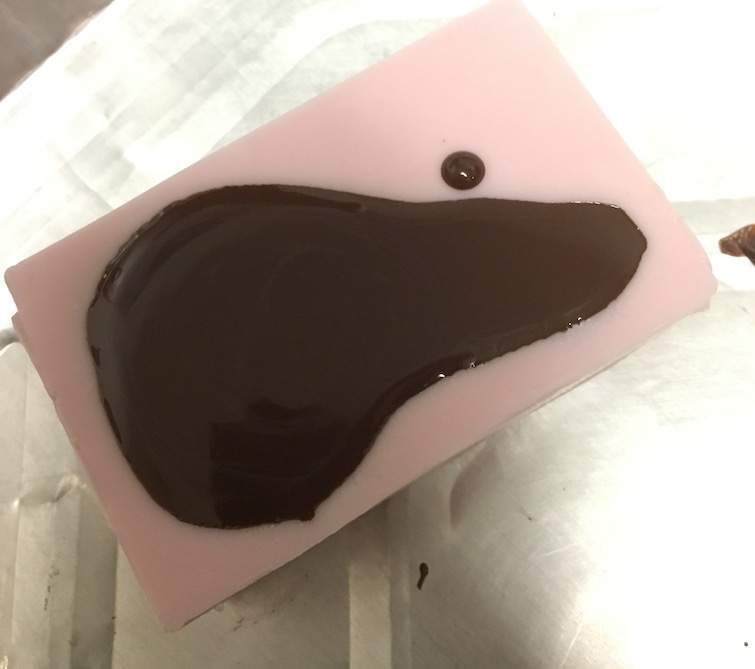
Pouring the chocolate was much easier than pouring the silicone! I then banged my mold on the ground a few times to eliminate any stray bubbles. Since it was Halloween, we painted the skull molds with orange-colored cocoa butter before pouring in the chocolate.
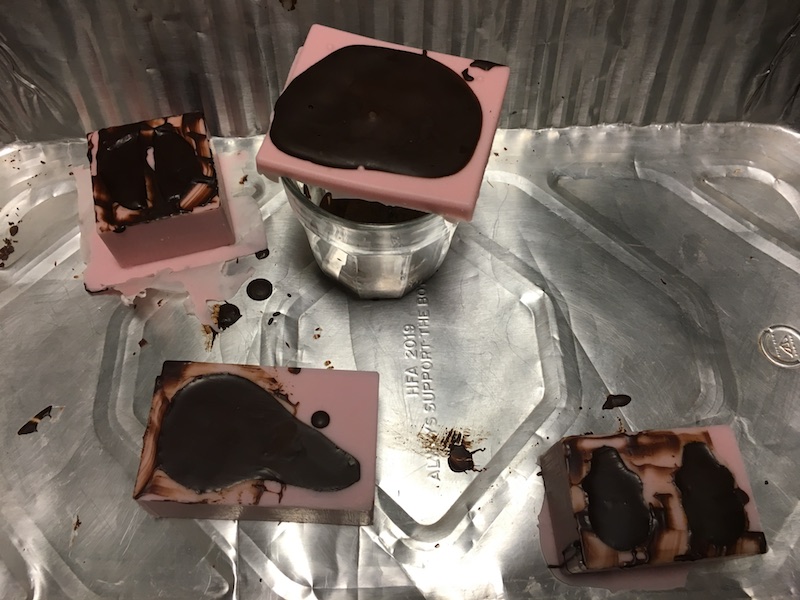
Just to be on the safe side, I put some bits of well-tempered chocolate chips on the top as seed crystals to ensure that the molten chocolate knew which crystalline form to take. This wasn't strictly necessary, since if my tempering worked then the chocolate should settle into the right crystal structure on its own. We could tell that the temper was good after about 10 minutes, as the chocolate started losing its glossiness and hardening rather than staying liquid.
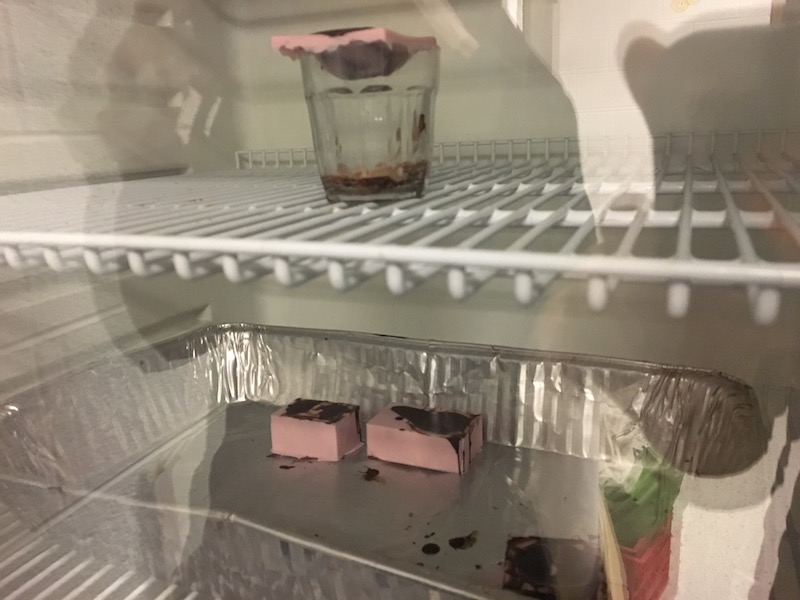
Since we were impatient to get home and document this process, we stuck our molds in the fridge to hasten the hardening process. This isn't actually the best for a proper chocolate temper, but it certainly sped things up.
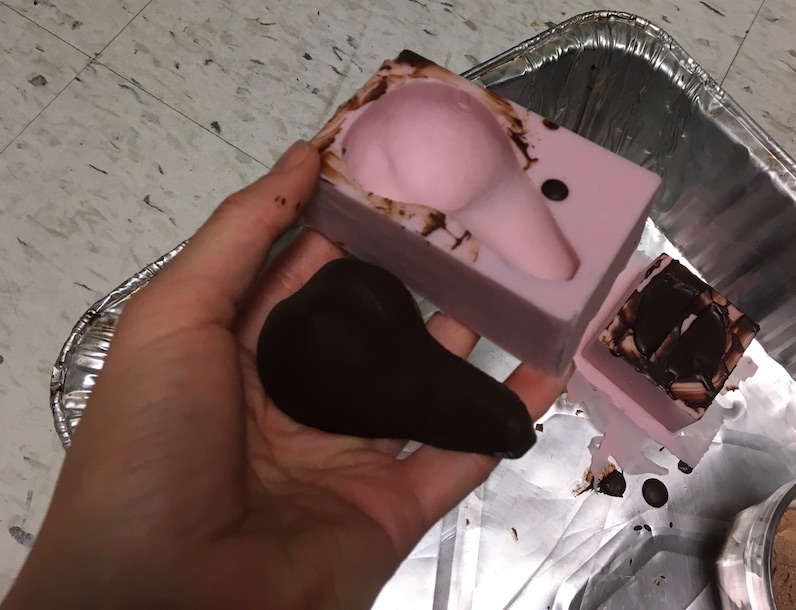
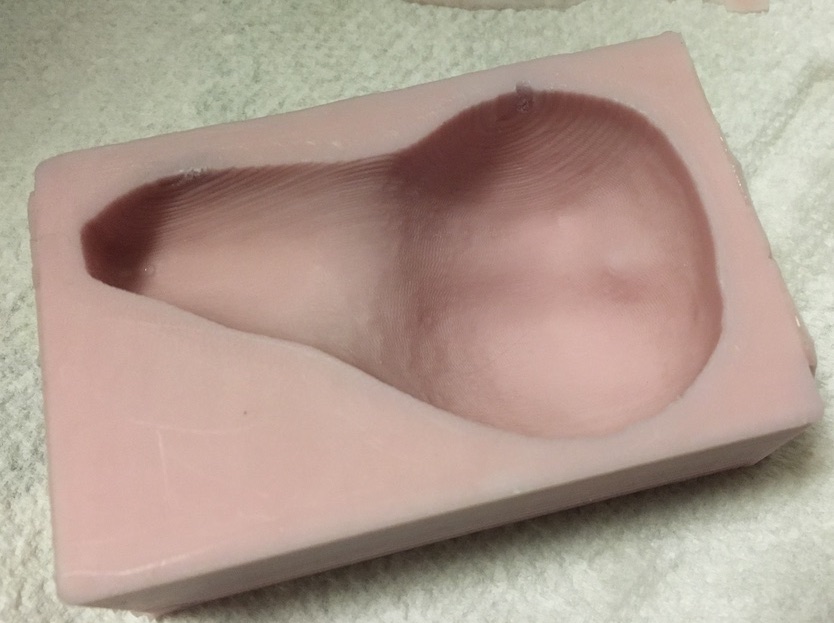
After about half an hour, we checked on our molds and they were all solidified. I popped out my pear, which was bubble-free, decently tempered, and perfectly pear-like! As expected, it had taken on the texture of the milled wax mold; to make a shinier, smoother surface, I'd need to perhaps melt the surface of the original positive mold.
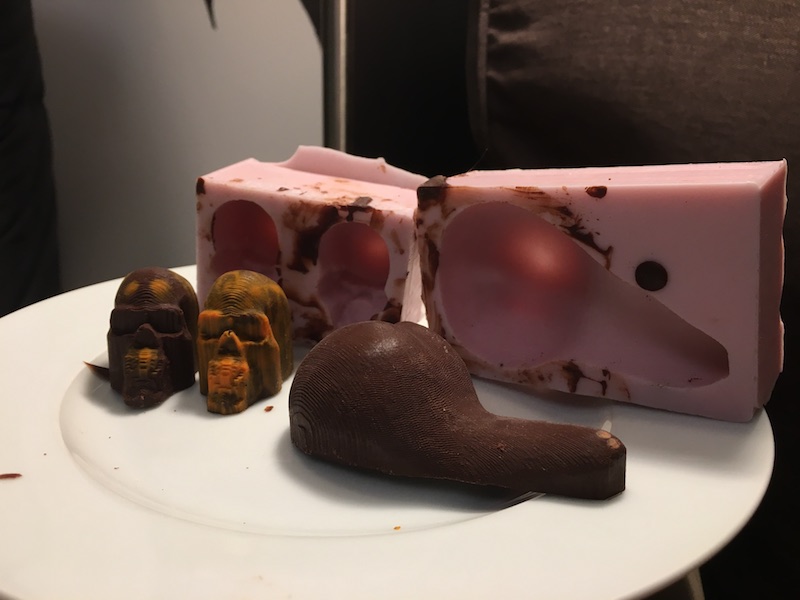
Pinar's colored skulls also came out well! Here are our final Halloween treats with their negative molds. Om nom nom...