(Continuous Recording, Selective Saving)
The minimum viable product has 4 features.
Continuously recorded audio. The device should have enough battery to continuously record for at least 4 hours — and ideally 10.
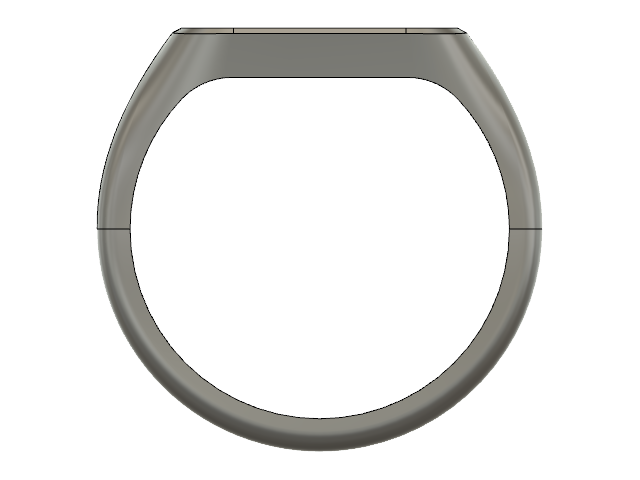
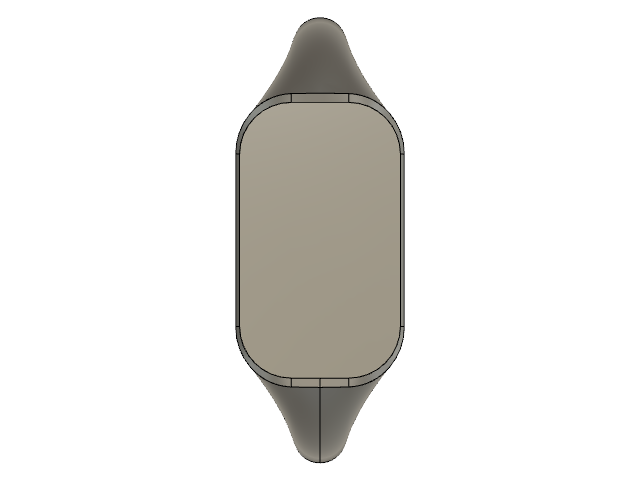
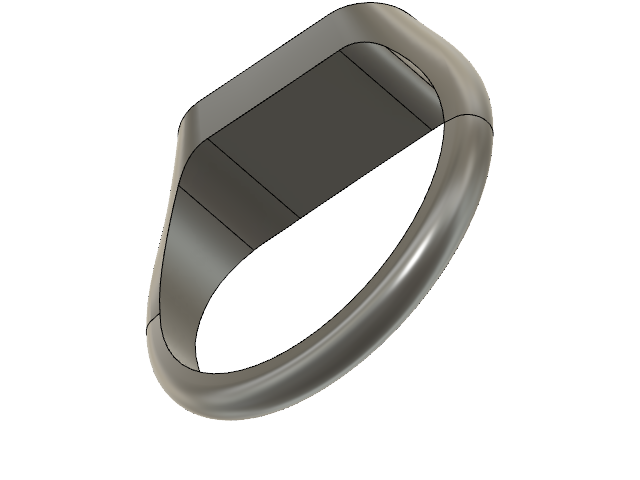
Wearable form factor. I want the device to be with me at all times.
Ability to save last 3-5min from audio buffer. The device needs a button to signal when the recording should be saved. The device should have enough storage to save at least 24 hours of audio. Scaling the amount of audio that can be saved should just require buying a more expensive microSD card.
(Easily) export audio files. This is a requirement. Saving audio isn't very useful if I have no way to access it. However, "easily" is in parenthesis because there are a lot of different ways to do the export. The MVP version might be as simple as access to the microSD card.
If I can get this working — and that is a big if — here are 4 of features that would be nice to have.
If somehow I have managed to get all of the above working, here are some crazy ideas that would bring this device from a clunky, but useful DIY project into the realm of a consumer wearables.
All of these stretch goals go together to create a device that is entirely wireless.
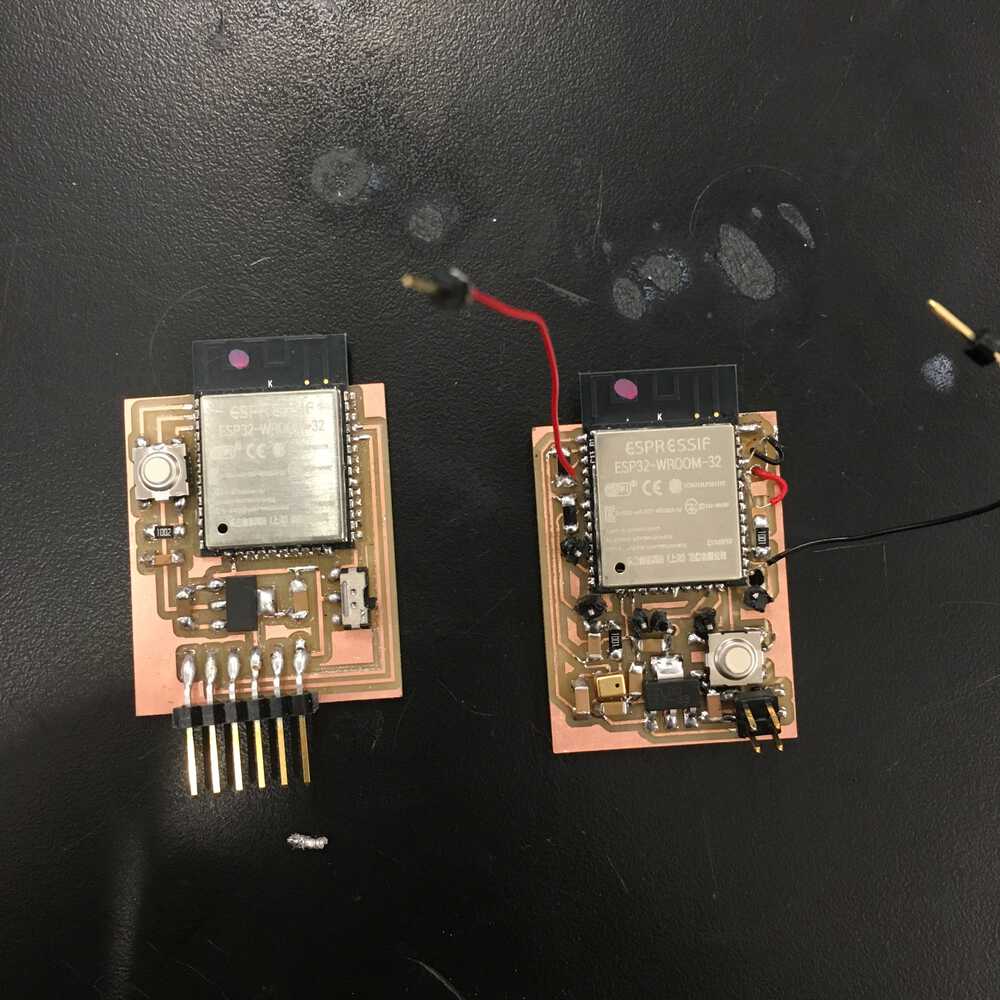
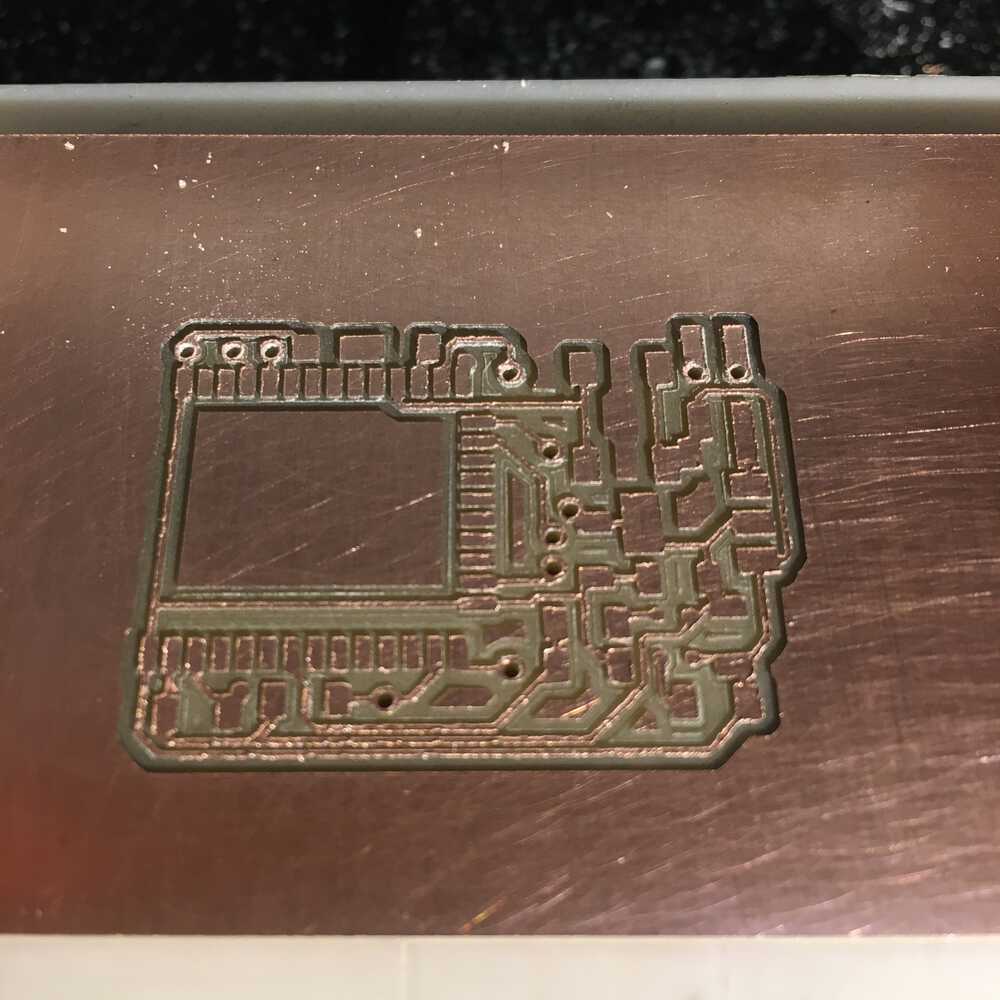
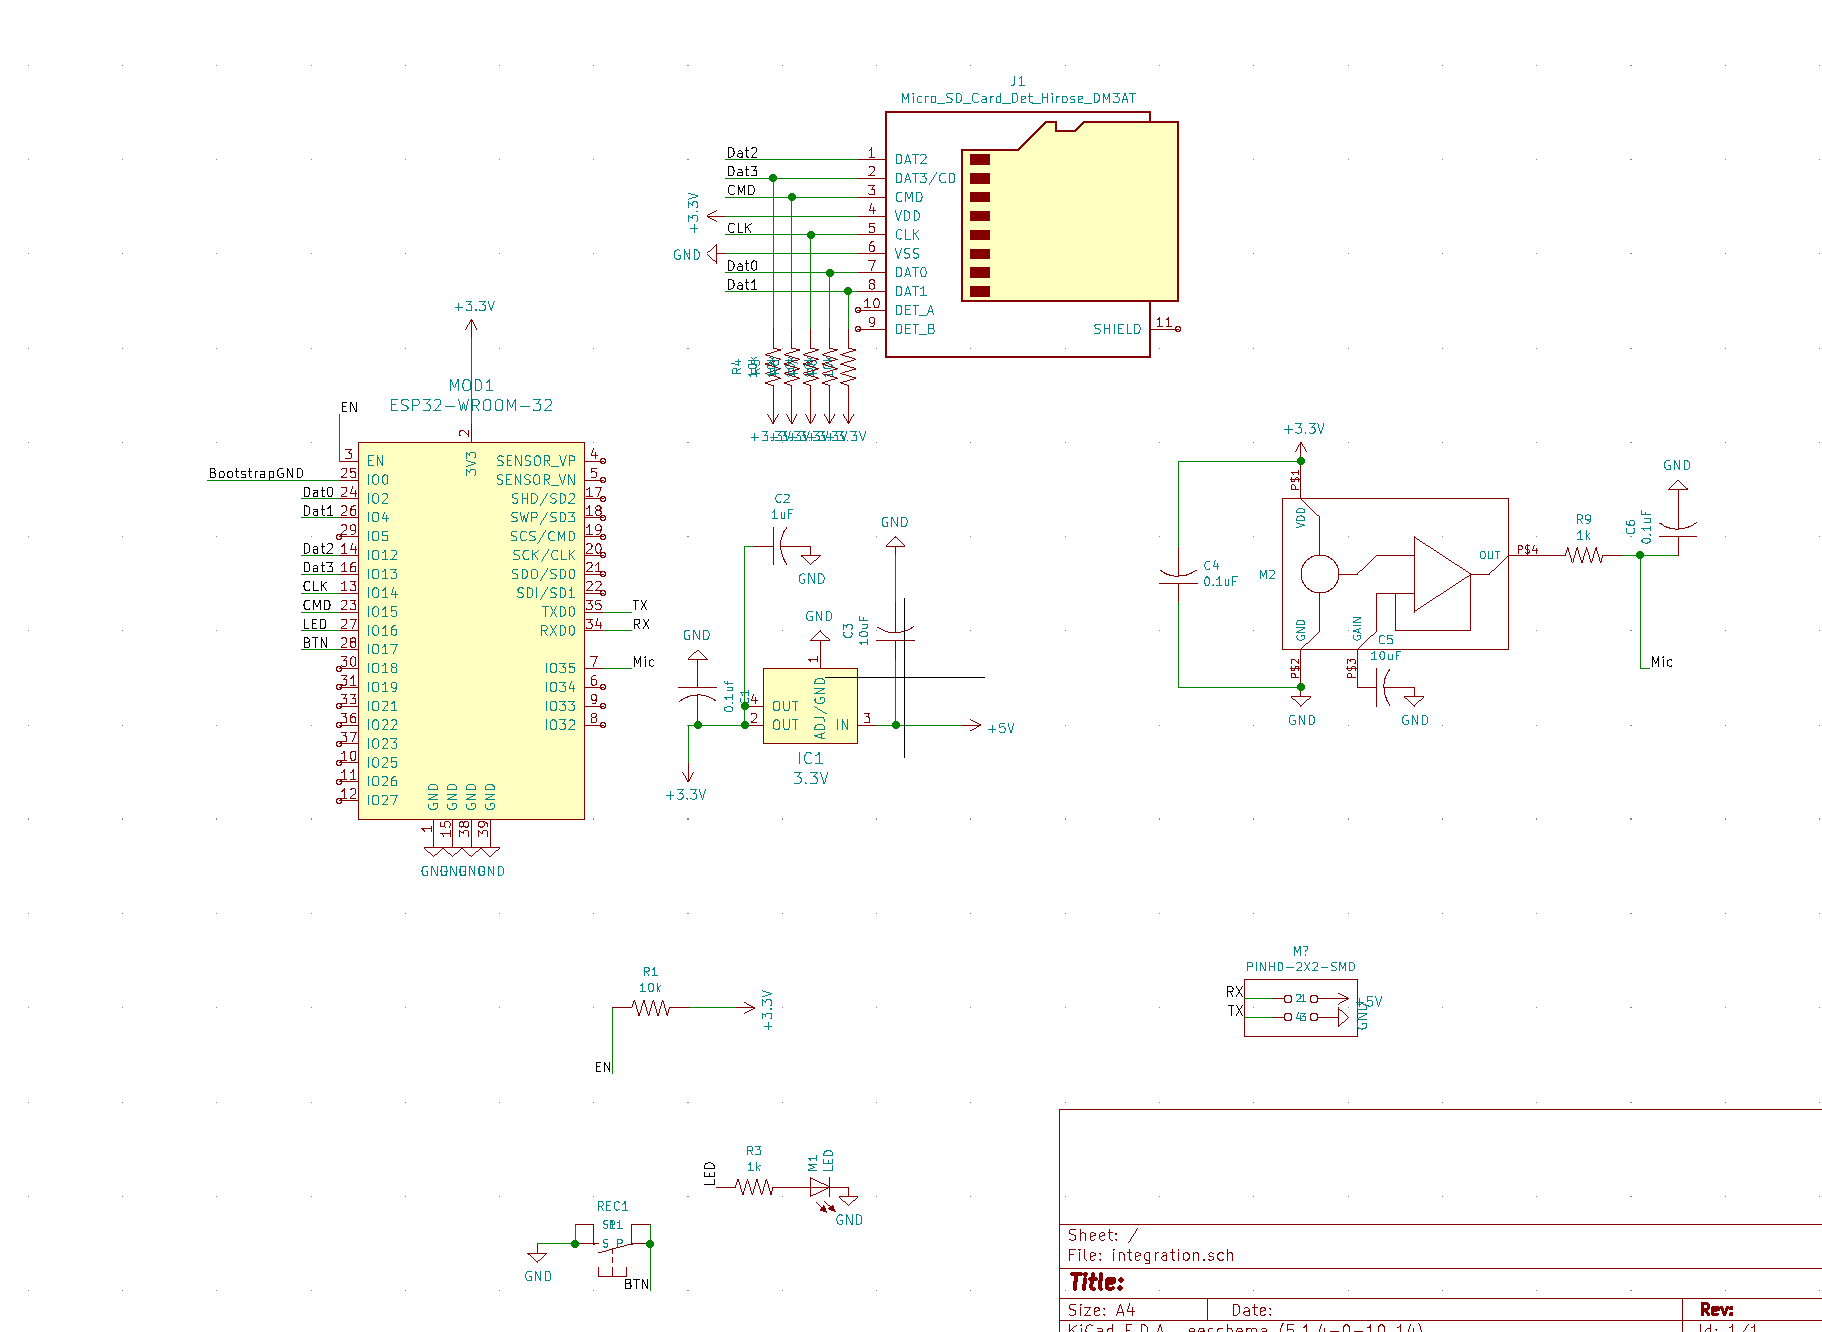
I built a 2-sided ESP-32 board, that interfaces with a microSD card over 4-line SDMMC. The board records audio, sampling at 44k hertz per second, via an analog MEMS microphone and saves it in real-time.
To retrieve the audio files, the user connects to a soft-access point — a wifi network generated by the device — and can download the files over an HTTP server.

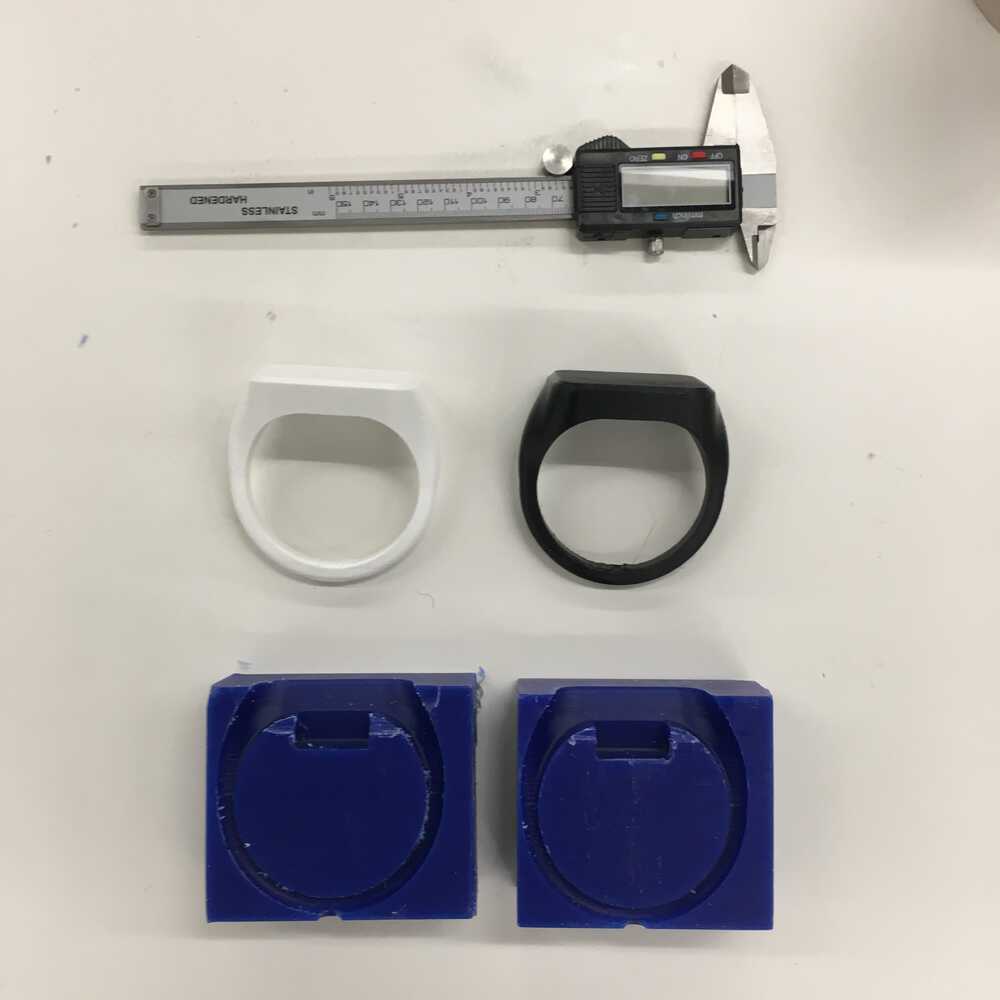
The board is 28mm x 44mm x 8mm. It is very small (the same size as Neil's hello world example board). Small enough to fit in on a wrist.
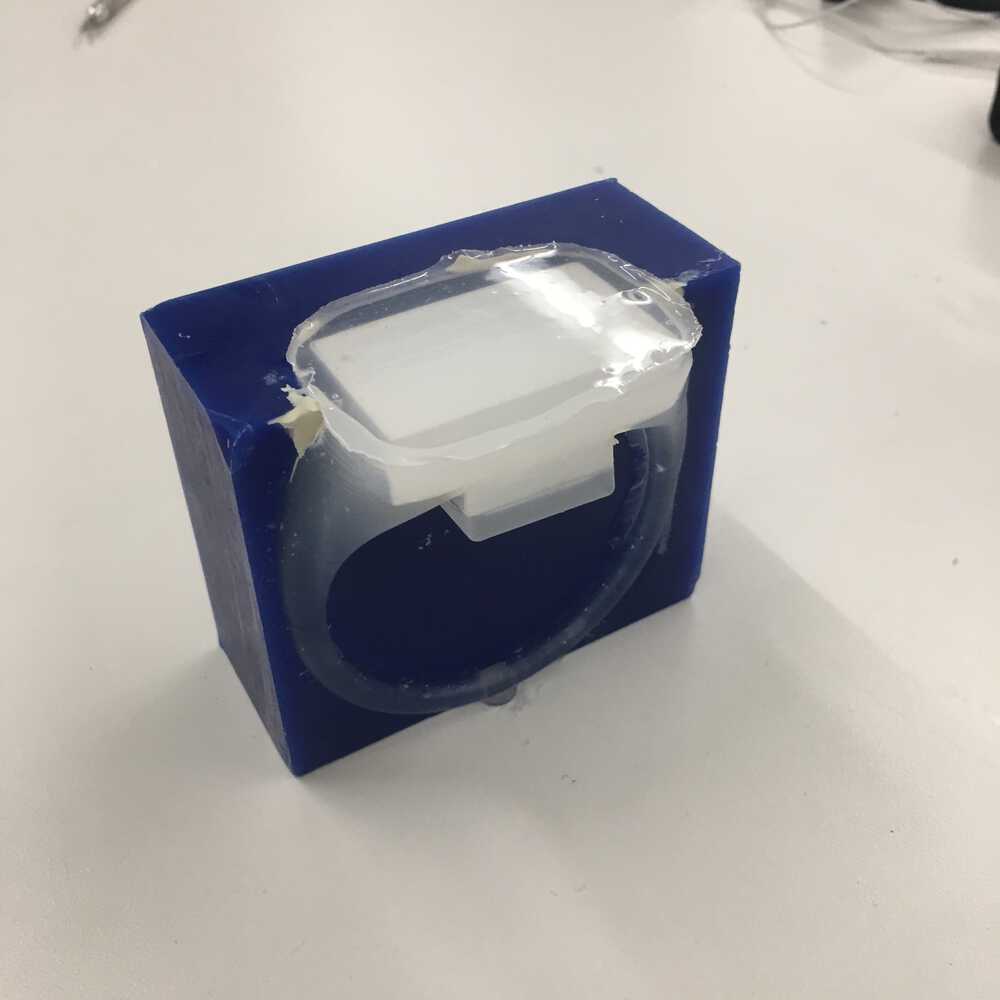
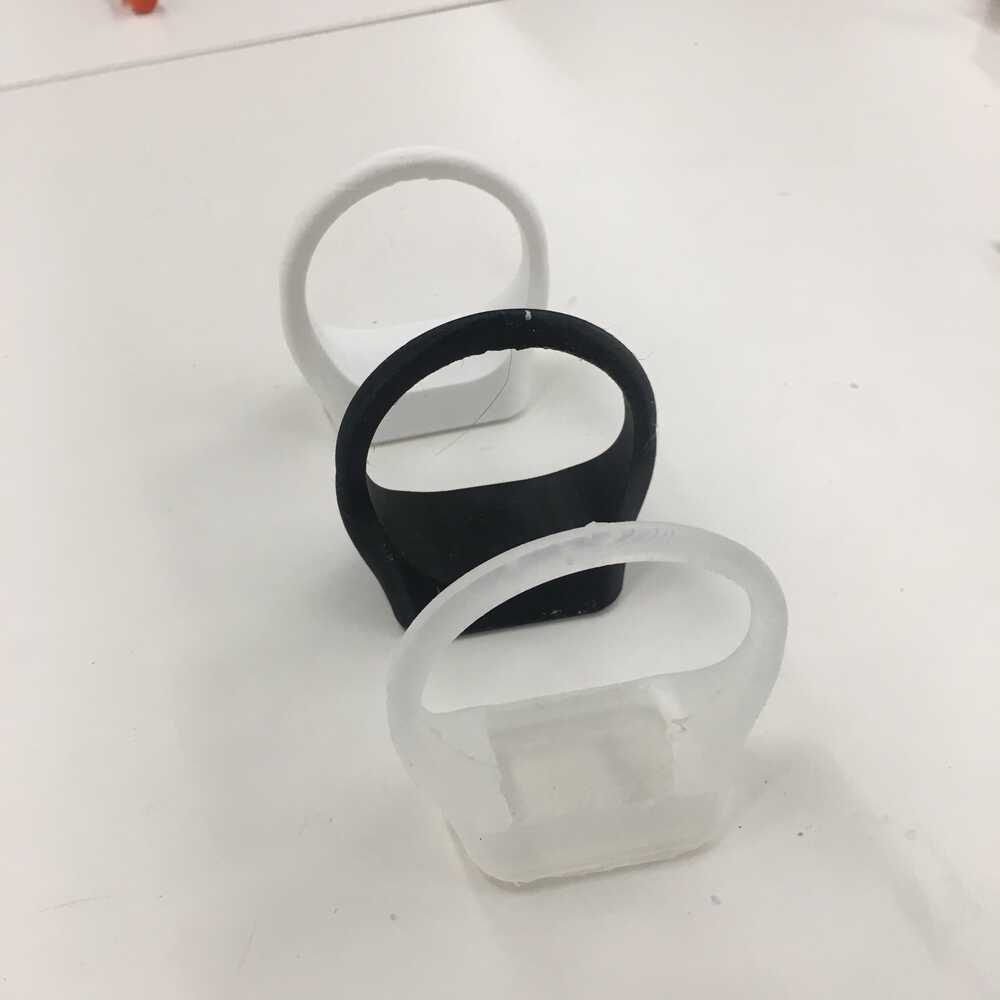
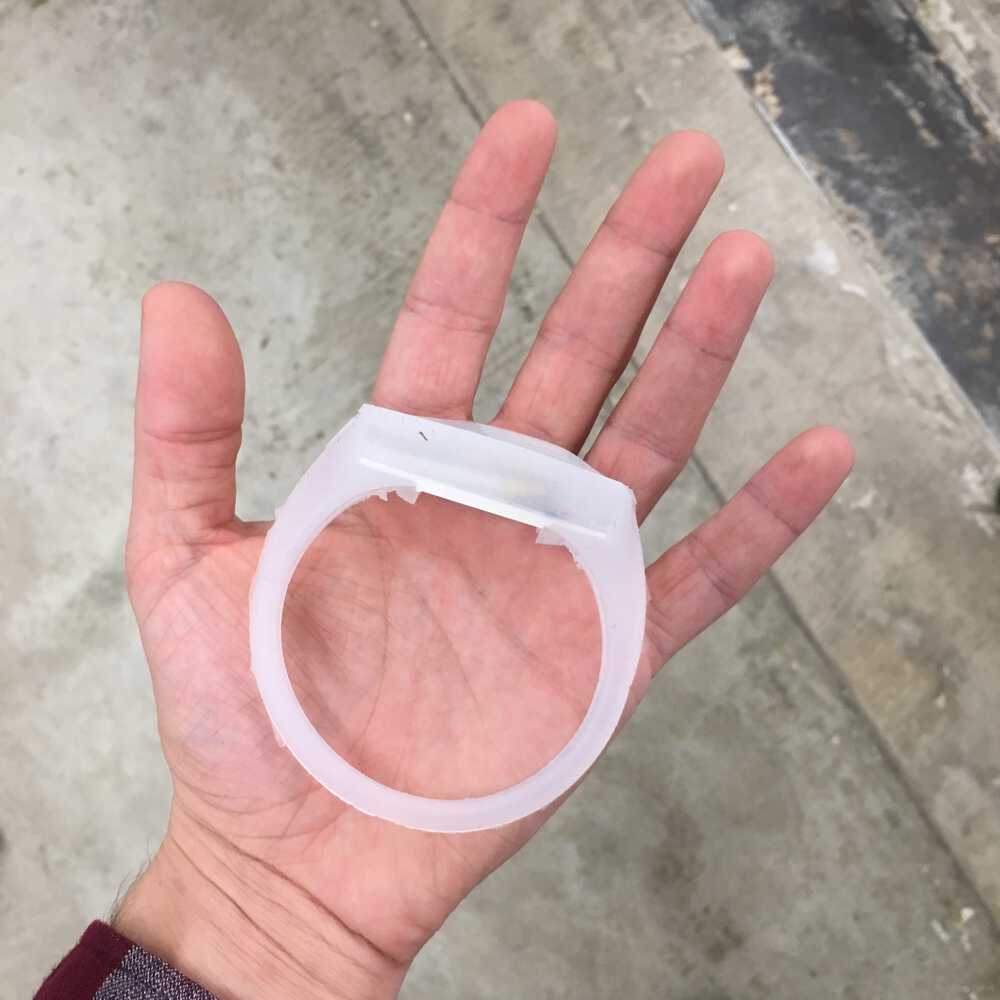
I created a 2-part mold out of machinable wax, with a third registration insert 3D printed on a PrusaMK3. I cast the mold with Mold Star 20T. And then 3D printed a cover for the bottom.
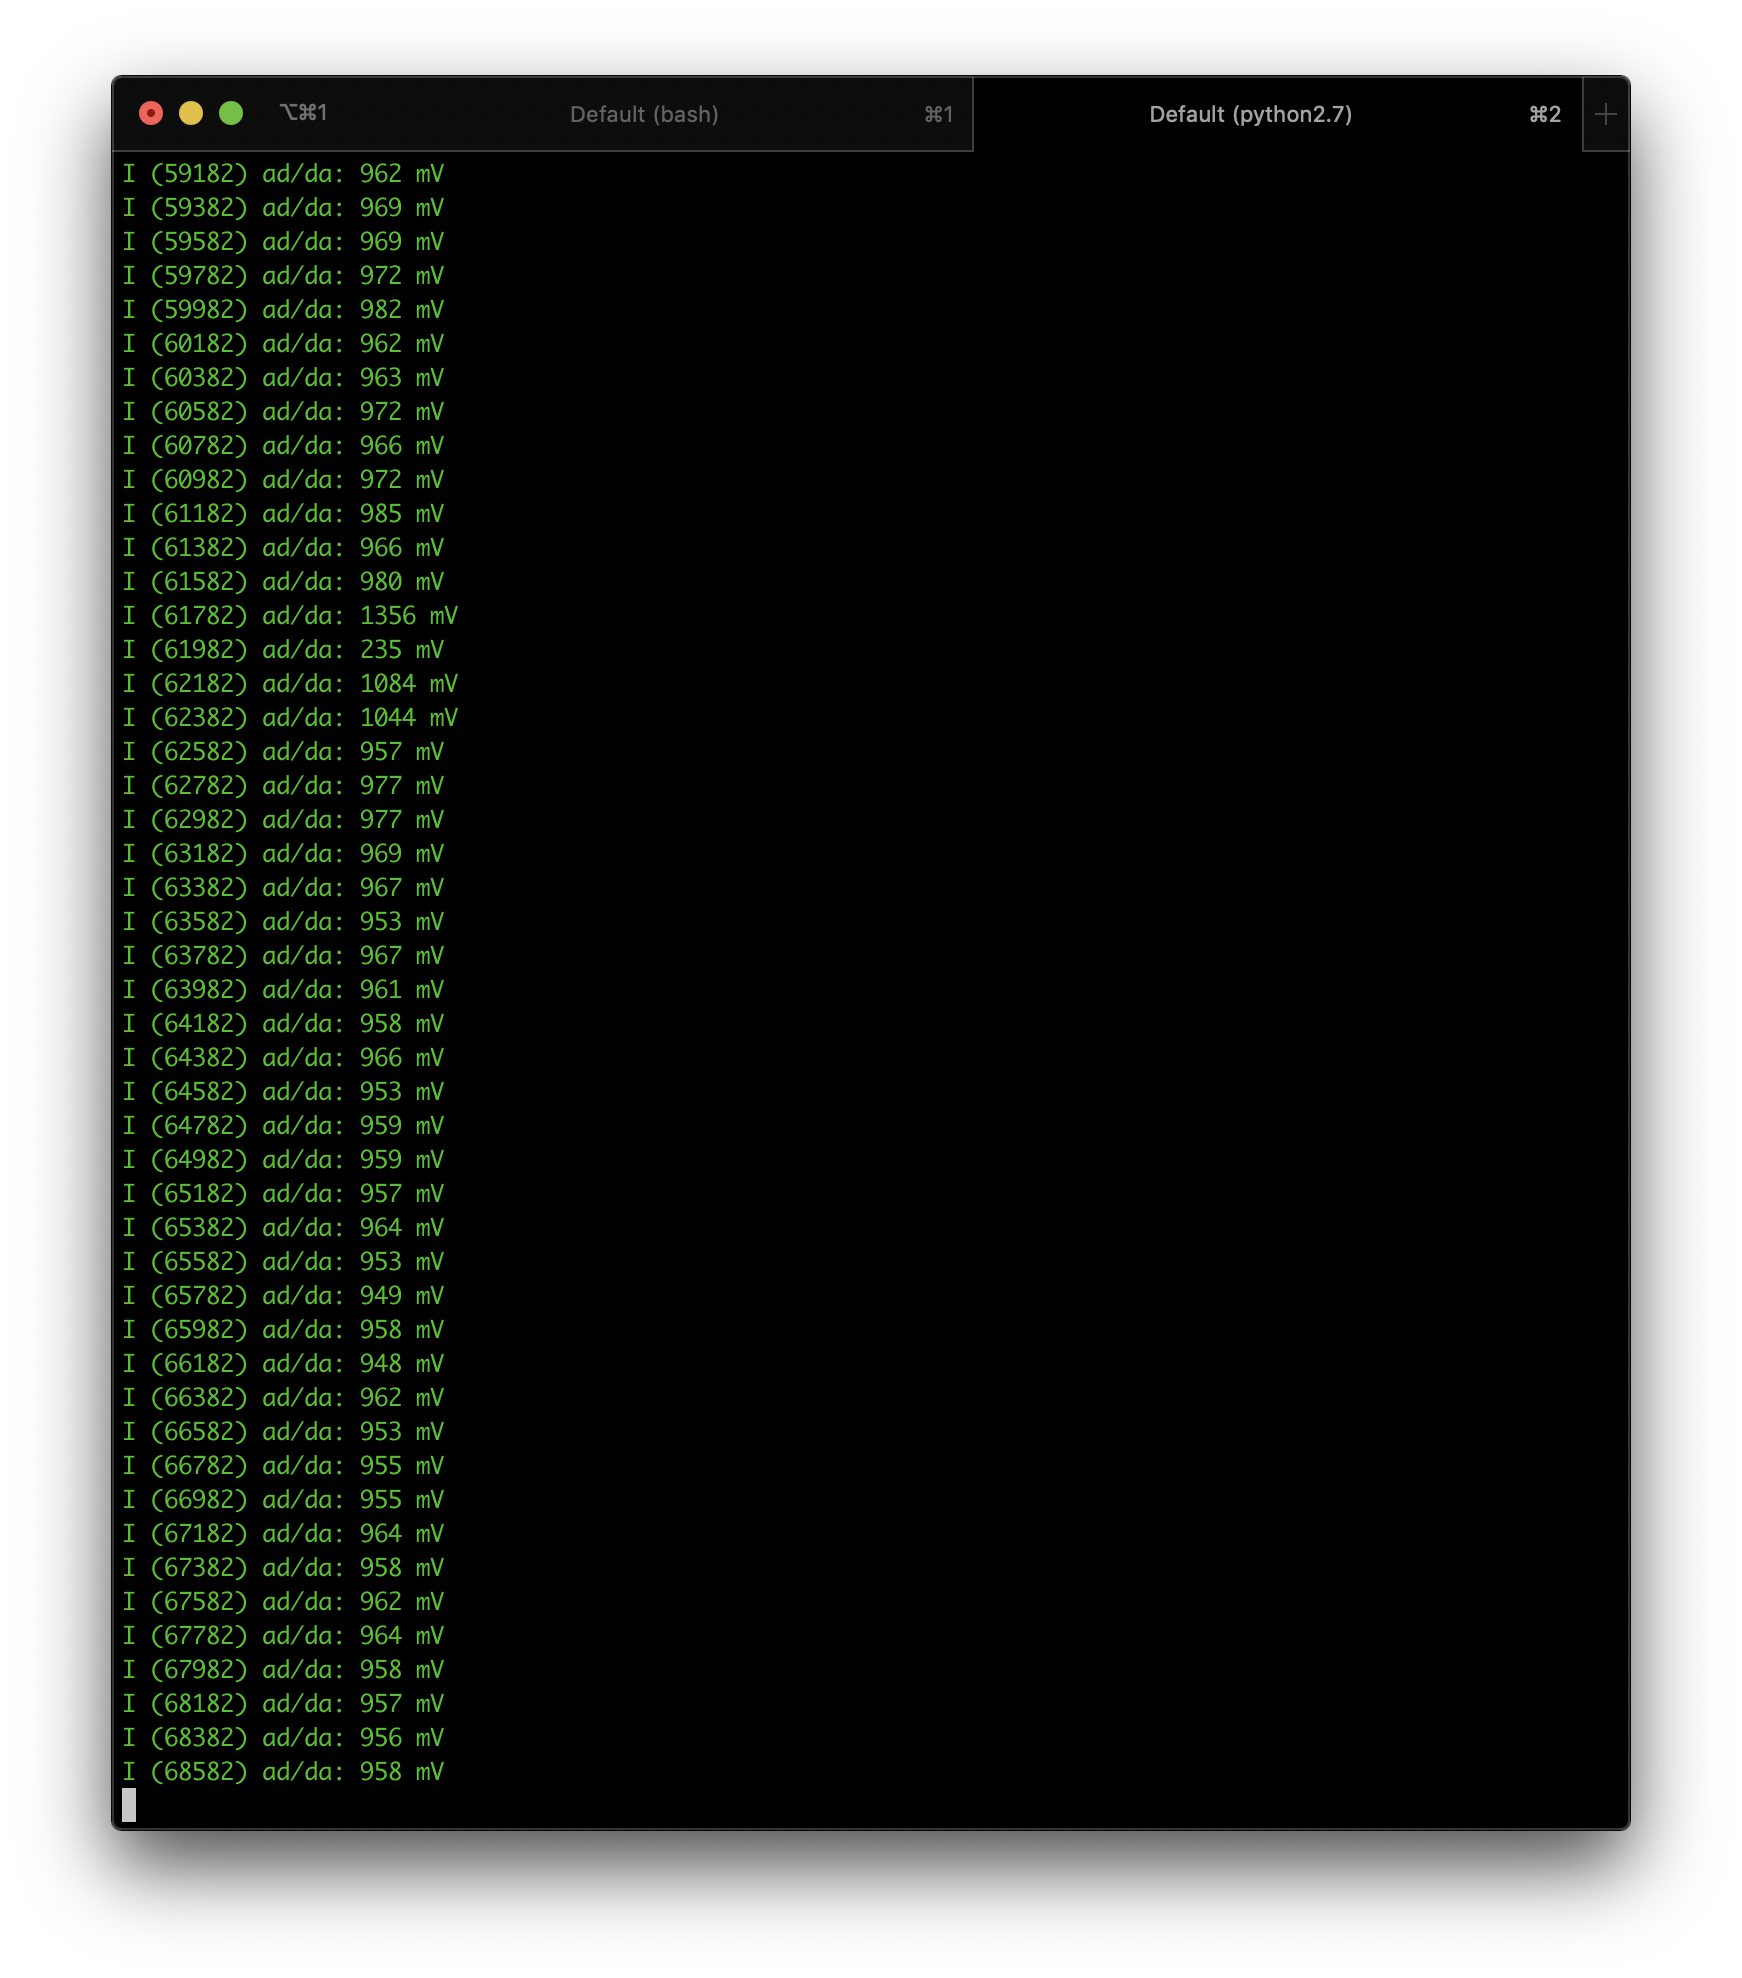
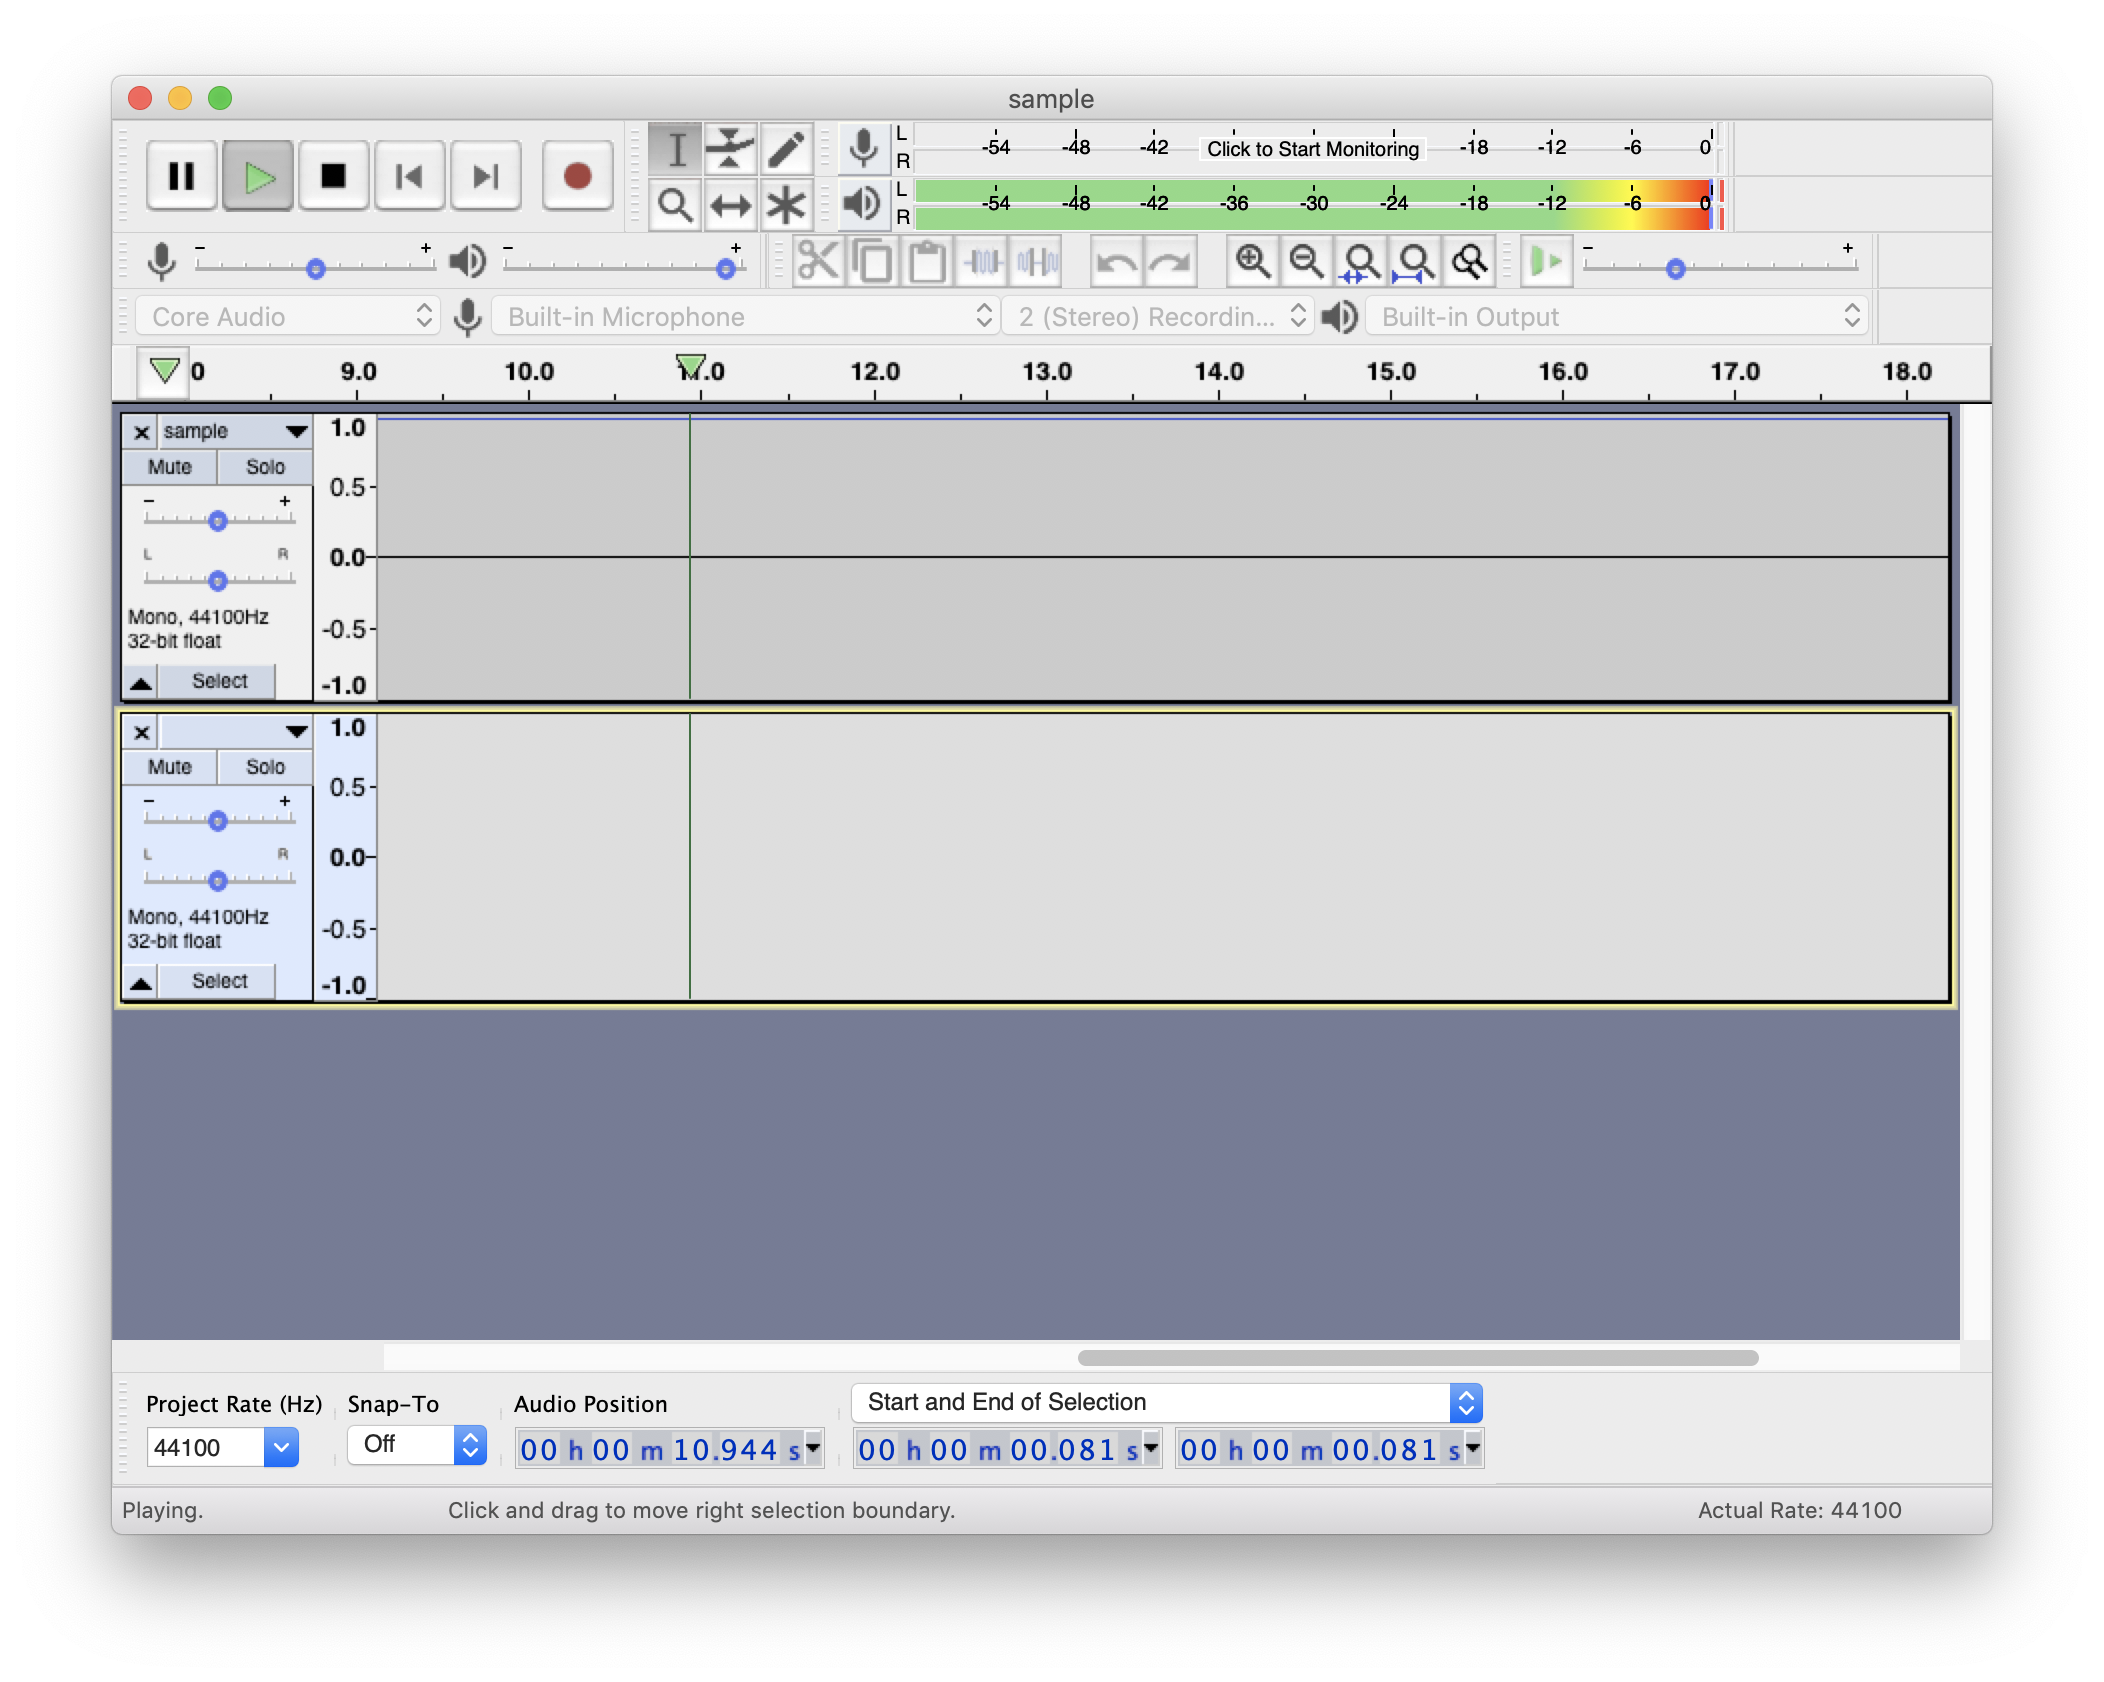
Audio input works.
Or at least values change in response to external stimulus.
Writing data at high speeds to a microSD card works — using a DMA buffer.
The WiFi soft-access point works.
File transfer over HTTP works.
Can run untethered on a 400mAh battery.
Offers 5+ hour battery life.
Fit into a wearable form-factor.
Audio playback on external device.
This is a problem that can be solved. I just ran out of time to fully understand the RIFF WAV header format and how to properly specify the microphone input (LSB vs MSB / audio channels / Linear PCM / etc.).
Ben Garber's wireless microphone
Moritz Kassner's advice on Advanced PCB Fabrication techniques
In order to capture audio data at an appropriate resolution for human hearing, around 44,000 samples need to be taken per second. For reference, CDs have a 44.1 kHz sampling frequency. Source
Lithium Ion (https://www.sparkfun.com/products/13813) 1AH, 50mm x 35mm
https://github.com/espressif/esp-idf/tree/master/examples/peripherals/i2s_adc_dac
https://www.youtube.com/watch?v=7Hn4UFi9wvs
https://www.makeuseof.com/tag/5-mistakes-avoid-buying-next-microsd-card/
http://web.mit.edu/evt/summary_battery_specifications.pdf
Charge management controller
Vertical Mount microUSB (6.7mm height) https://www.mouser.com/datasheet/2/276/1051330001_IO_CONNECTORS-1373818.pdf
Vertical Mount microUSB (5.9mm height) https://www.mouser.com/datasheet/2/222/KYCON_KMMVX-SMT-BS-BTR-1174199.pdf
Bottom side is battery / power management + microUSB port for power (either vertical mount or through side). Top Side ESP32, SD Card and microphone + lights?
https://esp32.com/viewtopic.php?t=1756&start=10
	i2s_config_t i2s_config_rx = {
		mode: (i2s_mode_t)(I2S_MODE_MASTER | I2S_MODE_RX),
		sample_rate: 44100,
		bits_per_sample: I2S_BITS_PER_SAMPLE_32BIT,
		channel_format: I2S_CHANNEL_FMT_RIGHT_LEFT,
		communication_format: (i2s_comm_format_t)(I2S_COMM_FORMAT_I2S | I2S_COMM_FORMAT_I2S_MSB),
		intr_alloc_flags: ESP_INTR_FLAG_LEVEL1,
		dma_buf_count: 14,
		dma_buf_len: 64
	};

	i2s_config_t i2s_config_tx = {
		mode: (i2s_mode_t)(I2S_MODE_MASTER | I2S_MODE_TX),
		sample_rate: 44100,
		bits_per_sample: I2S_BITS_PER_SAMPLE_32BIT,
		channel_format: I2S_CHANNEL_FMT_RIGHT_LEFT,
		communication_format: (i2s_comm_format_t)(I2S_COMM_FORMAT_I2S | I2S_COMM_FORMAT_I2S_MSB),
		intr_alloc_flags: ESP_INTR_FLAG_LEVEL1,
		dma_buf_count: 32,
		dma_buf_len: 64
	};

        i2s_pin_config_t pin_config = {
            .bck_io_num = 21,
            .ws_io_num = 26,
            .data_out_num = 22,//I2S_PIN_NO_CHANGE
            .data_in_num = 23
        };

	//Somehow it's needed. If not, noise!
 	pinMode(23, INPUT);

	//for recording
	i2s_driver_install(I2S_NUM_1, &i2s_config_rx, 0, NULL);
    	i2s_set_pin(I2S_NUM_1, &pin_config);

	//for playback
	i2s_driver_install(I2S_NUM_0, &i2s_config_tx, 0, NULL);
    	i2s_set_pin(I2S_NUM_0, &pin_config);

	uint32_t cnt = 0;
        uint32_t buffer;
   	uint32_t buffer_out = 0;
   	while(1)
   	{
		cnt++;
		buffer = 0;
		int bytes_popped = i2s_pop_sample(I2S_NUM_1, (char*)&buffer, portMAX_DELAY);

		buffer_out = buffer << 5;

		if (buffer_out == 0) {
			//For debugging, if out is zero
			Serial.printf("%d -> %x\n", cnt, (int)buffer_out);
			delay(50);
		}
		else {
			//Just playback for now
			i2s_push_sample(I2S_NUM_0, (char*)&buffer_out, portMAX_DELAY);
		}
   	}
https://esp32.com/viewtopic.php?t=9583
ES8388 Codec
http://fab.cba.mit.edu/classes/863.15/section.Harvard/people/Garber/wk10.html
I2S Pins (Specifically CLK)
https://esp32.com/viewtopic.php?f=5&t=1585
https://esp32.com/viewtopic.php?t=2001
https://github.com/maspetsberger/esp32-i2s-mems
SEL is unconnected, i.e. only one channel, apparently left
LRCL to #15
DOUT to #32
BCKL to #14
GND to GND
3V to 3V
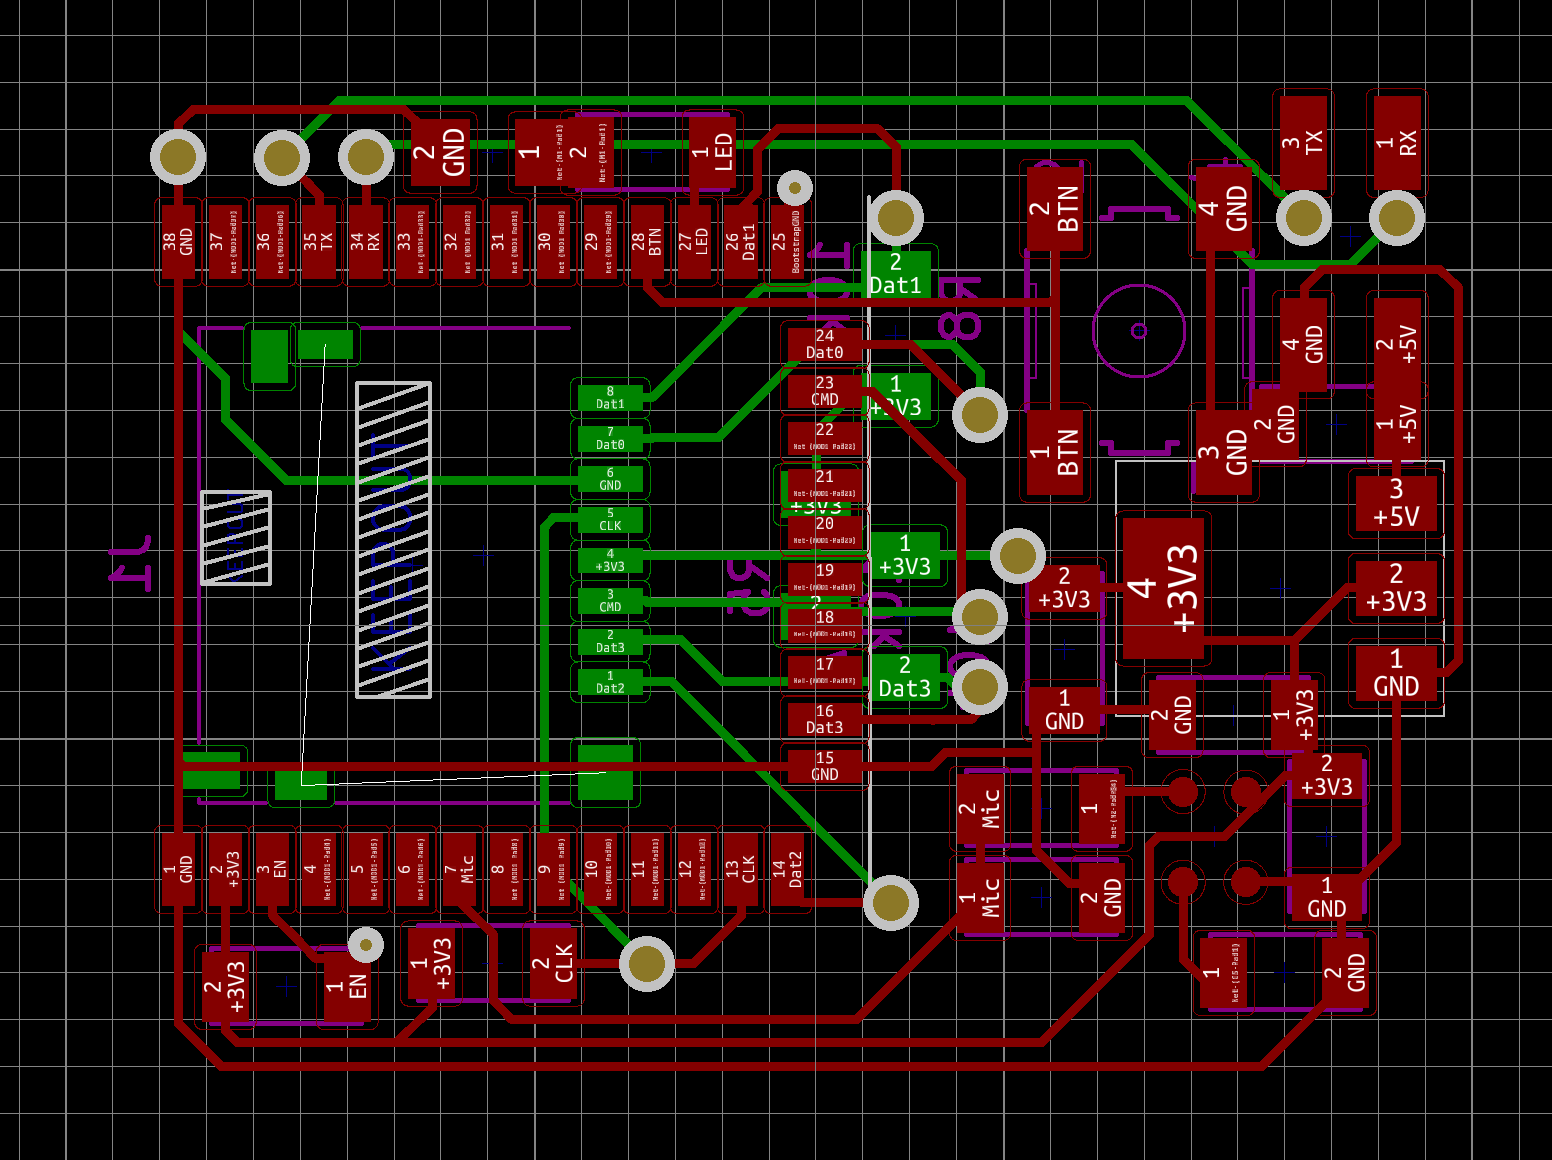
It makes sense to try the 4-bit SD mode rather than SPI because write speed is essential. After making my first dev board, I know realize that the schematic was wrong. I need to connect the pull ups to VCC.
Connecting SD cards with the ESP32 [can be a little bit difficult because the ESP32 uses the same pins for the __ protocol and bootstrapping the micro controller.
There were quite a few problems with my previous circuit besides the pull-ups not being connected properly. I looked into the pinouts for SD cards and realized that I hadn't been connecting ground (VSS) or the power (VDD).
So I need to update the design of my board. Also depending on how difficult it is to set up a 4-bit SD connection, it might make sense to start off with SPI...
| Pin Number | Pin Name | In SD Mode | In SPI Mode |
|---|---|---|---|
| 1 | DAT2/X | Connector Data line 2 | No use |
| 2 | DAT3/CS | Connector Data line 3 | Chip Select |
| 3 | CMD/DI | Command / Response Line | Data Input |
| 4 | VDD/VDD | Power supply (+3.3V) | Power supply (+3.3V) |
| 5 | CLK/SCLK | Clock | Serial Clock |
| 6 | VSS/VSS | Ground | Ground |
| 7 | DAT0/D0 | Connector Data line 0 | Data Out |
| 8 | DAT1/X | Connector Data line 1 | No use |
In the future, I should flash the device before connecting the microSD card and permanently burn in the voltage that the ESP32 should operate at (3.3V).
https://learn.adafruit.com/adafruit-microlipo-and-minilipo-battery-chargers/downloads
https://datasheet.octopart.com/ENW-89829A2KF-Panasonic-datasheet-21211675.pdf
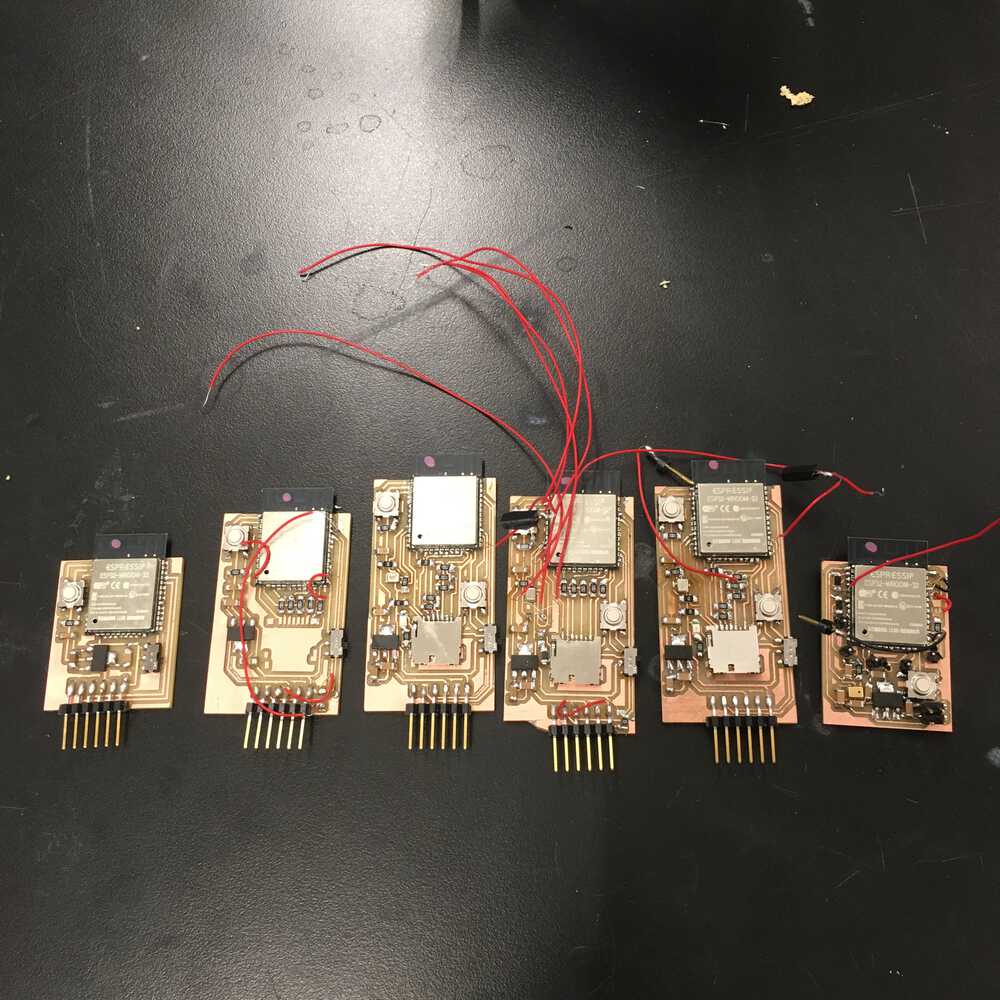
Now that my development board is mostly working, I need to start thinking about ways to compress the circuit. The various components that are needed to program the board take up a significant amount of space (a button, a switch, and the FTDI header, in addition to all the various traces connecting everything). I can reduce the size of the final circuit a lot if I find a way to remove all of this stuff. Creating a programming jib seems like the right approach.
A programming jib allows you to program a board before soldering it into a circuit. I can separate all of the programming components onto the jig and then only add the necessary components to the product board.
I will need to draw up a schematic. The main different is that there won't be pads for the ESP32 footprint. Instead the chip will be connect with pogo pins.
https://de.aliexpress.com/item/32816547042.html
Also the ESP32 has the ability to update its firmware over the air (OTA) — once it has been flashed with code enabling this functionality.
10/6 i2s microphone
This really seems like it should be possible and yet it seems like a lot of people have difficulty setting this up.
My contributions to the class / community:
Smaller fabFTDI (obsolete, due to ease of using ATSAM chipset)
Instructions for using KiCad with Fab Lab process
Schematic for ESP32 + MicroSD Card
12/9 Flash Memory would probably be better than microSD cards
https://esp32.com/viewtopic.php?f=12&t=2884
var consonants = function(s){
	return s.toLowerCase().split('').filter(c => !(c == 'a' || c == 'e' || c == 'i' || c == 'o' || c == 'u')).join('');
}

var shiftchar = function(str, shft) {
	return str.split('').map(c => isLetter(c) ? String.fromCharCode(c.charCodeAt()+shft)).join('') : c;
}

var gematria = function(str, shft) {
	return shiftchar(consonants(str), shft);
}

function isLetter(str) {
  return /^[a-z]+$/.test(str);
}
12/12 Through Holes / Vias in KiCad with the SRM-20 & Mods
I am still exporting everything as .svg — I played around with drill files but that didn't seem to be a productive direction to go in. I poked around about in the generated svg and found the <circle> responsible for the hole. The problem with kicad is that the drill holes themselves aren't exported on any layer.
I copy the code for this circle into the Edge-Cuts svg and change the styling to make it black.
Bash command to create a zip of all files in current directory:
zip ${PWD##*/}.zip -r ../${PWD##*/}
I have used sftp to add files to my website and then redownload them on whatever computer I need for the actually fabrication / machining. This has worked well but now that I want to make more complicated PCBs (with 2sides and vias) it is a pain to manually put each file onto the server.
12/14 Things to do
Casing for Bracelet
Finalize 3d model
Mill mold
Create cast
How do I get the right texture?
Final two sided-design
Design charging circuit
Debug i2s microphone or potential change to analog
Save audio clip to SD card
Use breakout board to expedite prototyping of analog / i2s microphone + figure out how to program board without FTDI
Set up environment for esp-idf quickly:
. $HOME/esp/esp-idf/export.sh
12/14 Analog MEMS microphone:
I can't seem to get the i2s microphone to work with the ESP32. Very frustrating. I've spent all day in front of the oscilloscope. I really thought this would be the easy part...
Anyway, I need to find a way to get audio so I just created a simple breakout board for the
# Name,   Type, SubType, Offset,  Size, Flags
# Note: if you have increased the bootloader size, make sure to update the offsets to avoid overlap
nvs,      data, nvs,     0x9000,  0x6000,
phy_init, data, phy,     0xf000,  0x1000,
factory,  app,  factory, 0x10000, 1M,
storage,  data, fat,     , 2M,
https://esp32.com/viewtopic.php?t=9790
Battery Size is 51mm x 34mm x 5.8mm
Make sure to keep the main copper board in place. It is crucial that it stays in the same position so that you can realign your PCB.
Flip your PCB over the vertical axis.
Reposition it snuggly in the bottom left corner.
You will need to adjust your origin to account for the material removed by the 1/32in bit.
12/16 Encoding Audio stream as WAV File
brew dhex
void start_mdns_service()
{
    //initialize mDNS service
    esp_err_t err = mdns_init();
    if (err) {
        printf("MDNS Init failed: %d\n", err);
        return;
    }

    //set hostname
    mdns_hostname_set("my-esp32");
    //set default instance
    mdns_instance_name_set("Jhon's ESP32 Thing");
}
esp_wifi_set_mode(WIFI_MODE_NULL);
MEMS surface mount microphone (Vesper VM1000)
MicroSD Card (16GB) & MicroSD Card holder
Wifi Chip
Power:
USB C port
Induction Charging Chip
Charging Chip https://www.digikey.com/product-detail/en/texas-instruments/BQ25898DYFFT/296-44120-1-ND/6005133
https://www.instructables.com/id/Cheap-LIR2032-Coin-Cell-Charger/
MCP-73831 is one of many cheap integrated Li-Ion chargers available on the market. SOT-23 package, cost: < 1USD.
https://www.amazon.com/CR2450-620mAh-Lithium-Battery-Panasonic/dp/B00W8ADFWU
http://ww1.microchip.com/downloads/en/AppNotes/00002447A.pdf
https://www.youtube.com/watch?v=iRj6xzNx7P4
https://www.youtube.com/watch?v=C7uMkBzOMaM
http://www.designlife-cycle.com/gel-bracelets
https://www.thomasnet.com/articles/plastics-rubber/silicone-bracelet-design/
Silicon Rubber
https://www.youtube.com/watch?v=8AkCbJC9PLQ
https://forums.autodesk.com/t5/fusion-360-design-validate/modeling-watch-band/td-p/7308343
https://www.youtube.com/watch?v=vKZx9eHEL6o
https://www.youtube.com/watch?v=vn9U4dPN4BI
https://www.youtube.com/watch?v=V9SrWvJJtaI
https://www.matterhackers.com/news/how-to-smooth-and-finish-your-pla-prints?
https://www.youtube.com/watch?v=0vgynnYzo08
https://www.youtube.com/watch?v=lIf9orw1Lzc
Modeling in Fusion
3D Printing & Preparing model for Cast
Casting model in silicone
https://www.makerbot.com/professional/post-processing/silicone-molding-1/
Shore A: 30-40?
https://www.therpf.com/forums/threads/how-do-you-cast-silicone.94825/
Basic rule: cast a soft part in a hard mold; a hard part in a soft mold.
Electronics
Set Up Vesper (or other MEMs microphone)
https://forum.pjrc.com/threads/52175-Audio-Recording-Logging-to-SD-card-gt-microSoundRecorder
https://www.avrfreaks.net/forum/connecting-microphone-microcontrollers-adc
I'd do this in 4 steps: Assume you have decided on 8 bit 8KHz samples per sec (speech/phone quality). 1) Play one cycle of a sinwave in a loop. 2) fill all ram with mic samples (1 sec or so... talk fast!) and play them in a loop finally 3) record 512 bytes at a time, write buffer1 to sd card while filling buffer2 from mic. 4)play samples from sd card. Probably need an AVR with 2K ram. 2 in buffers of 512 and a sector buffer of 512.
Write sensor data to SD
Make Arduino?
Wifi/Bluetooth data transfer to iOS app
Wireless (Soft) Access Point
iOS Side
Relevant Links
Rechargeable LiPo coin battery (via vertical USB-C port)
Battery life
2 Sided Board
http://fab.cba.mit.edu/classes/863.17/EECS/people/akaspar/w13/