Home
Project 1 - Digital Fabrication and Computer-Aided Design
This week, I learned how to model. For a beginner like me, even the simplest designs take a long time to create, but it's pretty cool to be able to create a visualization of your idea to show others and to try out before implementing a real thing. I hope to get into a better workflow using CAD. And maybe next week, I'll learn how to pose for photographs (haha, because modeling, get it?)
Goals
Class Assignment:
- plan and sketch a potential final project
- model (raster, vector, 2D, 3D, render, animate, simulate, ...) a possible final project, and post it on your class page
My Personal Goals:
- Brainstorm for final project - look at past projects for ideas of what people have done!
- Make a model without using tutorials - I've done a little bit of cadding before, and I want to see how much I can do based on just experience and experimentation.
Things I learned
- How to use OnShape
- How to experiment and try out random things until it works. I usually like watching tutorials, but always feel the need to completely learn the process before starting. As a result, I often get too caught up in watching tutorial after tutorial and never actually get anything done. I'm happy that didn't happen for this, but watching some tutorials might have sped up the process and improved my workflow. In the future, I will just start a project and watch the relevant tutorials.
- I discovered I should learn how to sketch my ideas. It'll help to be able to show others what I'm thinking.
- I should keep brainstorming and thinking of problems I can solve. I'm sure I can come up with something better.
The Process + Pics
- Looking at past projects
People have done some really awesome things in this class, and as excited as I am to make something cool, I'm also a bit intimidated. Some of the most memorable ones were a DishPenser that is a combined dishwasher and storage unit, a Sous-Vide immersion cooker, and an electro-powered longboard. (EDIT: at this point, I didn't know that the class website had a Google search at the bottom, so I was mostly going between people's pages and searching Google for project ideas; I was much more efficient later in the semester with the search bar). I don't know where I would even start if I did any of these projects. Most of my ideas seem a little more CS focused, and could maybe be done better as a phone application. Or they only involve a mechanical component and no electronics. I'm still confused as to what would make a good final project.
- Brainstorming ideas
I really want to make something useful. Ideally, I could create some kind of medical device that I could later get evaluated by professionals, modify, do user testing - the whole shebang. But I'm not sure where I would even begin for that because I don't know enough about any specific problems that I could solve. My current ideas - a prosthetic arm, a vitals monitor, a oxygen-level measurer, a body fat analyzer - all seem a bit too broad to be useful. I've emailed one of my connections to the Massachusetts General Hospital to see if I can get a tour of one of the clinics to learn more about relevant problems and am waiting to hear back. Hopefully something inspires me!
In the meantime, I've been thinking about an idea that I've been messing around with for a while: a speech device for Apraxia Speech of. Apraxia of Speech is a speech impediment in which the person can't tell that they're saying the wrong sound - like saying a hard "c" instead of a "t". It's basically dyslexia but for speech. I want to create a device that says a phrase that the user has to repeat back to it; then the device replays the original phrase, a recording of the user saying that phrase, and a percentage correlation score. This data can be tracked over time, and will eventually improve the user's speech. Over the summer, I talked to a speech therapist about this idea, and she says it would be really useful. However, we both kind of agreed that a mobile app is the best platform for this because that's what kids enjoy using, and what speech therapy has started to adopt.
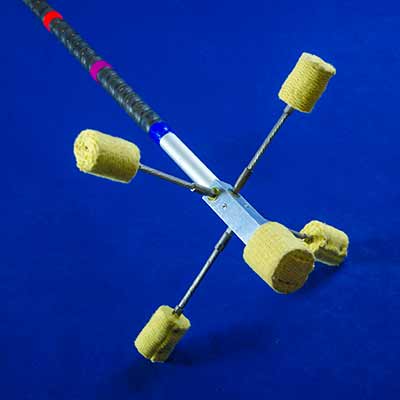
Another Idea of mine was to create a dragonstaff. I currently don't own one (they're really epxensive) and have to borrow one for my practices and performances.
 This doesn't have any electronic component though, which I'm sure is necessary for the class. I could maybe make a glow-dragonstaff, and put LEDs where the fire-wicks are supposed to be. I could even control the color changes depending on the acceleration or orientation of the staff!
Because the dragonstaff is one idea I can visualize best, I think I will temporarily choose that for modeling.
This doesn't have any electronic component though, which I'm sure is necessary for the class. I could maybe make a glow-dragonstaff, and put LEDs where the fire-wicks are supposed to be. I could even control the color changes depending on the acceleration or orientation of the staff!
Because the dragonstaff is one idea I can visualize best, I think I will temporarily choose that for modeling.
- Drawing sketches
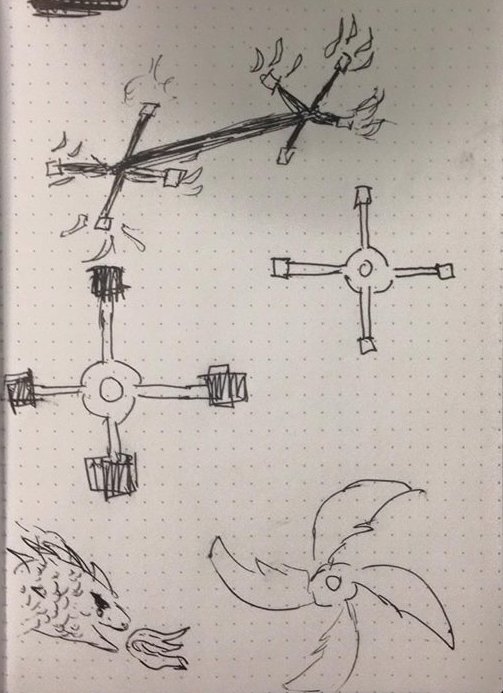
I'm not the greatest sketcher (I'm much better if I have a reference and more time/patience), but I drew up what I wanted to model. The spokes of the dragon staff are often placed like the image below, but I put them on a detachable piece instead. This will make it easier to CAD and to make, and I can make multiple replaceable heads. Doing one with dragon-wings on the ends would be pretty neat.
- Using Onshape
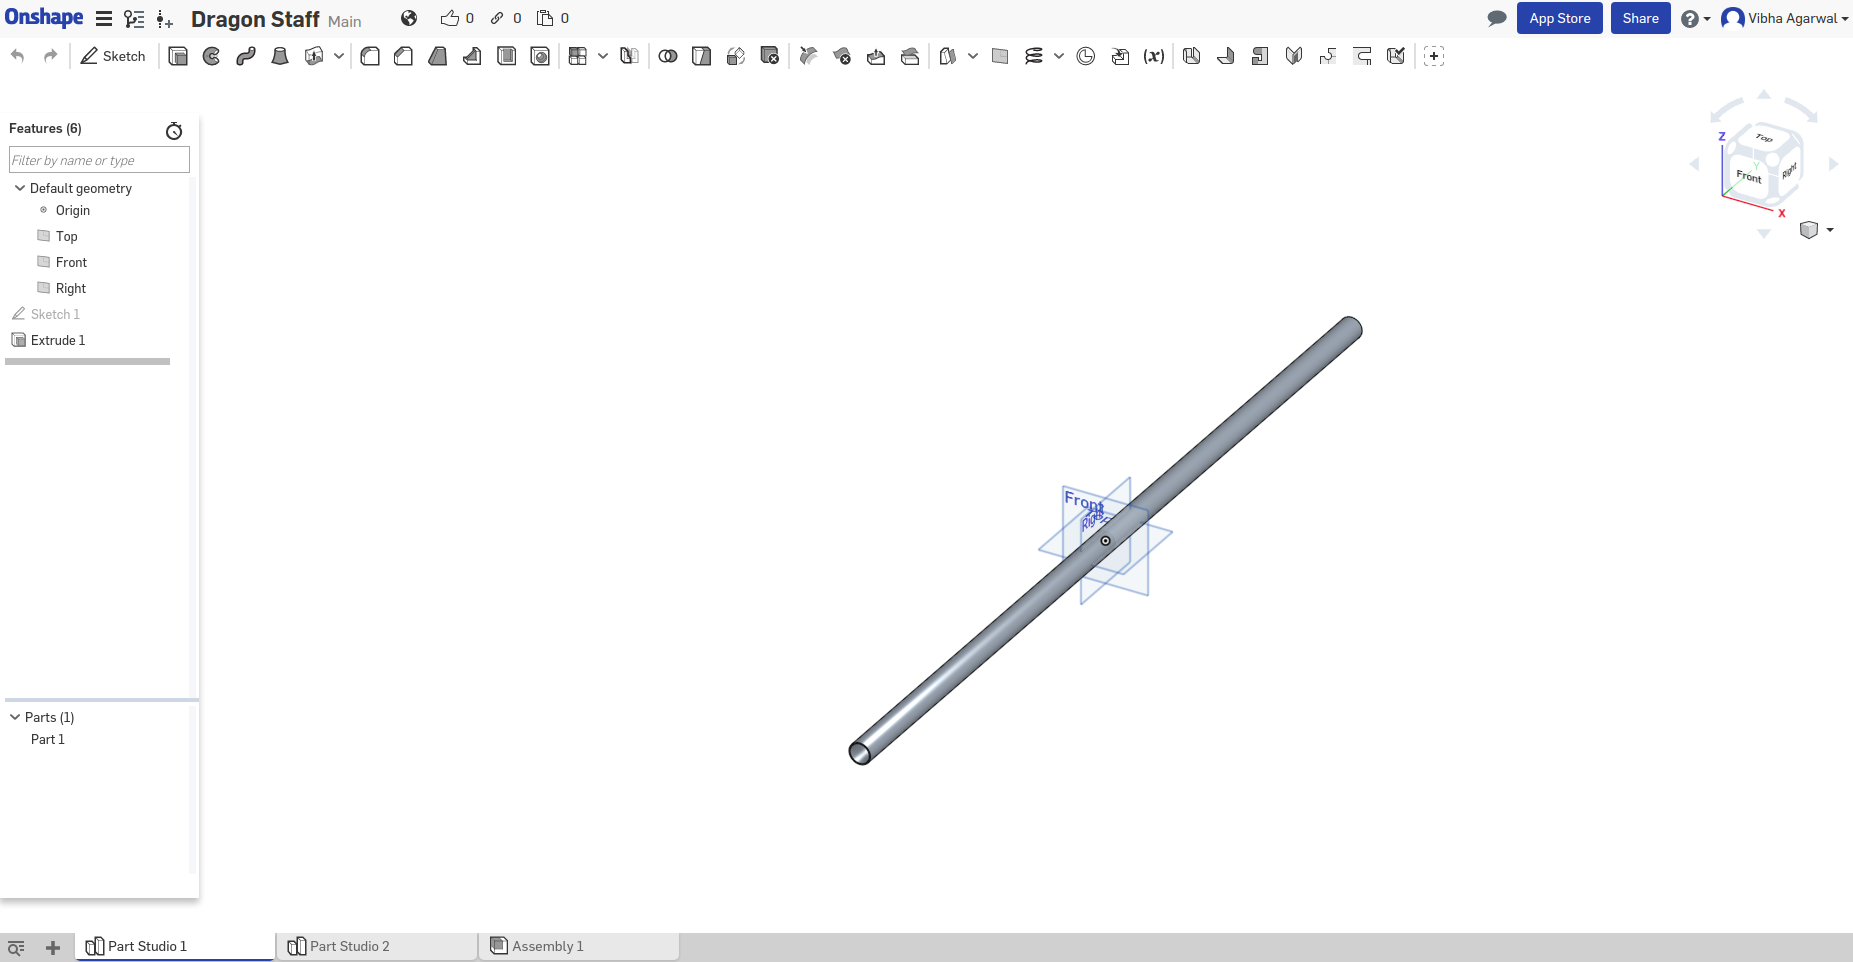
I decided to use Onshape because I was too lazy to download another software, it seemed pretty straightforward to use, and I could access my creations from both my Windows and Linux partitions. I decided to make the dragonstaff in two parts: the rod and the endpiece(s). The rod was very simple - I just made a circle with dimensions of a standard aluminum rod and extruded it in both directions.
 The endpiece was slightly harder because I don't have much experience with Cadding, and was unsure how to approach it. I ended up doing two sketches. The first sketch was for the extrusion of the center round piece that would fit the rod. After a few failed attempts, I ended up making a second sketch that was a line and a rectangle, with which I then made a circular pattern (4 copies).
 I made sure the line and rectangle were offset from an axis, so I was able to revolve the line and rectangle around the axis to make the spokes with wicks on the ends. I didnt know how to do it for all four spokes at once, so I had to use four revolves. It took longer than expected for such a simple piece, but I was pretty happy with the results.
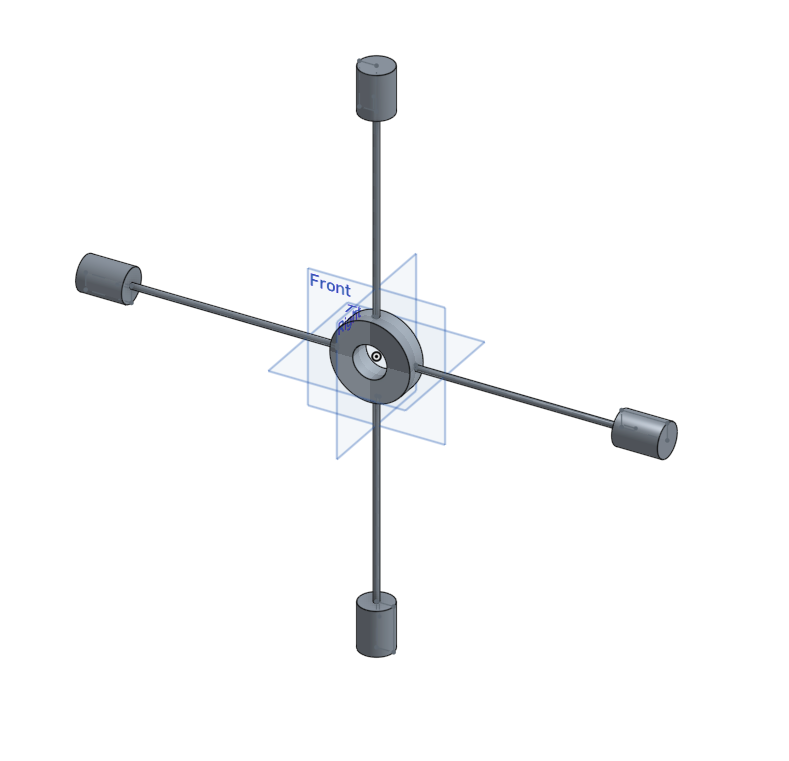 The last part was creating an assembly of the pieces, something that I've never done before. I still wanted to attempt making the entire model through just experimentation and no tutorials as a challenge to myself, so this part was a bit confusing. I think a different software such as Fusion might have been good because it gives more hints when you hover over icons. Nevertheless, I decided to use a Fastener mate on each end of the rod to 2 copies of the endpiece.
 Overall, the model looks like a dragonstaff, and has the appropriate dimensions - the functionality, however, is questionable to say the least!