week 8: output devices
This week, our assignment was to add an output device to a microcontroller board that we designed and program it to do something.
I wanted to use this week to begin experimenting with electronics to use in my final project. The output of my final project will be a sequence of music notes, so I wanted to use a speaker as an output device. I wanted to start with something I knew should work, so I milled the traces and outline for Neil's hello.speaker.45 board. The milling process went smoothly.
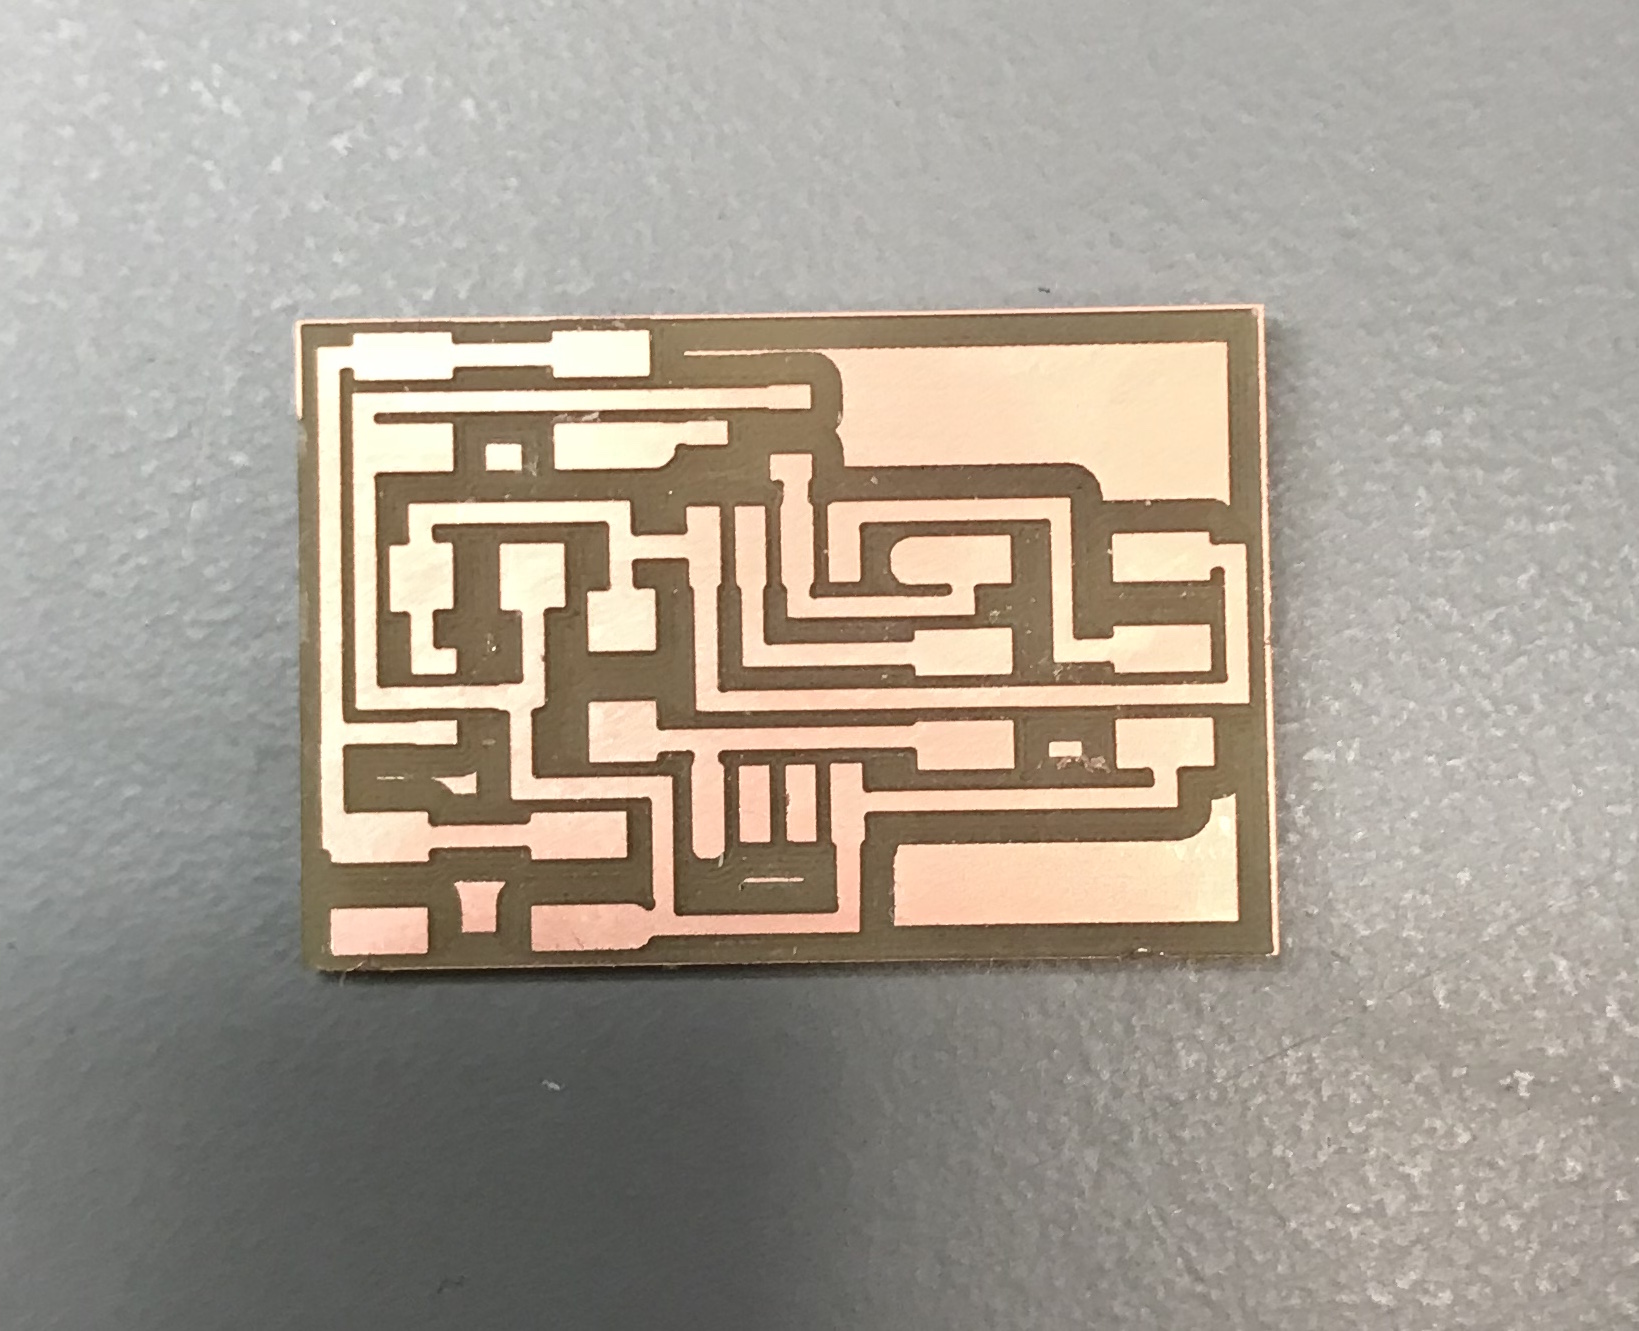
The milled hello.speaker.45 board.
I gathered the parts and soldered the board. I got help from Shirin regarding how to create the pin header connectors using the rainbow wires since I had not done that before. I also wasn't sure how I was supposed to connect to the speaker itself, and found out where I was supposed to solder the wires to the speaker and learned that either orientation would work for connecting the two wires to the speaker.
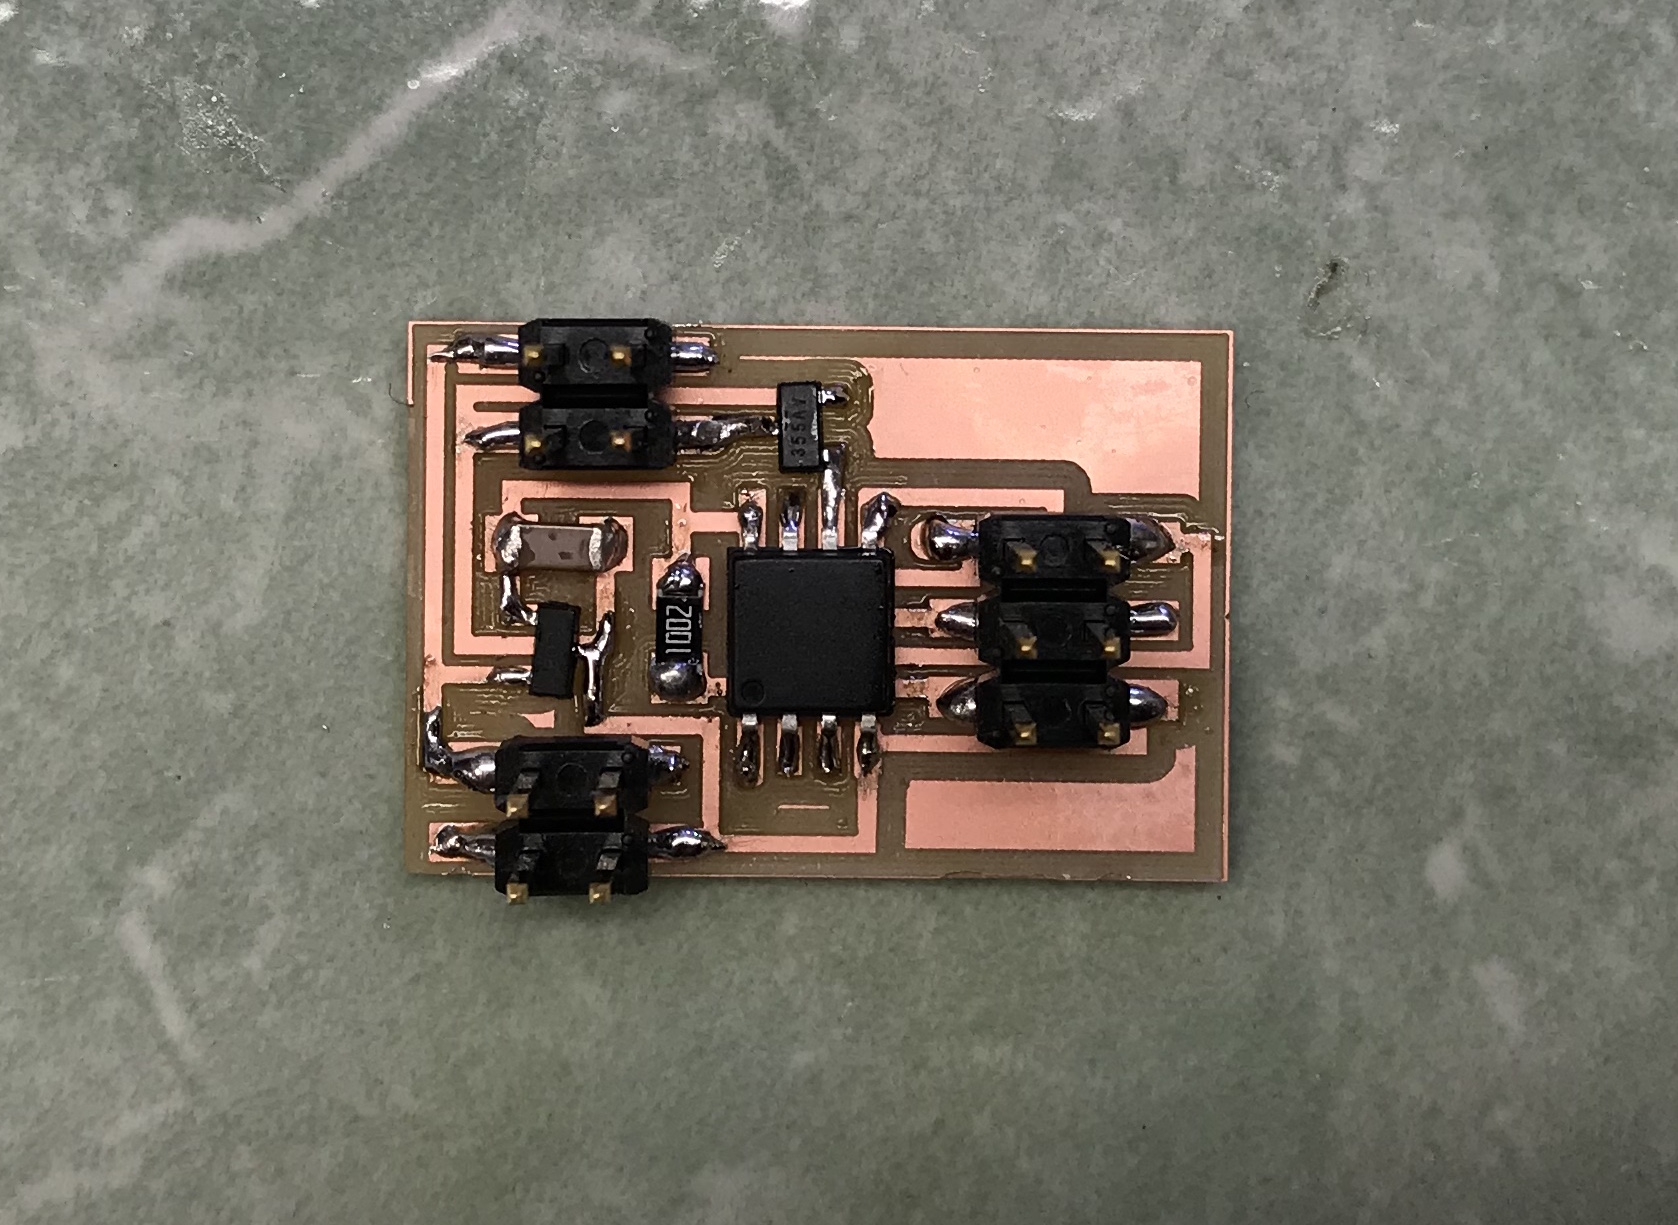
The stuffed hello.speaker.45 board.

The board connected to the speaker.
Attempting to program the board has been a major struggle. I connected it to my computer via one of the TinyISP programmers in EDS, but wasn't able to program it. I kept getting a rc=-1 error. After some failed attempts to debug, I decided to remake the board since it's a simple PCB and doesn't have a lot of components. I remilled the board and stuffed it, and when I tried to program it, the same thing happened.
The TA Mike was in EDS at this time, so I asked him for help debugging my board. He had me use the multimeter to make sure pins were connected correctly. I couldn't find any connections in the second board that seemed noticeably wrong, but Mike made some comments about places where my soldering could be better, so I went back and redid a lot of the soldering, until all the connections seemed good. I did more testing with the multimeter, then I tried to program it again, and still got the same error. Mike's next idea was that it was a problem with the ATTiny. I hadn't yet used the heat gun to remove a component from one of my boards, so I learned how to do that and successfully removed the ATTiny from my board, along with accidentally removing a couple of other small components. I soldered the new ATTiny and tested with the multimeter again. But when I tried to program it, the same thing happened.
At this point, I was frustrated and Mike was stumped. He told me to try one more thing--using a different programmer. There were two programmers in EDS, so I took out the other one, and...it worked on the first try! We think there was a problem with one of the programmers, which might actually explain some other programming struggles among students in the EECS section. But even though I was able to program the speaker board, I never got it to work when I connected it to a power supply.
I never came back to the speaker, but I incorporated output devices into my final project and designed my own output device board. For my final project, I used charlieplexing to control 12 LEDs embedded in piano keys. There is more information in my final project tracking page, but here are the board designs and evidence of my working output device.
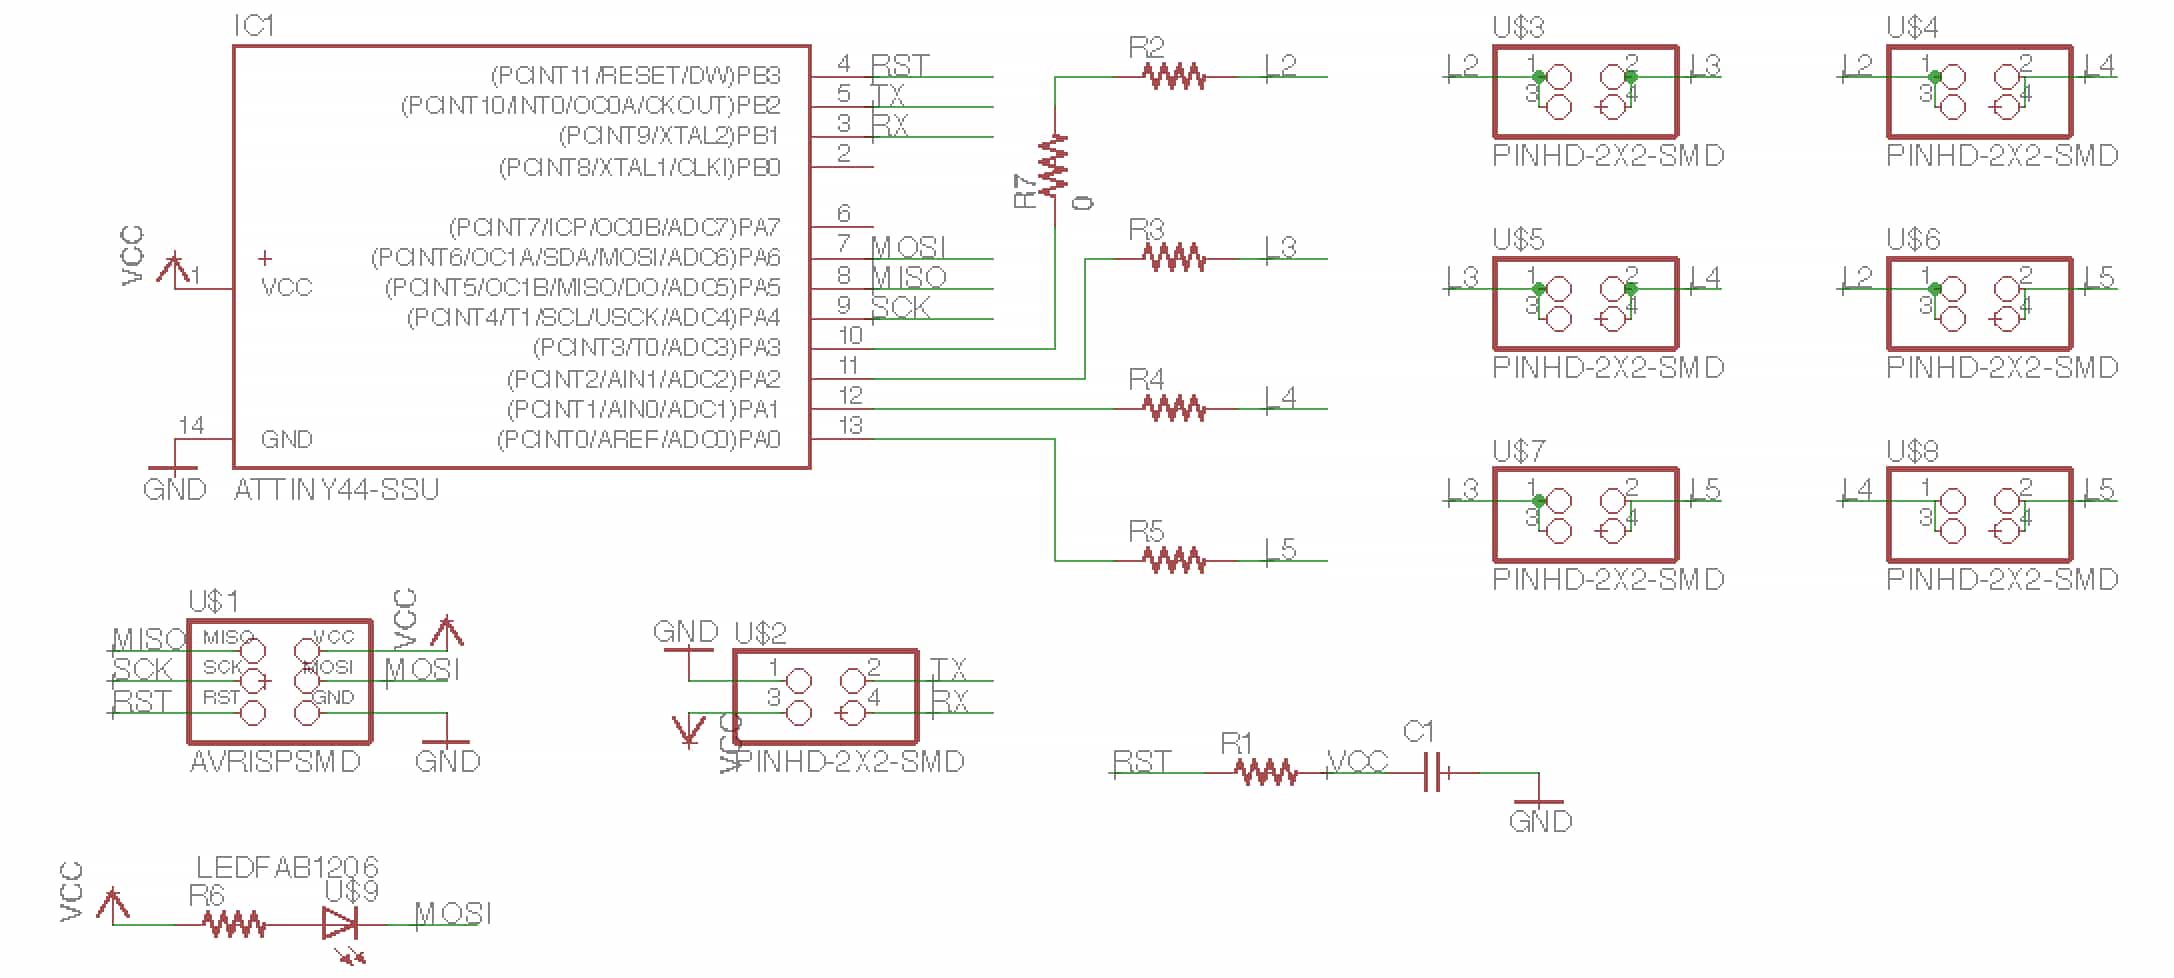
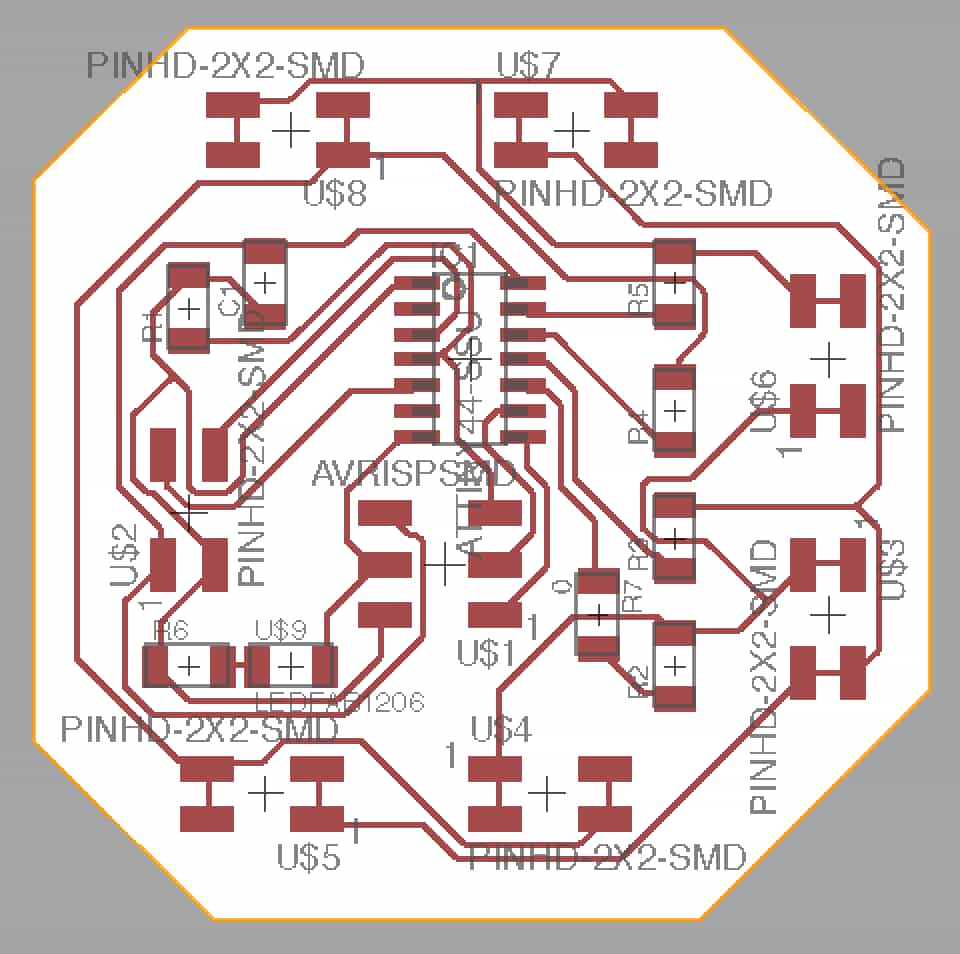
Designs for charlieplexing.
Working almost final version of project.