This week I want to create a board that combines ESP32 with an SD card and a microphone.
Install the Arduino IDE
brew cask install arduino
Setup board manager for ESP 32
Go to Preferences
Add an additional Board Manager URL
https://dl.espressif.com/dl/package_esp32_index.json
http://www.lapis-semi.com/en/semicon/speech/sample.html
https://github.com/maspetsberger/esp32-i2s-mems
https://jeelabs.org/2017/03/sd-cards-interrupts-and-dma/
https://www.esp32.com/viewtopic.php?t=1756&start=20
https://hackaday.io/project/28233/logs?sort=oldest
https://github.com/espressif/esp-idf/tree/master/examples/peripherals/i2s_adc_dac
Digital microphone (i2s or PDM)
http://fab.cba.mit.edu/classes/863.15/section.Harvard/people/Garber/wk10.html
Double Buffers
Hi Guys, I've had success connecting this SPH0641LU4H-1 MEMS PDM microphone to I2S interface and it works - sound quality is great.
Difference between PDM and i2S microphones? [https://ez.analog.com/audio/f/q-a/4259/difference-between-pdm-and-i2s-digital-microphones]
SPH0645LM4H i2S MEMS Microphone https://github.com/leonyuhanov/ESP32_MEMSMicrophone/blob/master/ESP32_MEMSMic.ino
INMP441 I2S Mic is BETTER (https://forum.micropython.org/viewtopic.php?f=18&t=5900&start=10)
Example Code for ESP32 i2s without Pipelines. https://www.esp32.com/viewtopic.php?f=13&t=1756
https://hackaday.io/project/162059-street-sense/log/160705-new-i2s-microphone
SPH0645LM4H
Understanding DMA and i2S https://github.com/miketeachman/micropython-esp32-i2s-examples
Soft AccessPoint Example: https://github.com/espressif/esp-idf/tree/master/examples/wifi/getting_started/softAP
xcrun simctl io booted recordVideo filename.mov
https://techtutorialsx.com/2018/01/07/esp32-arduino-http-server-over-soft-ap/
Multiple ways to write to SD cards, SPI, 1-bit SD, 4-bit SD MMC (faster: https://electronics.stackexchange.com/questions/124234/difference-between-1-bit-4-bit-and-8-bit-sdio)
https://og.reddit.com/r/esp32/comments/d71es9/a_breakdown_of_my_experience_trying_to_talk_to_an/
If you use SD interface in 4-line mode, instead of SPI, you can get read speed around 3MB/s, from a FAT partition, and around 12MB/s if you read from card as a raw block device
(Source: https://github.com/espressif/esp-idf/issues/3249)
https://esp32.com/viewtopic.php?t=1942
Code example: https://github.com/espressif/esp-idf/tree/d57890cdf/examples/storage/sd_card
Schematics for SD to ESP32 Connection.
Code: https://docs.espressif.com/projects/esp-idf/en/latest/api-reference/peripherals/sdspi_host.html
Which ESP32 Pins can be used for SPI? GPIO vs IOMUX https://esp32.com/viewtopic.php?t=11224
I used the recomended pullups GPIO14, GPIO15, GPIO2, GPIO4, GPIO12, GPIO13, each 10k.
| SD card pin | SPI pin | Notes | |
|---|---|---|---|
| GPIO14 (MTMS) | CLK | SCK | 10k pullup in SD mode |
| GPIO15 (MTDO) | CMD | MOSI | 10k pullup, both in SD and SPI modes |
| GPIO2 | D0 | MISO | 10k pullup in SD mode, pull low to go into download mode (see Note about GPIO2 below!) |
| GPIO4 | D1 | N/C | not used in 1-line SD mode; 10k pullup in 4-line SD mode |
| GPIO12 (MTDI) | D2 | N/C | not used in 1-line SD mode; 10k pullup in 4-line SD mode (see Note about GPIO12 below!) |
| GPIO13 (MTCK) | D3 | CS | not used in 1-line SD mode, but card's D3 pin must have a 10k pullup |
| N/C | CD | optional, not used in the example | |
| N/C | WP | optional, not used in the example |
With the given pinout for SPI mode, same connections between the SD card and ESP32 can be used to test both SD and SPI modes, provided that the appropriate pullups are in place. See the document about pullup requirements for more details about pullup support and compatibility of modules and development boards.
In SPI mode, pins can be customized. See the initialization of
sdspi_slot_config_tstructure in the example code.
gpio_pullup_en(GPIO_NUM_12); call. Most SD cards work fine when an internal pullup on GPIO12 line is enabled. Note that if ESP32 experiences a power-on reset while the SD card is sending data, high level on GPIO12 can be latched into the bootstrapping register, and ESP32 will enter a boot loop until external reset with correct GPIO12 level is applied.Source: https://github.com/espressif/esp-idf/tree/master/examples/storage/sd_card
Really helpful tutorial on ESP32 Pins:https://randomnerdtutorials.com/esp32-pinout-reference-gpios/
Ring Buffer? Dual Buffer?
Ring Buffer Documentation: https://docs.espressif.com/projects/esp-idf/en/latest/api-reference/system/freertos_additions.html
The classic way to deal with this problem is a ring buffer or alternatively a two phase buffer. You can then read data continuously while perfroming periodic time consuming block writes.
A ring buffer has separate read and write pointers (or indexes). You read ADC values on a timer interrupt. The interrupt handler writes the data through the write pointer, increments the pointer, and checks if it's gone past the end of the buffer. If it has, it sets it back to the start. The main program loop checks the amount of unwritten data in the buffer: if it's above a threshold it writes out a block of size equal to the threshold value. The check is done by comparing the read and write indexes to see how far ahead the write index has got. You subtract the read index from the write index. If the result is negative, the write index has wrapped round and you need to add the buffer length to the result (modulo arithmetic).
Handling wrap-round for the read pointer is simple if you choose a threshold of half of the buffer size: it will only ever have two values after completion of a read (0 or len(buf)//2) and won't wrap until the last element has been read. In other words you only need to perform the check at the end and the read activity always handles contiguous elements. This works for thresholds of other integer fractions of the size.
A two phase buffer uses two separate buffers with read and write alternating between the two. There's little to choose between them and I generally use ring buffers. They are actually much simpler to implement than my explanation suggests, once you've got your head round the idea.
In either case the size of the buffer is determined by the amount of time it takes to write out the amount of data you've chosen. This should be a worst case including provision for garbage collection - there's no penalty in too large a buffer aside from RAM use. In terms of implementation it's likely that an array will provide better performance than a Python list.
Source: https://forum.micropython.org/viewtopic.php?t=601
16k buffer?
Create big DMA buffer and use interrupts to flush it to SD card.
https://calsol.berkeley.edu/optimizing-file-writes/
// LOOP RECORDING
do
{
	//read data from I2S bus
	esp_err_t res = i2s_read(I2S_NUM, (void*)i2s_read_buff, I2S_DMA_BUFF_LEN_BYTES, &bytes_read, portMAX_DELAY);
	if(res != ESP_OK)
        {
		ESP_LOGE(TAG, "i2s_read error (ESP_FAIL) -> STOP RECORDING");
		break;
	}

	if(bytes_read != I2S_DMA_BUFF_LEN_BYTES)
	{
		ESP_LOGE(TAG, "i2s_read error (bytes_read != I2S_DMA_BUFF_LEN_BYTES)");
	}

        // write to SD Card
        size_t bytes_written_sd = fwrite(i2s_read_buff, bytes_read, 1, fileRec);
	if(bytes_written_sd != 1)
	{
		ESP_LOGE(TAG, "fwrite error -> STOP RECORDING");
		break;
	}
} while((xEventGroupGetBits(s_status_event_group) & STOP_RECORDING_BIT) == 0)
https://esp32.com/viewtopic.php?t=9583
https://stackoverflow.com/questions/1538420/difference-between-malloc-and-calloc
- You can use 4MiB of the 8MiB of external RAM in the same way as internal memory, give you enable that in menuconfig. However…
- You cannot use DMA with a buffer in external RAM. So while you can probably move a bunch of other stuff to the external memory, the DMA buffers need to stay in internal memory. (I’m halfway sure that DMA buffers are the bulk of the memory usage of Smartmatrix.)
- The remaining 4MiB of PSRAM can only be used through a special API; you’d need to integrate that into your peoject manually if you want to use that, and as it needs to be accessed through a bankswitching scheme, not every program will be adaptable to this.
Source: https://community.pixelmatix.com/t/will-i-benefit-by-having-an-esp-with-psram/447/5
ESP32 has a few hundred kilobytes of internal RAM, residing on the same die as the rest of the chip components. It can be insufficient for some purposes, so ESP32 has the ability to also use up to 4 MB of external SPI RAM memory.
This should be the backup option, if the ESP32 WROOM doesn't have enough power. Upgrade to the WROOVER
[codec_chip]-->i2s_stream-->wav_encoder-->fatfs_stream-->[sdcard]
https://docs.espressif.com/projects/esp-adf/en/latest/design-guide/design-considerations.html
"The initial spare internal RAM is 290kB." Wifi 50k+, Flash Drive 12k+
- According to the Wi-Fi menuconfig each Tx and Rx buffer occupies 1.6kB internal RAM. The value of 50kB RAM is assuming use of 5 Rx static buffers and 6 Tx static buffers. If PSRAM is not in use, then the “Type of WiFi Tx Buffer” option should be set as DYNAMIC in order to save RAM, in this case, the RAM usage will be far less than 50kB, but programmer should keep at least 50kB available for the Wi-Fi to be able to transmit the data. [Internal RAM only]
- Depending on value of SD_CARD_OPEN_FILE_NUM_MAX in audio_hal/board/board.h, that is then used in
sd_card_mount()function, the RAM needed will increase with a greater number of maximum open files. 12kB is the RAM needed with 5 max files and 512 bytes CONFIG_WL_SECTOR_SIZE. [Internal RAM only]- Depending on configuration settings of the I2S stream, refer to audio_stream/include/i2s_stream.h and audio_stream/i2s_stream.c. [Internal RAM only]
- Depending on configuration setting of the Ringbuffer, refer to DEFAULT_PIPELINE_RINGBUF_SIZE in audio_pipeline/include/audio_pipeline.h or user setting, if the buffer is created with e.g.
rb_create().
You can output the I2S0 clock using CLK_OUT0 like this:
 PIN_FUNC_SELECT(PERIPHS_IO_MUX_GPIO0_U, FUNC_GPIO0_CLK_OUT1);
    REG_SET_FIELD(PIN_CTRL, CLK_OUT1, 0);
Source: https://esp32.com/viewtopic.php?t=1521
Low Level i2s Code https://github.com/cnlohr/esp32-cnlohr-demo/tree/master/main
https://github.com/espressif/esp-adf/issues/164
https://og.reddit.com/r/esp32/comments/bid08m/finally_got_audio_sampling_via_dma_with_no_cpu/
Open source schematics of a ESP32 Adf Board: https://github.com/OLIMEX/ESP32-ADF/tree/master/SOFTWARE/Internet_Radio_demo
</reasearch>
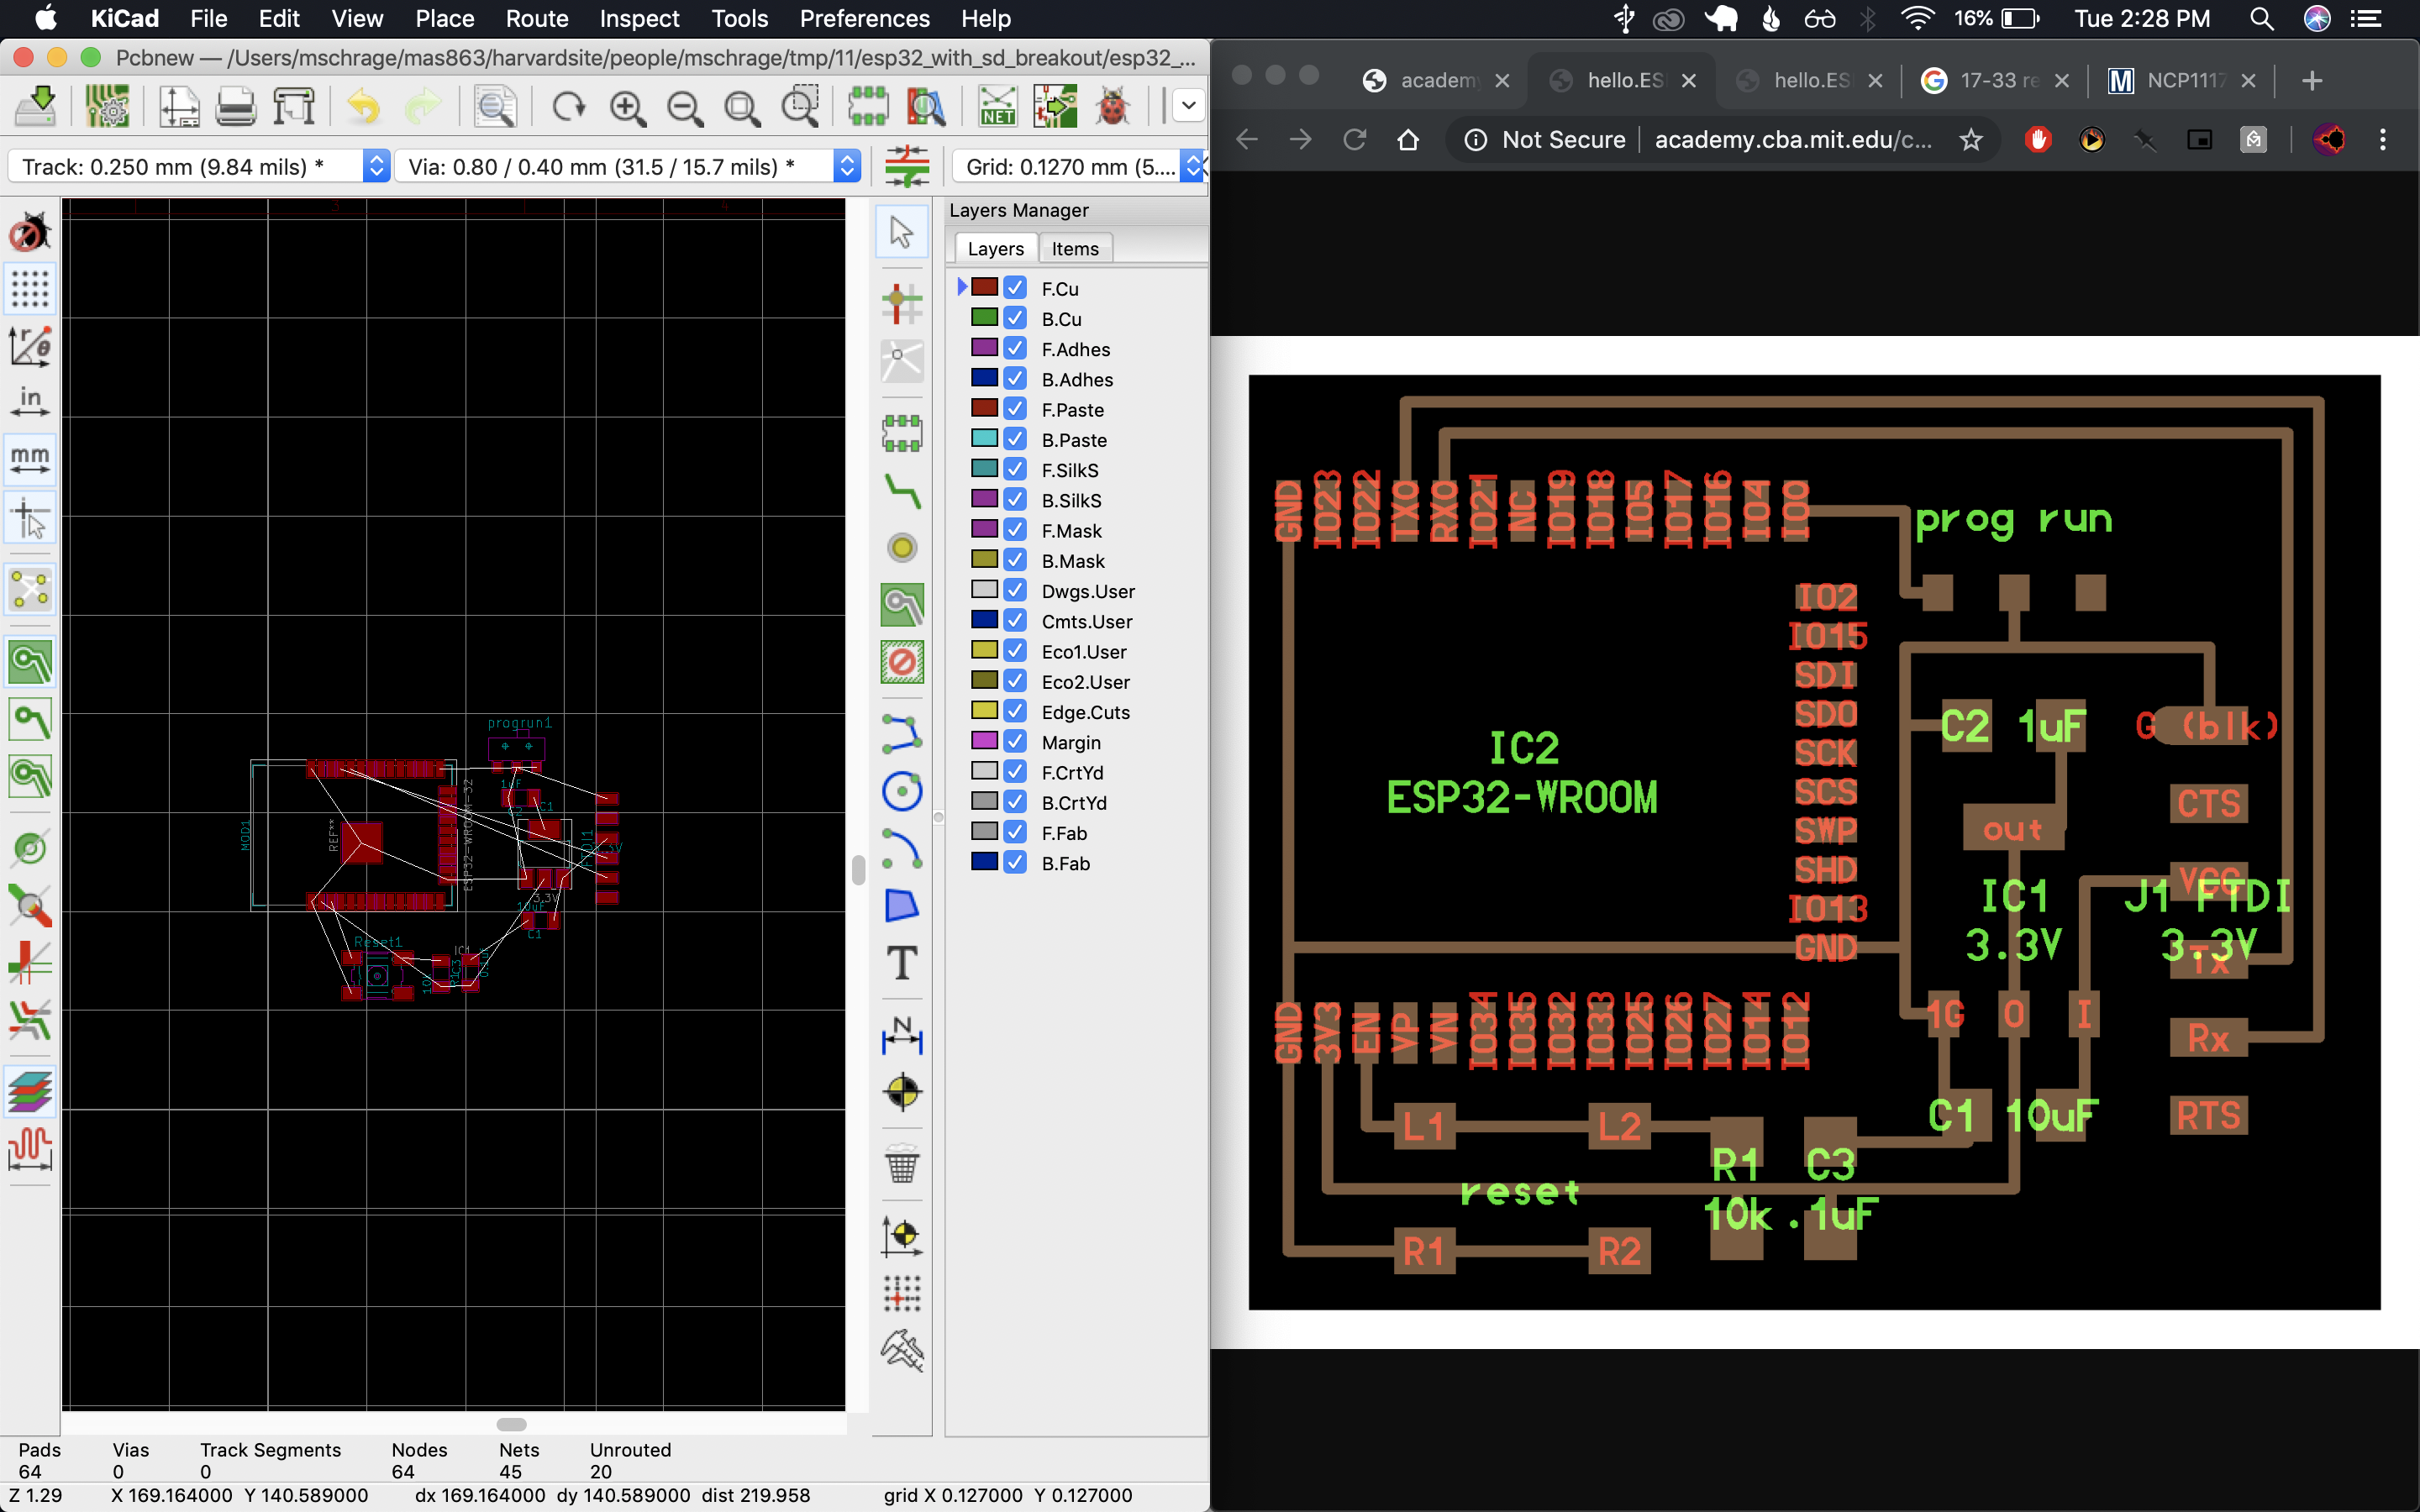
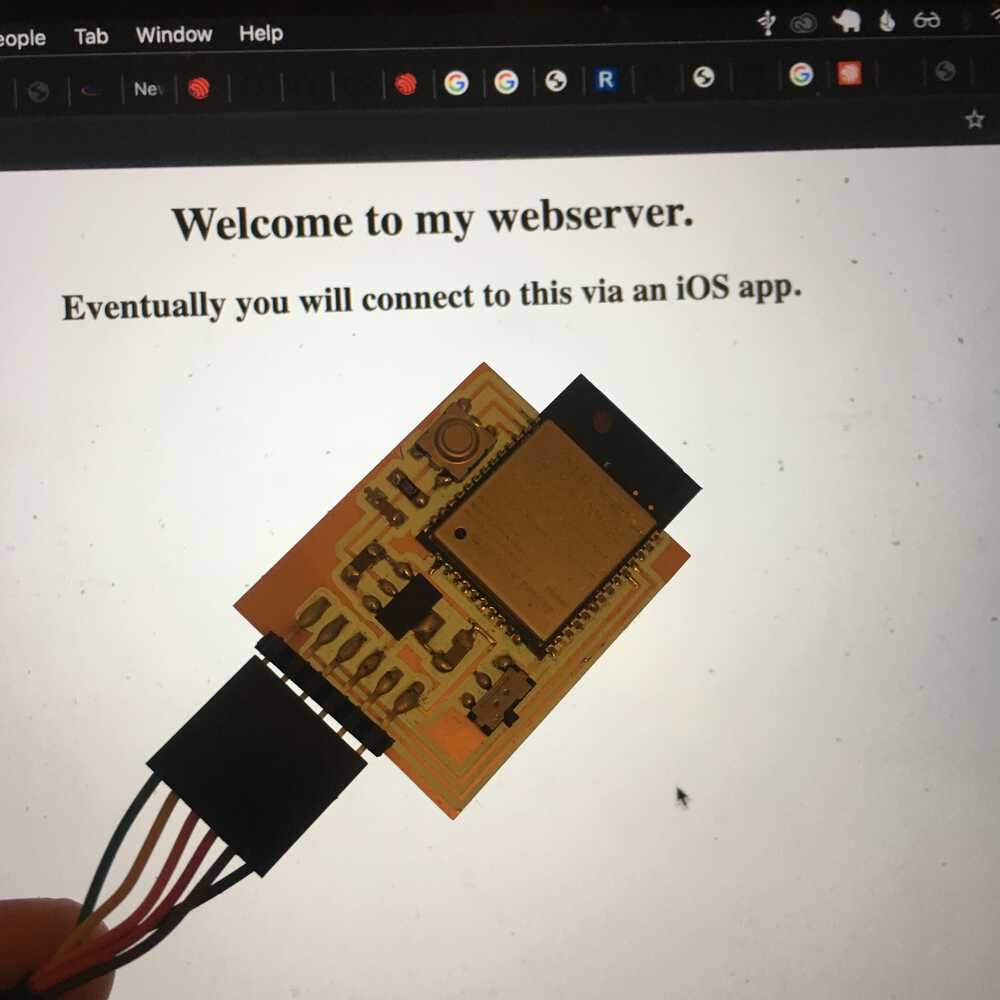
I made two boards. One was a direct copy of Neil's example board. The other included a microSD card as well.
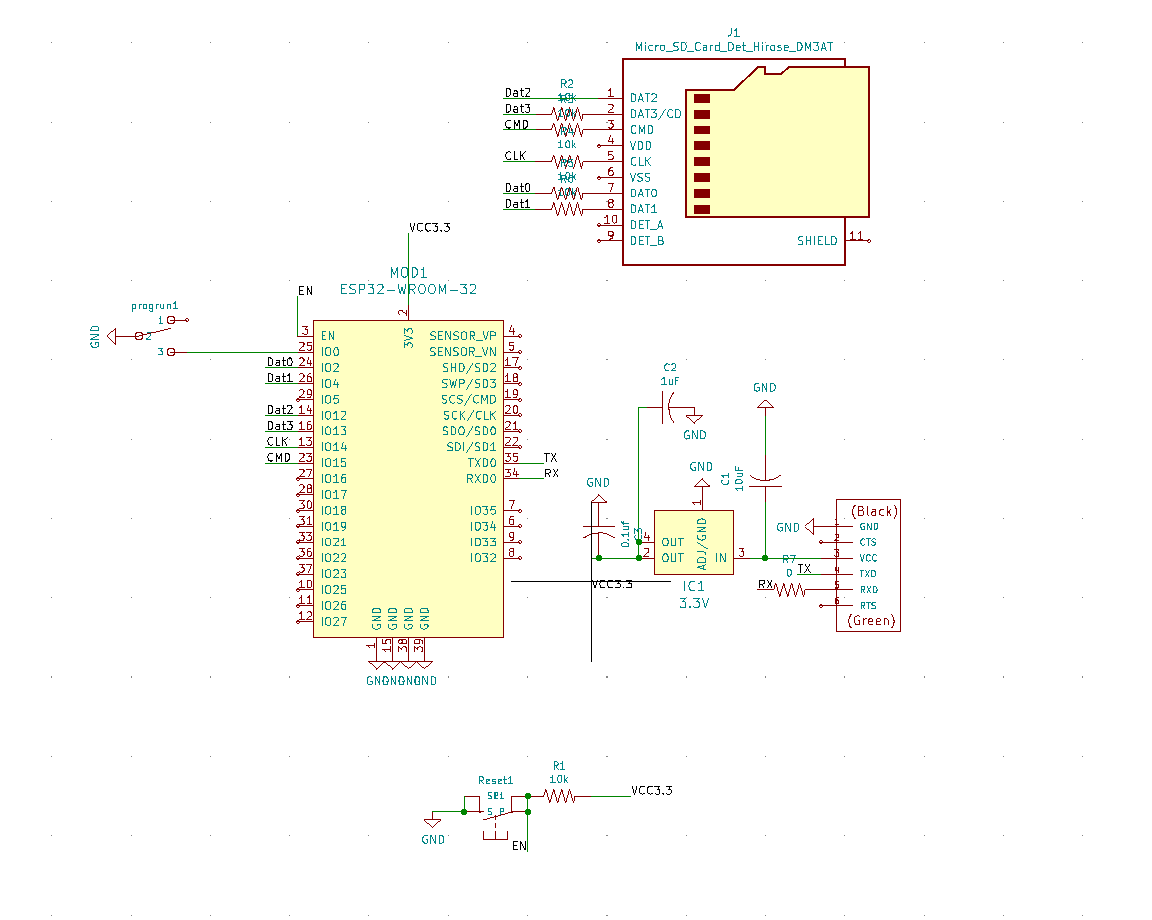
Here are the KiCad Schematics for my version.
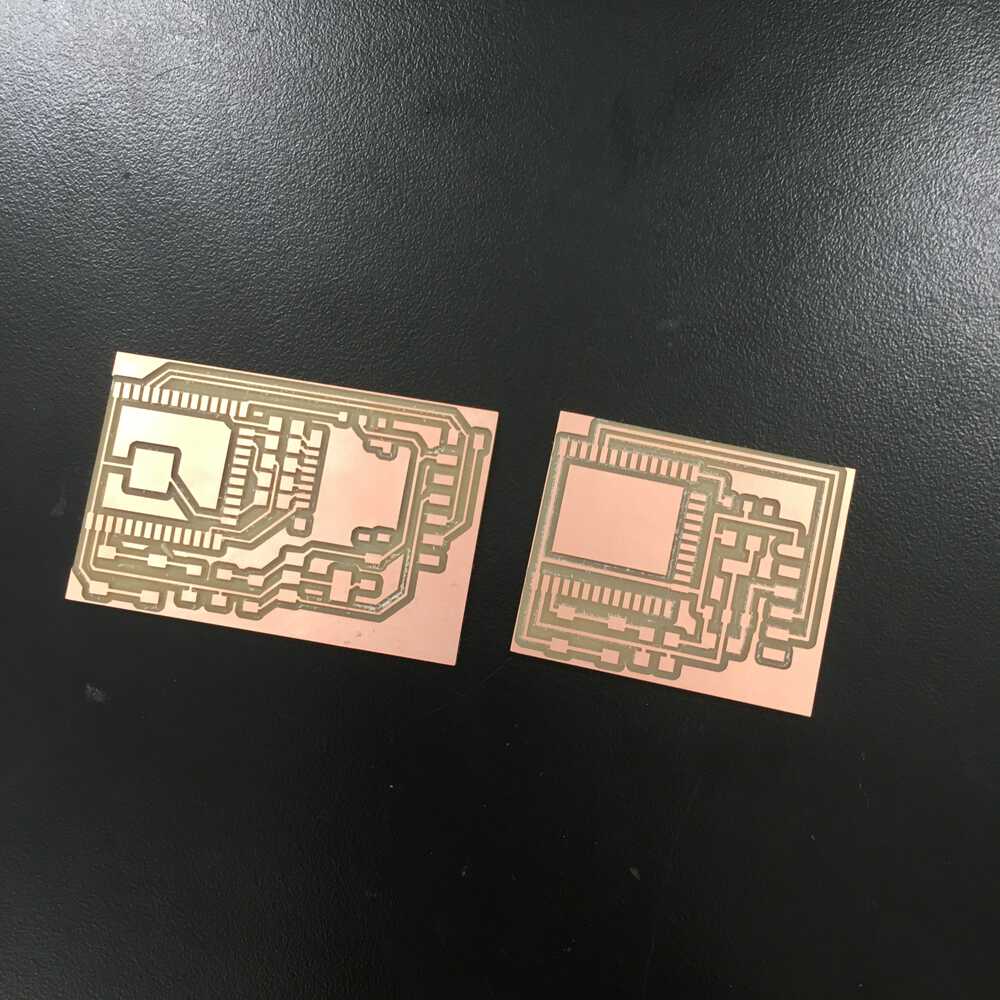
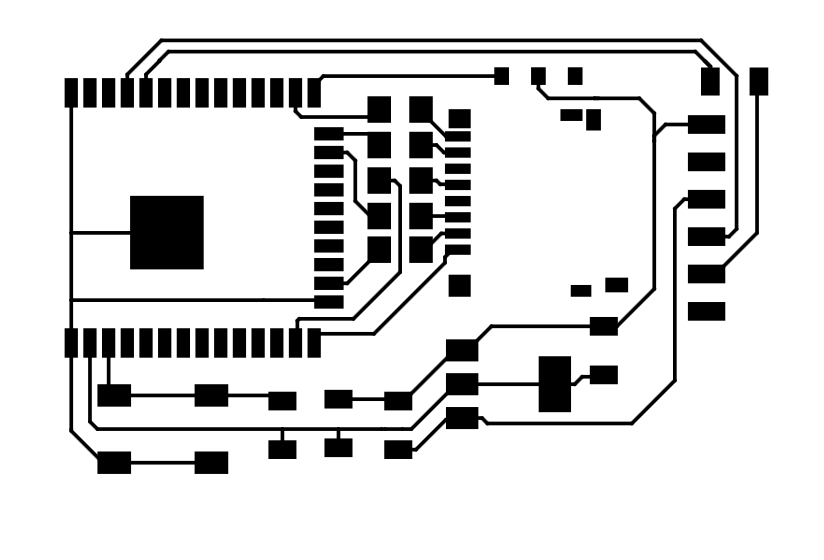
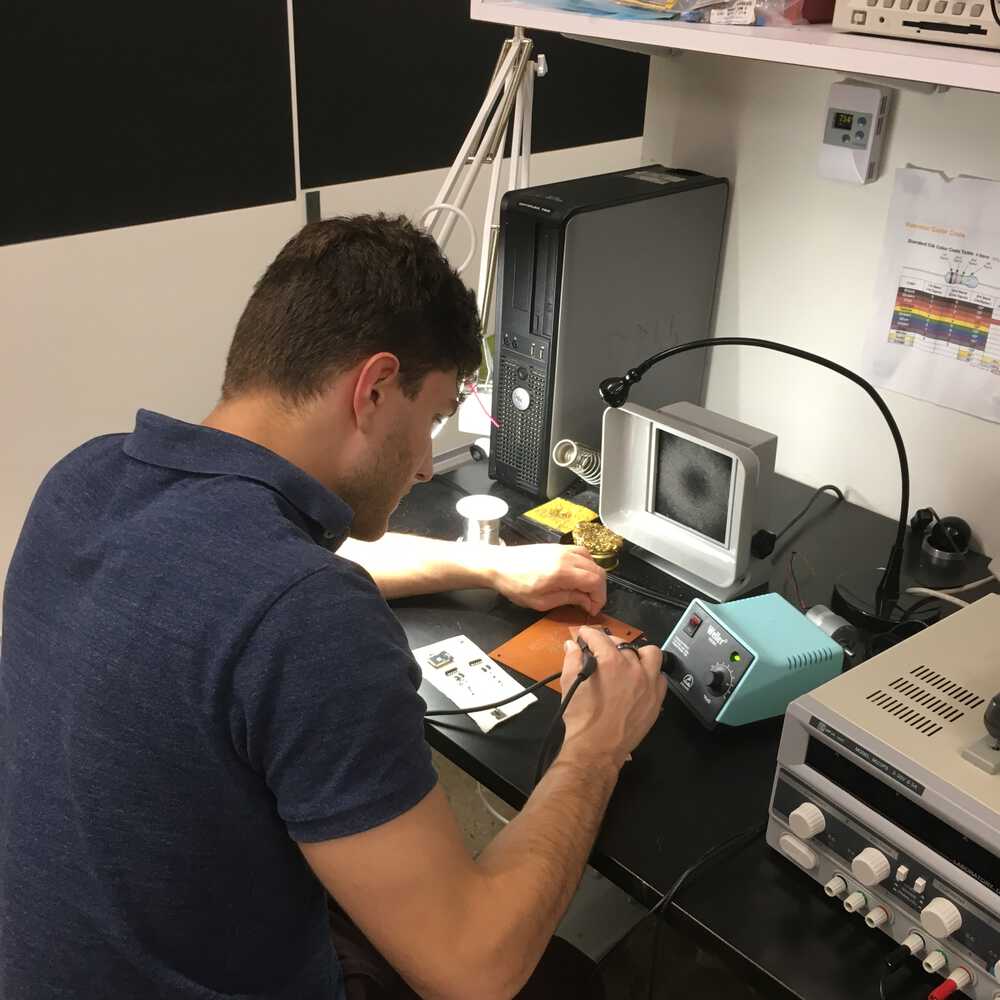
I milled both boards with minimal errors. I decided to get everything working with Neil's ESP32, because I wanted to minimize unknown sources of error while getting started with the ESP IDF.
The first thing I did was looking up the documentation. I am going to use the ESP Integrated Development Framework (IDF) rather than the Arduino. This may present some difficulties.
Something I record doing first is installing esptools.py which lets you debug if your board is working much more quickly. Just run pip install esptool.
Download the toolchain here and save it into your ~/Downloads directory. (This is the URL to the current version as of Nov 19th 2019, it may have been updated since then.)
Run the following commands
mkdir -p ~/esp
cd ~/esp
tar -xzf ~/Downloads/xtensa-esp32-elf-osx-1.22.0-80-g6c4433a-5.2.0.tar.gz
Add the toolchain to your PATH.
sudo nano ~/.profileexport PATH=$HOME/esp/xtensa-esp32-elf/bin:$PATH to the file.source ~/.profileGo to the ~/esp directory and git clone -b v3.3 --recursive https://github.com/espressif/esp-idf.git
Add IDF to your PATH.
nano ~/.profile
Add
export IDF_PATH=~/esp/esp-idf
source ~/.profile
You can run printenv IDF_PATH to check if it is there
Install python dependencies
python -m pip install --user -r $IDF_PATH/requirements.txtpip run sudo easy_install pipNow the development environment has been set up, we need to create our first project.
Find the serial port your device is connected to.
ls -a /dev/cu*Copy the example project in a new folder.
cd ~/esp
cp -r $IDF_PATH/examples/get-started/hello_world .
Set up the configurations and check if everything has worked so far.
cd ~/esp/hello_world
make menuconfig
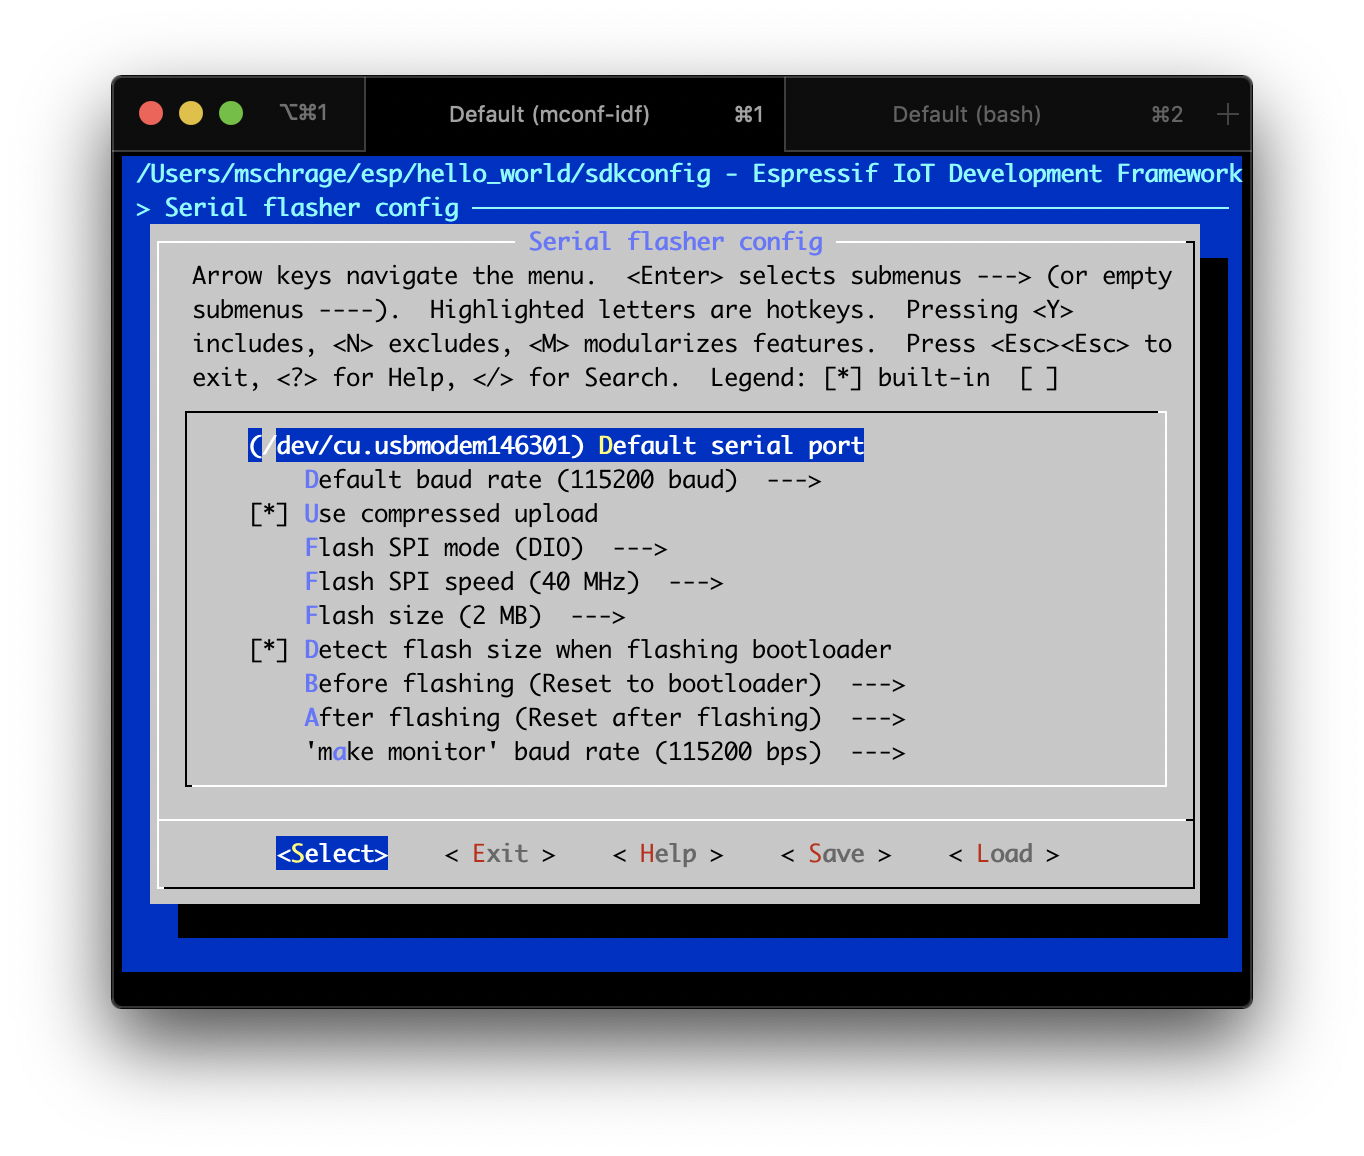
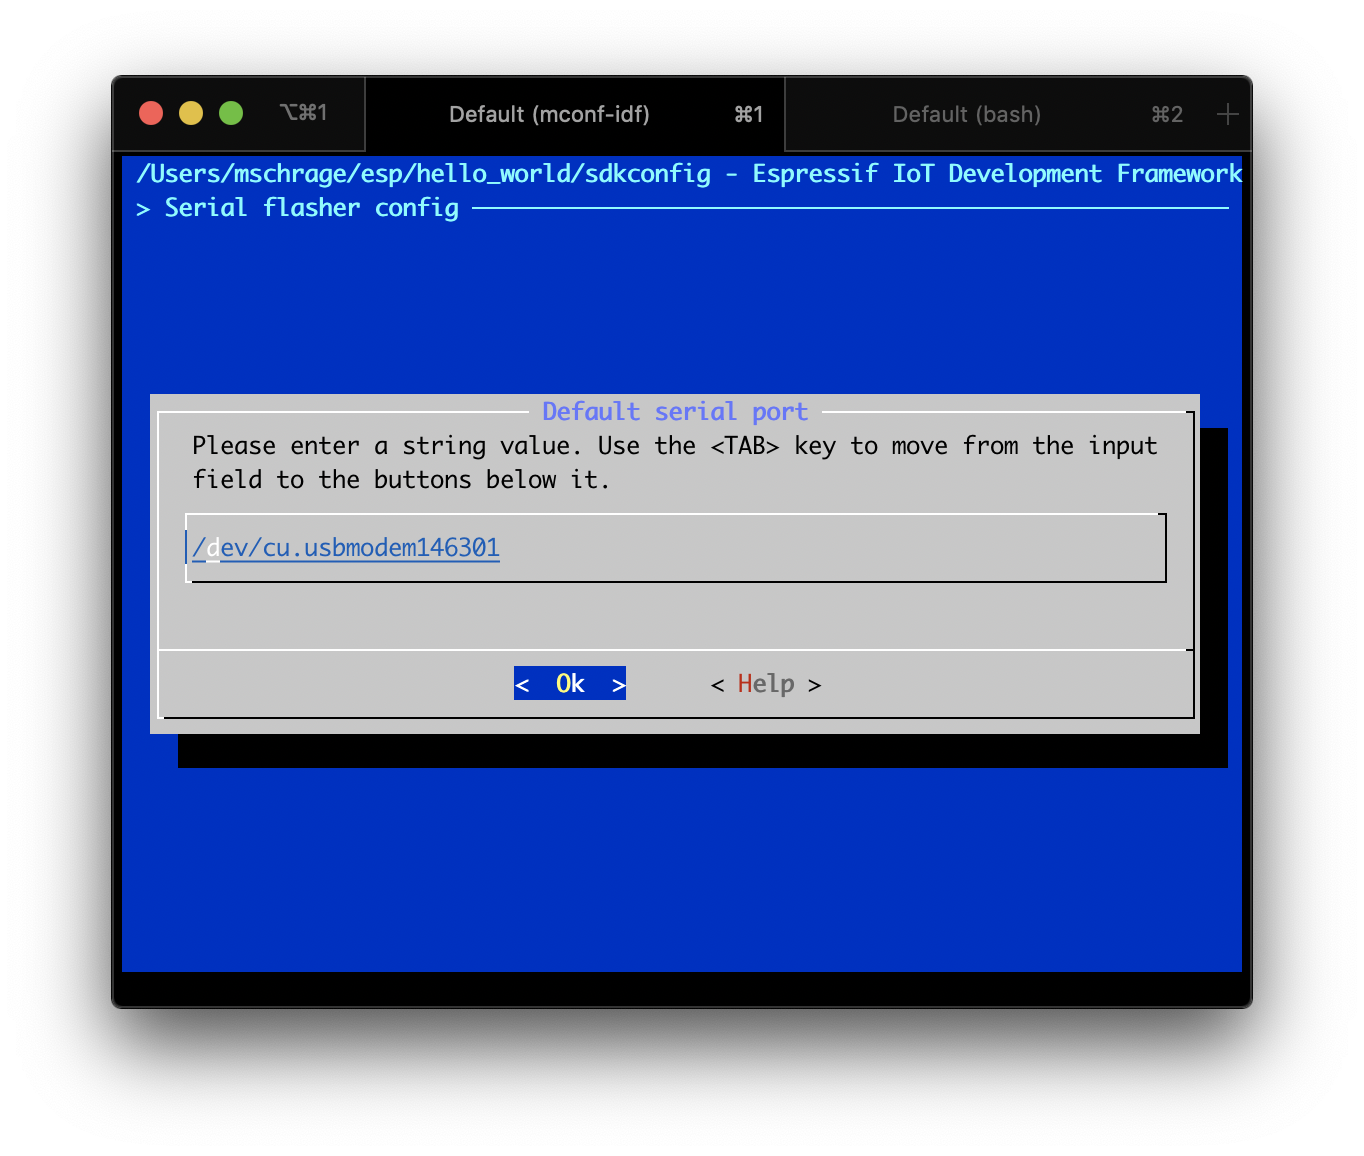
You should see a screen that looks like this. Navigate to Serial flasher config > Default serial port and update the value.
Run make flash with the ESP32 connected via an FTDI cable.
EN pin.Connecting...---...—, press the reset button. 
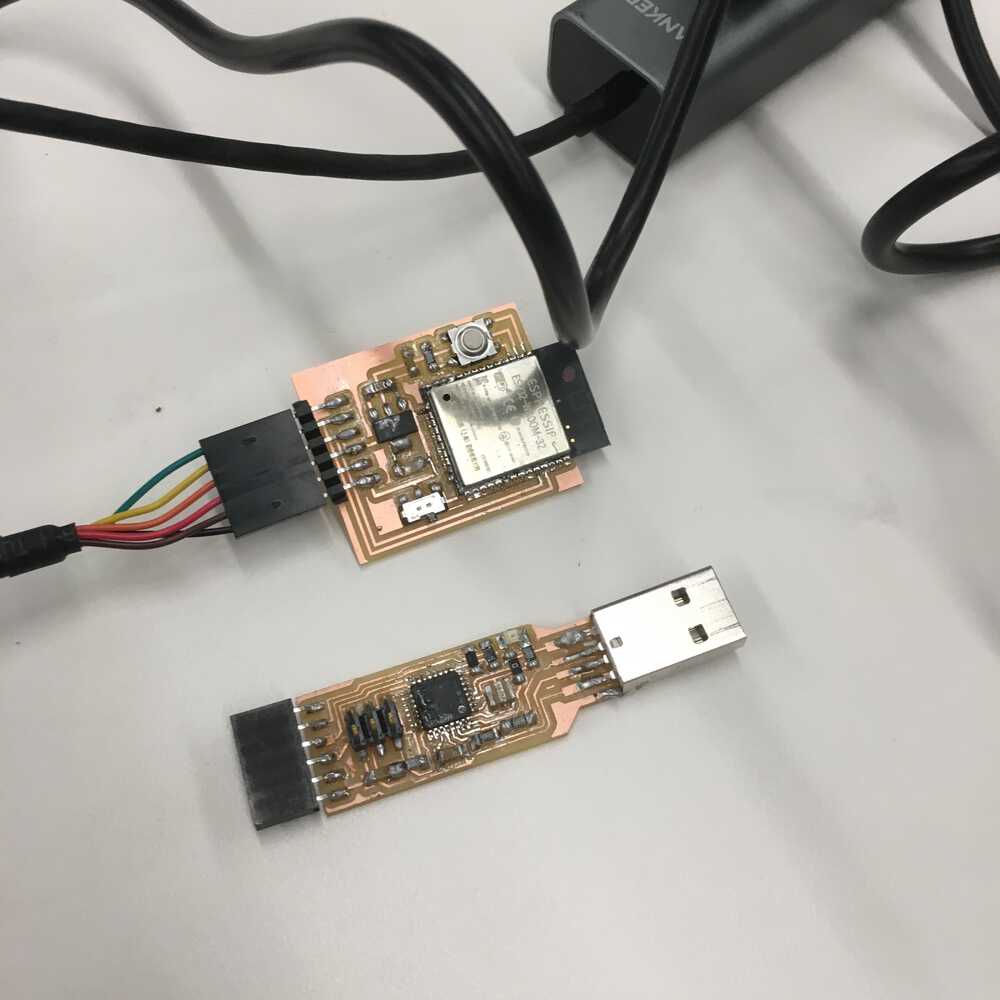
Just had a moment of panic because I thought my board wasn't working. I tried a lot of random stuff. Ended up downloading esptools.py. Tried different serial ports. Turns out the FabFTDI that I made can't program the board. I am not sure why, but swapping out out for one of the normal cables fixed the issue.
Use esptool to check the connection,esptool.py --port /dev/cu.usbserial-FTAV0OPC chip_id .
Make sure to disconnet any CoolTerm (or other serial connection) instances or you will get errors when trying to connect. Stuff like "could not open port" or "port is busy."
For my final project, I will need to transfer audio files from the ESP32 to my iOS device. I looked into file transfer over Bluetooth, but Apple doesn't permit it.
So the next best way to do this is to create a soft access point — essentially just a local WiFi hotspot that is not connected to the internet — and send the files over HTTP.
I used the code below which is a mix of the IDF SoftAP example and code to start a server that I found here.
#include <string.h>
#include "freertos/FreeRTOS.h"
#include "freertos/task.h"
#include "freertos/event_groups.h"
#include "esp_system.h"
#include "esp_wifi.h"
#include "esp_event_loop.h"
#include "esp_log.h"
#include "nvs_flash.h"

#include "lwip/err.h"
#include "lwip/sys.h"

#include "esp_vfs.h"
#include "esp_spiffs.h"
#include "esp_http_server.h"

#include <stdio.h>
#include <sys/param.h>
#include <sys/unistd.h>
#include <sys/stat.h>
#include <dirent.h>

#include "tcpip_adapter.h"
static const char *TAG = "wifi softAP";

static esp_err_t servePage_get_handler(httpd_req_t *req)
{
    httpd_resp_sendstr_chunk(req, "<!DOCTYPE html><html>");

    httpd_resp_sendstr_chunk(req, "<head><meta charset = \"utf-8\">");
    httpd_resp_sendstr_chunk(req, "<title>mschrage's audio recordings</title>");

    httpd_resp_sendstr_chunk(req, "</head>");

    httpd_resp_sendstr_chunk(req, "<body>");

    httpd_resp_sendstr_chunk(req, "<center><h1>Welcome to my webserver.</h1><h2>Eventually you will connect to this via an iOS app.</h2></center>");

    httpd_resp_sendstr_chunk(req, "</body></html>");

    httpd_resp_send_chunk(req, NULL, 0);
    return ESP_OK;
}

static const httpd_uri_t servePage = {
    .uri = "/",
    .method = HTTP_GET,
    .handler = servePage_get_handler,
    .user_ctx = NULL};

static httpd_handle_t start_webserver(void)
{
    httpd_handle_t server = NULL;
    httpd_config_t config = HTTPD_DEFAULT_CONFIG();

    // Start the httpd server
    ESP_LOGI(TAG, "Starting server on port: '%d'", config.server_port);
    if (httpd_start(&server, &config) == ESP_OK)
    {
        // Set URI handlers
        ESP_LOGI(TAG, "Registering URI handlers");
        httpd_register_uri_handler(server, &servePage);
        return server;
    }

    ESP_LOGI(TAG, "Error starting server!");
    return NULL;
}


/* The examples use WiFi configuration that you can set via 'make menuconfig'.

   If you'd rather not, just change the below entries to strings with
   the config you want - ie #define EXAMPLE_WIFI_SSID "mywifissid"
*/
#define EXAMPLE_ESP_WIFI_SSID      "mschrage"
#define EXAMPLE_ESP_WIFI_PASS      ""
#define EXAMPLE_MAX_STA_CONN       CONFIG_MAX_STA_CONN


/* FreeRTOS event group to signal when we are connected*/
static EventGroupHandle_t s_wifi_event_group;


static esp_err_t event_handler(void *ctx, system_event_t *event)
{
    switch(event->event_id) {
    case SYSTEM_EVENT_AP_STACONNECTED:
        ESP_LOGI(TAG, "station:"MACSTR" join, AID=%d",
                 MAC2STR(event->event_info.sta_connected.mac),
                 event->event_info.sta_connected.aid);
        break;
    case SYSTEM_EVENT_AP_STADISCONNECTED:
        ESP_LOGI(TAG, "station:"MACSTR"leave, AID=%d",
                 MAC2STR(event->event_info.sta_disconnected.mac),
                 event->event_info.sta_disconnected.aid);
        break;
    default:
        break;
    }
    return ESP_OK;
}

void wifi_init_softap()
{
    s_wifi_event_group = xEventGroupCreate();

    tcpip_adapter_init();
    ESP_ERROR_CHECK(esp_event_loop_init(event_handler, NULL));

    wifi_init_config_t cfg = WIFI_INIT_CONFIG_DEFAULT();
    ESP_ERROR_CHECK(esp_wifi_init(&cfg));
    wifi_config_t wifi_config = {
        .ap = {
            .ssid = EXAMPLE_ESP_WIFI_SSID,
            .ssid_len = strlen(EXAMPLE_ESP_WIFI_SSID),
            .password = EXAMPLE_ESP_WIFI_PASS,
            .max_connection = EXAMPLE_MAX_STA_CONN,
            .authmode = WIFI_AUTH_WPA_WPA2_PSK
        },
    };
    if (strlen(EXAMPLE_ESP_WIFI_PASS) == 0) {
        wifi_config.ap.authmode = WIFI_AUTH_OPEN;
    }

    ESP_ERROR_CHECK(esp_wifi_set_mode(WIFI_MODE_AP));
    ESP_ERROR_CHECK(esp_wifi_set_config(ESP_IF_WIFI_AP, &wifi_config));
    ESP_ERROR_CHECK(esp_wifi_start());

            tcpip_adapter_ip_info_t ip_info;
        IP4_ADDR(&ip_info.ip, 192, 168, 1, 1);
        IP4_ADDR(&ip_info.gw, 192, 168, 1, 1);
        IP4_ADDR(&ip_info.netmask, 255, 255, 255, 0);

        tcpip_adapter_ap_start((uint8_t *)"9C:B6:D0:E7:30:0F", &ip_info);

    ESP_LOGI(TAG, "wifi_init_softap finished.SSID:%s password:%s",
             EXAMPLE_ESP_WIFI_SSID, EXAMPLE_ESP_WIFI_PASS);

    start_webserver();

}


void app_main()
{
    //Initialize NVS
    esp_err_t ret = nvs_flash_init();
    if (ret == ESP_ERR_NVS_NO_FREE_PAGES || ret == ESP_ERR_NVS_NEW_VERSION_FOUND) {
      ESP_ERROR_CHECK(nvs_flash_erase());
      ret = nvs_flash_init();
    }
    ESP_ERROR_CHECK(ret);

    ESP_LOGI(TAG, "ESP_WIFI_MODE_AP");
    wifi_init_softap();
}
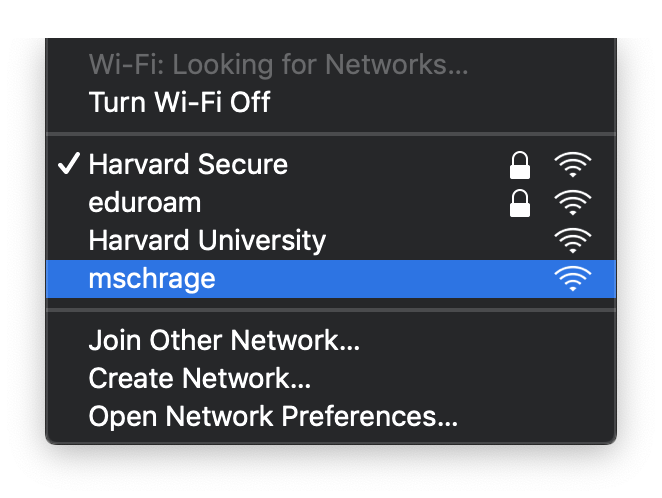
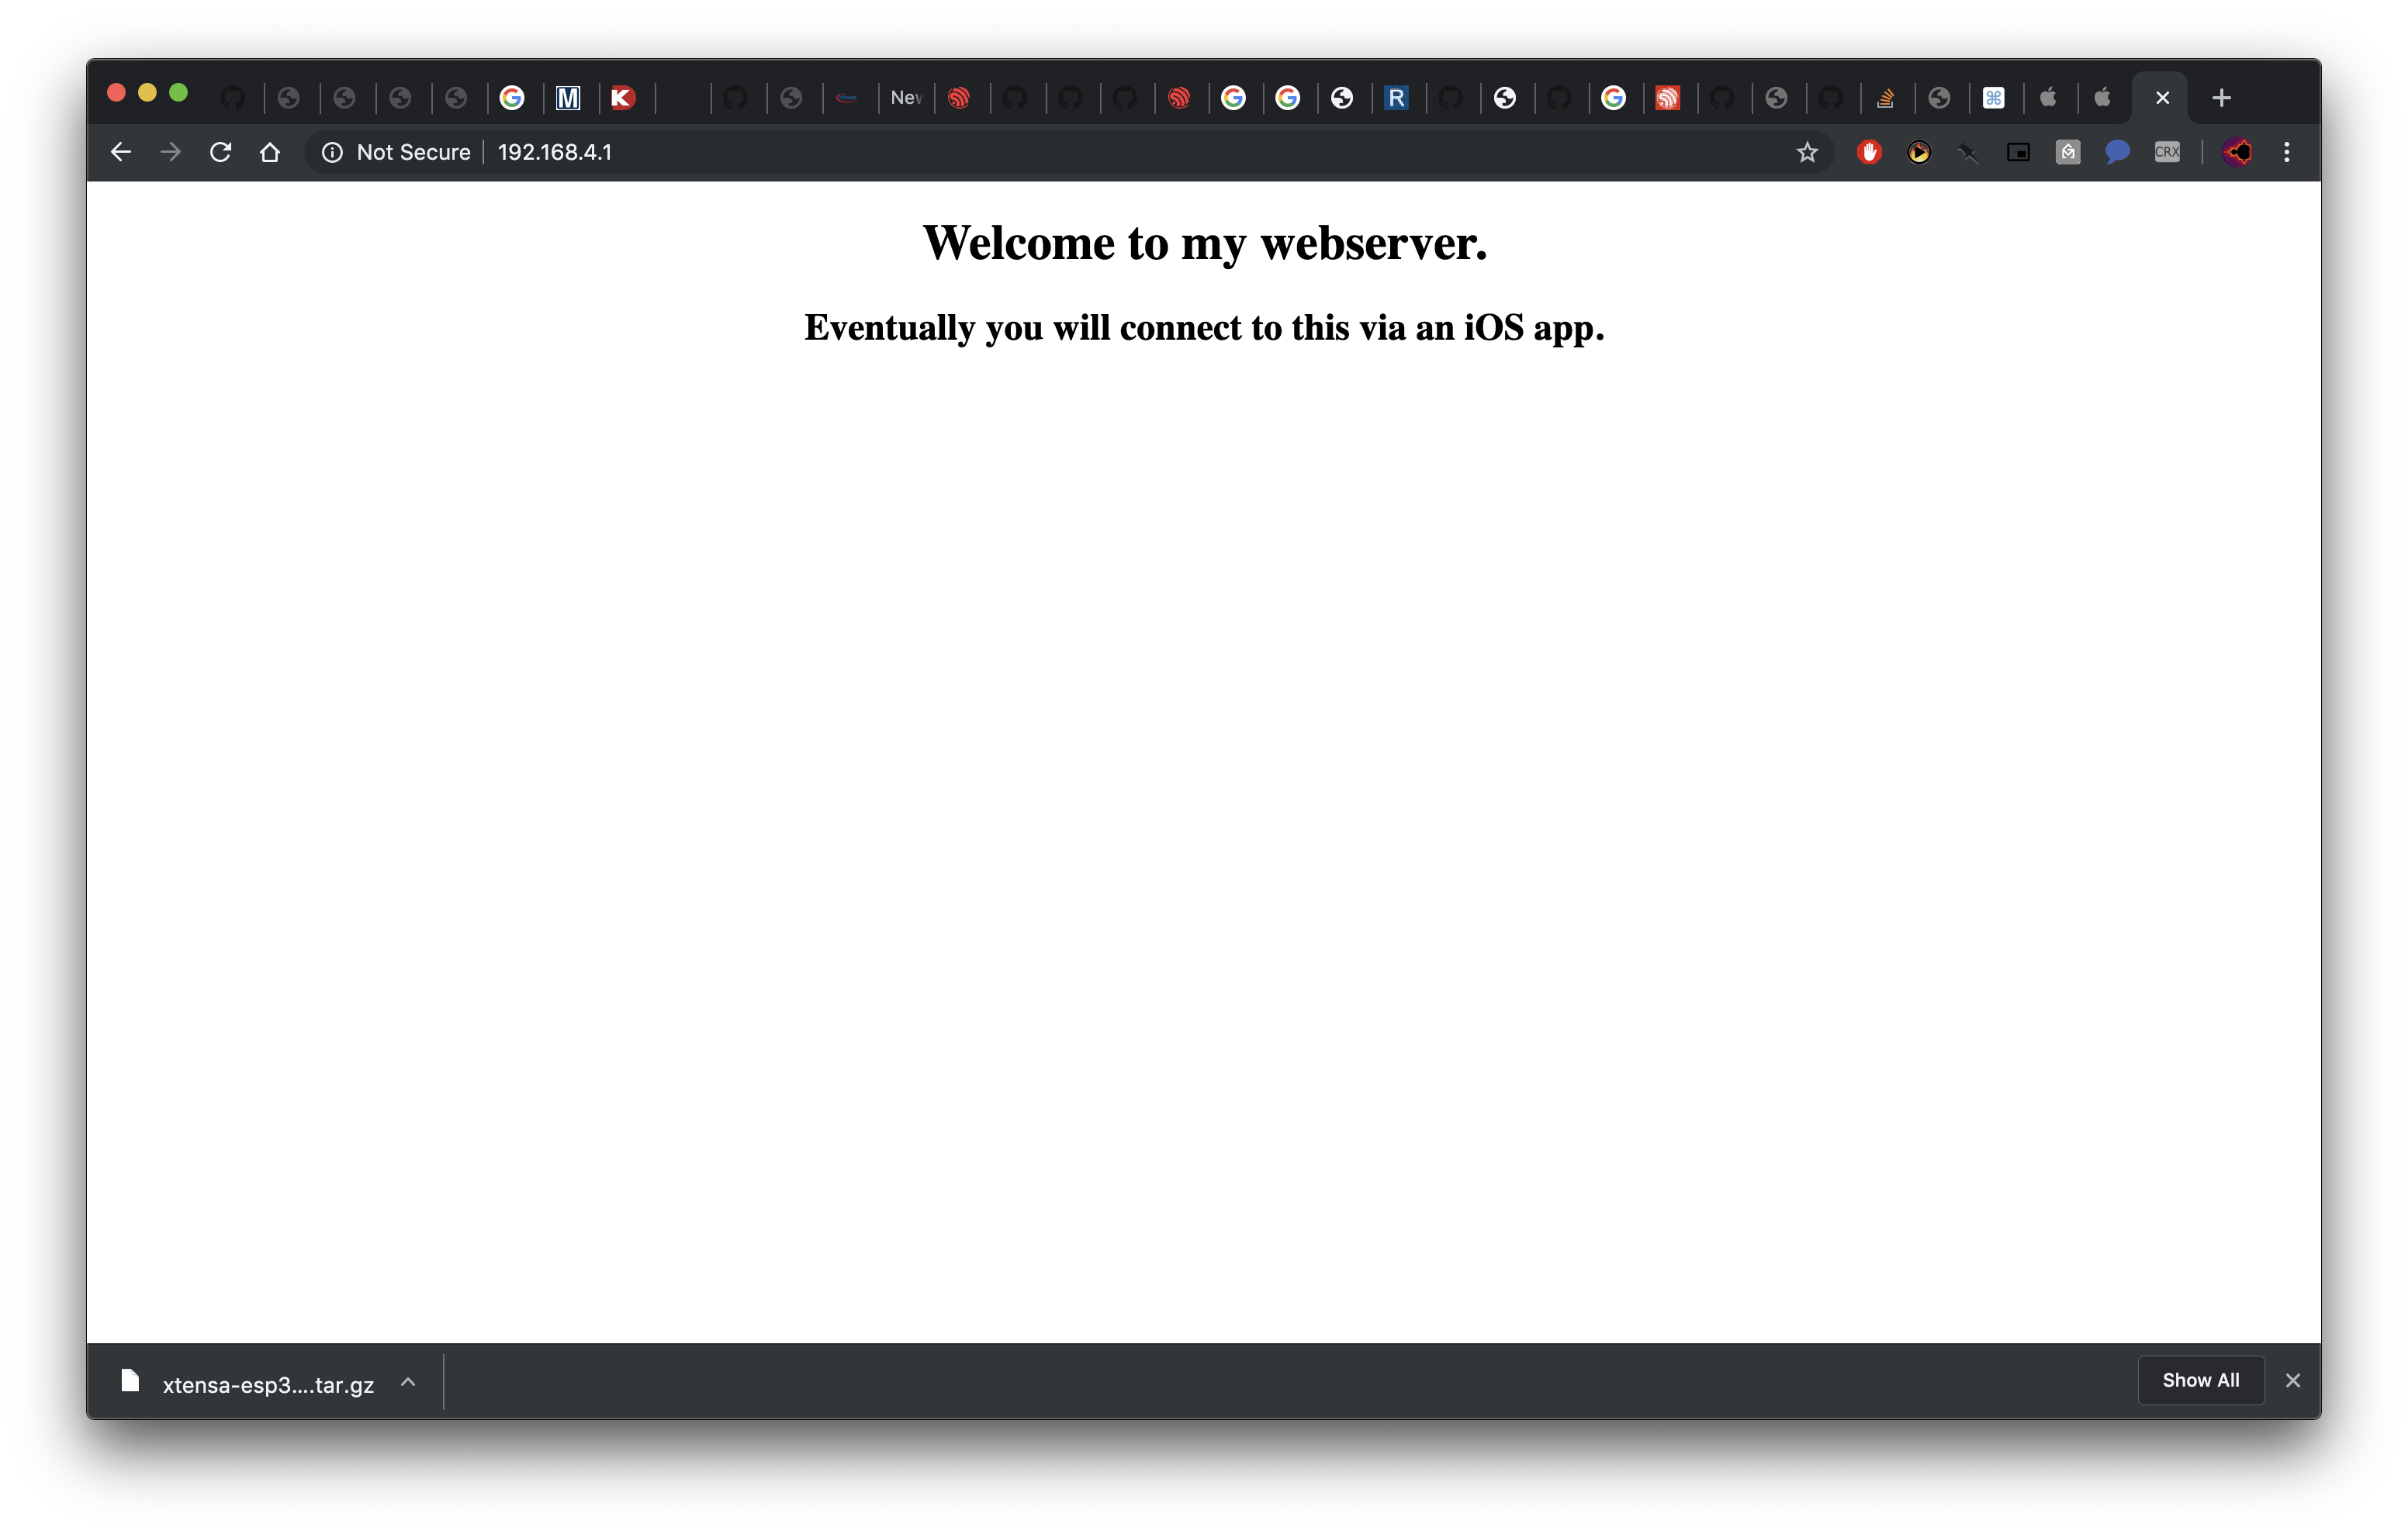
The default IP address of the ESP32 in SoftAccess Mode is 192.168.4.1. So if you connect to the ESP32's WiFi network and go to 192.168.4.1:80/, you will see the following webpage.
It was getting late by the time I managed to get this to work, but I wanted to throw together a simple iOS app to see if I could get the device to programmatically connect to the ESP32's wifi network.
import NetworkExtension

let wifiConfig = NEHotspotConfiguration(ssid: ssid)
        wiFiConfig.joinOnce = false
        NEHotspotConfigurationManager.shared.apply(wifiConfig) { error in
       //Do something                                                       }
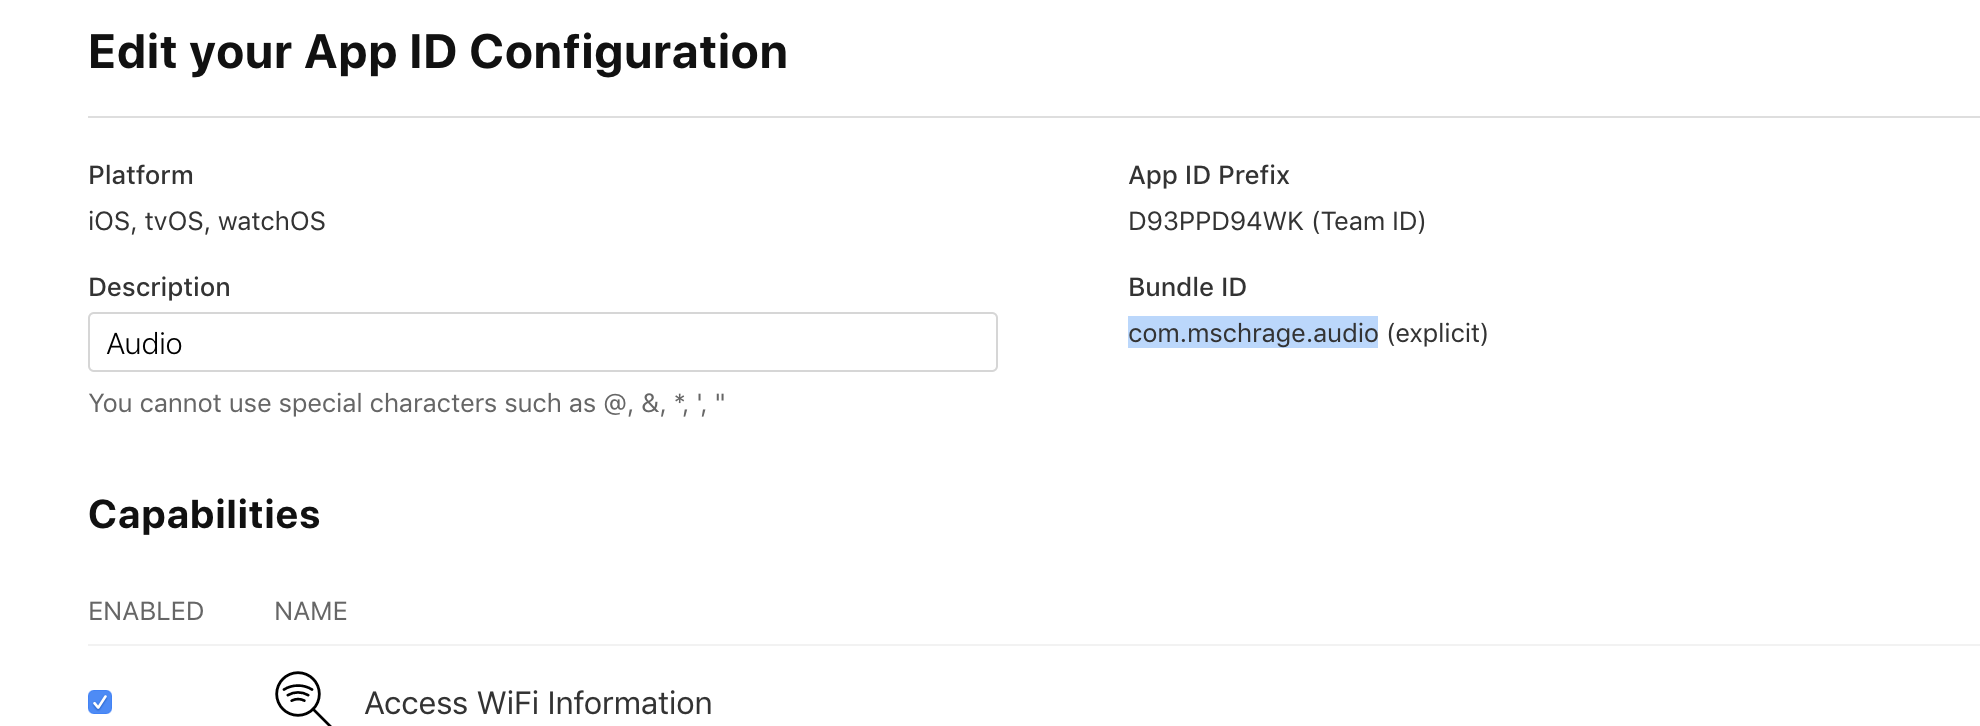
You need to add Network Extensions & Hotspot Capability to your app — this requires registering as an Apple Developer and paying $99 per year.
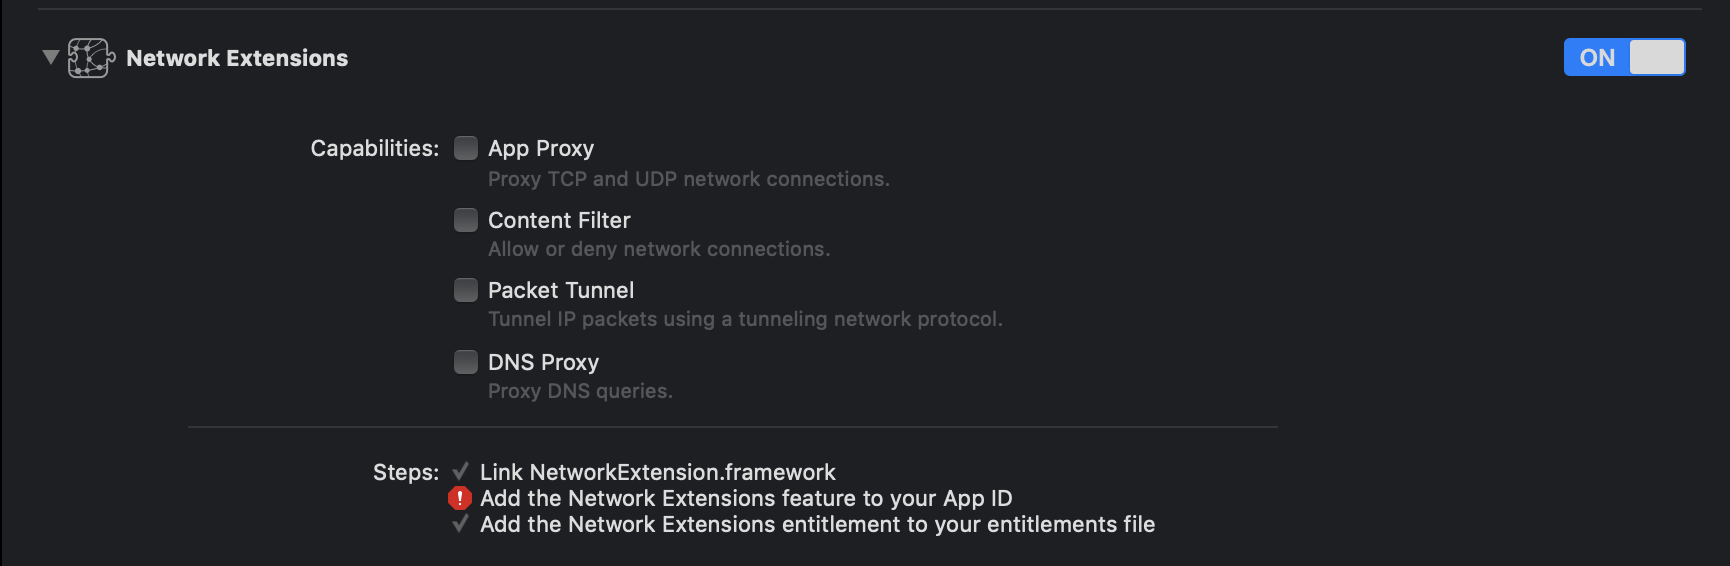

You will need to update these settings in your App Id as well as in Xcode.
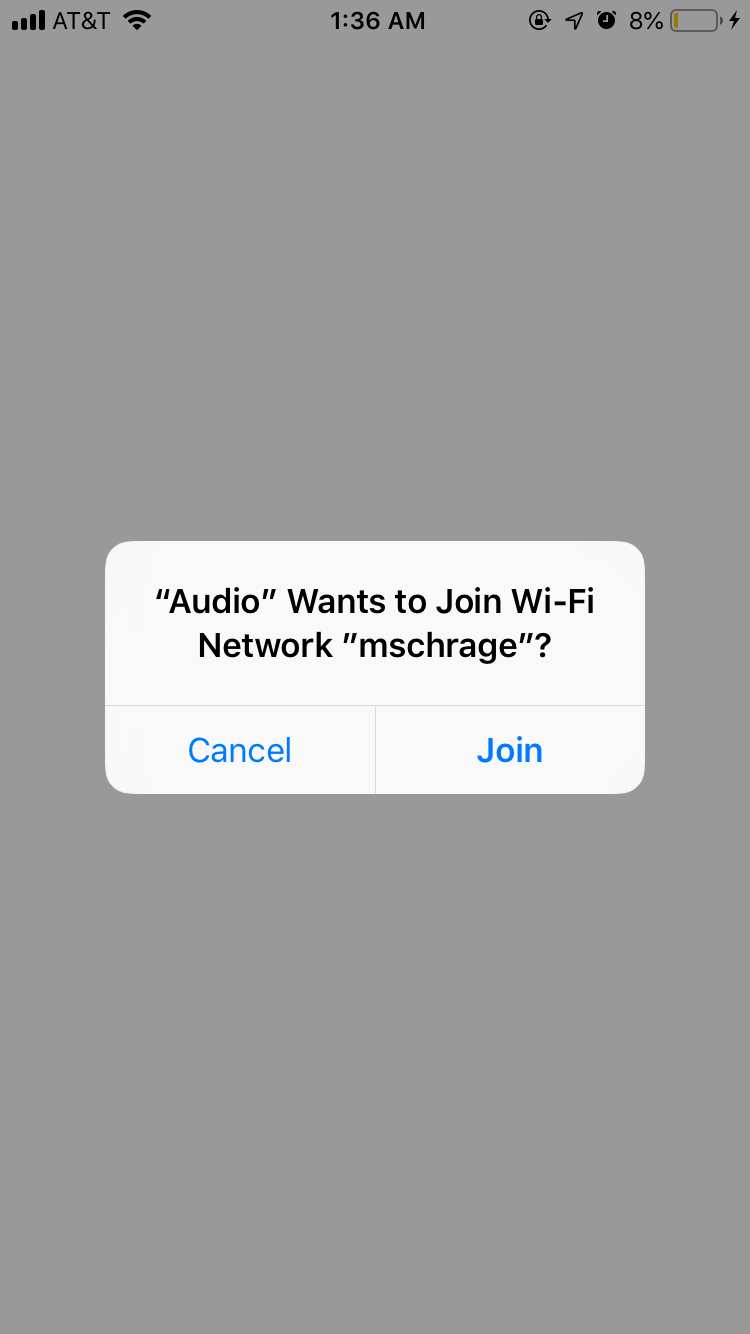
I got a rudimentary version of the app to work. When you shake the phone, it attempts to connect you to the ESP32's wifi network.