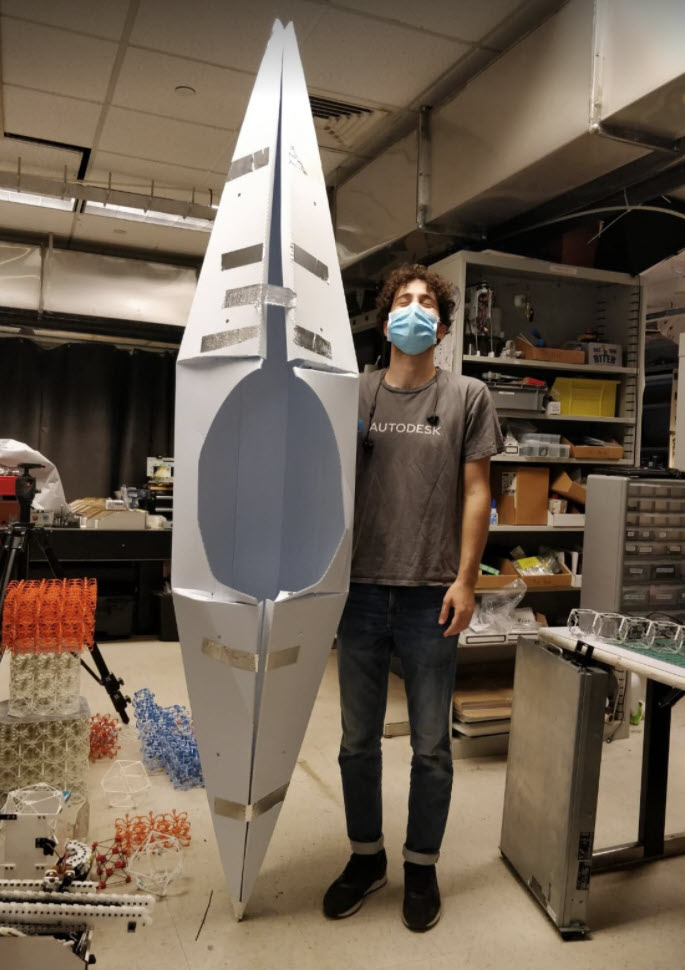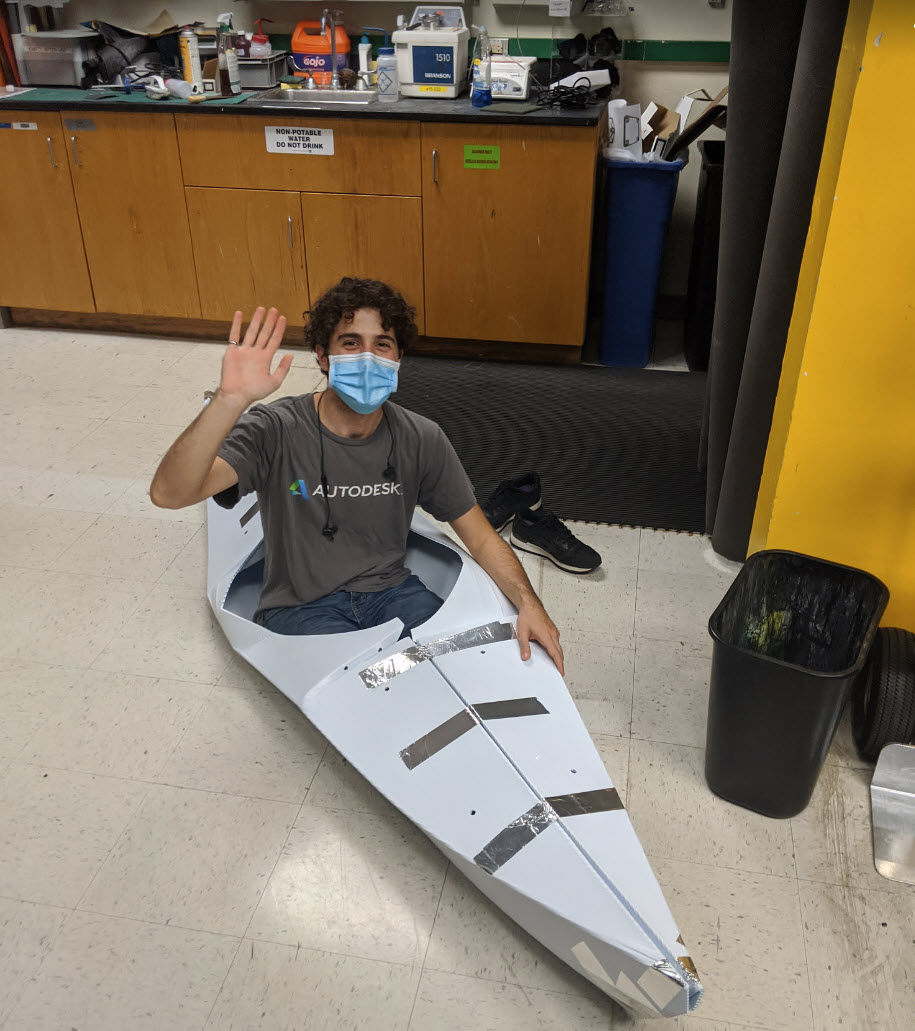
For week 4 our task is simply to “make something big,” so my plan here was to make a human + water compatible version of the kayak from week 2.
If I want it to actually float for any appreciable amount of time, this will require cutting it out of a material that isn’t cardboard, and of course making it a lot bigger. The material that folding kayaks seem to be typically made from is a corrugated plastic product that goes by a few different brand names, the one used most often seems to be Coroplast (not to be confused with chloroplast which I continually do). Coroplast is used most often in the sign-making industry, so there are lots of local suppliers (sign shops) who will sell it to you for ~$20 / sheet. At that price I called up a bunch of local shops + home depot/lowes, and wound up buying two 4’x8’ sheets from a Boston-based signmaking shop called AlphaGraphics. Unfortunately the shipping was significantly pricier than the actual cost of the sign, but if you have your own car this would be relatively cheap and easy. The corrugated material is also super light and stiff compared to a comparable solid plastic stock (the majority of our bending stresses are born on the very thin skin of the outer layer of the corrugation).
In shopping around for the product I asked about a few key points regarding the material:
The product needs to be polypropylene (PP) and not polycarbonate (PC). PP is able to withstand the repeated high bending stresses of folding and unfolding that will be required to assemble and disassemble the kayak. I would imagine that PC would just strain whiten and fail after a few cycles.
The flute direction needs to be in the long axis of the 4x8 sheet. This is because we want to kayak to collapse easily up into a “tube” around us, but we need it to be stiff in the long axis in which it will be supporting our weight, and not behave like a big floating grocery bag. In the end no one seemed to even stock 3x8 product with the extrusion on the long axis (this makes sense if you think about how much easier it likely is to extrude in the direction of the long axis).
I was initially looking for 5mm stock which is what some of the actual manufacturers of these kayaks claim to use. In the US it’s easy to find 3/64”, which is conveniently used a lot for sheet goods as it’s almost exactly 4mm, and so I settled on this instead. Keep in mind that this is in the midst of COVID, and I repeatedly heard from signmakers about how their inventory was low and they didn’t have lots to spare (it seems there’s a huge demand for new signage). In the end the sheets were extremely light, but to my dismay the actual walls are only ~750um, which seems unacceptably low considering it will be all that exists between me and rock (not really a problem on the charles). So in retrospect I would have liked to been able to actually visit a shop and feel what I was buying beforehand. I’d imagine the tradeoff with thicker material is that it’s more difficult to bend, and so maybe this was fortunate for a first attempt. Also a note for future reference is that Boulter plywood stocked 0.25” corrugated plastic, but they weren’t sure if it was PP or PC, so I wound up not buying it.
I asked around with many, many shops to find 5’x 10’ sheet material but had no luck there. This could have also been because of COVID (see above). Here’s a spoiler but the 4x8 sheet yields a kayak that’s very much on the small side, and so finding some inexpensive 5’x10’ for next time would be my first task for round II.
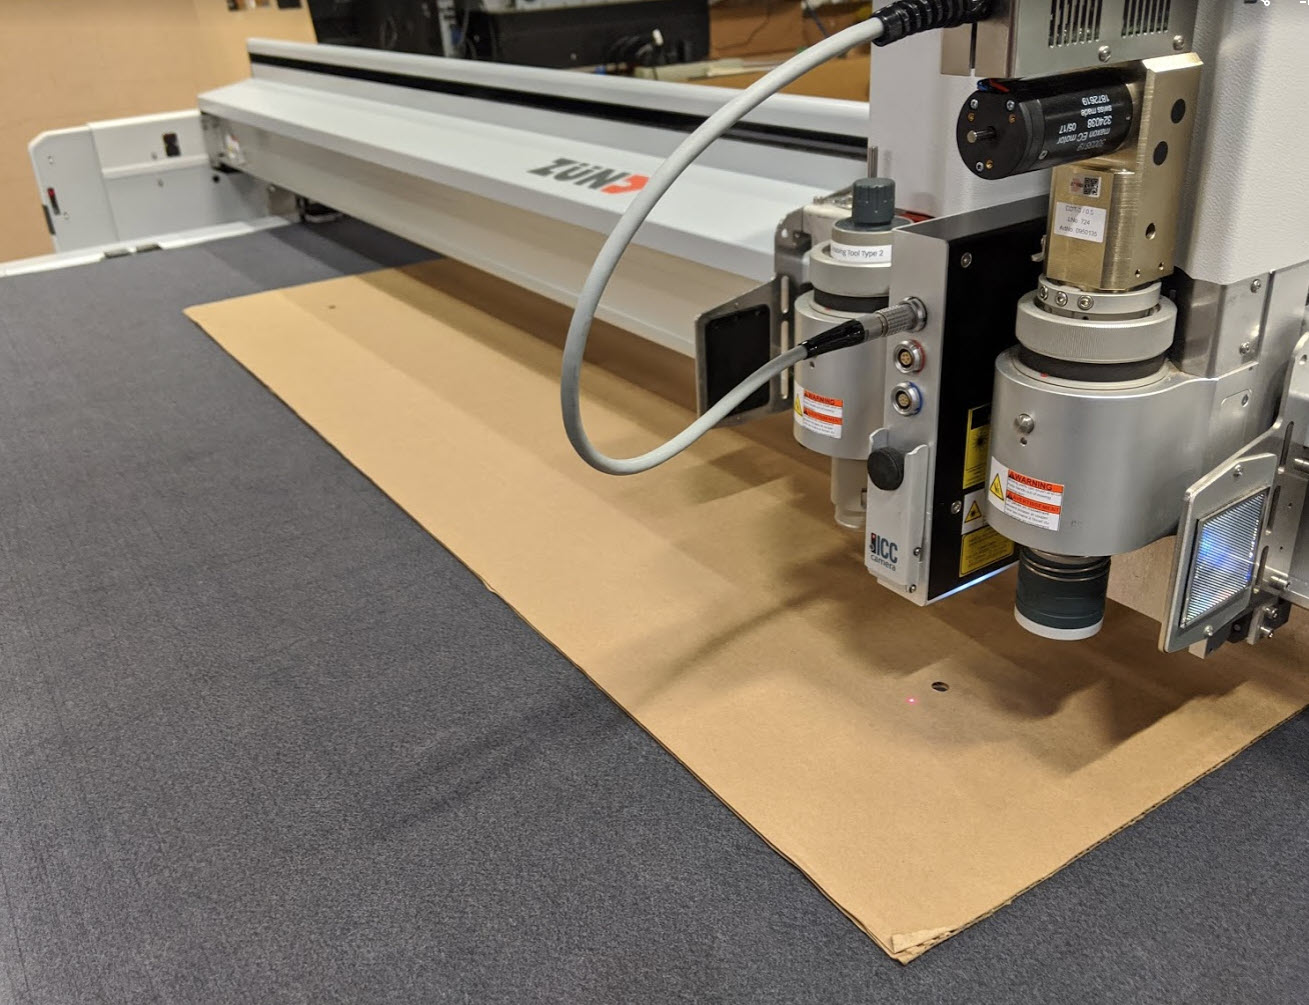
On Friday I had ShopBot training with Tom and Cody, where we CAM’d up a big power-button-like object in OSB. Because I wound up not finding any 5’x10’ stock, and because the Zund is a really amazing machine that I was excited to learn to cut on, I asked Alfonso if he would train me on it. On Saturday we had scheduled to clean up the back of 023, and after ~5 hours of sorting and throwing stuff in the trash (a lot of servo horns) we headed up to the shop. Coroplast is likely one of the primary materials the Zund was engineered to cut, considering it’s catered towards the signs/graphics industry.
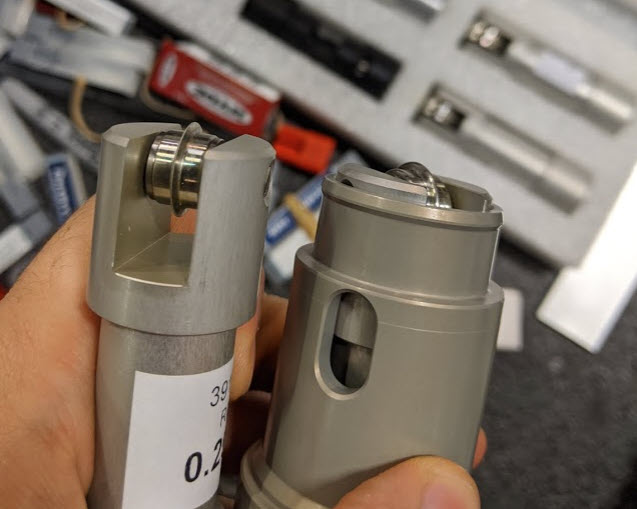
The kayak has some subtle (but actually very demanding in terms of manufacturing) quirks to it that warrant discussion. We need to both cut out the outline of the kayak, but also bend/score all of the internal features, which could be accomplished in one of three ways. We could simply skim the top of the material with a marker or cutter in order to manually crease and bend them later. We could use a v-cutter (in the case of the Zund a blade installed at a 45deg angle), to score our creases, cut through the top skin of the corrugation, and remove material such that the fold can happen. Or lastly we could use a special tool to crease the material. With a ShopBot I might juts put a rounded tool in the spindle and drive it around to compress the material, but the Zund actually has a whole ecosystem of tools called creasing wheels meant to do this. The wheels are profiled rollers that get driven into the material, and can be lifted and actively rotated in order to maintain tangency with your creasing direction. Below are two of the tools I was considering, in the end I chose one of the more blunt, but aggressive ones we had (the one on the right in the photo below). Alfonso was encouraging me to crease with something more aggressive, and in the end he was absolutely right. It took a lot of wrestling to get the kayak folded up, particularly around the very tight inverted bends around the cockpit where I actually wound up splitting the plastic on 2 of the 4 bends.
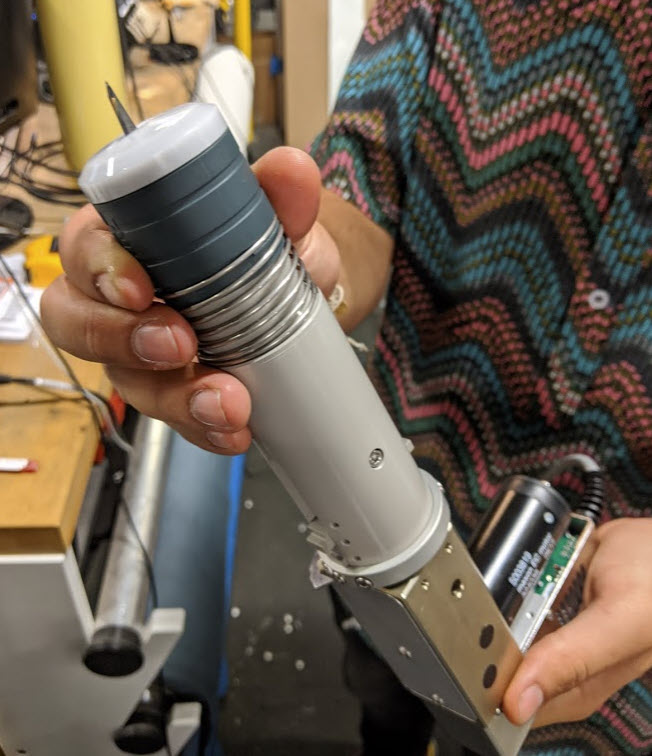
Choosing the knife was comparatively, as we just needed something capable of cutting through the plastic. The Zund uses a special module called an EOT (electrically oscillating tool), that mounts a blade similar to a x-acto blade, and then axially jiggles is very quickly (the oscillating) and also rotates it to maintain tangency with our cutting direction. In the photo below you can see the large spring which keeps the sheath of the knife engaged with the stock, presumably to prevent the vertical cutting action from lifting up the material.
After choosing our tools we mounted them in 2 of the 3 module mounts (independently controlled z-axes of the Zund)
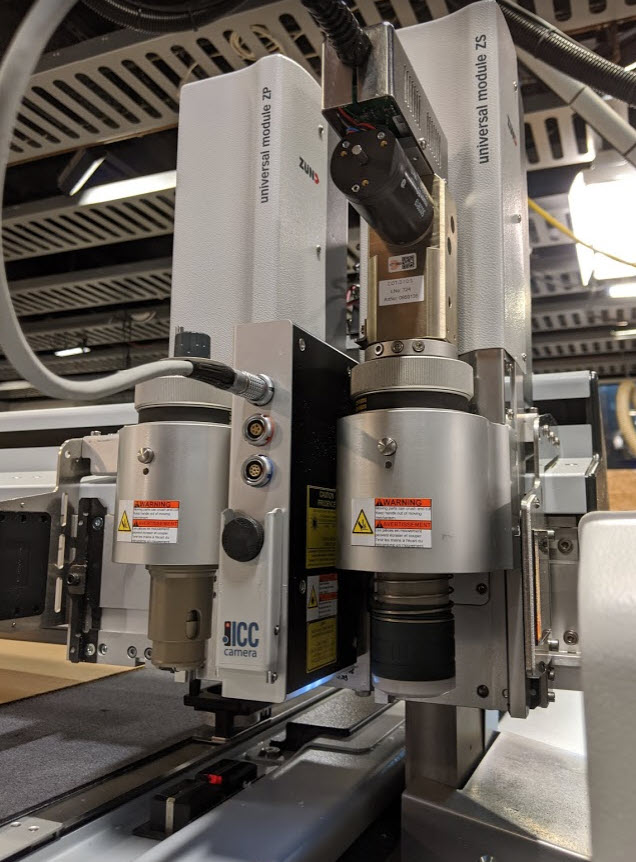
Among other neat features, the Zund has a self healing sacrificial bed that we cut into to ensure we fully cut our stock, as well as a vacuum table that allows us to hold down material uniformly and easily. The best reason to use the Zund for our kayak is because it has a whole infrastructure to support 2 sided machining. Because we need to crease our stock on both sides (we fold in both directions), we would normally need to flip the stock material, locate on ad edge, and re-zero. The Zund has an amazing feature in which you can cut in registration features (in this case 4x 8mm diameter thru holes), and after flipping use an on-board camera to relocate the stock regardless of orientation, and then performing a rigid-body transform in the X-Y plane (really similar to what I would like to do for my final project).
Cutting went really smoothly, after which I folded everything up with some squeezy clamps and aluminum ducting tape.
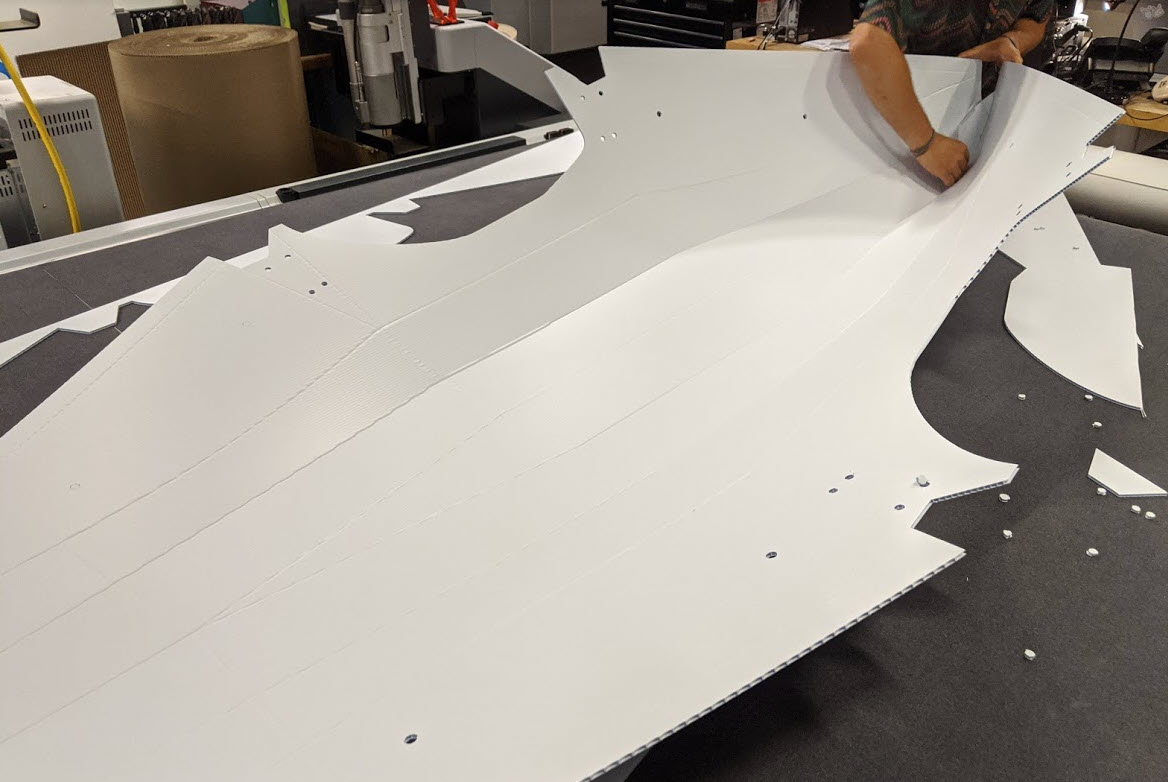
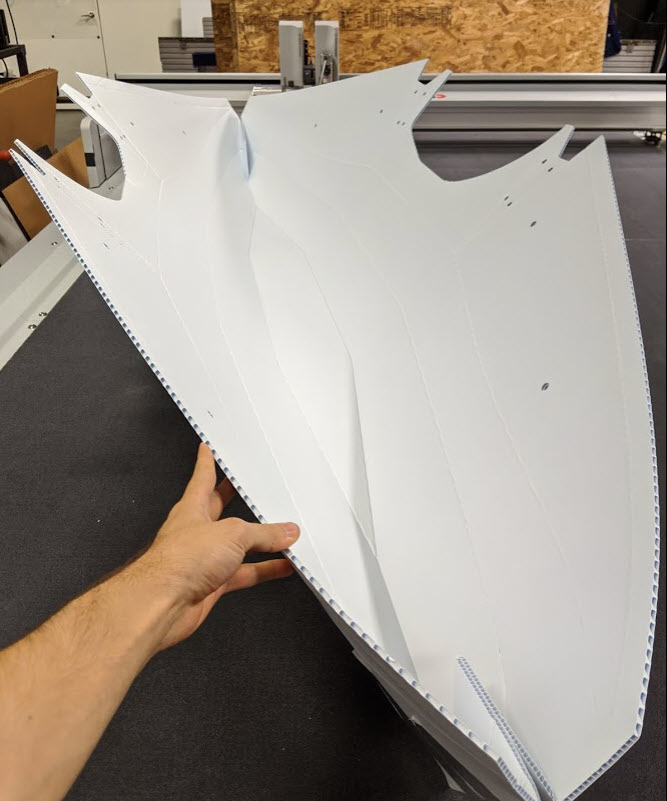
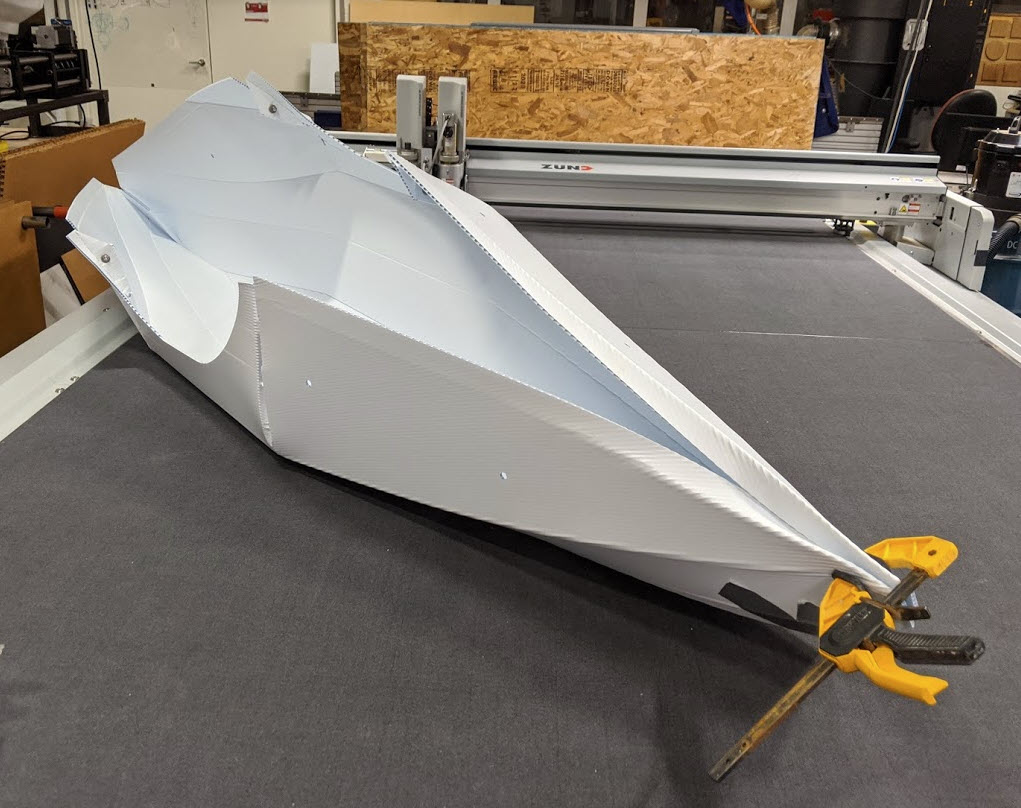
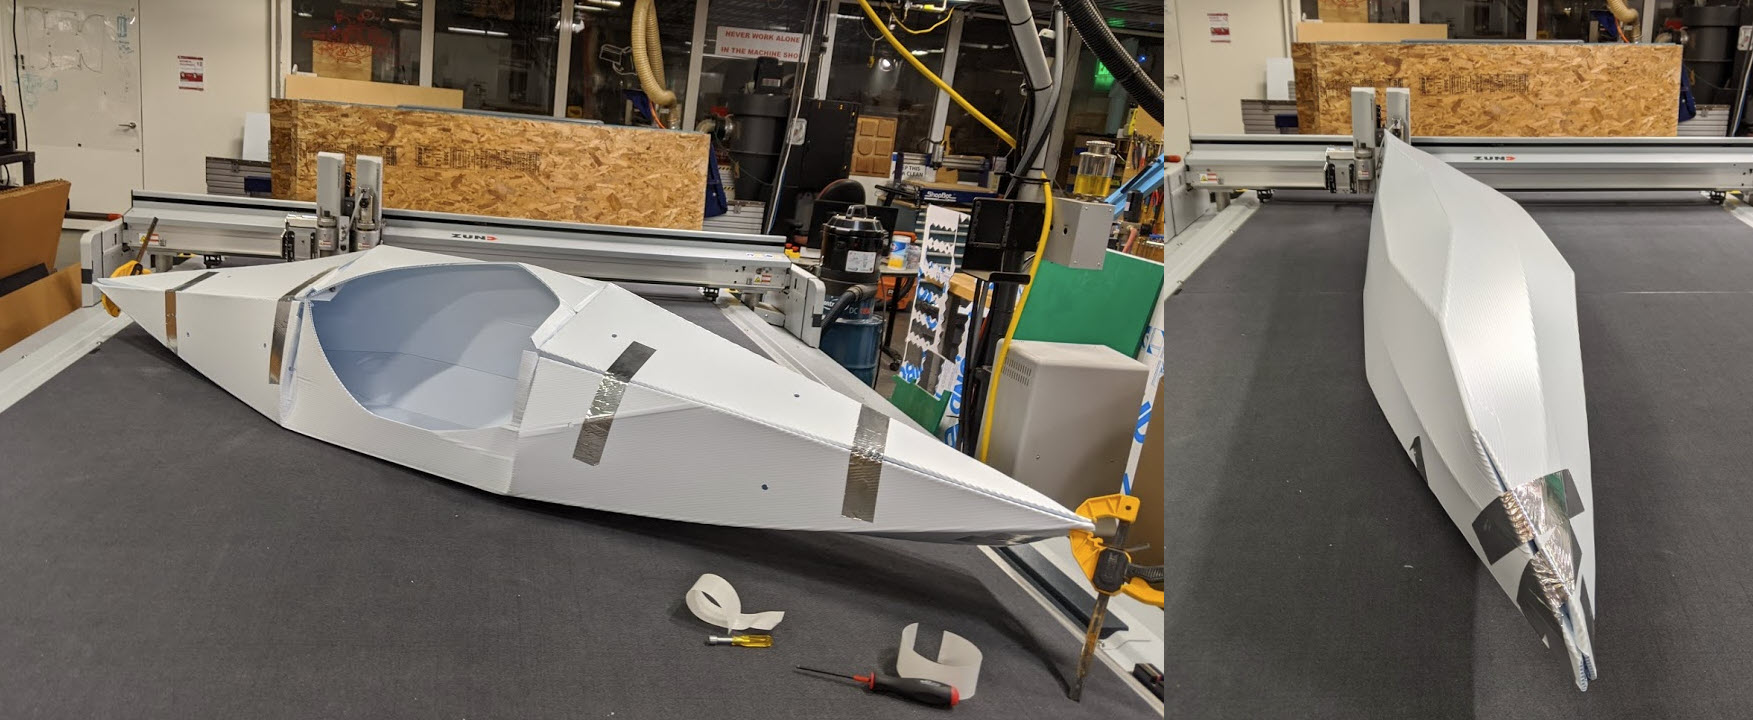
Here you can see the final product, still held together with tape - I was laughing because as the photo was being taken one of the taped joints burst apart. If I have time (and courage) to hop into the Charles with it before Wednesday I will post here with an update!