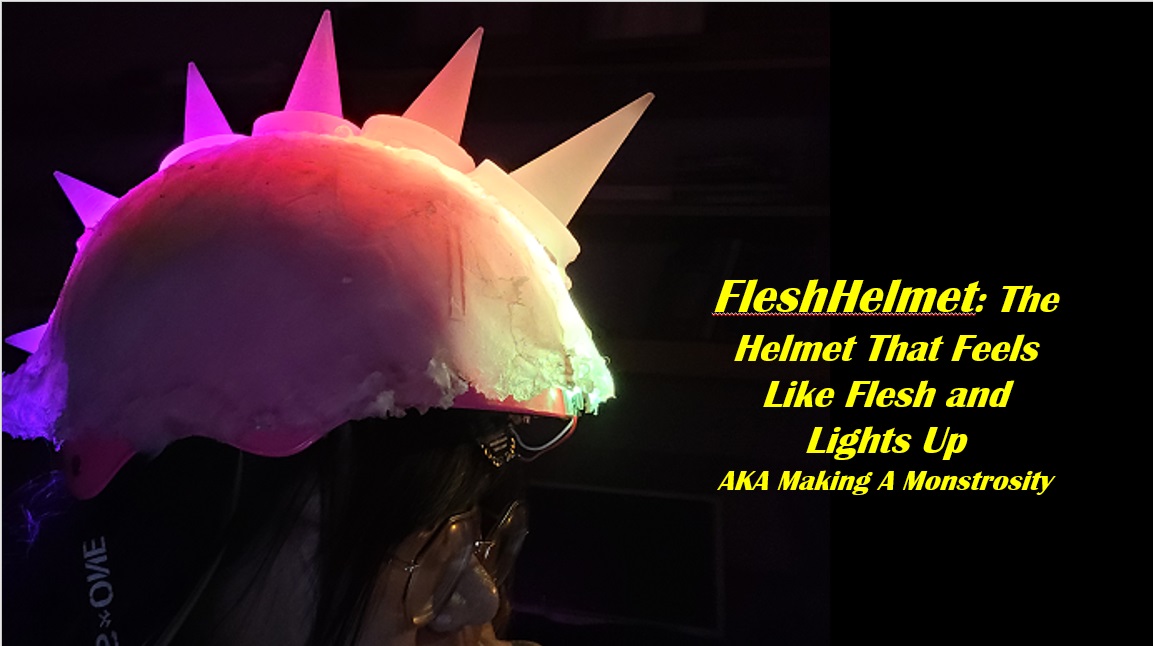
Final Project: FleshHelmet: The Helmet That Feels Like Flesh and Lights Up!
the Flopppity, Wiggly, "Flesh-Like" Punk Spike Helmet Topper
Or, How I Learned to Make-Do with Almost Anything in the face of illness, covid and inexperience
This page acts as a summary of the implementation of my final project ideas. If you are interested in seeing the progress/discussion of how I got to these decisions, please refer to Week 0 and Final Project Brainstorms.
So unfortunately, this meant I lost of a lot of scheduling time for various machines, and realistically was quite anxious to return to spaces with a lot of people (especially since my labmate took about a week before he began testing positive after exposure). While I was nervous, I'm a DIY-er at heart, self-taught in almost every skill I have, and love that hand-made, rough-around-the-edges look. I decided to use what I had learned in class to do what I could on my own, in combination with this attitude.. Again, this is more indetail on my Week 0 page.
What does it do? It's a flexible helmet cover with punk spikes that lights up. The LEDs then react to music--they light up along the top with volume.
Who's done what beforehand? Helmets have been done in previous HTMAA classes. The concept of wearable, sound-reactive LEDs are also easily available at some novelty stores.
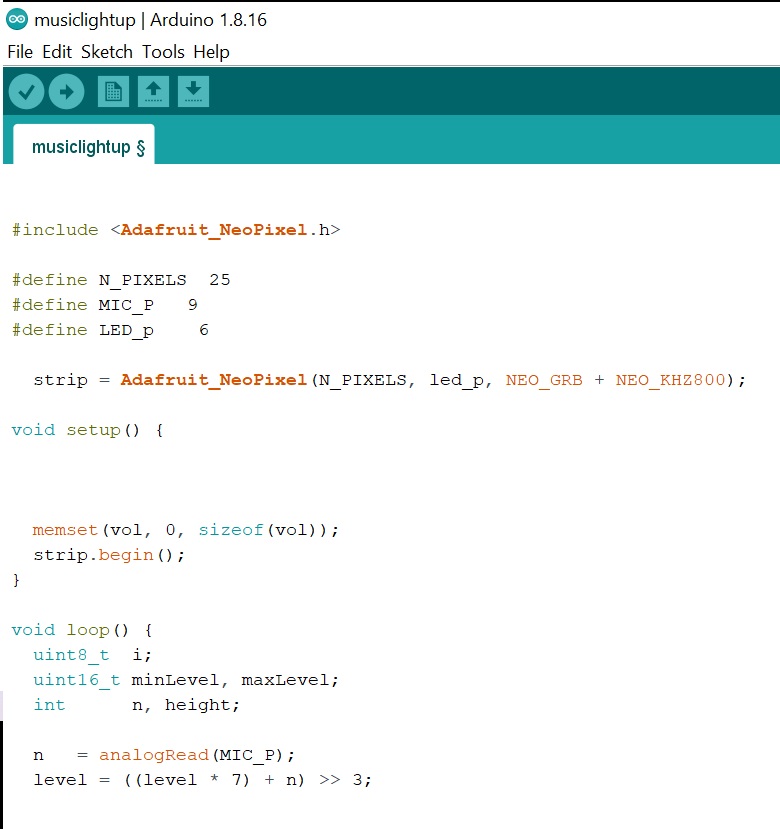
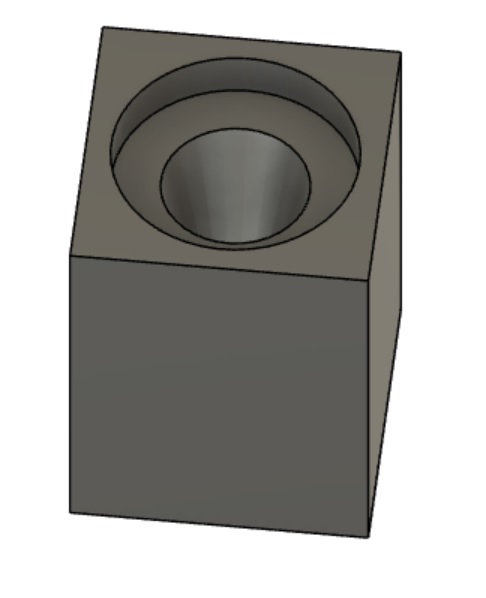
What did you design? I designed the spikes, the PCB and the mold.
What materials and components were used?: A number of molding materials were tested and used for the body and spikes. These included rebound25, Free Form Air and Ecoflex30.
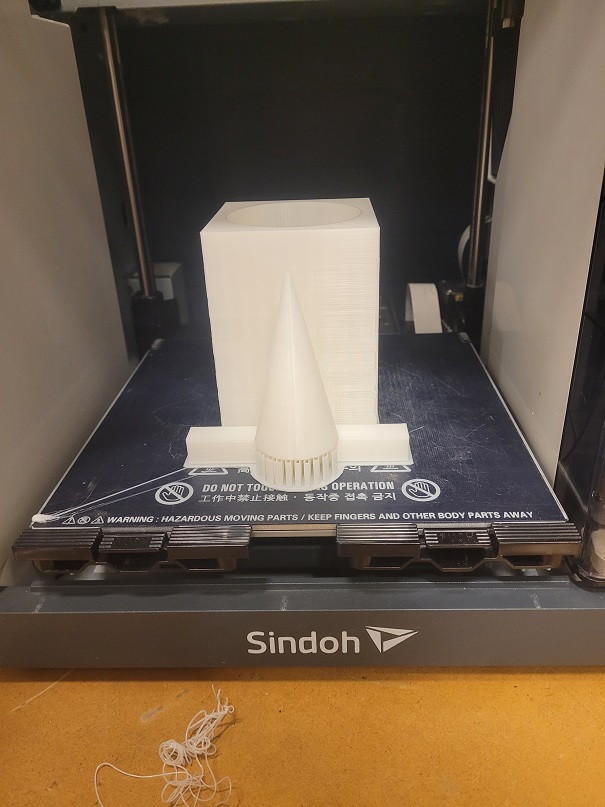
For the electronics, I used a D11C board and a number of resistors, capacitors and header pieces, all soldered to a copper board milled with my traces. My spike mold was printed with white PLA. The decorations were made of vinyl.
Where did they come from? The molding/casting materials were from Amazon while the electronics, vinyl and PLA were from the FabLab inventory
How much did they cost? What parts and systems were made? the mold, topper/spikes, d11c devkit and neopixel breakout board were made. I bought a breakout mic board because I liked the look of it and the battery used for class demonstration.
What processes were used? Molding/casting using silicone and clay-like material. PCB milling and stuffing. 3d Printing and vinyl cutting.
What questions were answered? while my project didn't have overarching themes or answers to big questions, it was made mostly for fun. The things I learned from it include:
1. silicone is much heavier than expected
2. IF I want things to show through ecoflex30, I should "embed" them in earlier layers than later.
3. How fun is this idea (answer: very)
What worked? What didn't? I would say if I were to do this project again, I would likely do everything differently. I thought initially I wanted to have it be flexible, but that came at the cost of weight. The material also ended up quite sticky and picked up dust and hair, which I didn't like. Additionally, I thought that having a dripping look would be cool, but came out looking messy. those are things I would say didn't "work" in terms of design/function, but they acted as they were expected to. The LED and initial code worked, but because I did not package my project well, the microphone didn't work at presentations. There is a video of the neopixels lighting up to music in Output devices. Overall, I like my project as a prototype/experience for me trying lots of materials not covered in class, but it did not meet my expectations.
How was it evaluated? It was evaluated by the overall effect. My initial desires included:
1. Do the spikes move when I wear it? Yes!
2. Is it lightweight? No :(
3. Does it light up? Yes
4. Does it react to music? not anymore
What are the implications? implications include that I need a better way to mount the microphone if a single fall couldn't handle it. I also think having one uniform material likely isn't the right call. The spikes themselves were not so heavy, but to headpiece needed to be somewhat substantial piece to be on. I think maybe some type of fabric that I could make apocket to install the spikes into could work in the future and have a more handmade DIY look.