3D Printing and Scanning
This week's assignments:
1) 3D scan an object.
2) Design and 3D print an object that could not be made subtractively.
[1] 3D Scanning
While most people in my section were using fancy and expensive ($25k!) 3D scanners such as Artec Space Spider, I decided to try another approach -- use my phone as a 3D scanner. More specifically, I happened to have recently purchased the iPhone 12 Pro which has a LIDAR scanner, a crucial element of getting semi-precise 3D scans. Using the Polycam app (great app, highly recommend!), I did a 3D scan of my computer mouse. To do this, I put the mouse on a table and walked around the table a few times with my phone pointed towards the mouse. Once the Polycam app had taken around 200 photos (and along with each photo, an associated point map generated by the LIDAR scanner), the app began processing the images and stitched them together into a decent-quality 3D scan. Here's a video of what it looks like viewing the generated 3D mesh in the Polycam app:
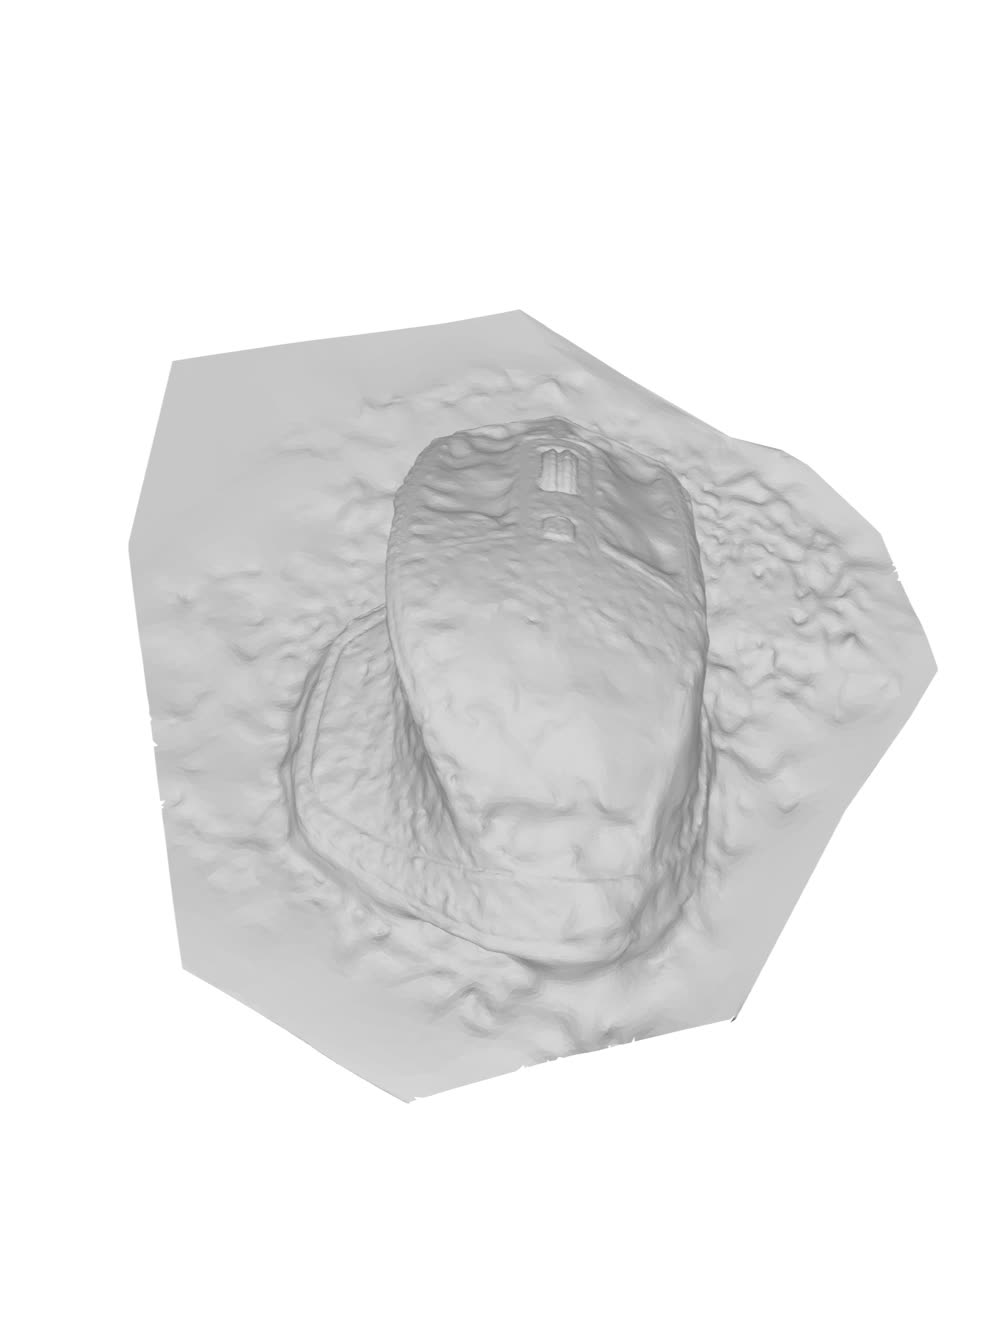
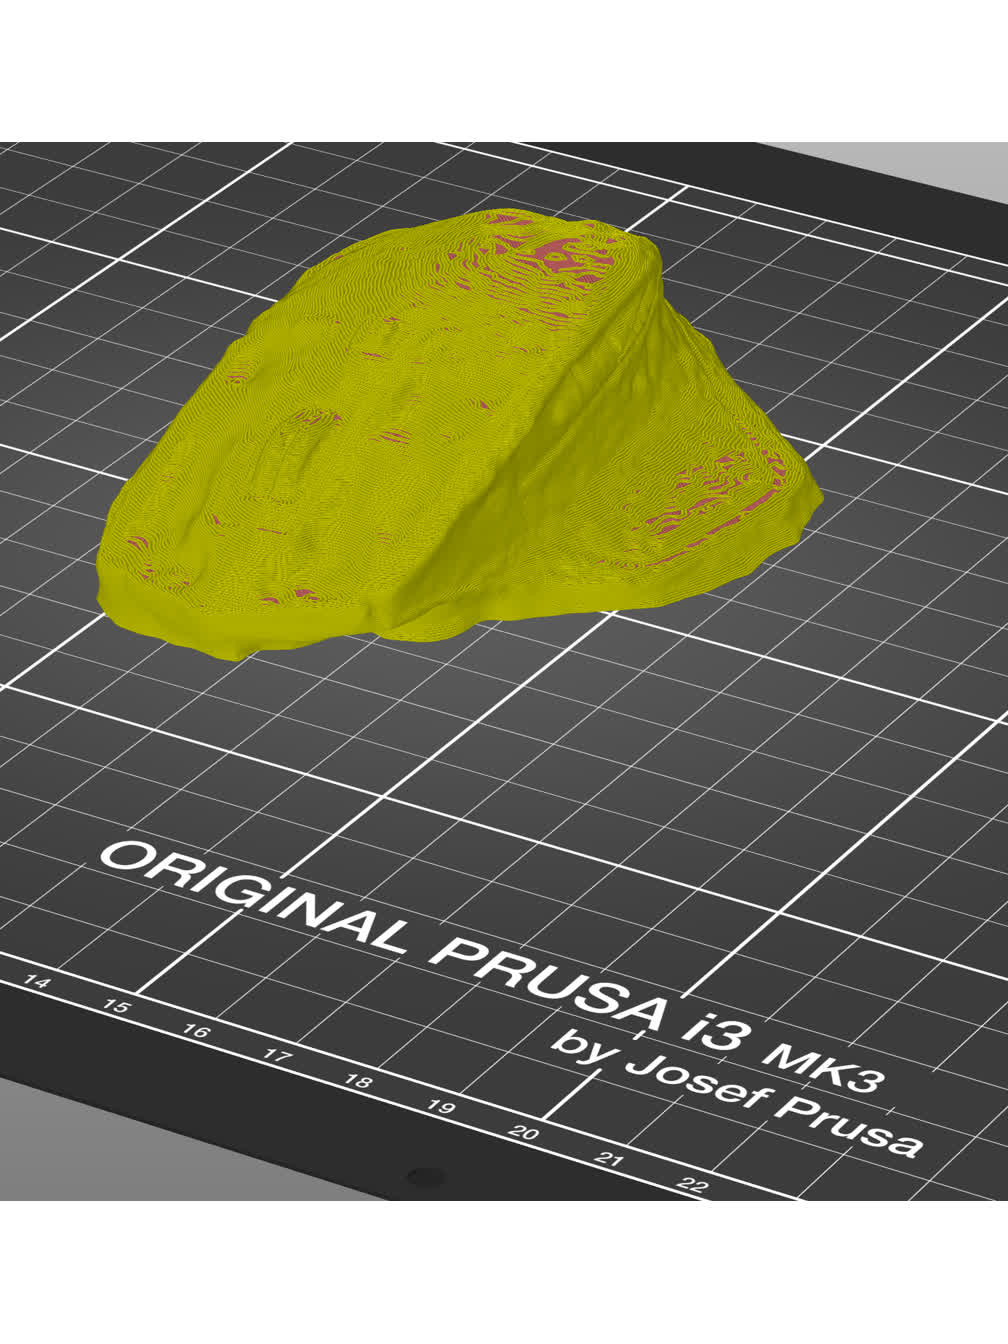
I was then able to export the generated mesh as an STL, after the app stitched the mesh together into a solid object. Below shows the resulting STL file being viewed in an STL viewer and being sliced in PrusaSlicer.
Just for fun, I decided to play with the app's other capability, which is scanning large-scale environments. Again, for this feature, the app stitches together images and LIDAR-generated point maps to create a 3D mesh. I decided to scan the electronics work bench in the Harvard shop, and after walking back and forth around the desks for a few minutes, I was able to view the following scan:
It turned out surprisingly well!
[2] 3D Printing
Before printing, as a group we first determined the characteristics of the 3D printers we had (Prusa i3 MK3S) by running a few test prints. The results we found are documented here: bridging test, wall thickness test.
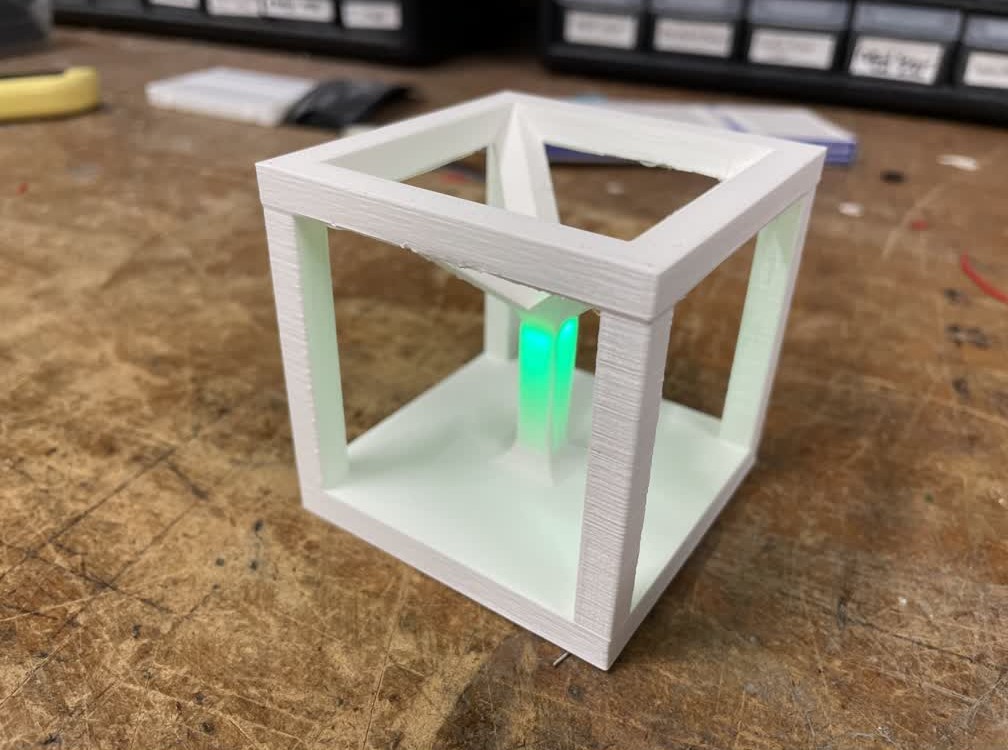
My design for an object that could not be made subtractively was inspired by a hypercube. I decided that I would accomplish the "not made subtractively" part by pausing the print halfway through, embedding some electronics inside, and then resuming the print. The resulting object I designed looks like this:
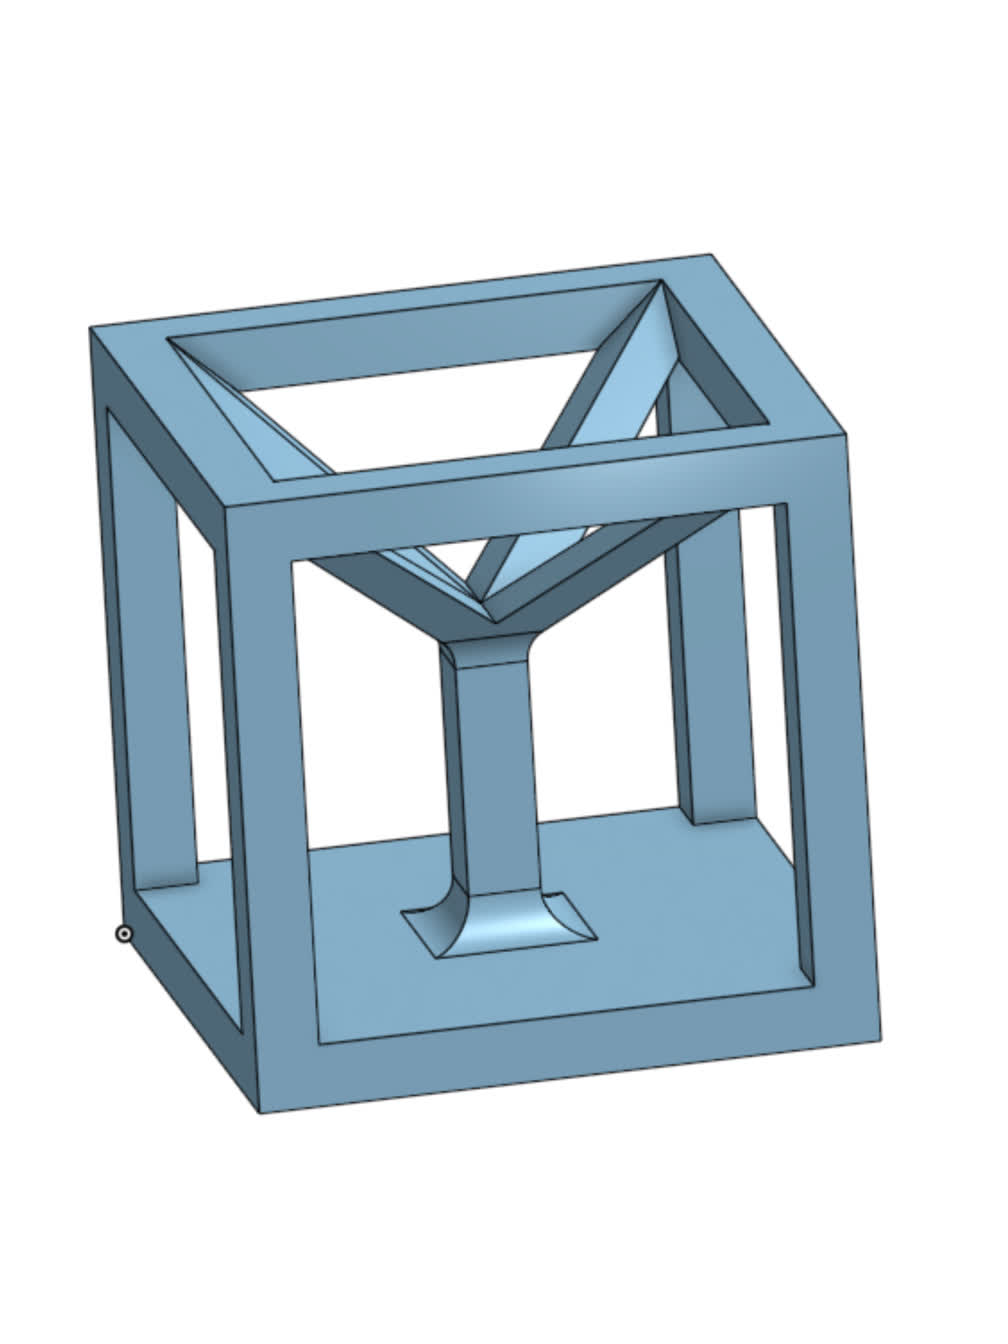
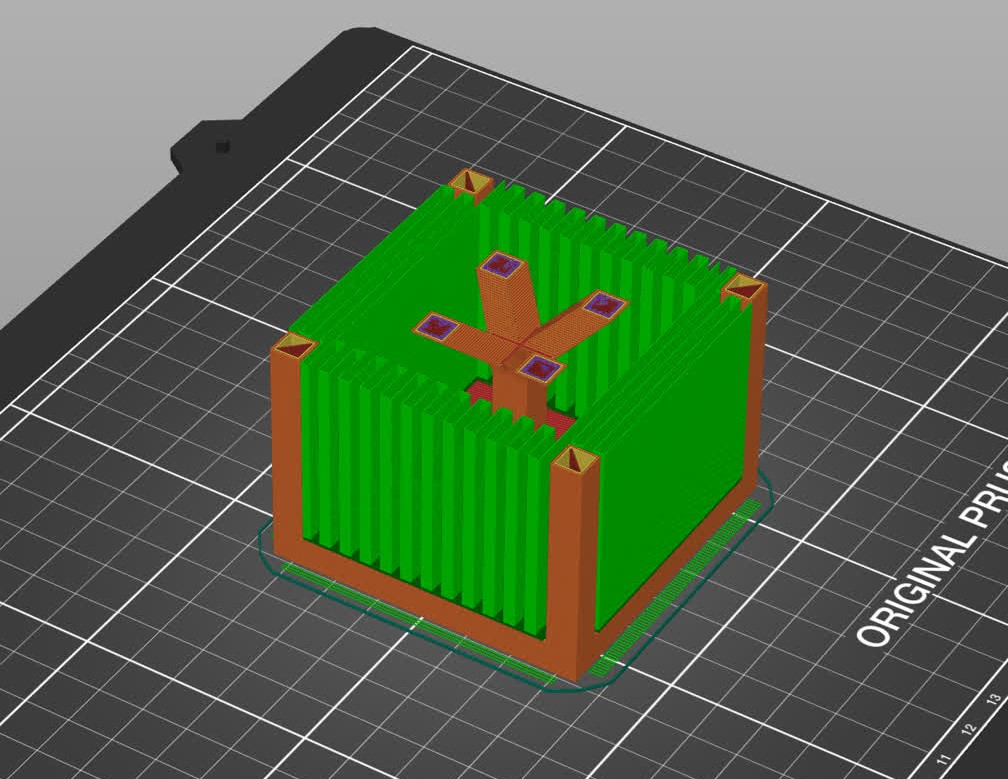
The idea was to embed an LED in the central "stalk" of the object, which I ended up calling the lightcube. This is what the lightcube looks like after slicing, while being printed, and completely finished:

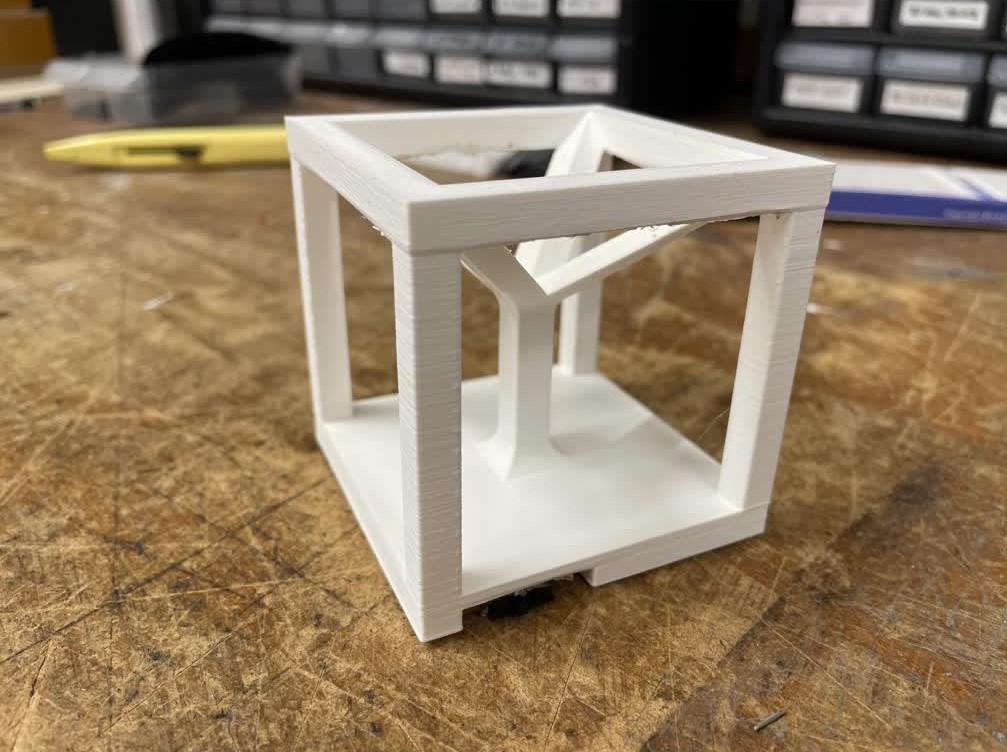
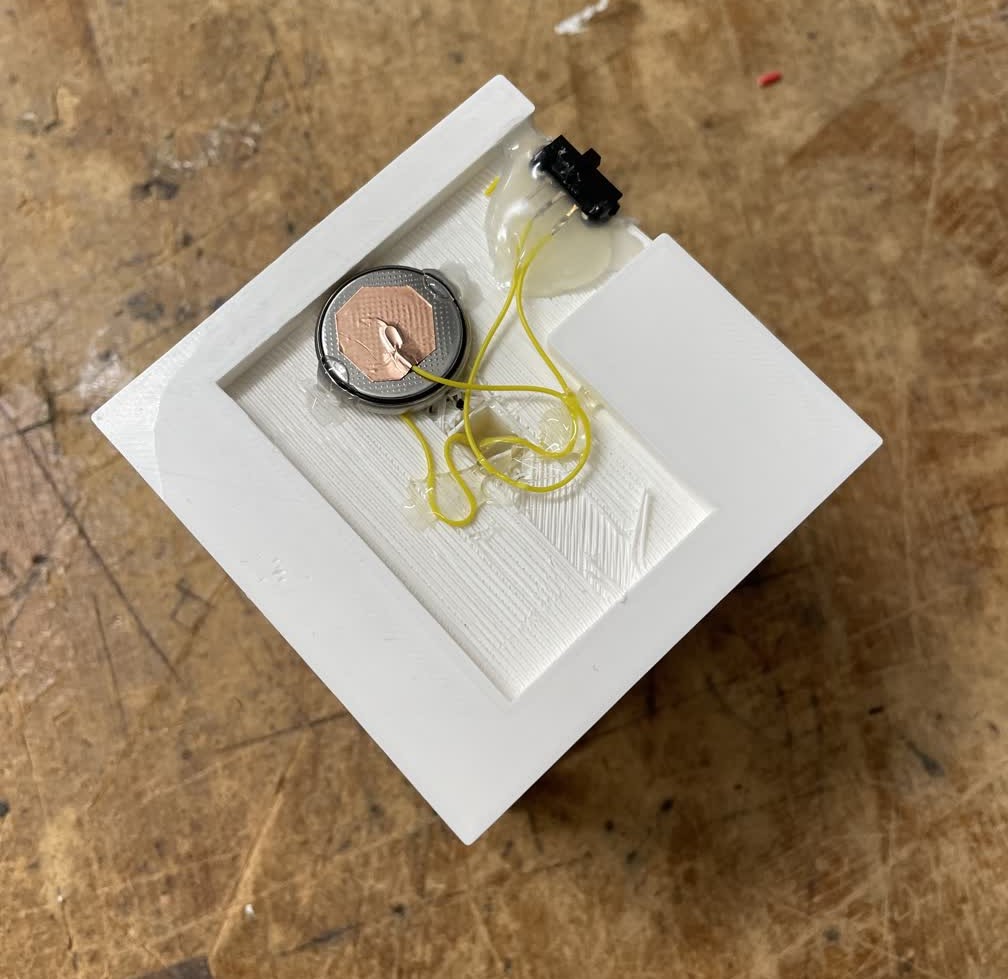
I was able to successfully pause the print and insert an LED along with two extension wires for its leads. This is what the bottom of the lightcube looks like once a battery and switch were added to the LED, and here is what it looks like when turned on: