i wanted to make a simple website minimal, only html and css, hosted on cba's gitlab it uses a responsive grid system built by this person used homebrew to install git on my mac and these instructions to clone the class repo
(this is the website, you're in it)
vinyl cutter
i've been making connectors for an octet spaceframe.
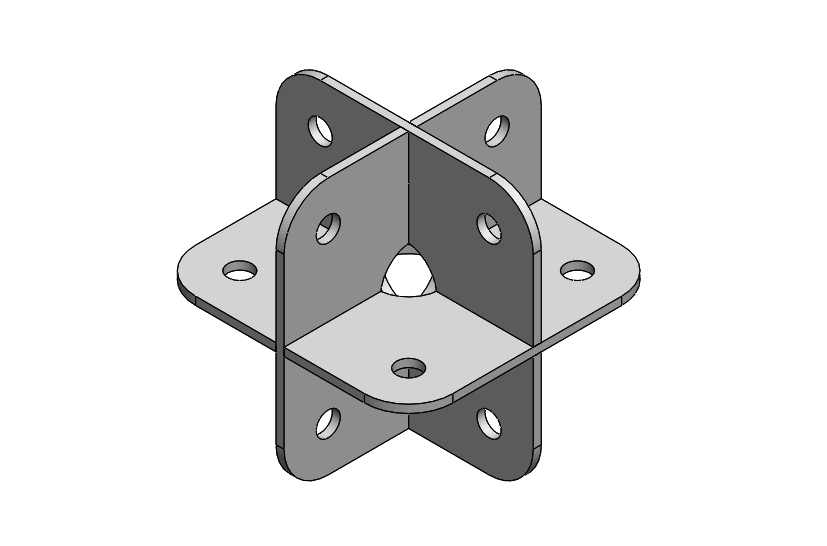
originally modeled in solidworks 2014
i exported an isometric view to .dxf
opened up in adobe illustrator.
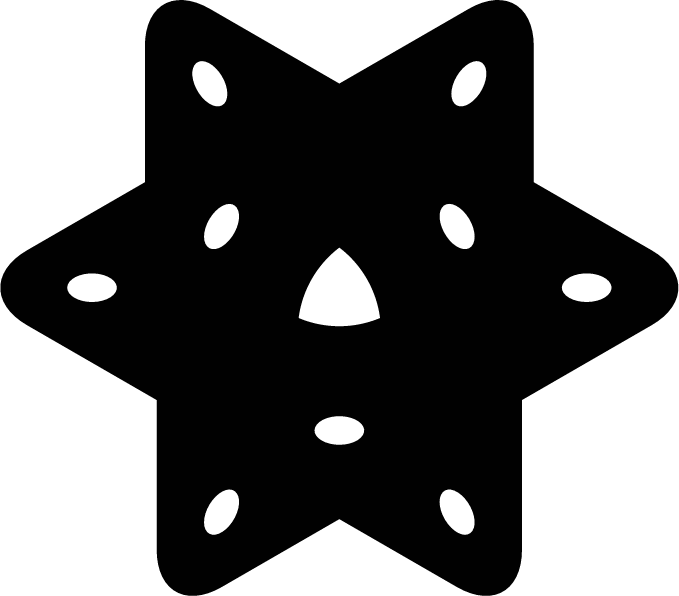
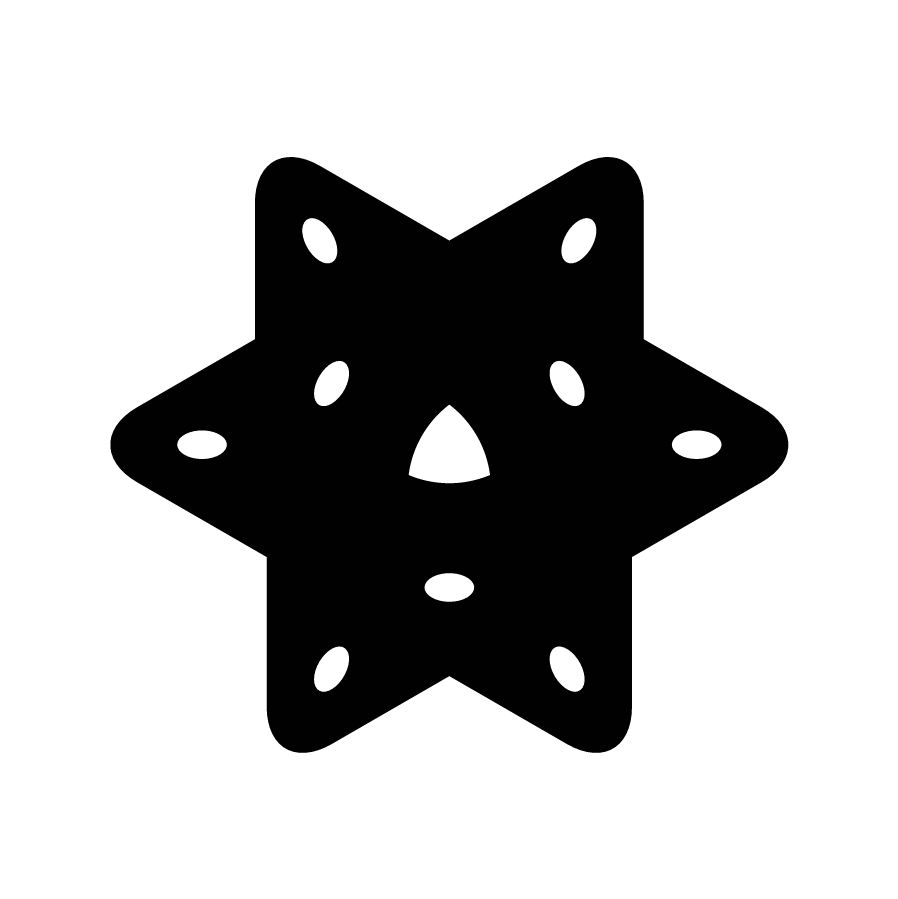
use the "Join" (cmd+J) command to close curves.
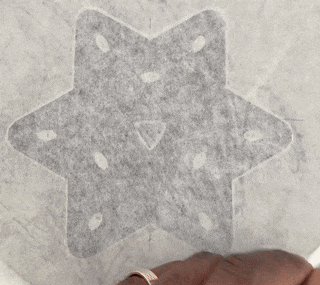
makes a pretty cool logo / sticker for my laptop.
(squint, can you see 3 intersecting squares?)
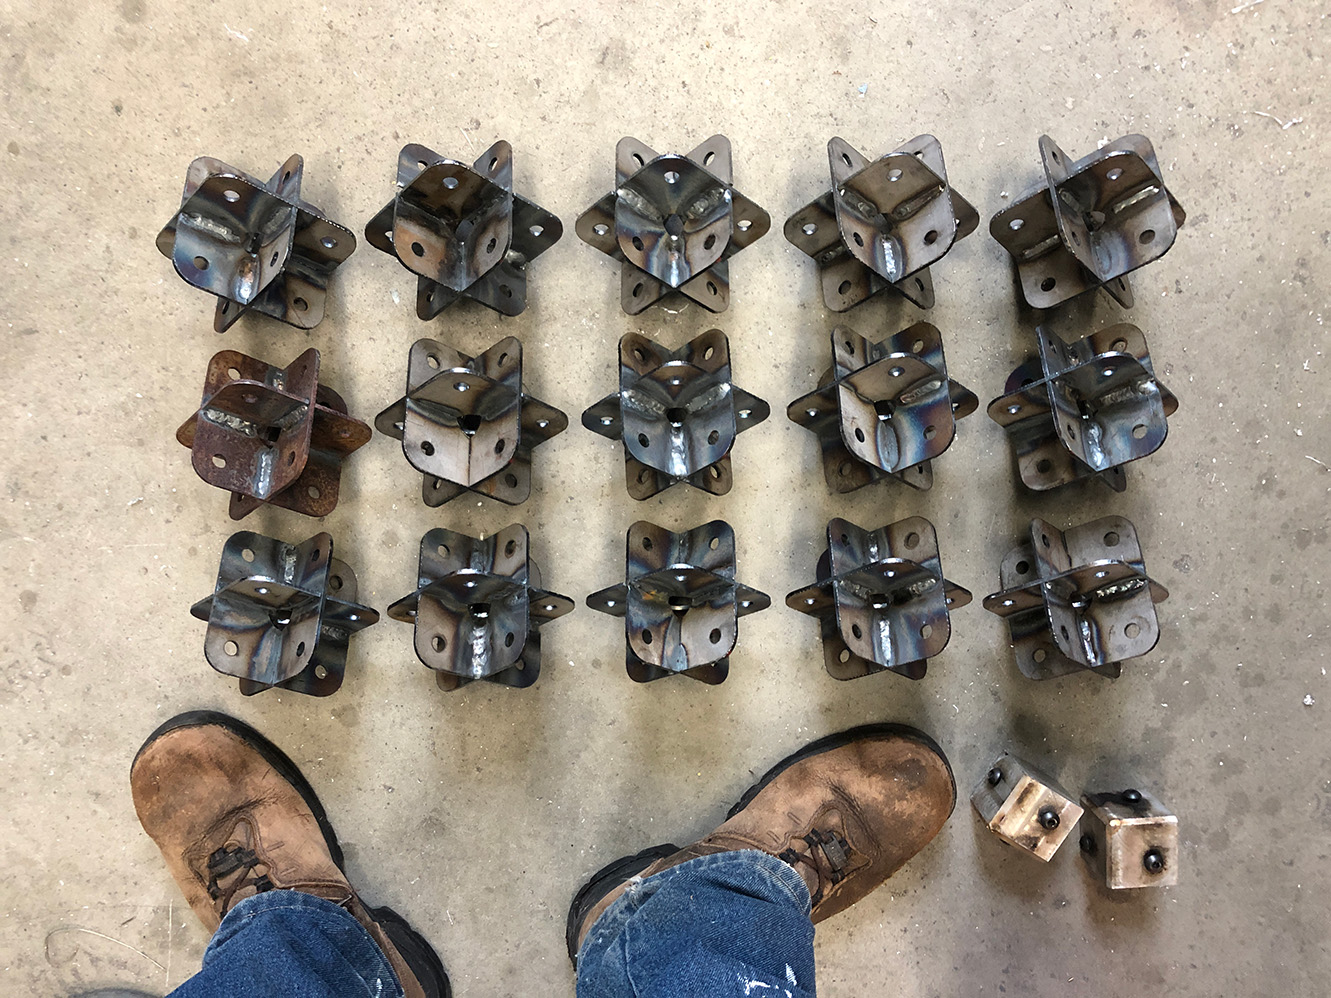
set of 15 octet connectors
exported this isometric view
failed cut - the tips didn't cut
good cut - .png with "Use Artboard"
my first .png exported didn't cut correctly.
you need a white border around the image for the vector/toolpath to be generated in mods.
in Illustrator, select "use Artboards" when you "Export As" and the white space around is recognized.
however, it then cut too small, so adjust the "dpi" in mods to change size.

mods - cba's lab-made control software for post-processing
error 1: when trying to "Send File" in the "WebSocket Device", I received a error message. the archshops vinylcutter tutorial spells out the problem and solution in section "4". someone probably swapped the usb connections around, so under "device" try "lp1" or "lp2" or "lp0" until it works.
error 2: the roland vinylcutter by default will start cutting at x=0, on the far left. if you have a small design, it means all the vinyl on the right gets wasted. jogging over the cutting head, and holding down the "ORIGIN" button (for a long second, thx Jen), will zero the head at a new location.
transfer the vinyl using the large roll of low-tack masking tape.
pro-tip: my laptop had old gunky residue from other stickers. you can clean up sticky messes with the extra vinyl. i tried using rubbing alcohol first, but it just spread the gunk around.
how to make gif: i converted the 39MB .mov file to a 615KB .gif using ezgif.com
the reveal
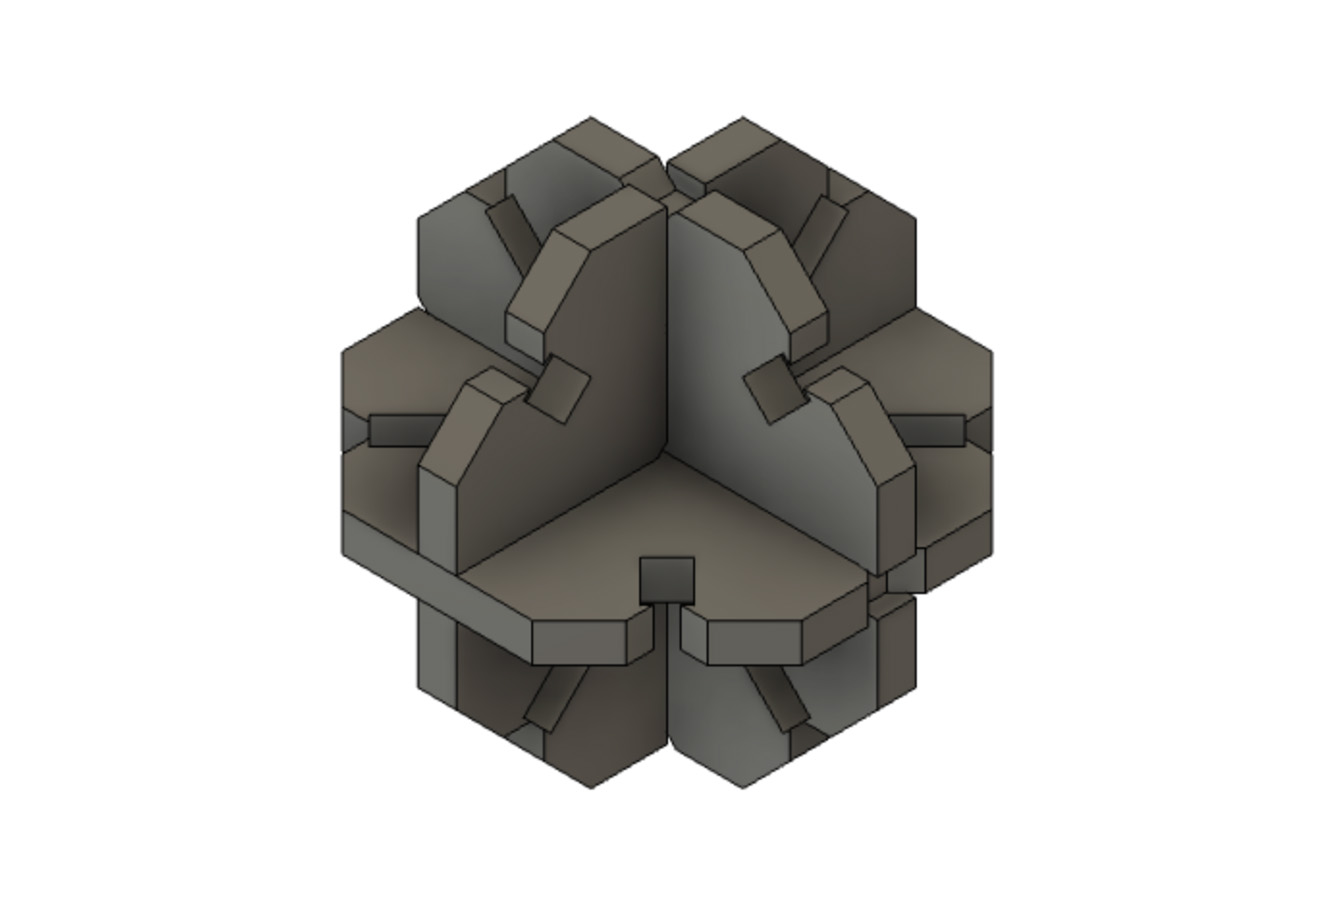
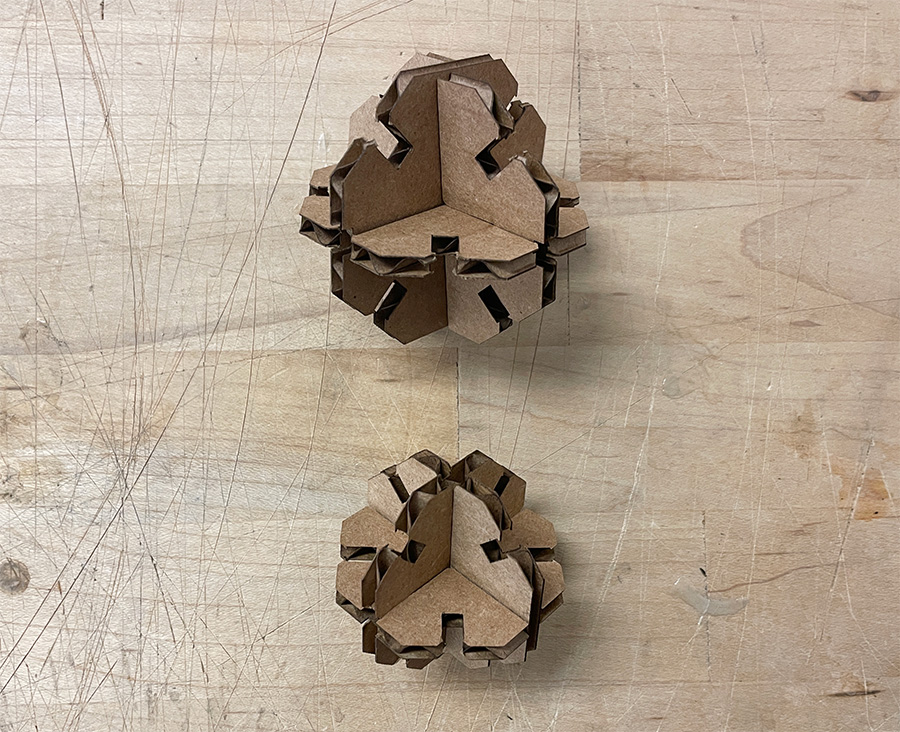
let's make a parametric octet spaceframe and connector kit out of cardboard. this is a variation of the steel / nuts and bolts system i'm working on. the connectors are made from 3 types of parts, and one type of strut of arbitrary length. i used both a chamfer and snap-fit for the joint.
modeled in fusion 360
the connectors are the orthogonal intersection of 3 octagons.
this is an isometric view.
you can think of this as the skeleton of an octahedron.
so the struts are the delaunay of the cubic (Zn) lattice?
here's how to make something parametric in Fusion 360.
watch this video:
Modify > Change Parameters > Add User Parameter (plus icon)
- “Name” your parameter (remember this)
- “Expression” is your dimension that you can control or adjust
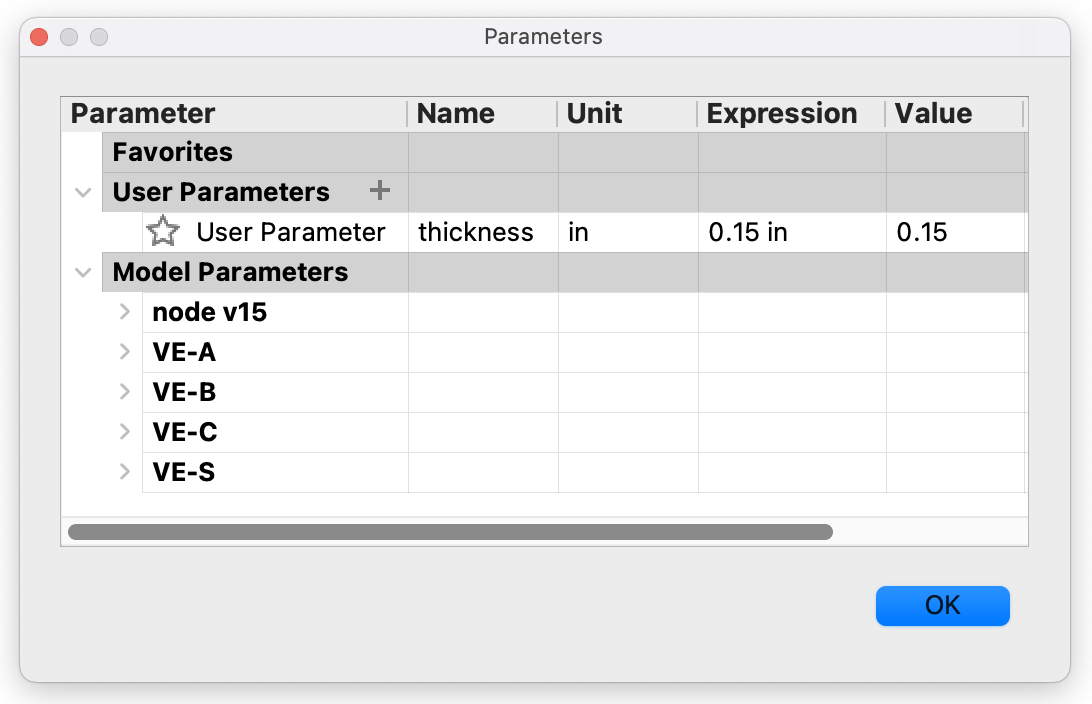
change parameter window
adjusted "thickness" from 0.1875" to 0.15"
for this file, the parameter is called “thickness”. i ONLY used dimensions with multiples or divisions of "thickness". this came in handy, because i initially assumed the cardboard was 3/16ths (0.1875") thick, but it's really closer to 0.15" after measuring with some calipers. the snap-fits didn't work great and the joints were loose and sloppy, but felt great after adjusting the parameter. the dynamic modeling really saved a lot of time.
i used the Modify > Arrange command to lay the components on a plane.
i had to "create a sketch" on each face.
right-click the sketch in the tree > "save as dxf".
open each .dxf in illustrator > copy/paste to one file.
once arranged > "export as dxf".
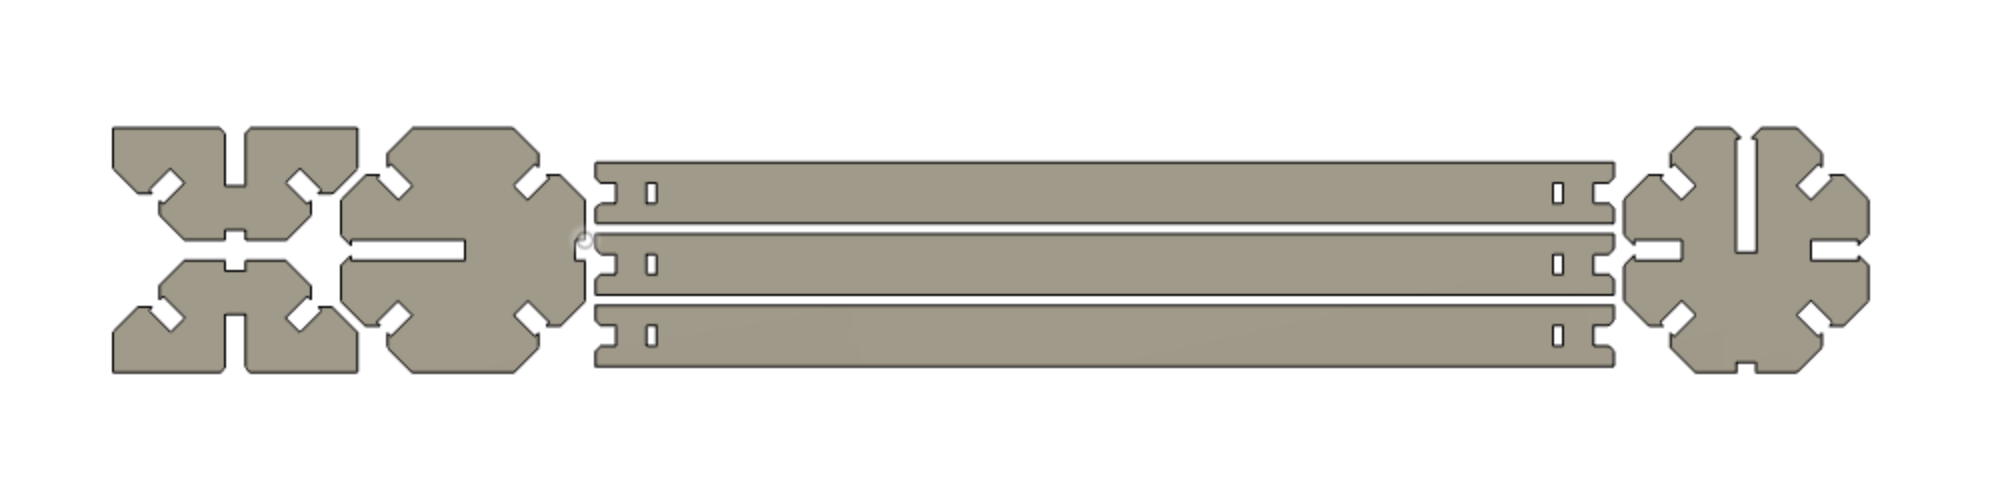
"arranged" in fusion
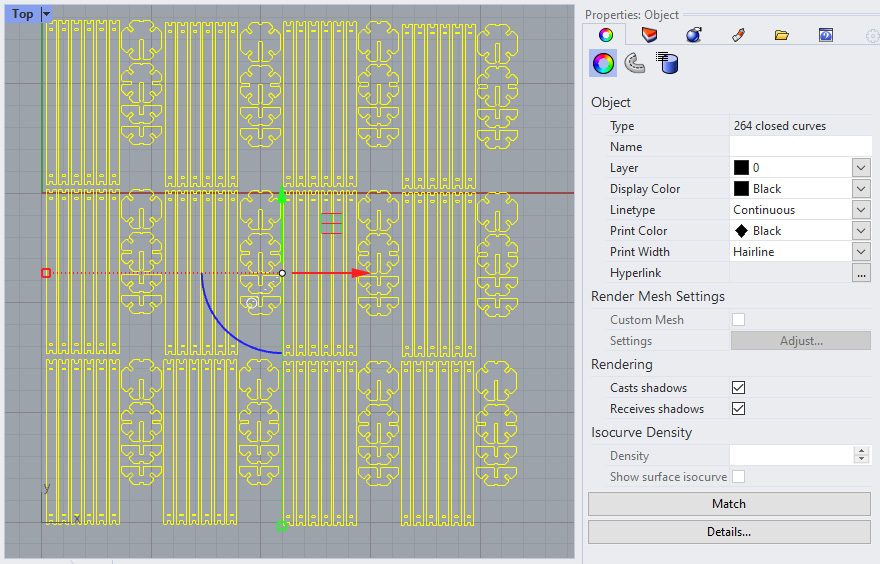
change "object properties" to hairline (thx shah)
view from the epilog
rhino is the archshops post-processor for the epilog.
refer to archshops tutorial.
> open file in rhino
since i imported my .dxf from a different software
i need to change the "print width" in both object properties (the rainbow donut)
and layer properties (the american pie) to "hairline".
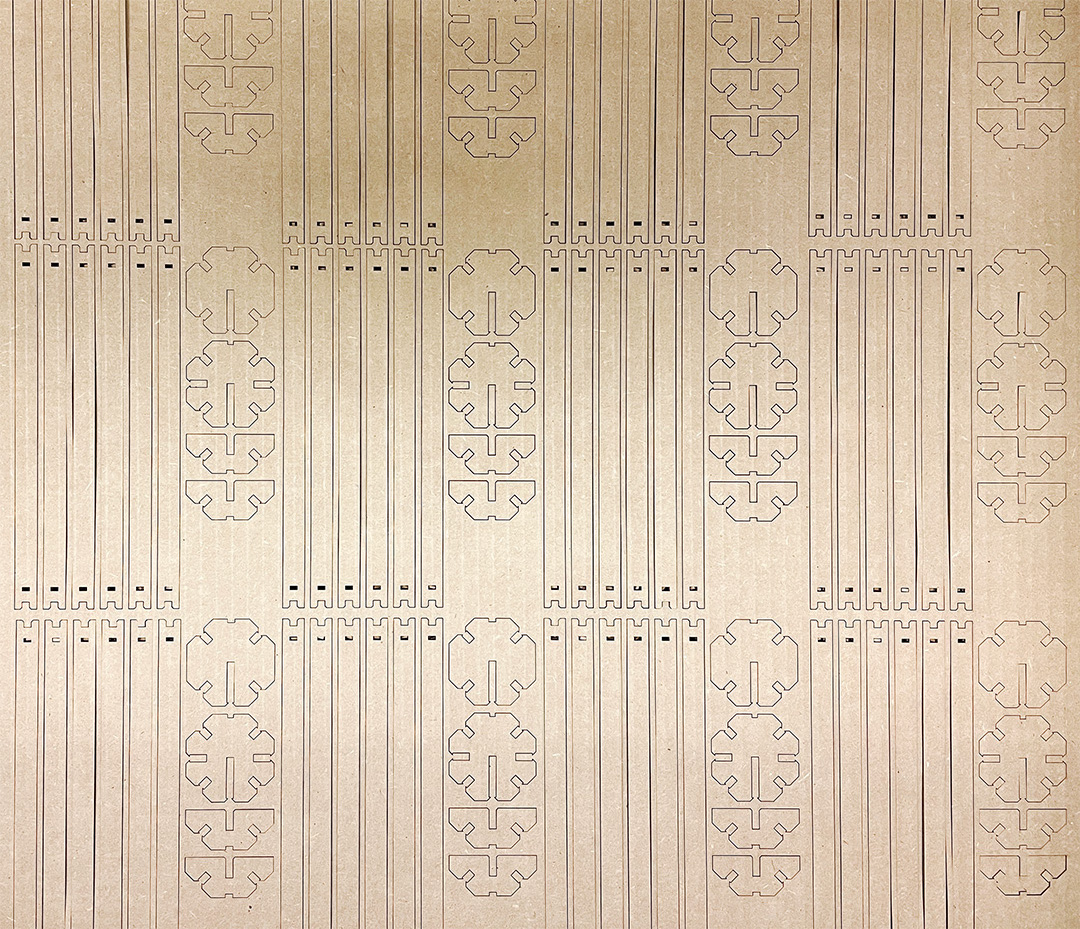
set lens height
then print > properties > swap 24" x 36" >
adjust speed(30)/power(26) >
set window/viewport > hit enter.
a 32min laser cut
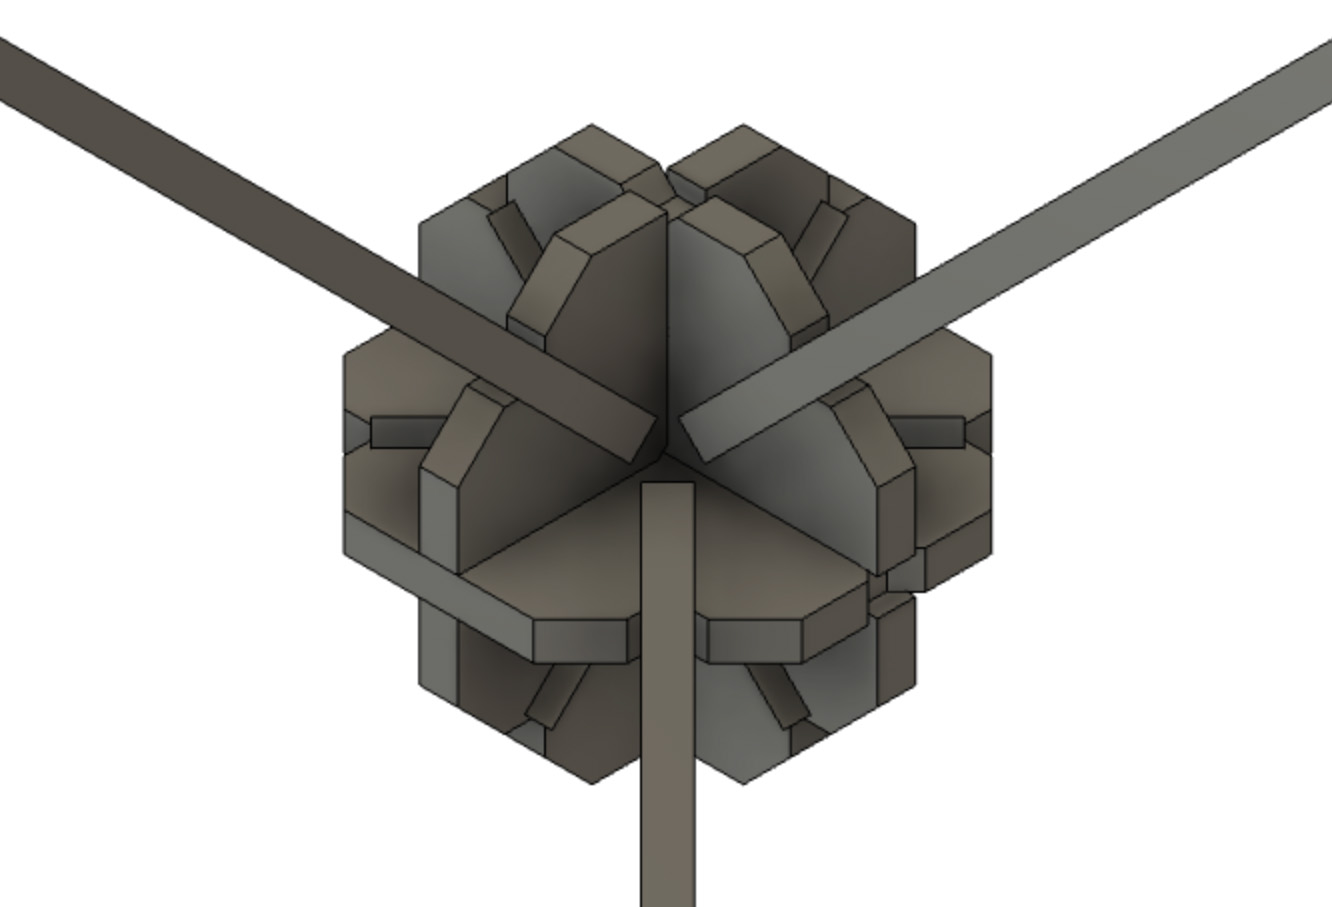
produces 12 connectors
and 72 struts
the toroidal structure below uses 24 connectors

the octet kit
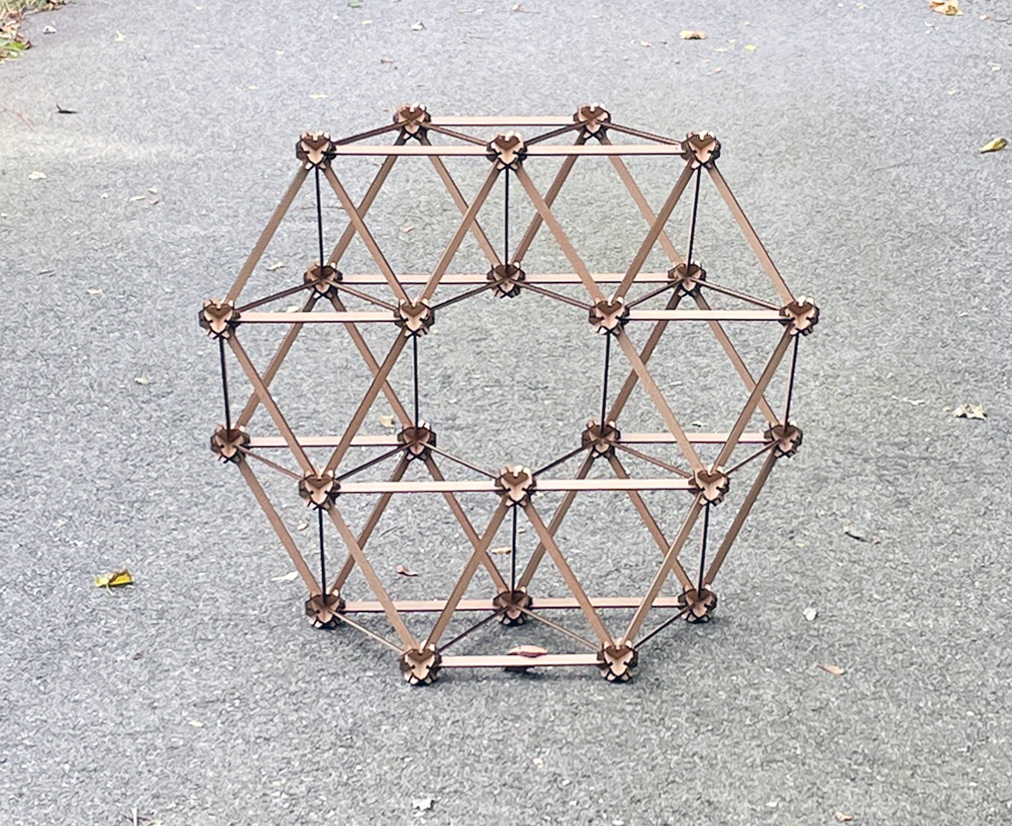
torus view
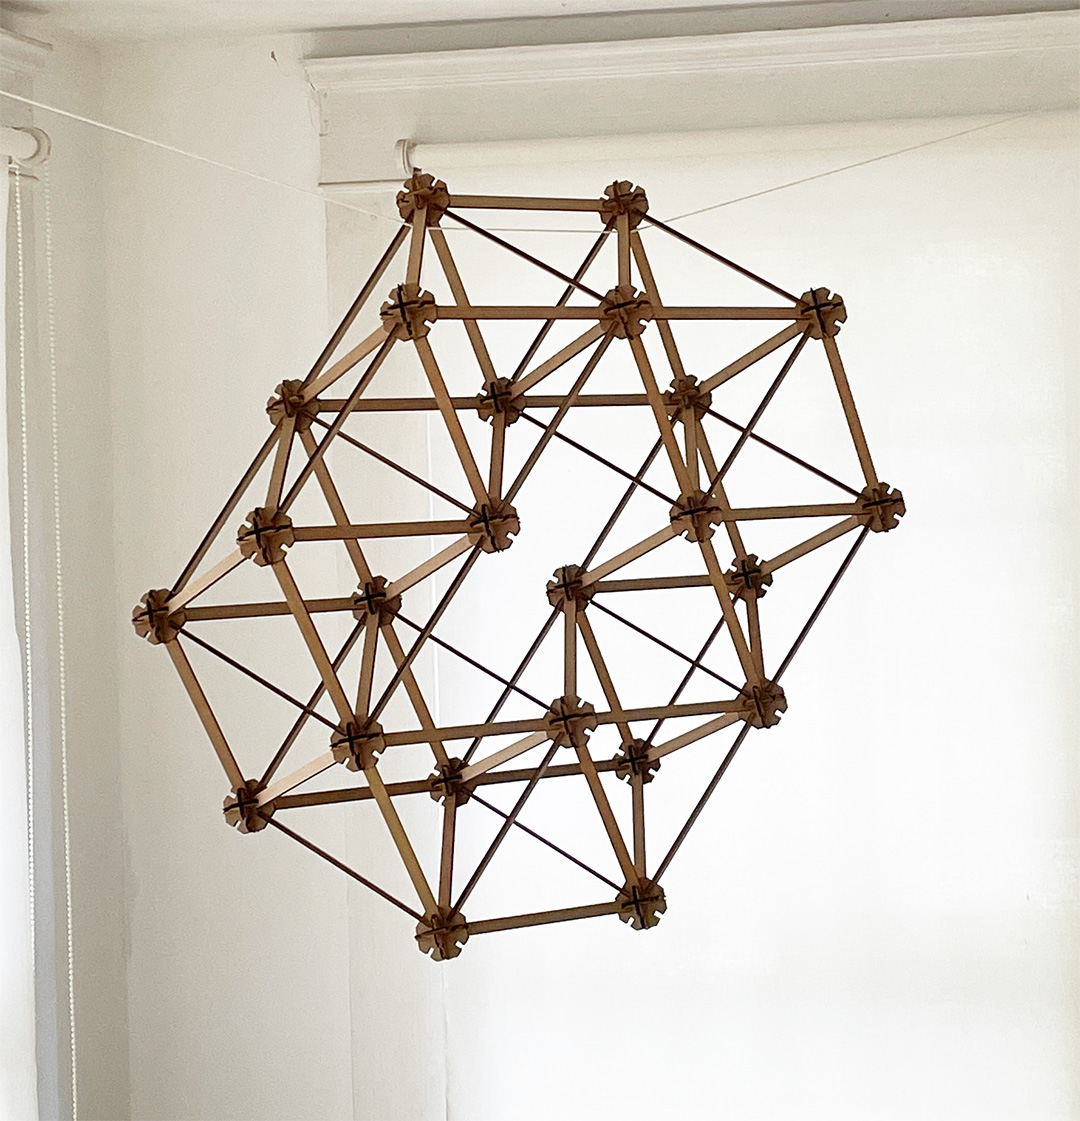
hanging in my office

i referenced a nasa paper by architect haresh lalvani which explored some toroidal configurations
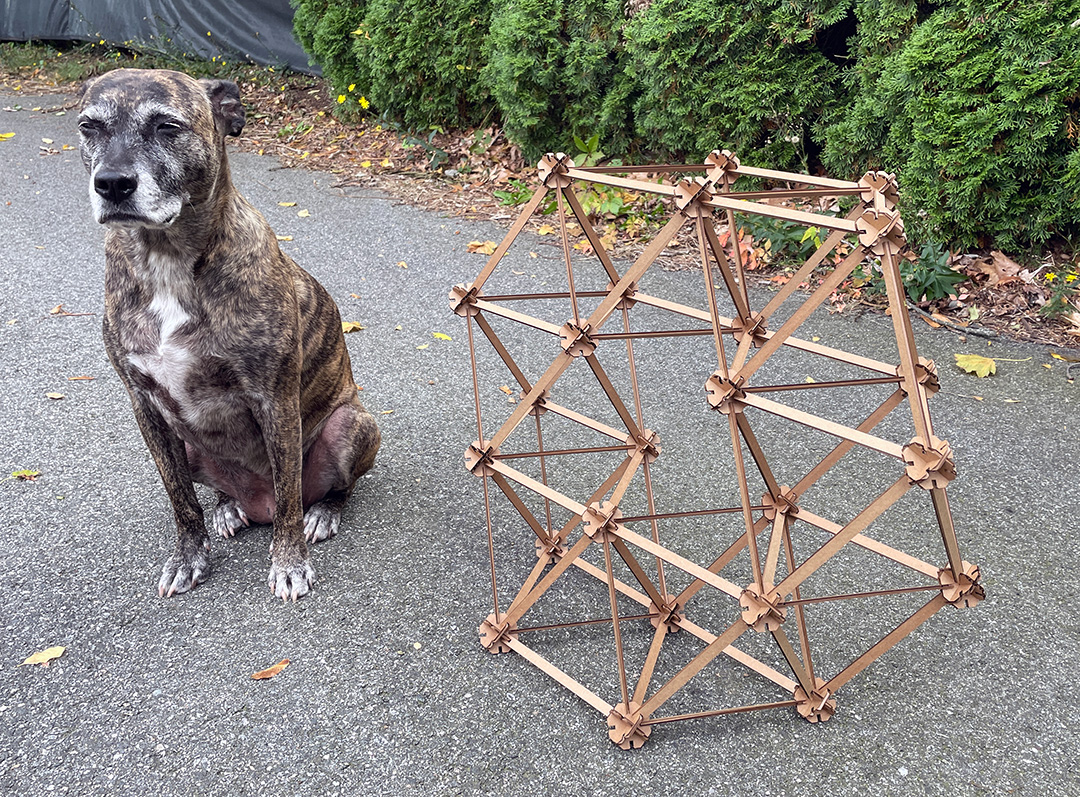
dog for scale