Overview
Workload: ● ● ○ ○ ○
Previous Knowledge: ● ○ ○ ○ ○
Current Knowledge: ● ● ○ ○ ○
Concepts
Programming languages, device interfaces, data interfaces, UI, performance, security
Software
Processing
Assignments
1. Write an application that interfaces a user with an input and/or output device you made
2. Compare as many tool options as possible [Group]
Documentation
Over the past few weeks, we have worked with electronics production and design and learned how to use input and outputs devices as well as how to create a networking connecting different parts of a project. Now, the objective is to write an application that allows users to interface with one or more of the electronics we created.
Again, I decided to start with a very simple idea. Honestly, spiral development has been the most useful concept I learned and the main reason for trying to first create something that works and, then, try to expand the scope and make it more complex.
Basically, I wanted to use the board I created in Week 10 - Output Devices and interact with that no matter how simple my application will be. If that works, I could try to either change this application or try to interact with a more complex Adafruit Proximity Sensor Board.
Choosing the language
1. The first step was to choose a language. Since I had never worked with any of them, that was not a straightforward choice.
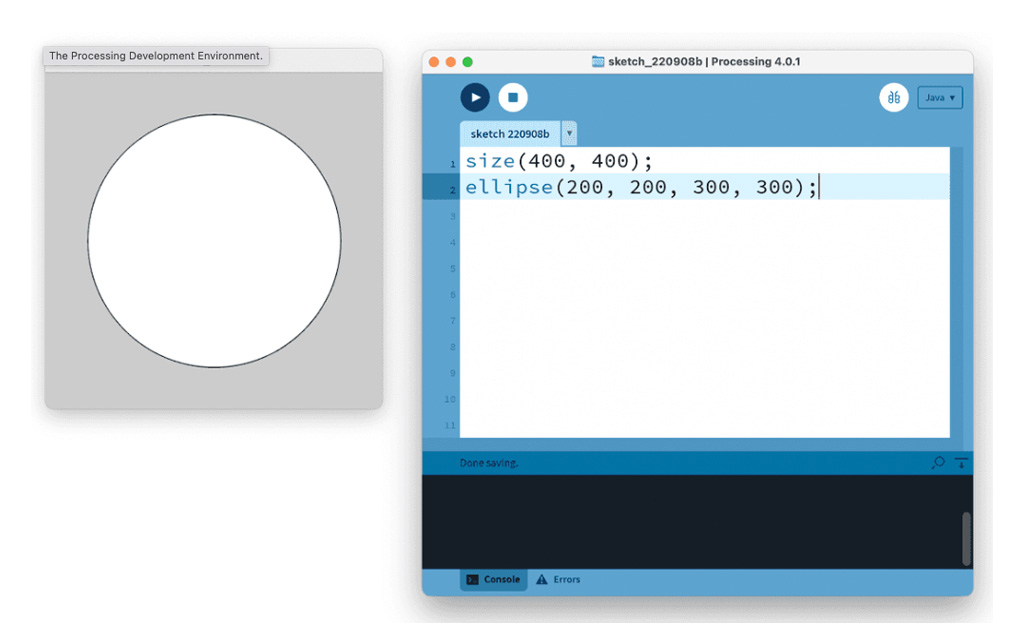
After searching more about some of them, I decided to pick Processing and, after all, I believe that was a great choice.
![]()
Processing is a free graphical library and integrated development environment (IDE) built for the electronic arts, new media art, and visual design communities with the purpose of teaching non-programmers the fundamentals of computer programming in a visual context.
It uses the Java language, with additional simplifications such as additional classes and aliased mathematical functions and operations. It also provides a graphical user interface for simplifying the compilation and execution stage.
The Processing language and IDE have been the precursor to other projects including Arduino and Wiring.
I enjoyed learning more about it for some reasons. First, the applications on design and arts are awesome - I hope to study more over the next few months and be able to create something more complex. Second, the documentations and tutorials are very easy to follow and friendly for people without a coding background. And, finally, it was very intuitive to use it for communicating with the board, given that Arduino IDE is based on that.
2. After picking a language, I browsed through their website and tried to learn more about the basics and some applications.
• Processing Website
• Reference
• Tutorials
• Examples
• Libraries
3. Finally, I downloaded and installed the Processing software.
* Initially, I used version 4.0.1, but after running into some issues and ended up downloading the older one (3.5.4).
The interface is very similar to Arduino IDE. There is a Text Editor, a row of buttons on the top and the Message Area and the Console below the editor.
Interacting with Electronics
1. After searching for some resources, I found the following tutorial about how to use Processing to talk to external electronic components.
Tutorial: Electronics and Processing
The tutorial was not only very useful for this assignment, but it was also the greatest source of basic information about Electronics. It was great to review some key concepts we have learned throughout the class.
2. At the end of the page, there were some examples on how to interact with board components through Processing.
For instance, they teach how to control an LED, how to get information from a light sensor and use inside your application or how to turn a DC motor on and off.
Testing
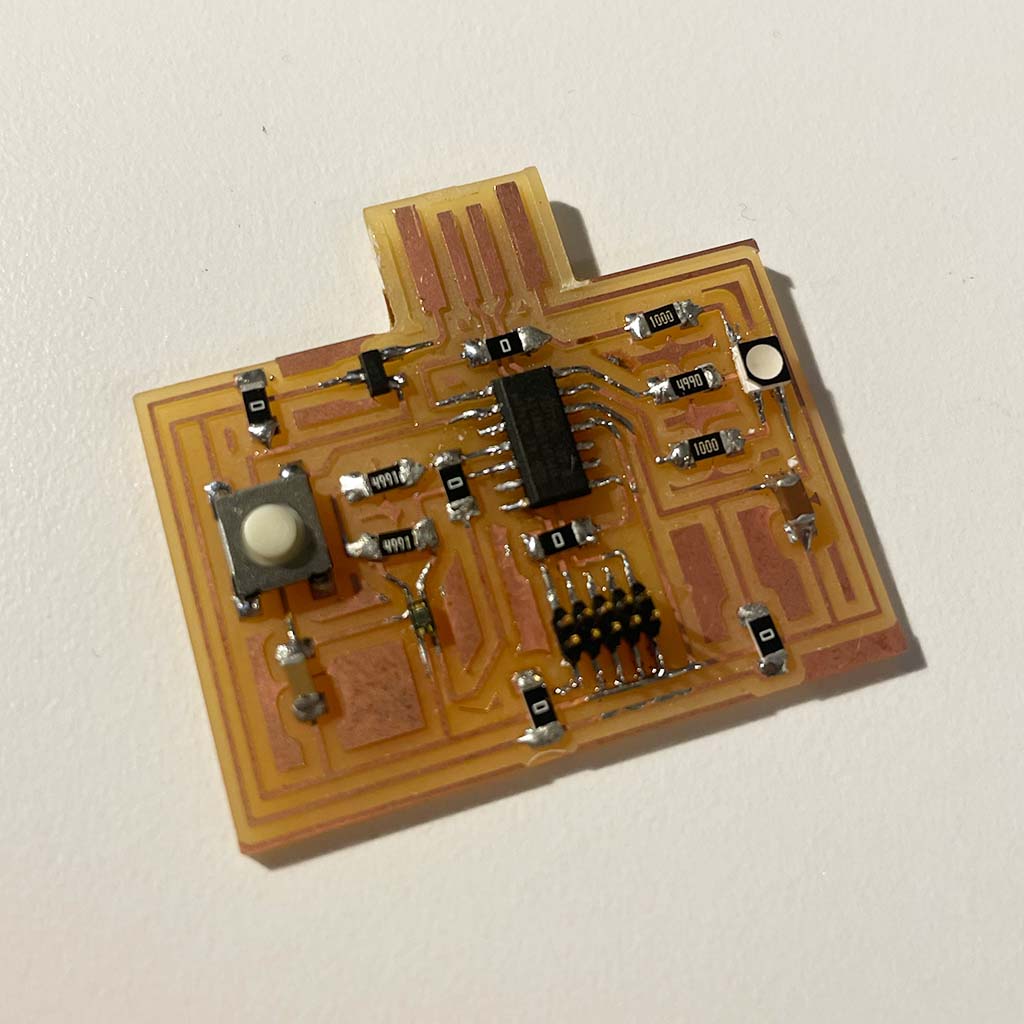
1. I decided to start with the board I created in Week 10 - Output Devices..
In addition to the microcontroler (ATMSAMD11C), it had an RGB light sensor and an RGB LED.
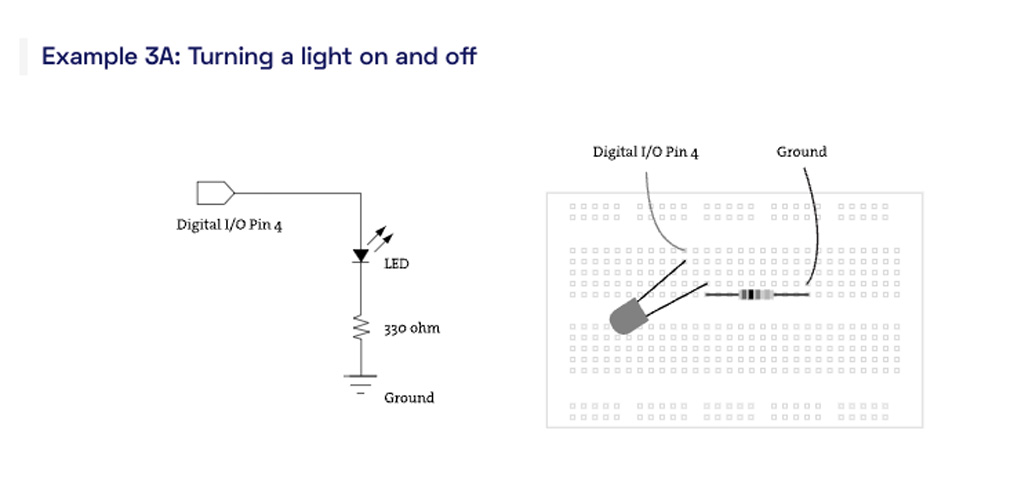
2. First, I wanted to test the LED and try to control it through an application. For that, I used the Example 3: Turning a light on and off
3. For any example, there are two programs required:
1. Code for the board (uploaded through Arduino IDE
2. Code for Processing.
Also, it is required to have the serial library. In this case, Serial is already a Core library that allows us to send data between Processing and external hardware through serial communication (RS-232).
4. In Arduino IDE, I followed the same steps learned in previous weeks (choose port, choose board, etc.) and run the following code:
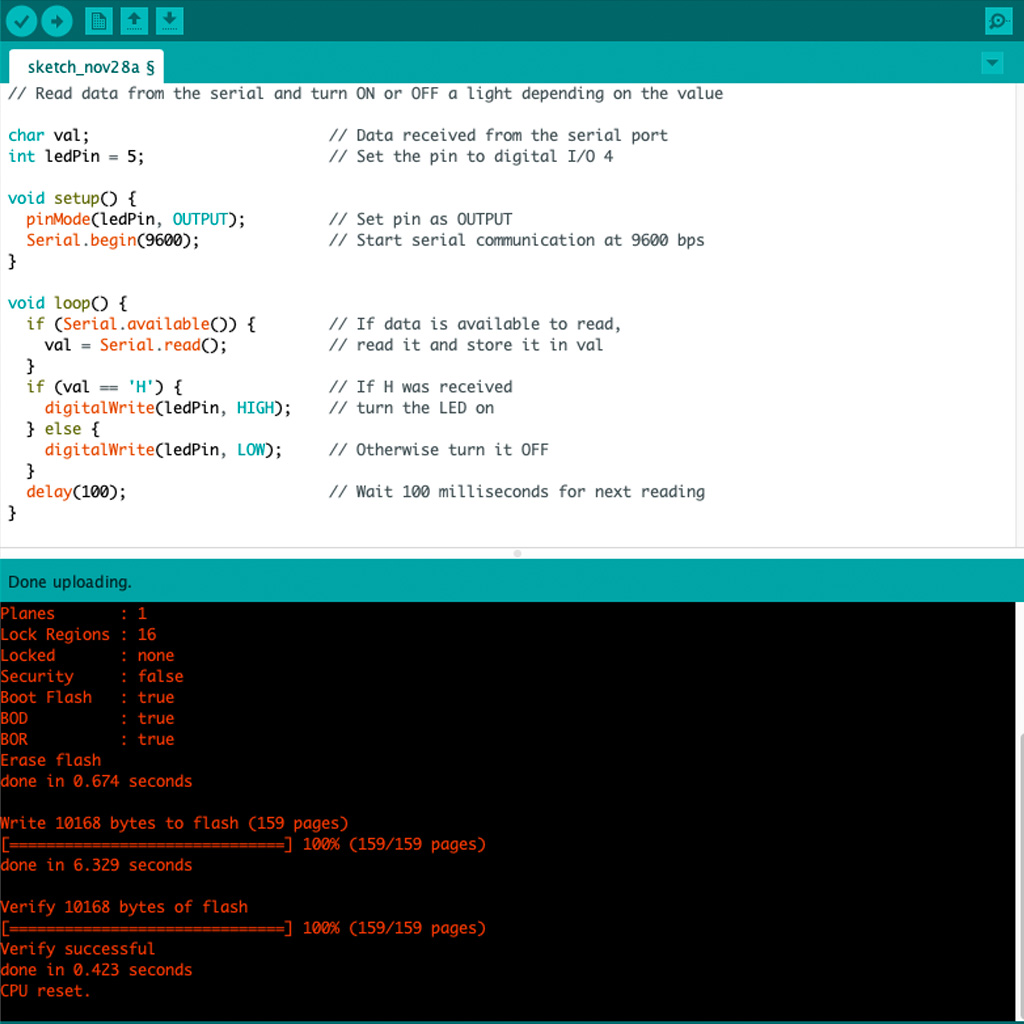
* I only had to update the port based on my design. In this case, I decided to start with only one color and that's why I choose port 5 (Green LED).
5. In Processing, I adapted the code to include a "ON/OFF" text and run the following:
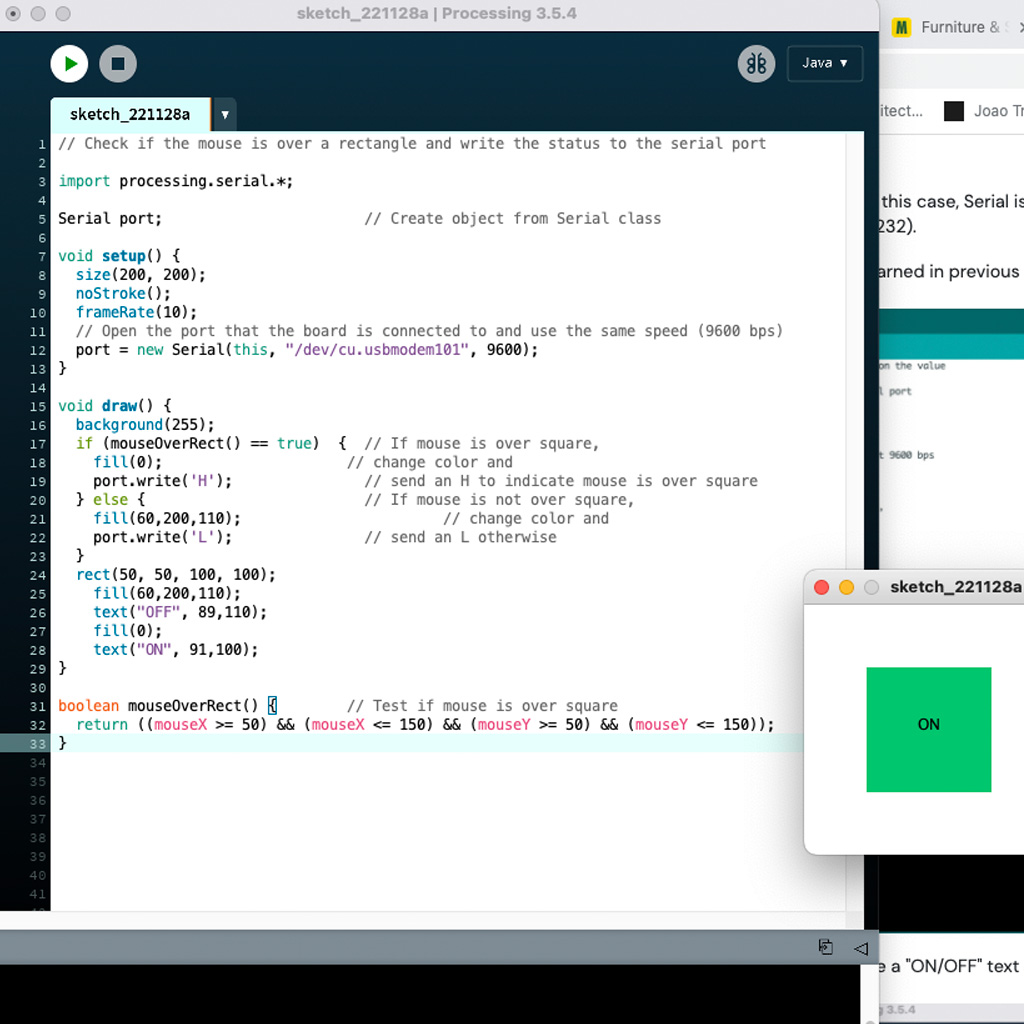
* In addition to changing the color and adding the text, I had to include the respective port ("/dev/cu.usbmodem101").
6. Finally, the application worked well and was able to interface with the board. Below, it is a short video:
It was nice to complete the assignment, but I really want to spend more time learning about how to create other applications that can interface with external devices.
Also, I feel that Processing is a great language to learn more about, especially because of some personal interests - I found some awesome examples of data visualization and digital arts.