13
MACHINE BUILDING
This week we worked as a group to design a machine that includes mechanism + actuation + automation + application, and built and operated it.
| Concepts: | Mechanical design, mechanisms, modules, machine control |
| Date: | 11.30.2022 |
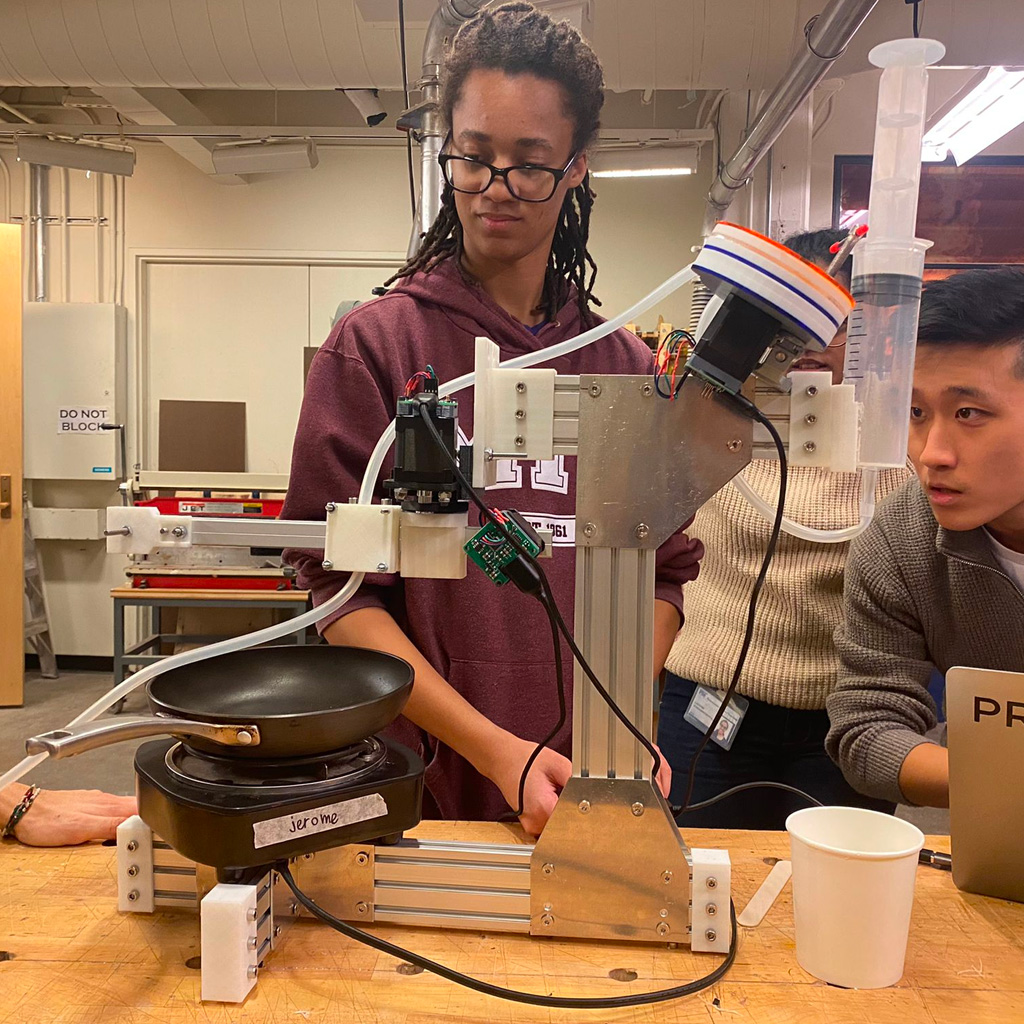
We built a pancake bot that takes a sketch as an input and extrudes pancake batter onto a pan. It uses polar coordinates to move in the XY plane.
Documentation:
As part of the work division, Joao took on the role of documenting the project. Here's the link to his excellent documentation of the process: Sketchy Cake
Work Division
We divided the project into smaller parts and allocated to different teams according to skills:
1. Form Construction: built a structure made of metal triple rails and metal sheets.
2. 3D Printed Parts: design and print plastic parts for connecting parts, finishing and supporting motors.
3. Extruder Mechanism: design and build motorized part to extrude pancake batter.
4. Linear and Radial Arms: design and build arms to move the extruder, changing the radius and the position of the drawings.
5. Software: program the machine to control electronic motors and create a friendly interface.
My Contribution
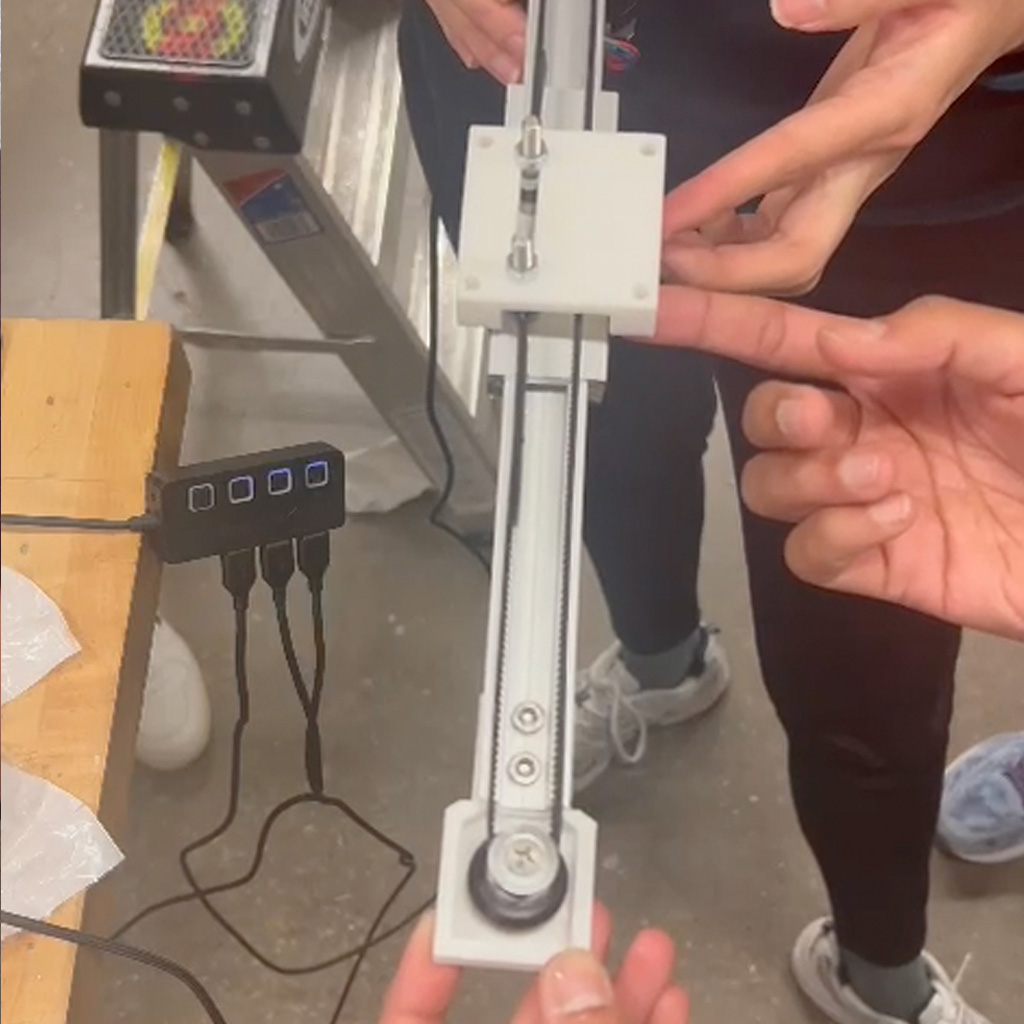
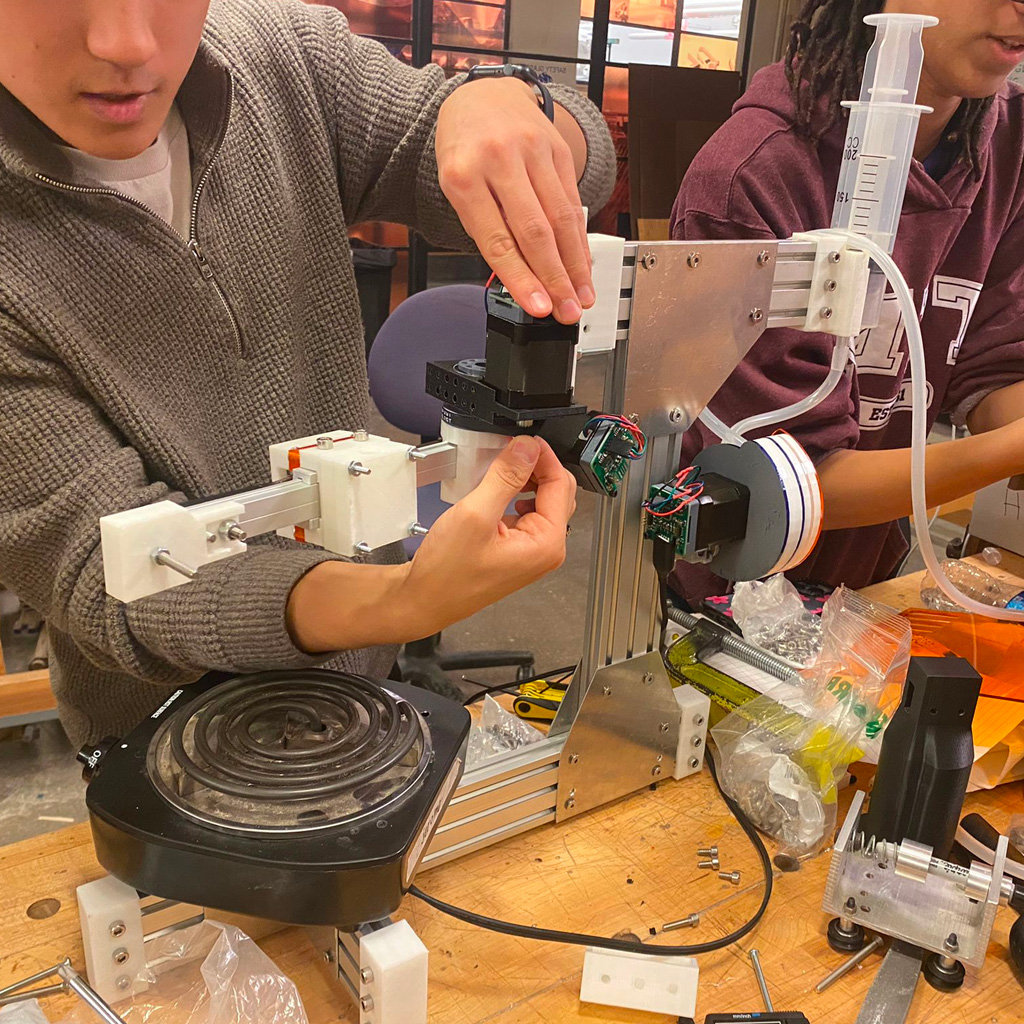
I helped with Form Construction in the beginning. Later, I worked primarily on the Linear and Radial Arms, mainly the tensioning and the mounting of the motors, and designed and printed 3D parts for the same.
Form Construction
In parallel, all teams started to work on each of the project tasks:
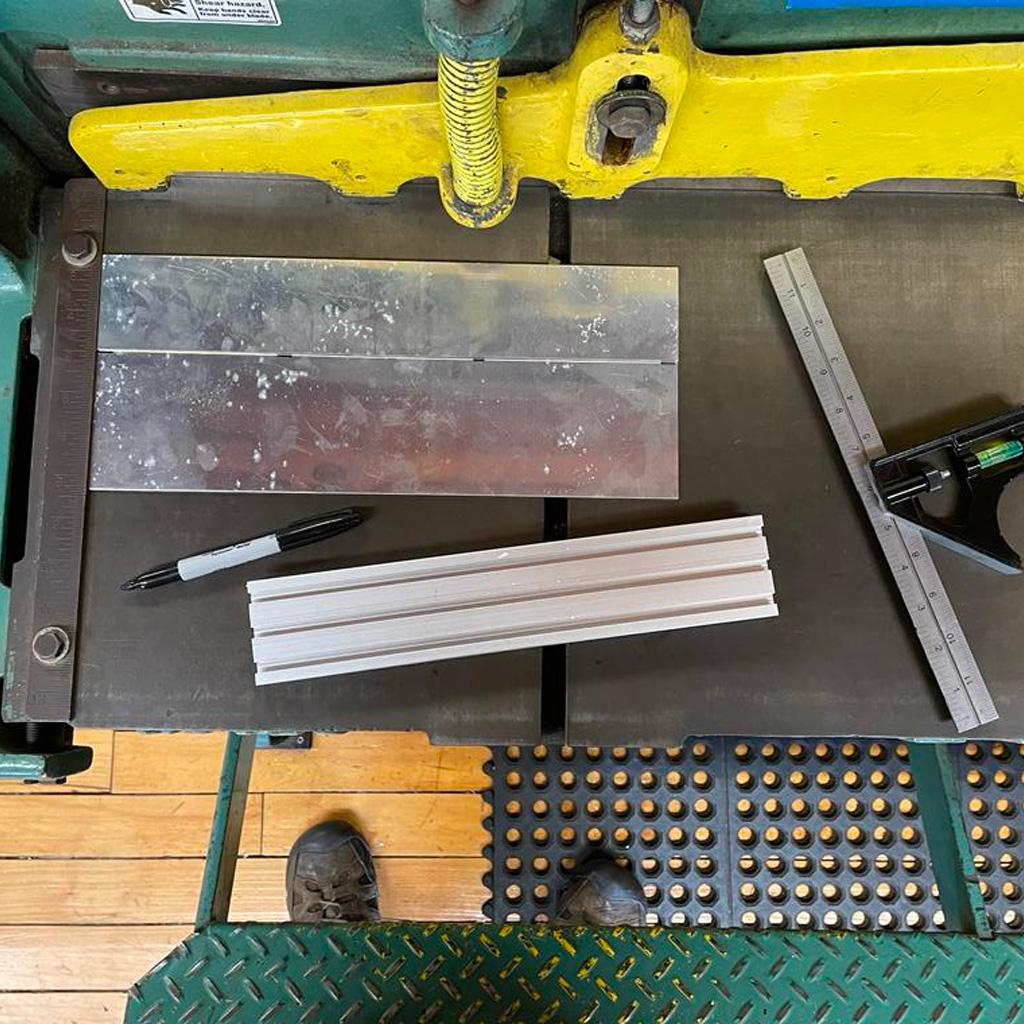
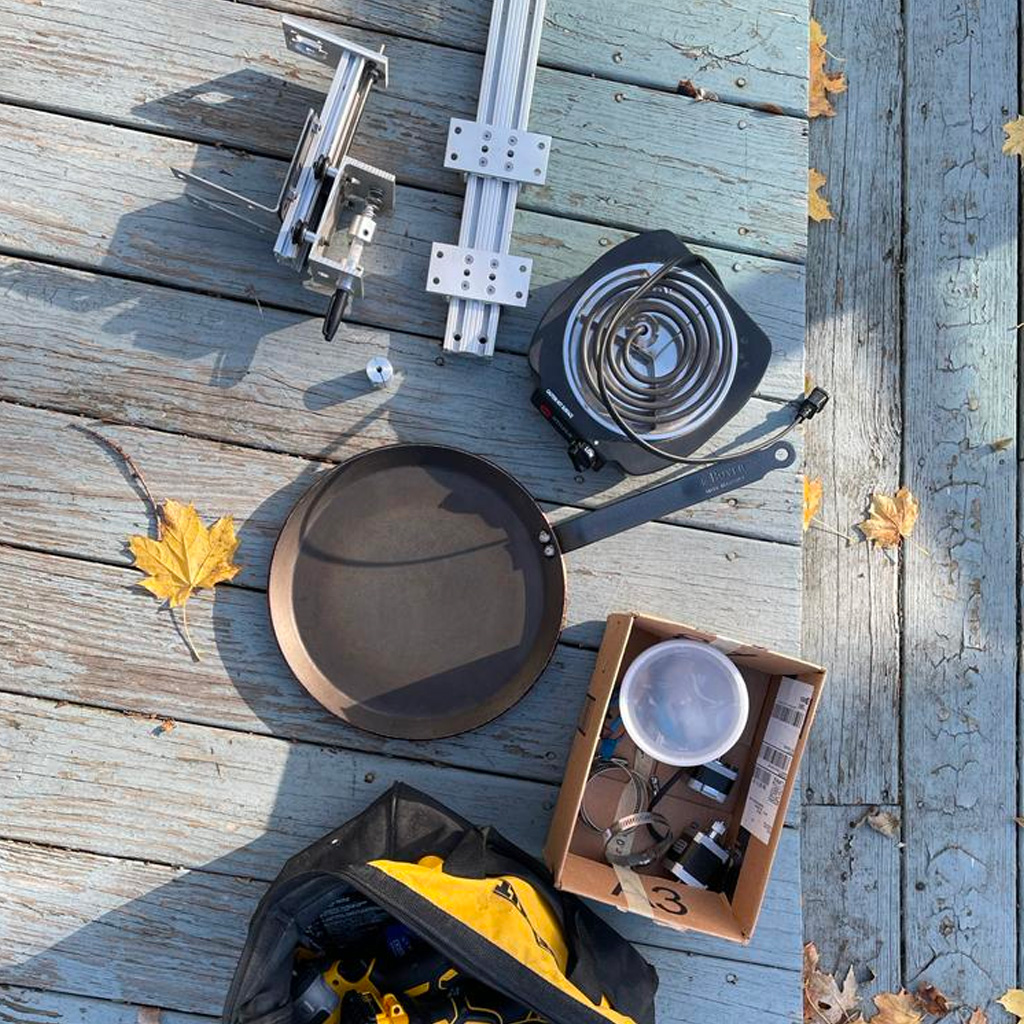
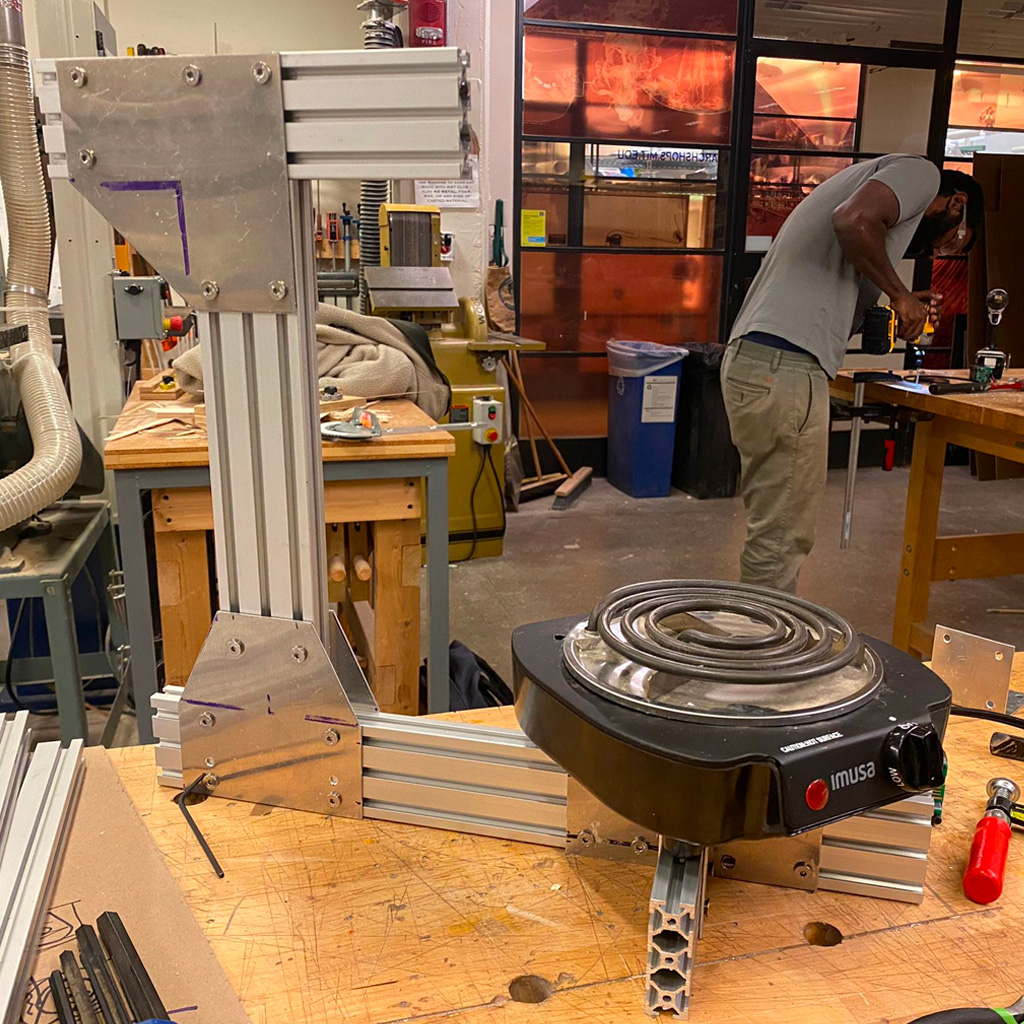
Following the design, we selected some parts that were necessary for the machine, In addition to the materials that were provided, we used a hot plate, pan and small structural metal parts. Then, Jerome cut all the parts according to the required sizes. We used the triple metal rails and connected them with aluminum plates. At the shop, we were able to connect the pieces and build the basic structure to which all the motors and other components should be connected.
3D Printed Parts
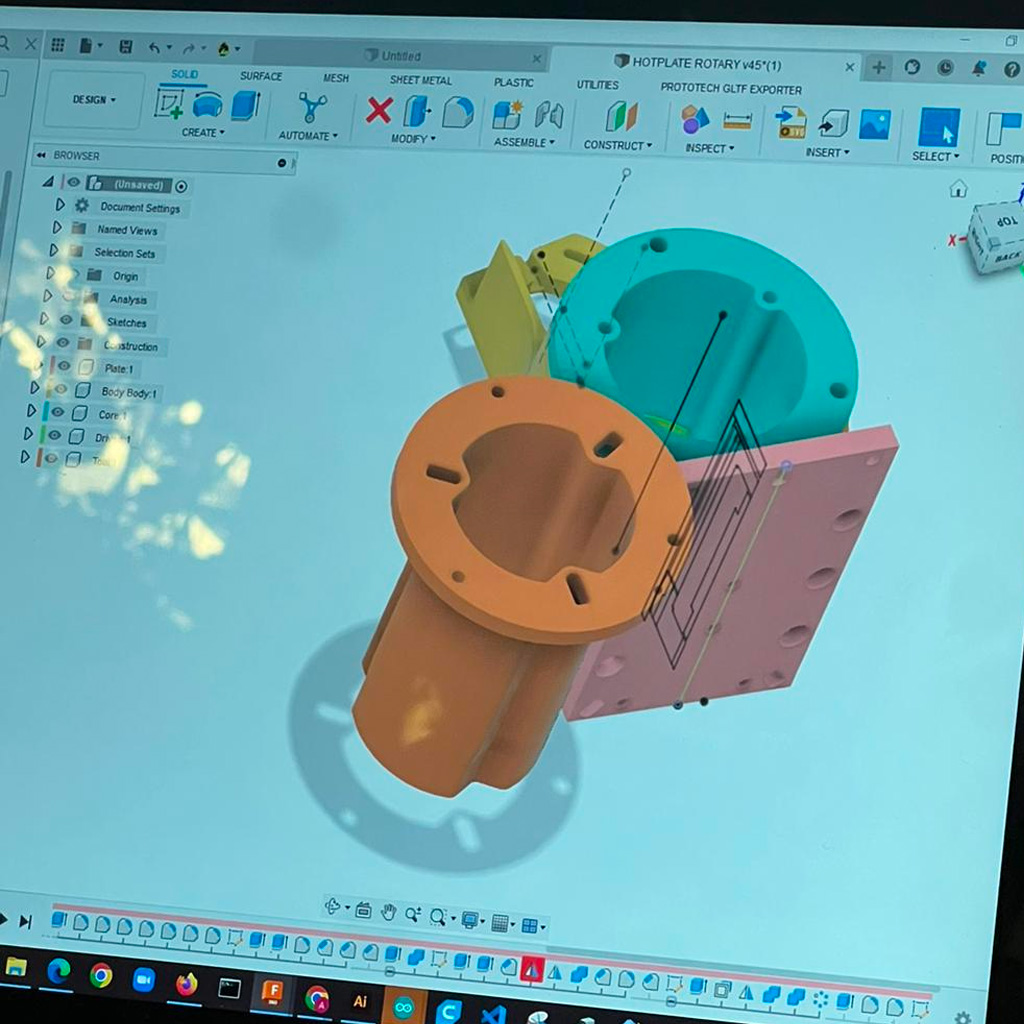
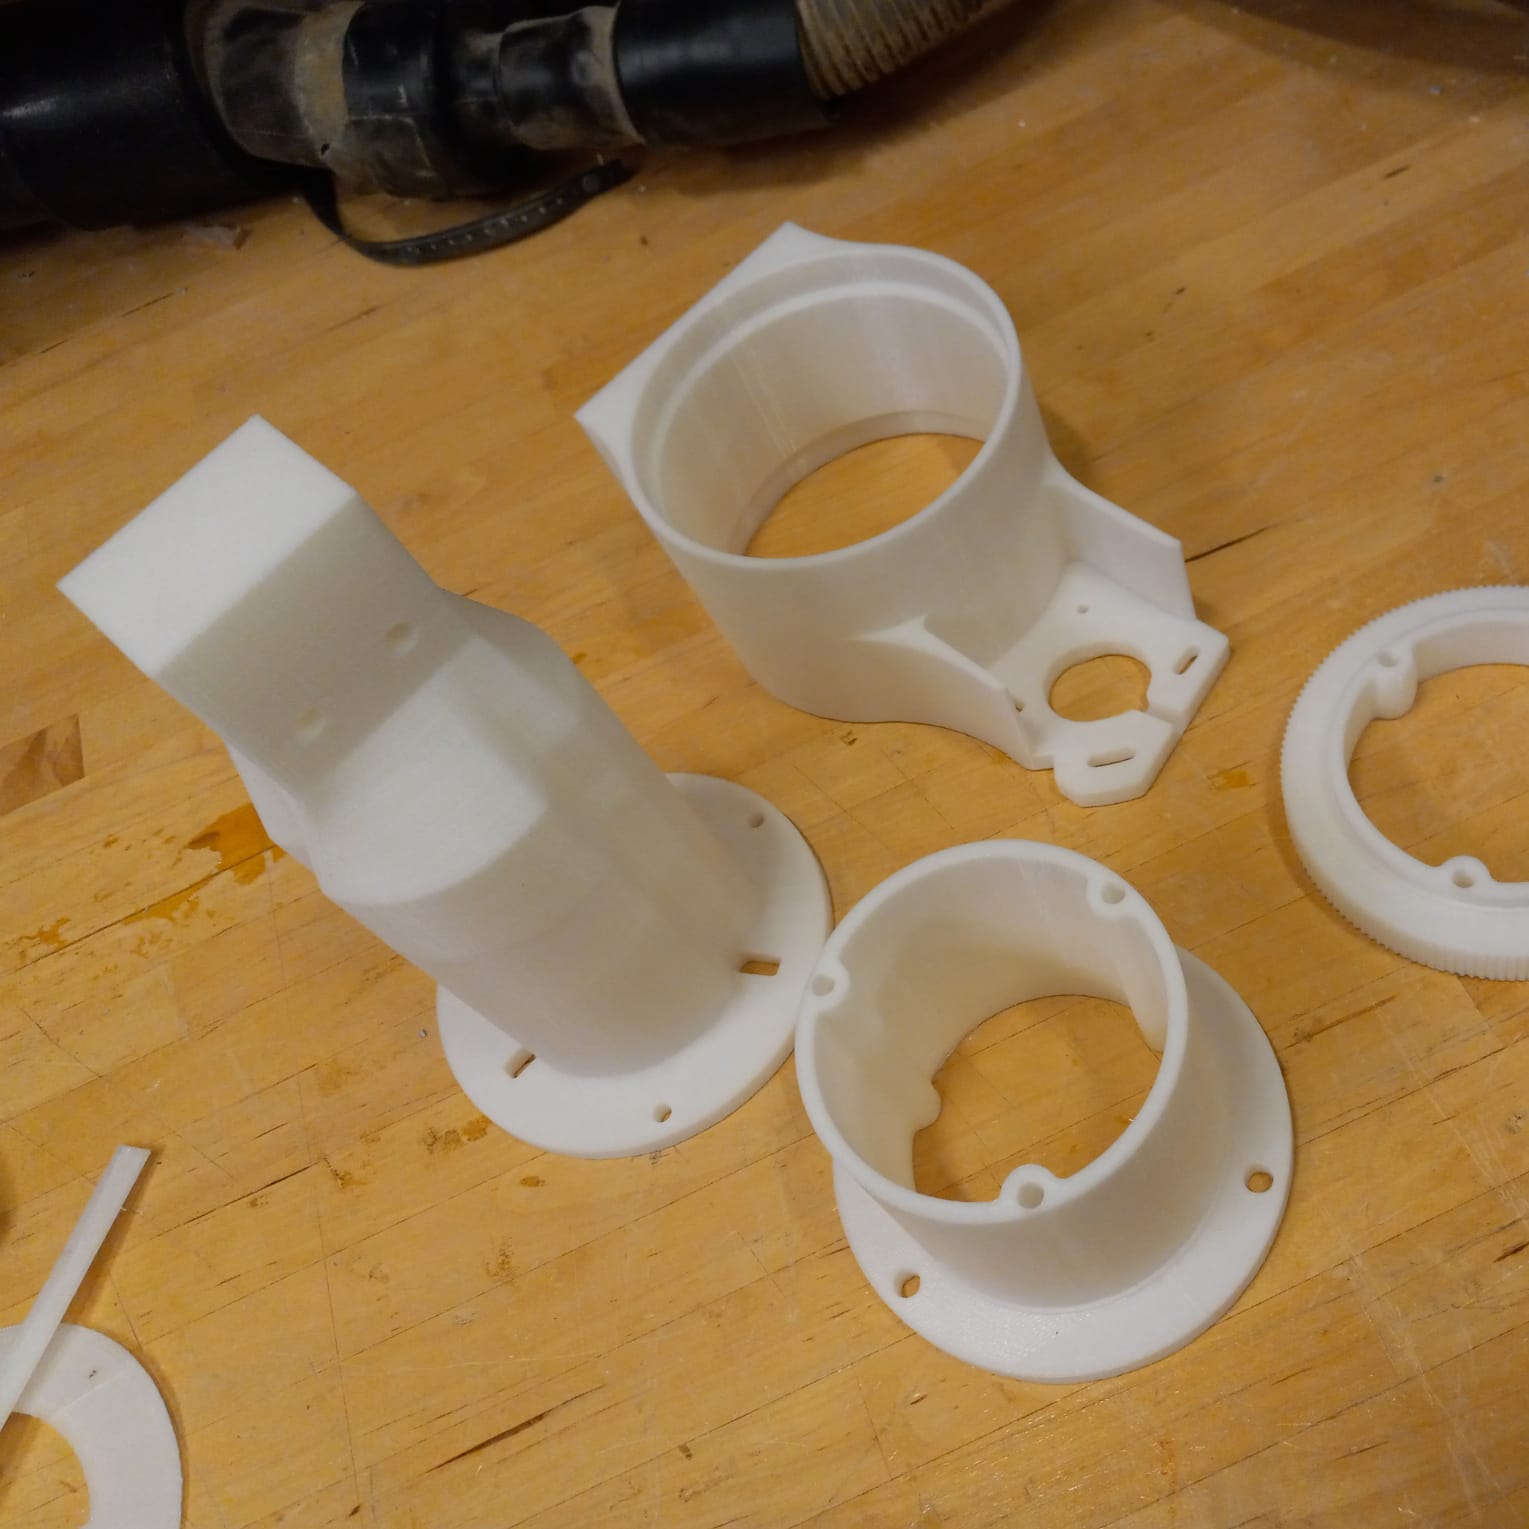
With the structure partially done, we figured out some 3D printed parts we needed. We used the documentation available at Beehive documentation to adjust dimensions. For example, we printed a few end caps to make the machine more stable and a few mounts to support the motors and rails. Some of them didn't work as expected and, in some cases, the pieces that we needed to fix them were not available. So, we had to reprint or adapt, cut and fix some of them.
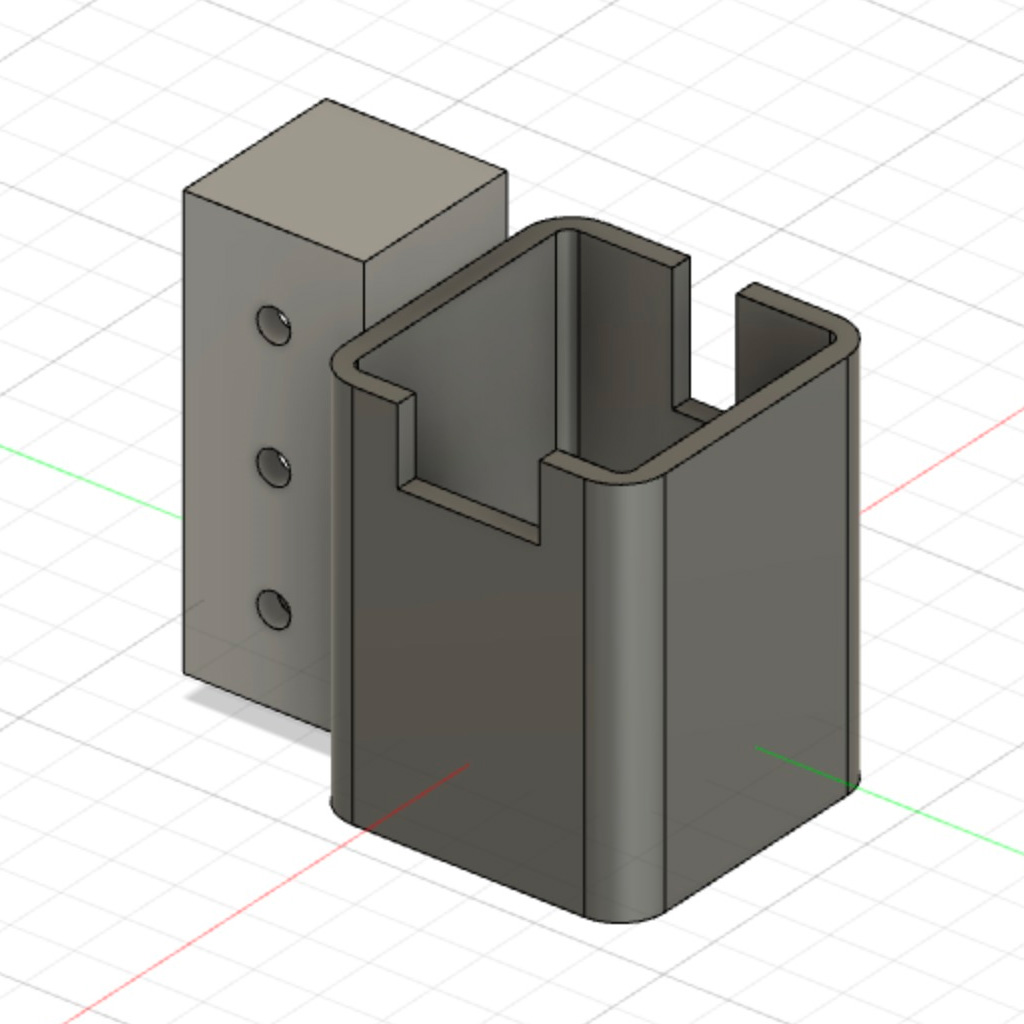
Linear and Radial Arms
To drive the movements, we needed to build two mechanisms - linear and radial - that would be individually controlled by motors. The linear part was built using another smaller rail that we had and mounting the motor connected to a rubber band. The radial movement was controlled by another motors that was mounted to the top structure. In order to connect both motors, it was necessary to 3D print some additional parts.