Week 3 - 3D Scanning and Printing
This weeks individual and group assignment concerned 3D scanning and printing. The group assignment was to characterize some of the printers available in the shop by performing several prints which tests a certain capability. The result is that we were able to characterize the shallowest overhang angle, dimensional tolerances, surface finishes, fit clearances, extrusion and valley print quality, and various bridge and overhang performances for the different printers. Some of the results can be found by clicking the following link to the group page.
This weeks individual assignment was two fold: 3D print something that cannot be made subtractively and 3D scan something.
3D Printing
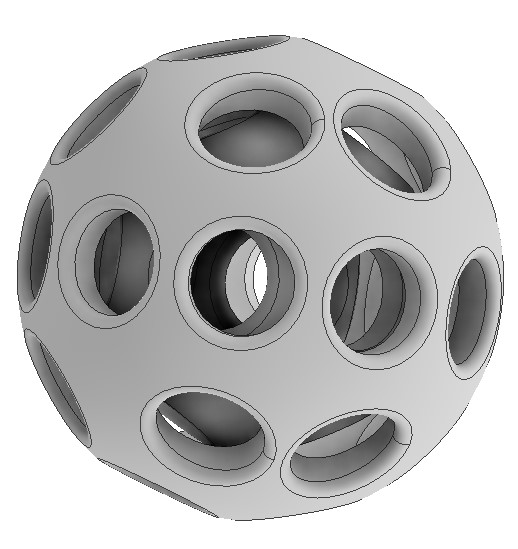
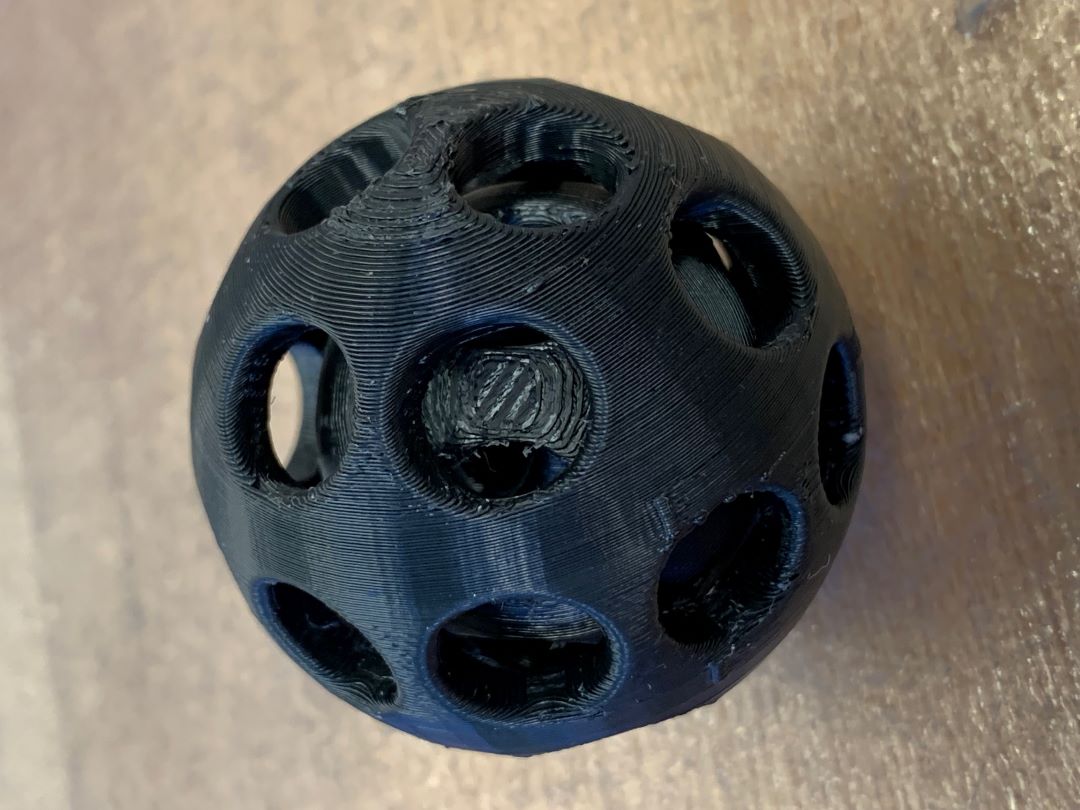
A fair warning, the following pictures could be triggering for those with tribophobia!!! This weeks individual assignment was relatively simple, as I have some experience with 3D printing parts (though I haven't worked with any of the printers available in the EDS shop before and am very intrigued by the Prusa). When I heard the challenge for this week to make something that cannot be made subtractively, I thought immeditately that it lends itself to a part within a part. So I decided to make a ball within a ball within a ball. This can only be made additively because during the 3D printing process we have access to the center of parts that made be closed off later. The resulting part is a cross between a wiffle ball and dog toy, but is oddly fun to play with... something about the sound, the holes, and the weight distrubtion make tossing the part very satisfying.
I decided to make the balls with holes in them for several reasons. The most important being to provide access for the removal of support material. This is where I was able to take advantage of one of the cool machines in the EDS shop. Removing all that support material manually through the holes would be very tedious. Luckily, the Stratys printer in the shop is capable of printing with dissolvable support materials. This means that I gain access to the hard to reach areas and by placing the part in a chemical bath after the print, the support material melts away. This results in a very clean finish.
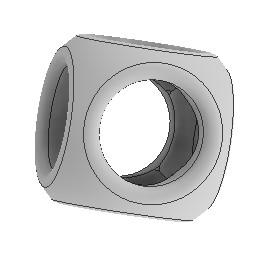
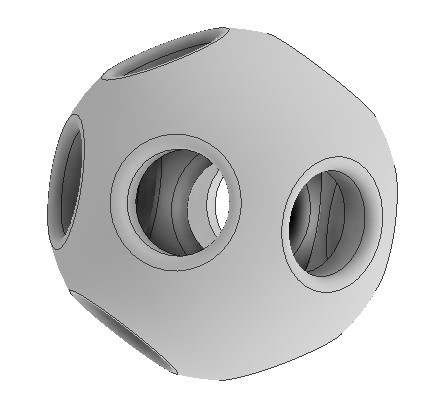
The following picture of the CAD model, showing each ball level by level. The first picture is of the innermost ball. The second picture has the middle ball with the innermost ball inside it. And then the last picture is the full part with all three balls.
I let the part print overnight. The total print time was 6 hrs and I printed it with a couple of the test pieces from the group project to save print time.
The next morning, it was placed in the chemical bath to dissolve the support material and the end result was a great part that worked just as expected.

3D Scanning
This part of the individual assignment was fairly open as well. I decided to scan a previously scanned and printed version of a private head, with the idea that it would be interesting to see the deviation from the original with iterative scan/prints, sort of like the game "telephone". I didn't actually print the head, but scanned it using the Revopoint scanner available in the shop. The part that I was scanning was placed on a rotating bed with stickers that should be randomly placed to help the post-processing software determine the absolute spatial orientation of the head.
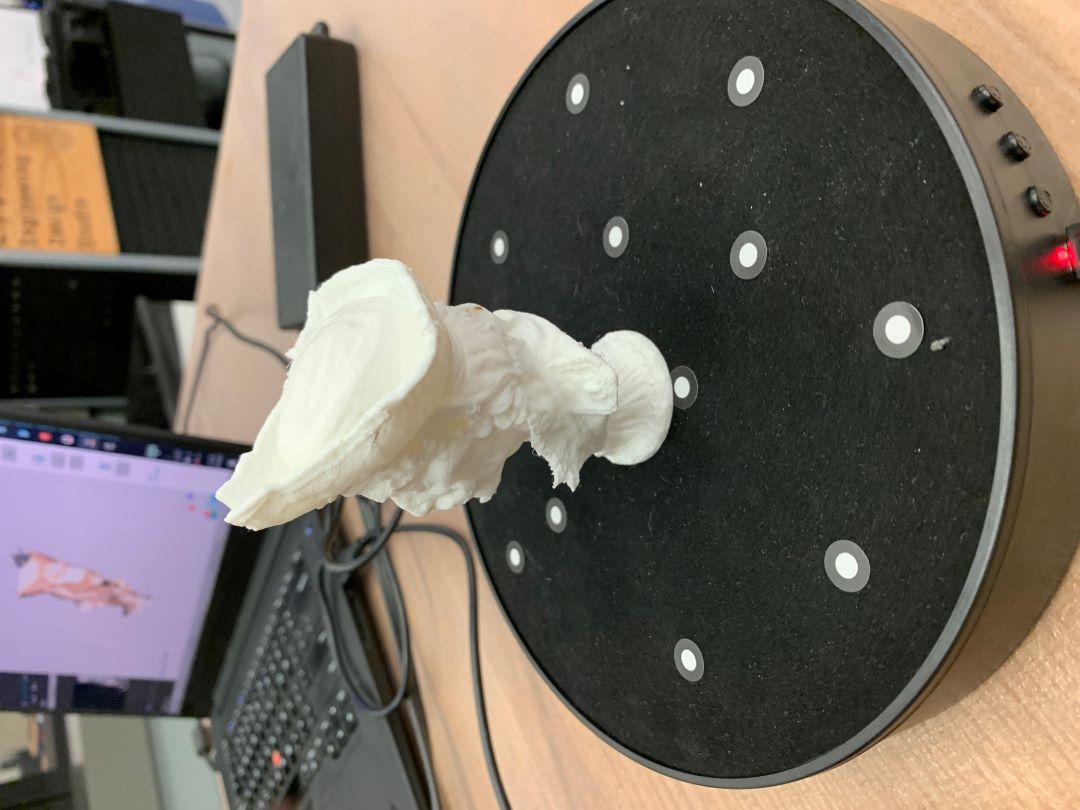
This works best if the part being scanned is rotated slowly, if the part is white, and if the scanner is held steady, prefereablly on a tripod. After scanning, the magic is in the software. The software takes all of the points and fuses them before creating a mesh to fill in the holes.
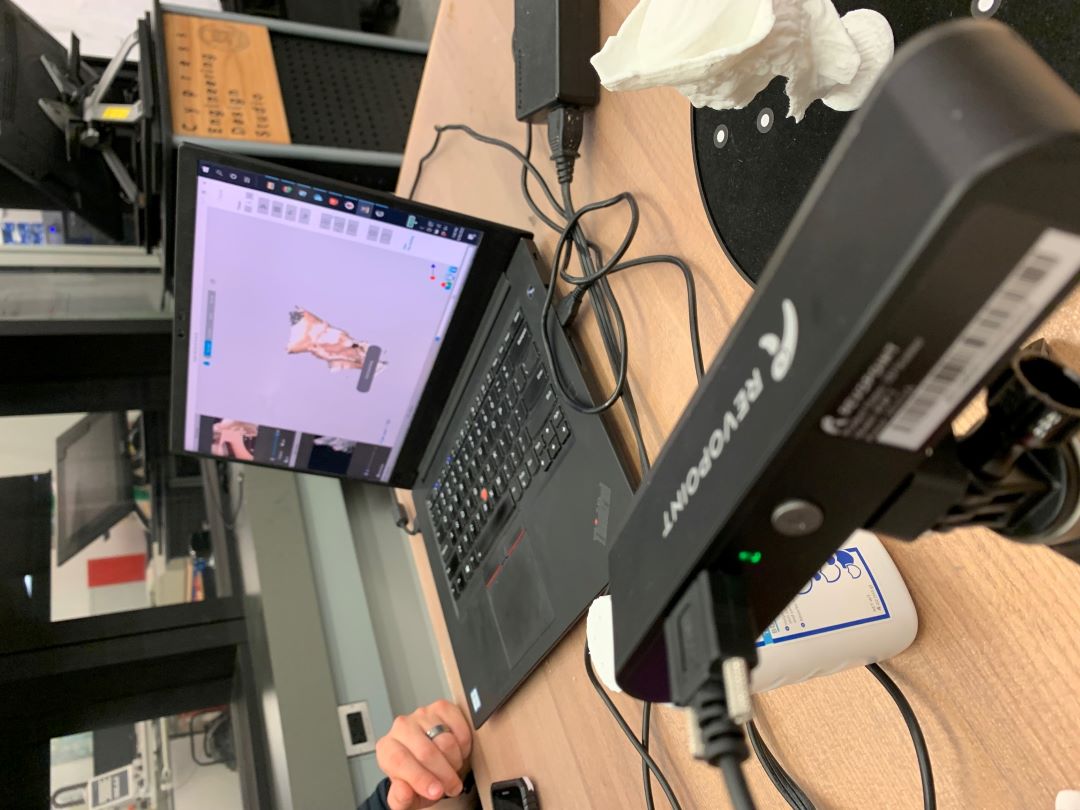
The result is an .stl part file that can be read and opened in a 3D modeling software and then printed again.
Design files for this week can be found here.