Week 8
Molding & Casting
Molds, casts and my face eternalised in cement
I started this week full with ambitious ideas and creative plans, because that's what HTMAA is all about. For this molding and casting week, I was inspired by a French brand called Schiaparelli who are known for their futuristic couture and accessories. I was especially intrigued by a beautiful jacket made in 1953 with rose-shaped motifs, which I have studied carefully prior for an embroidery project I did a few years ago.
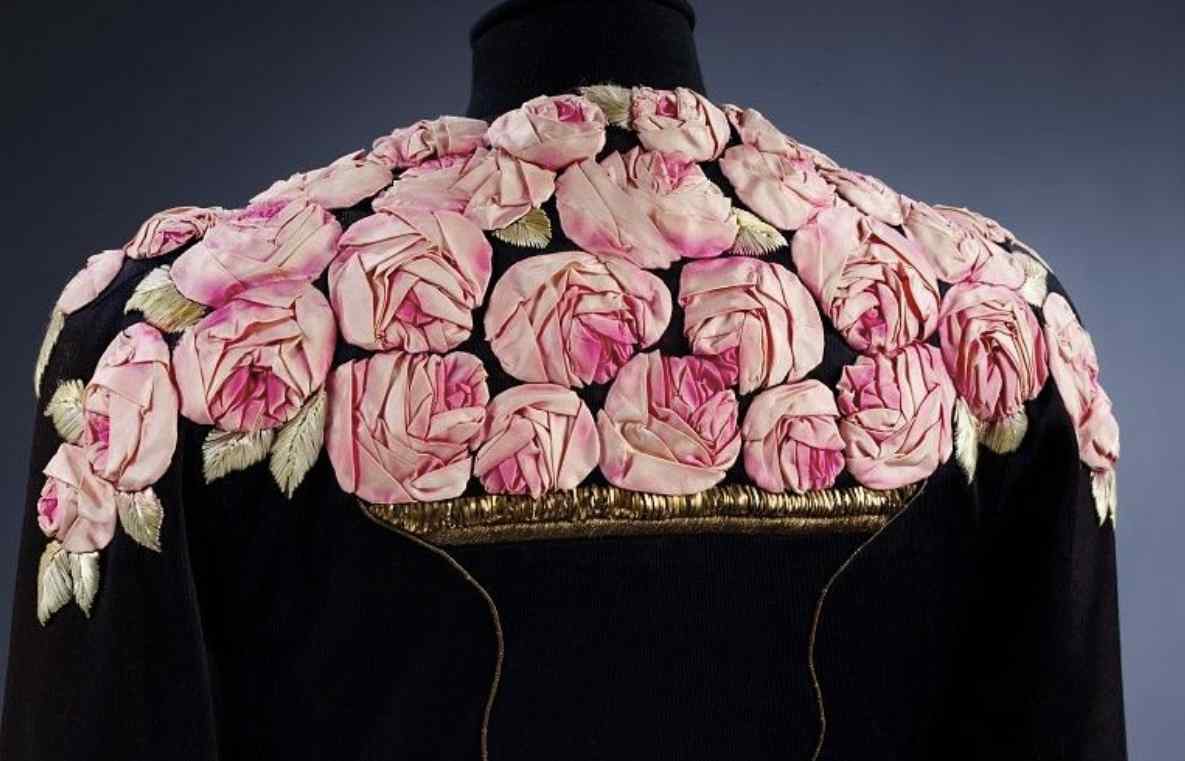
It is fabric molded in rose petal shapes, and layered to create the shape of a rose in an intricate way. I made some sketches on paper first to get a sense of what I wanted, and I decided to make an earring and cast it in metal.
Design
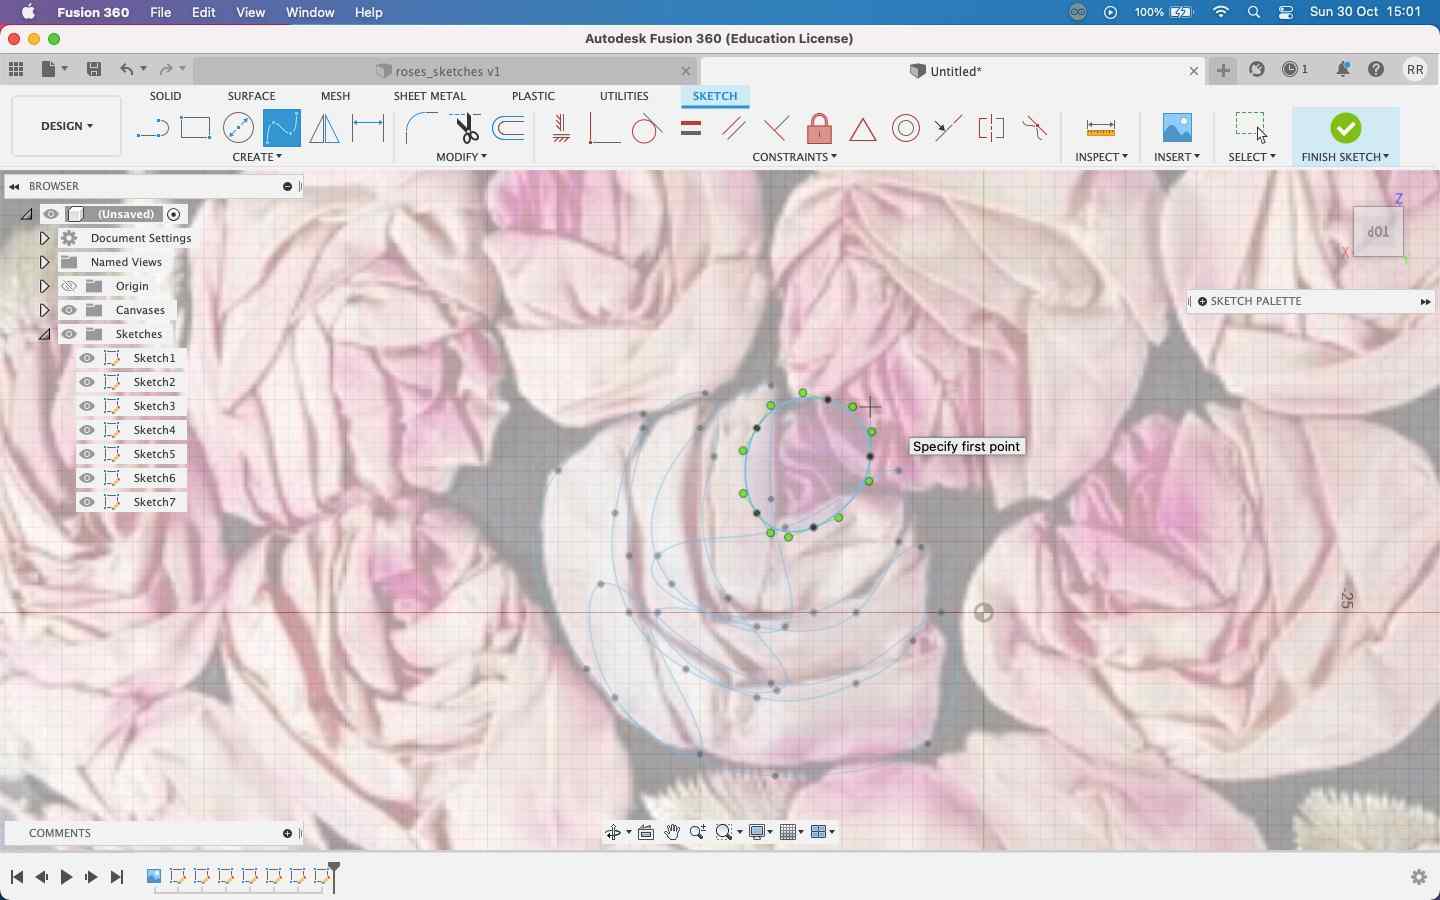
I started off by sketching some petal shapes in Fusion. The idea was to make them irregular and assymetrical to get a 'real' rose shape. I started off by using the Fit Point Spline tool to sketch this out.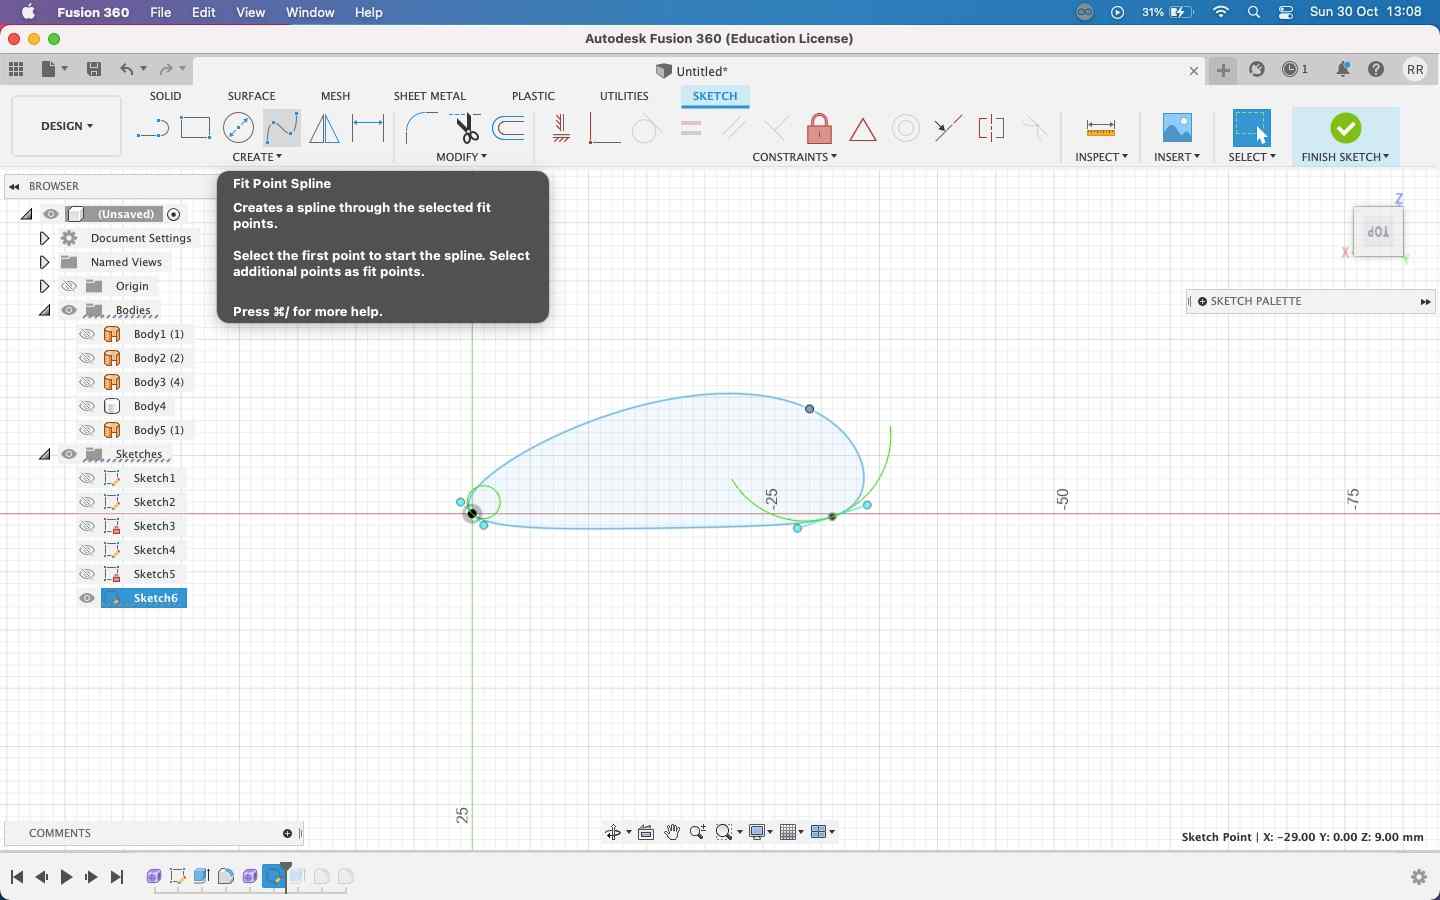
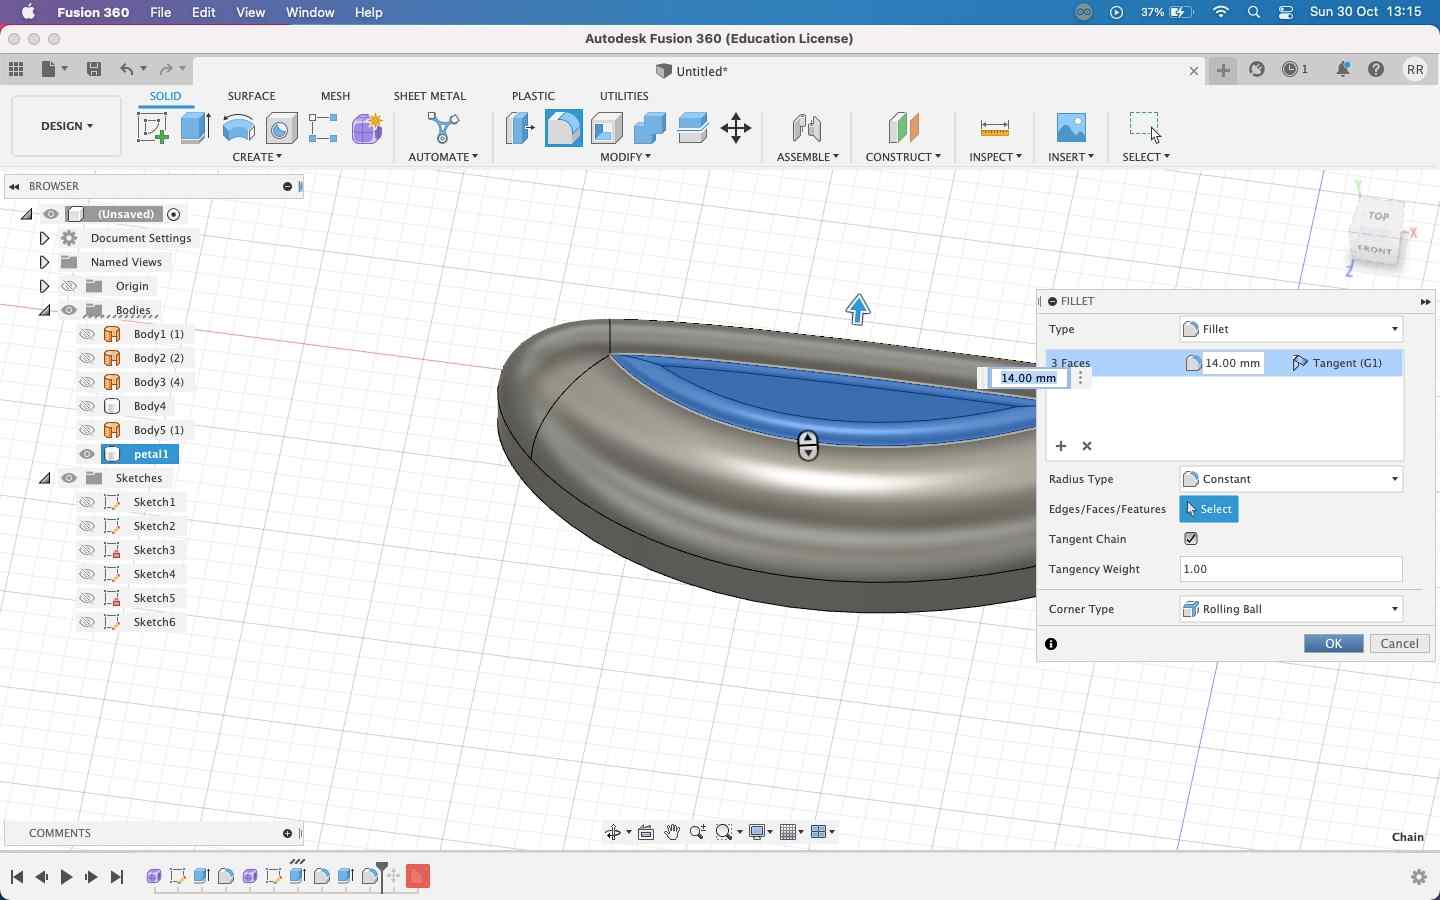
I drew a single petal, extruded it and used Fillet on the corners to get a rounder shape.
I found the shape to be too sharp so I went back to sketching and made a rounder shape:
I then decided to use the original image of the rose jacket as my canvas on Fusion, so I imported it using the Insert Tool:
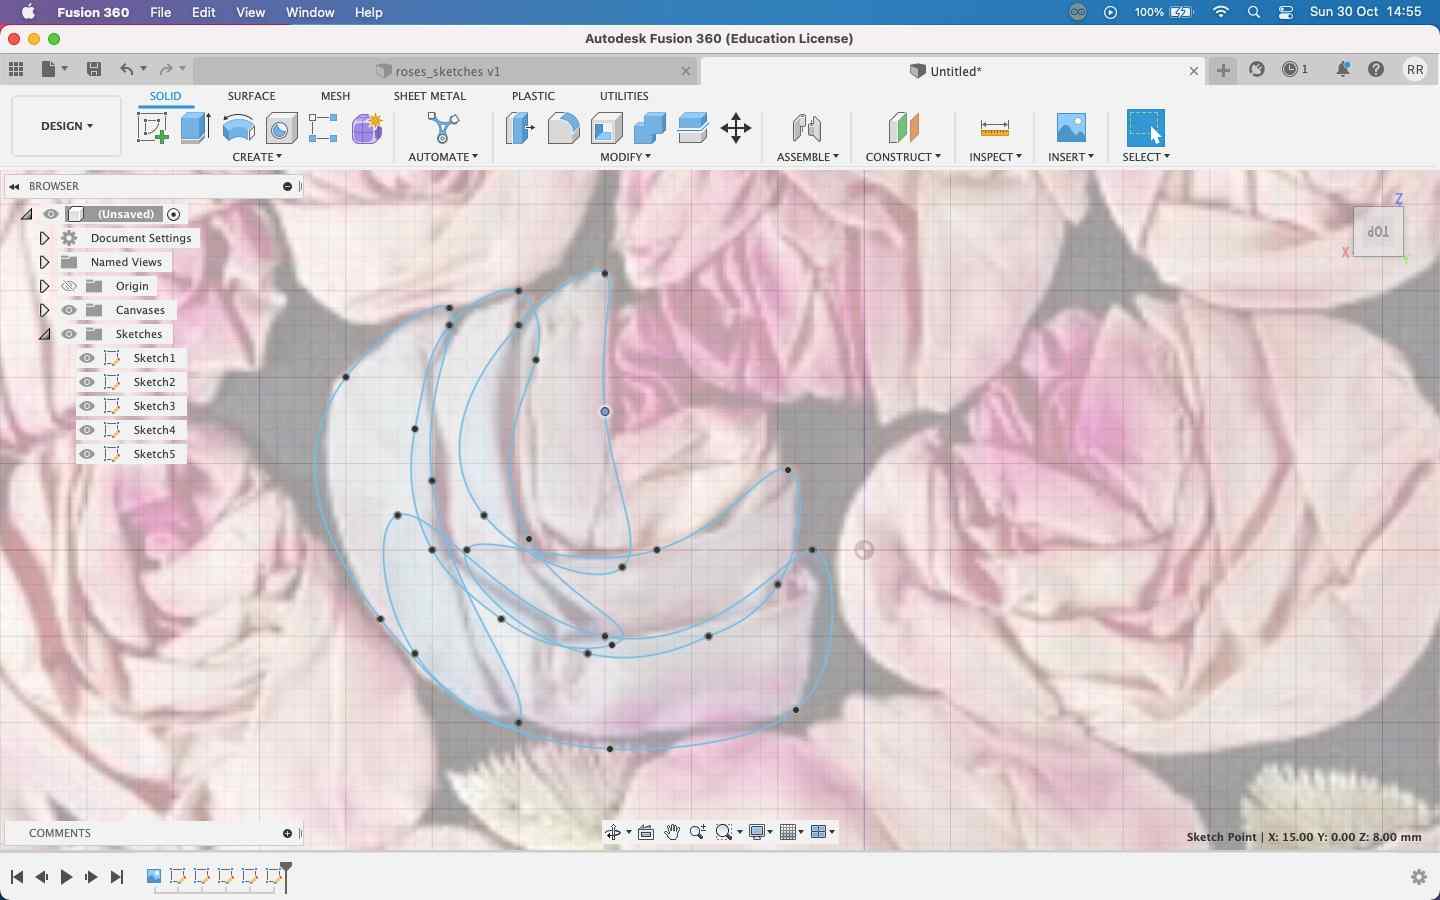
I then sketched on top of the canvas using the same Fit Point sketching tool:
I can smoothen the curves using the curve points on the sketch:
Once I was done with the sketching, I hid the canvas and started extruding the individual petals to different heights:
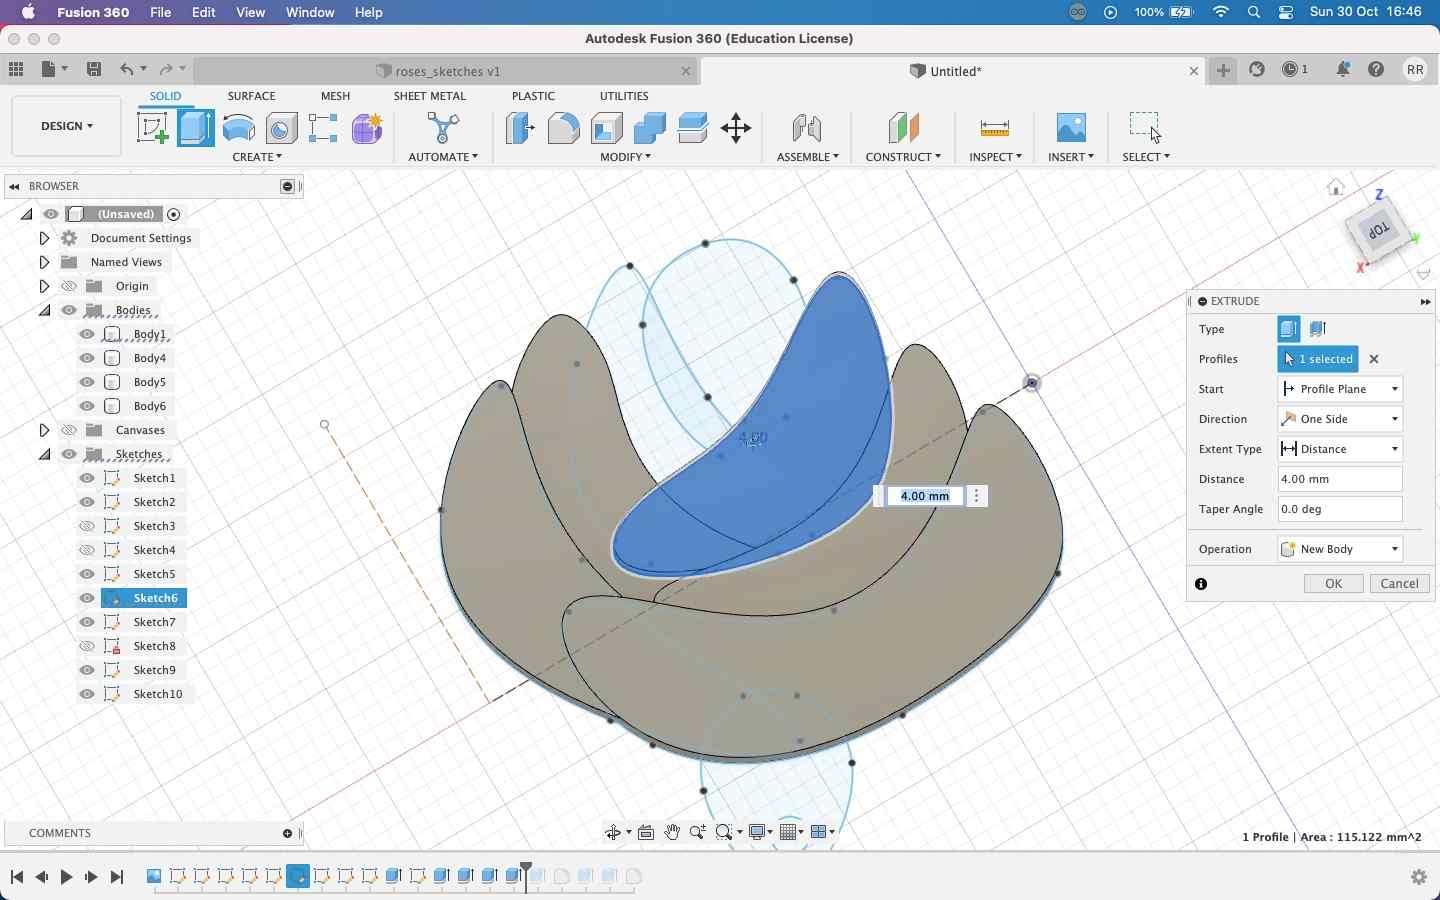
I experimented a bit with different values for filleting the edges of each petal. Because each petal was of a different height, I had to look for the maximum fillet value individually.
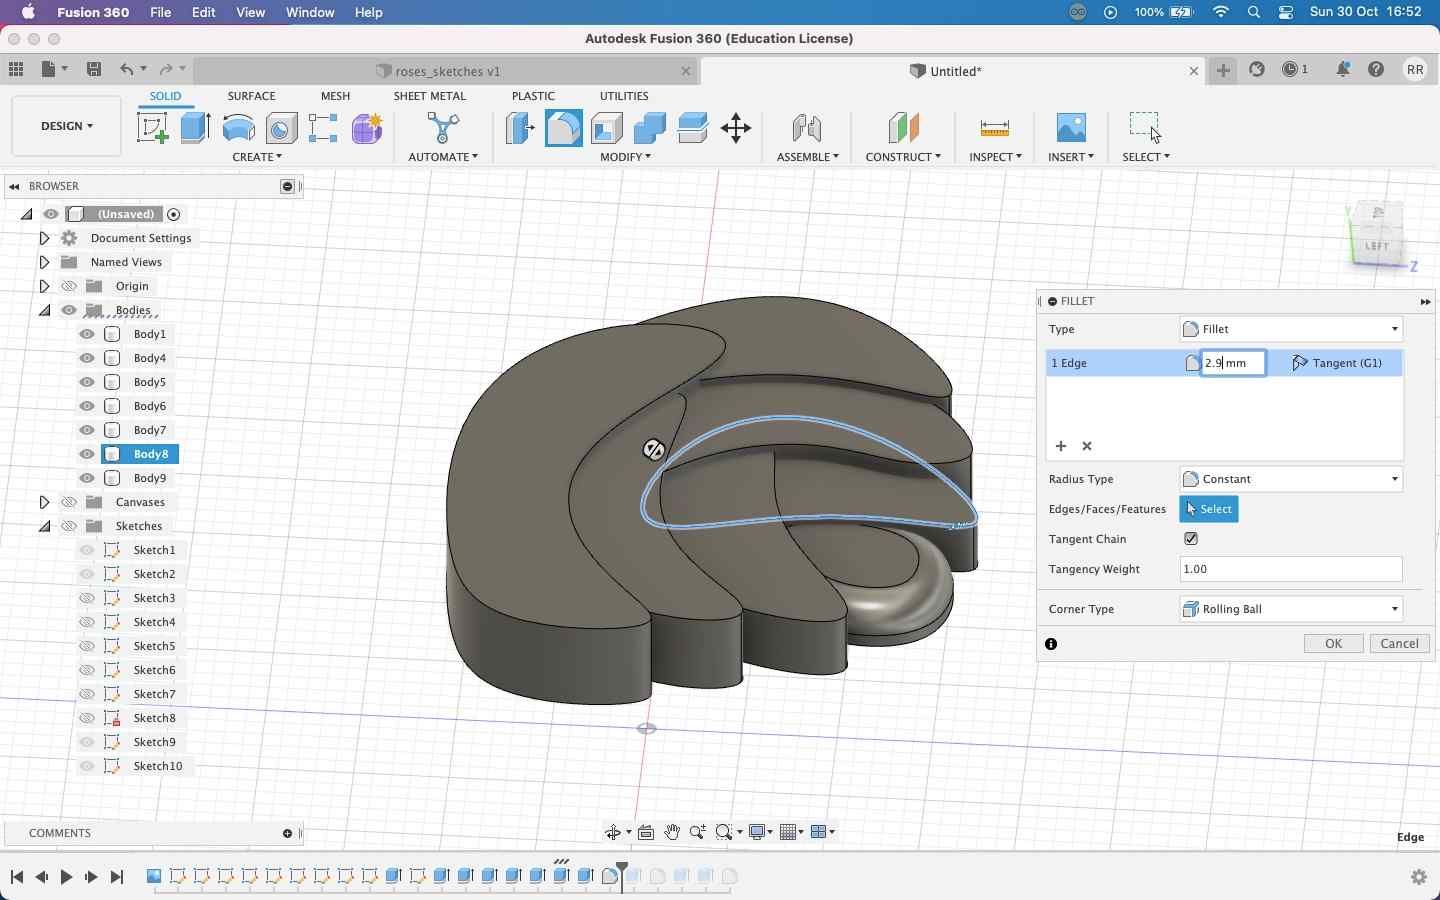
I was happy with the outcome:

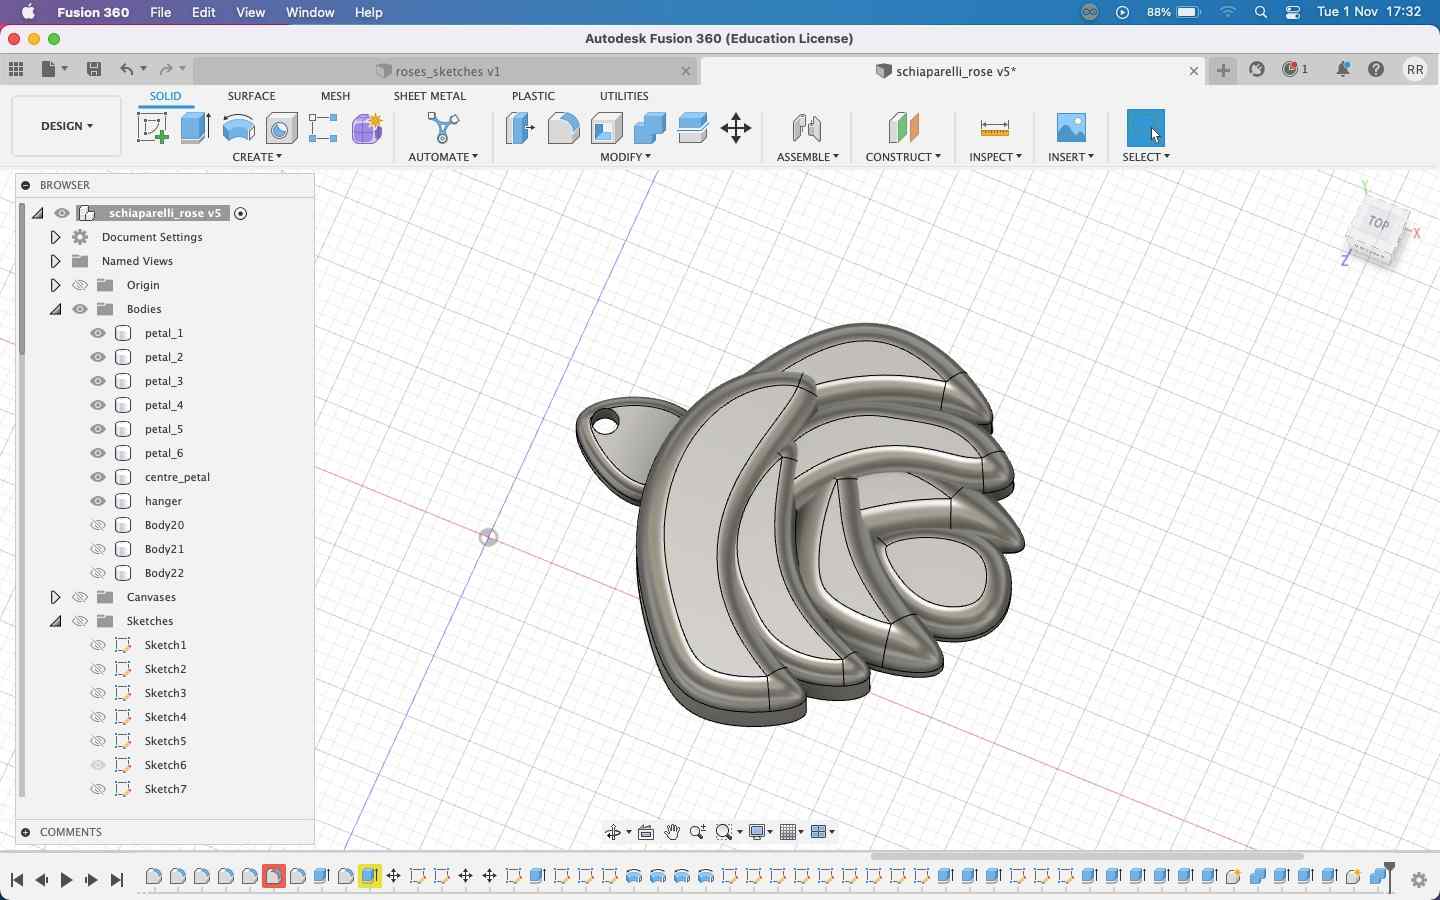
I also added an upper dangle (that's what it's called, I googled it) for the post to go into
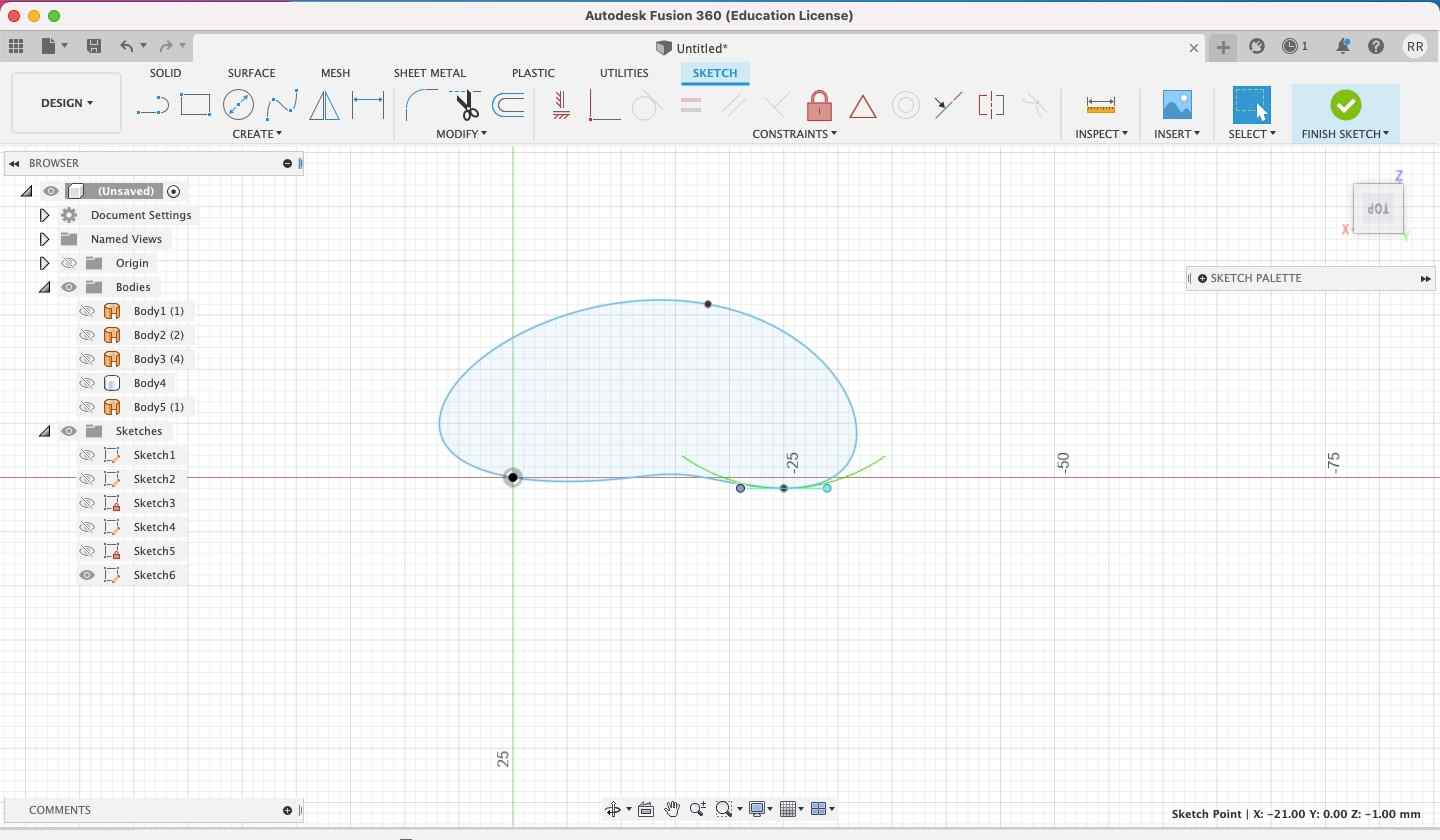
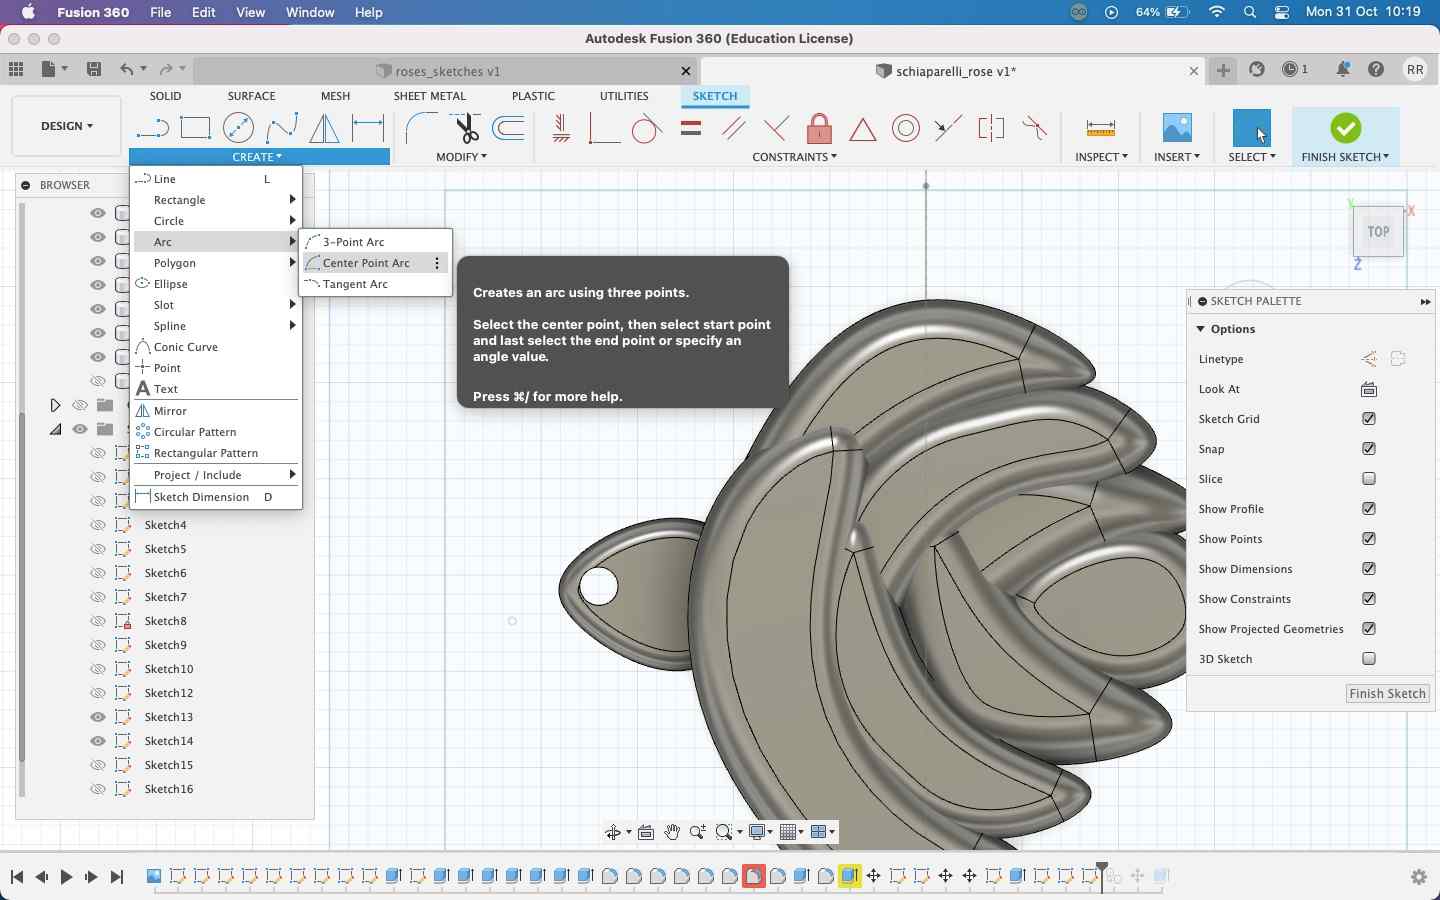
To create the walls for the actual milling, I sketched a rectangular plane on the rose, and offset it by 6mm. For the registering points, I used a new technique: create a half circle using the Centre Point Arc tool:
And then I used Revolve to create either a 180° hole or hemisphere:
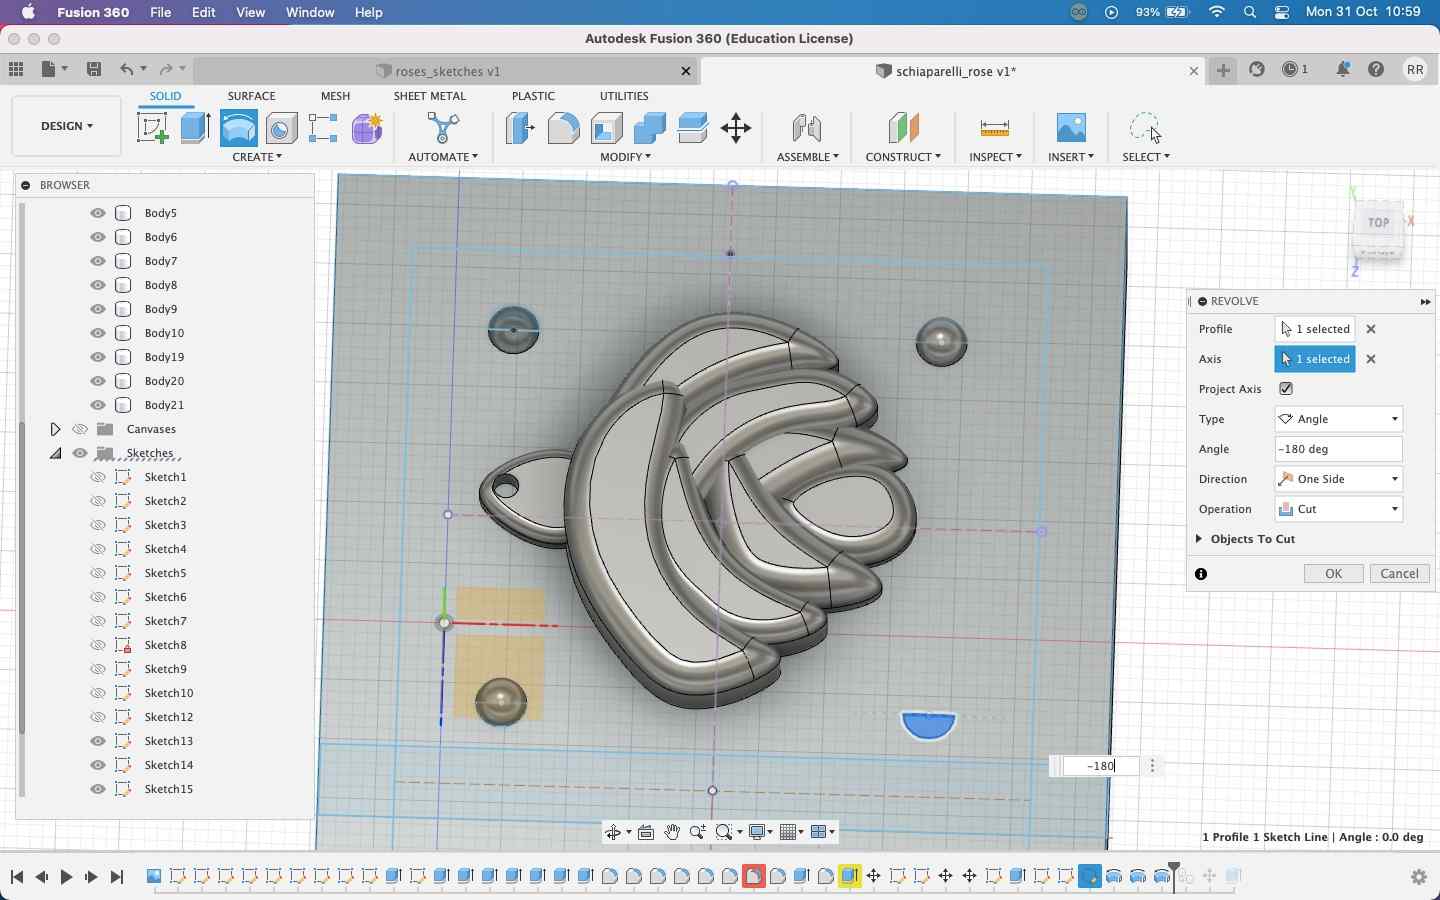
I also needed two funnels: a sprew and an air vent. I extruded it as a positive, so that when I cast it I will get the hollow version.
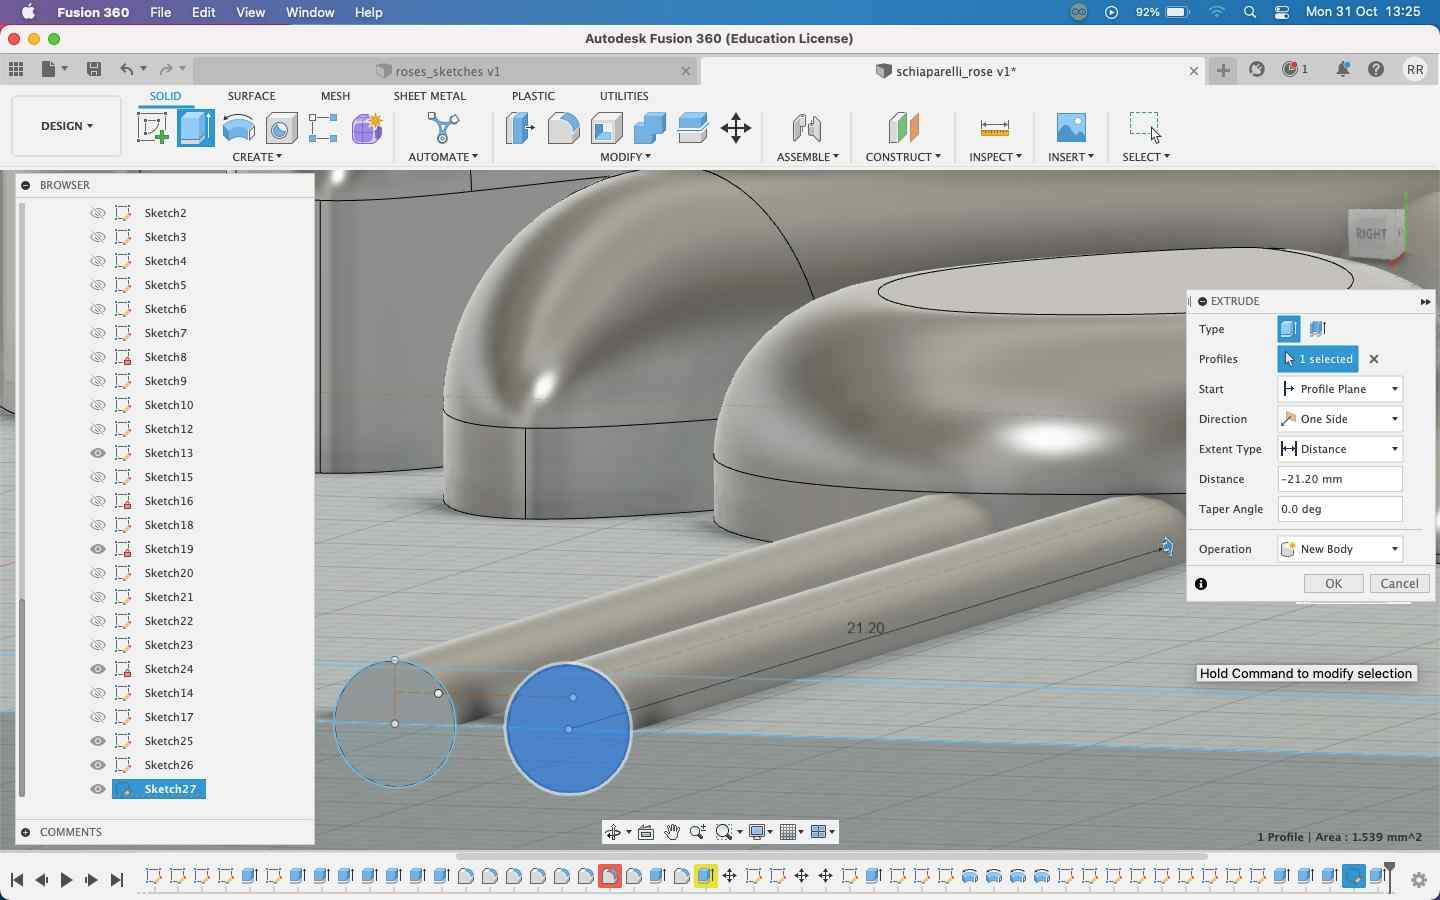
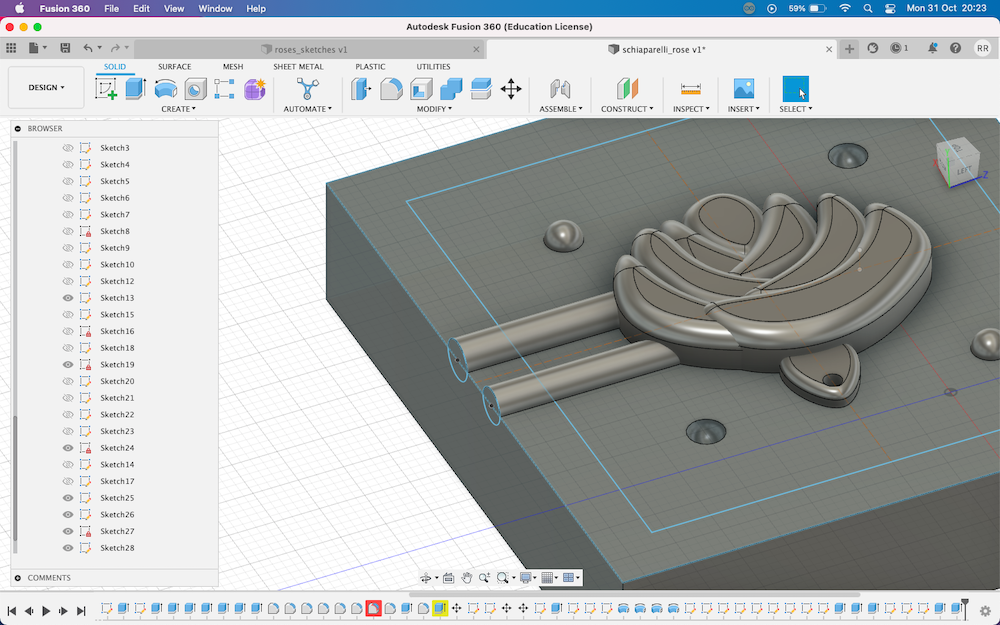
This is the final version:
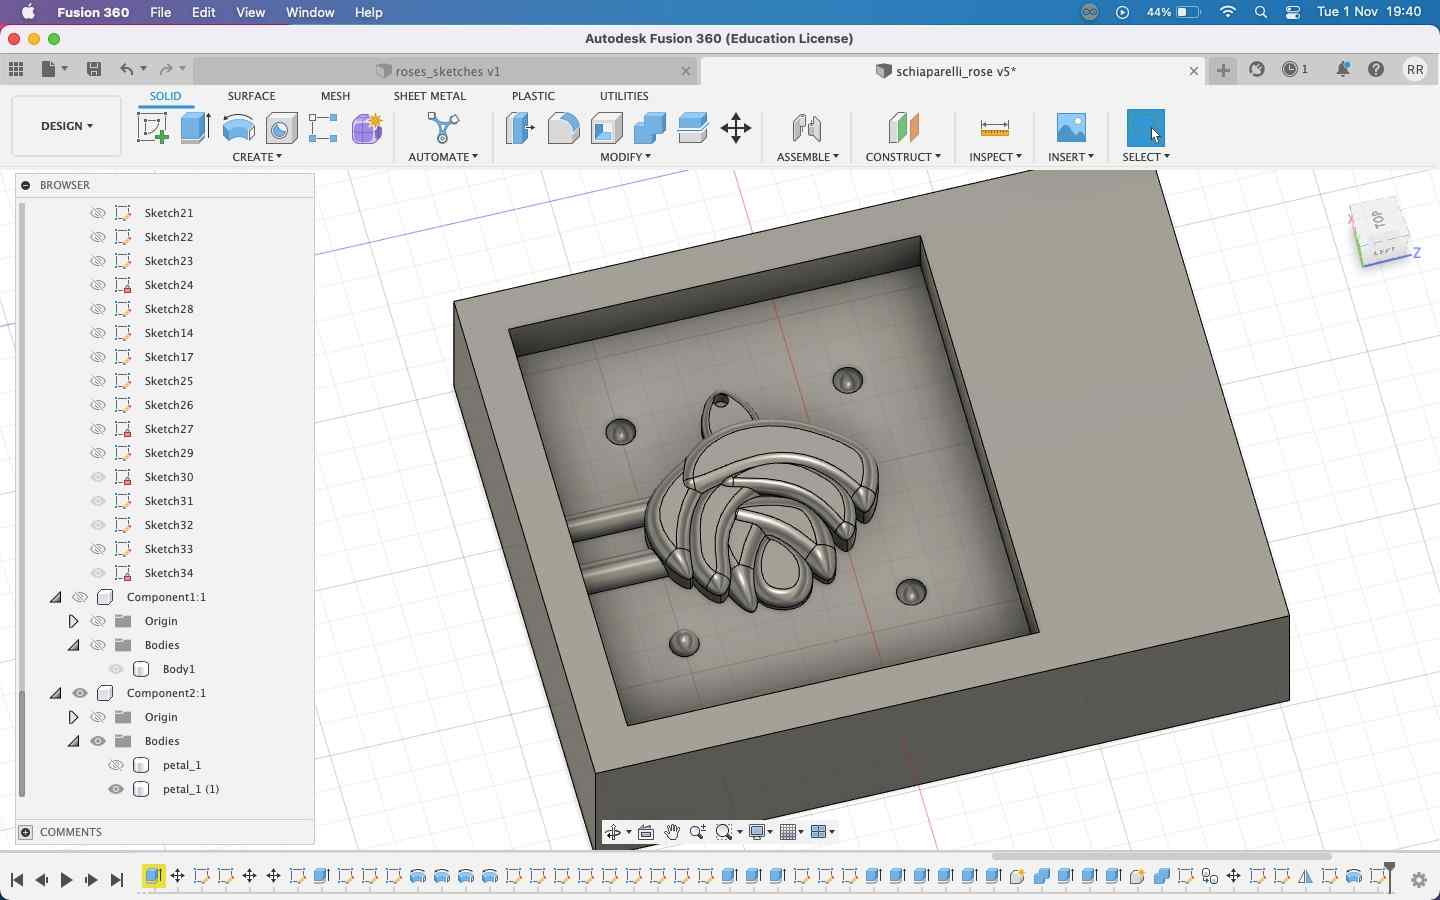
Once I was finished, I combined all the separate bodies into one body and exported that as a stl file.
Milling
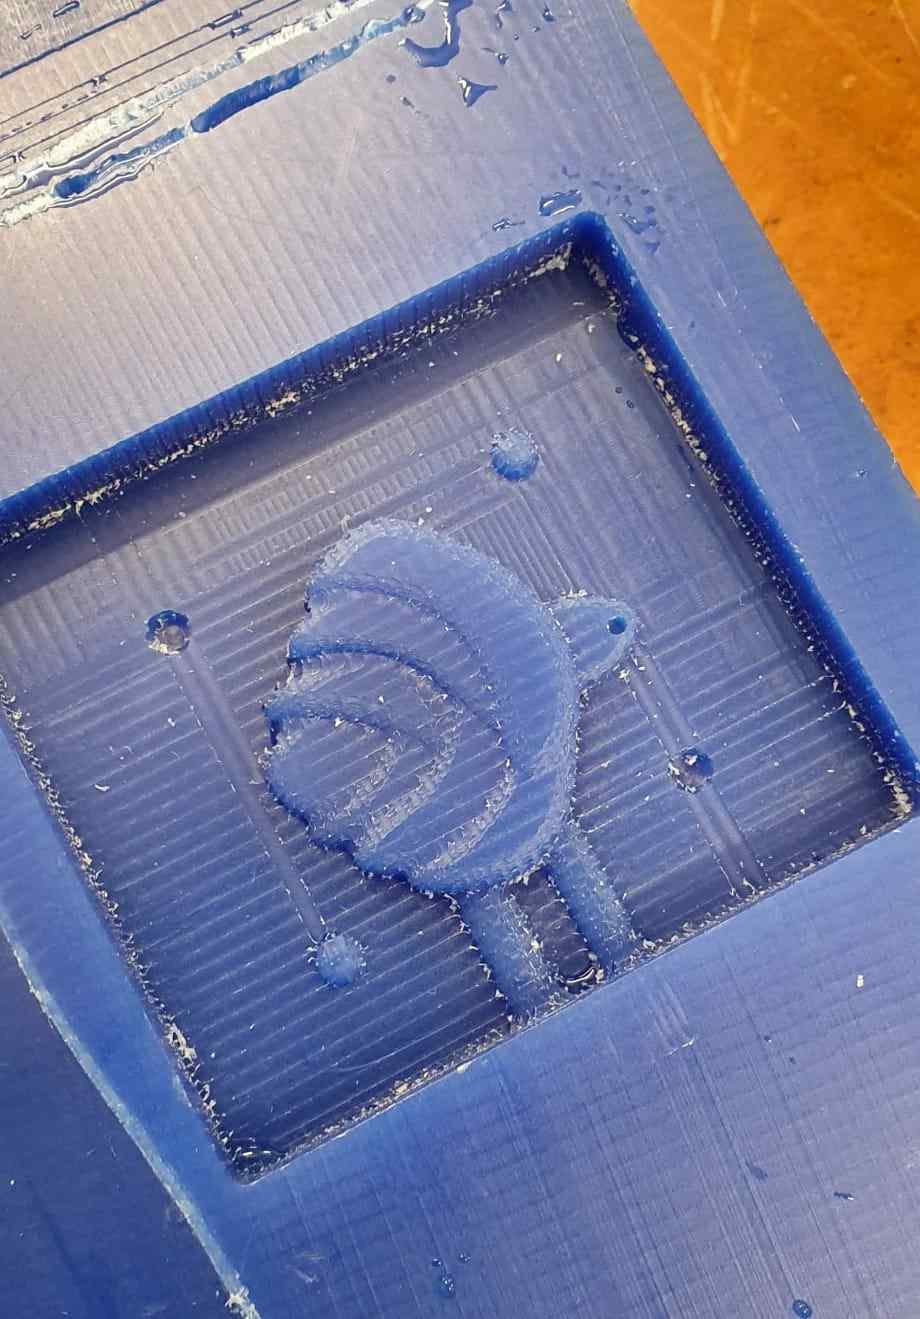
The milling machine proved to be a bit of a pain. Mods kept playing funky, including plunging in to the wax and getting the bit stuck into the wax, even though I only had 8mm walls. I ended up using the "mill 2.5D stl" program. I inserted my stl file, set the settings accordingly and after a few tricky trials, Cedric helped me get everything in order. Here are my settings: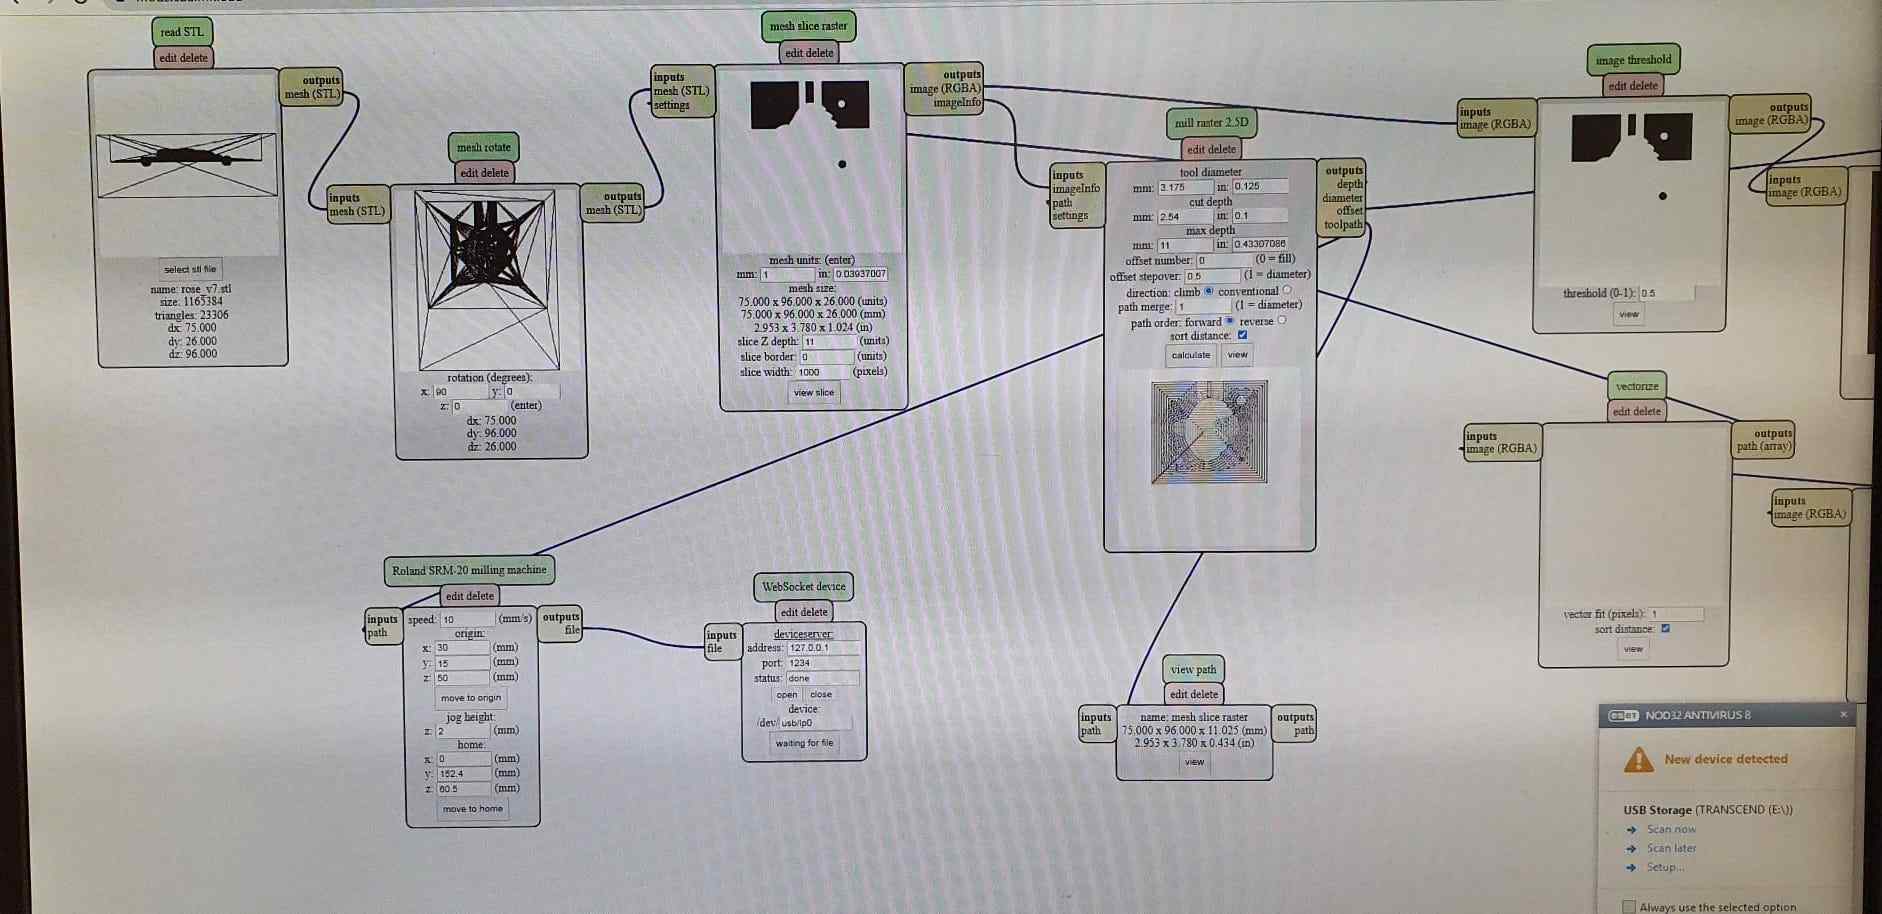
I used the 1/8" bit for the rough pass and lifted the bit by 1mm as recommended. For the finer pass, I used the 1/16" bit but I think I should have gone with a finer bit to get more of the detail out. This is how it turned out with the 1/16":
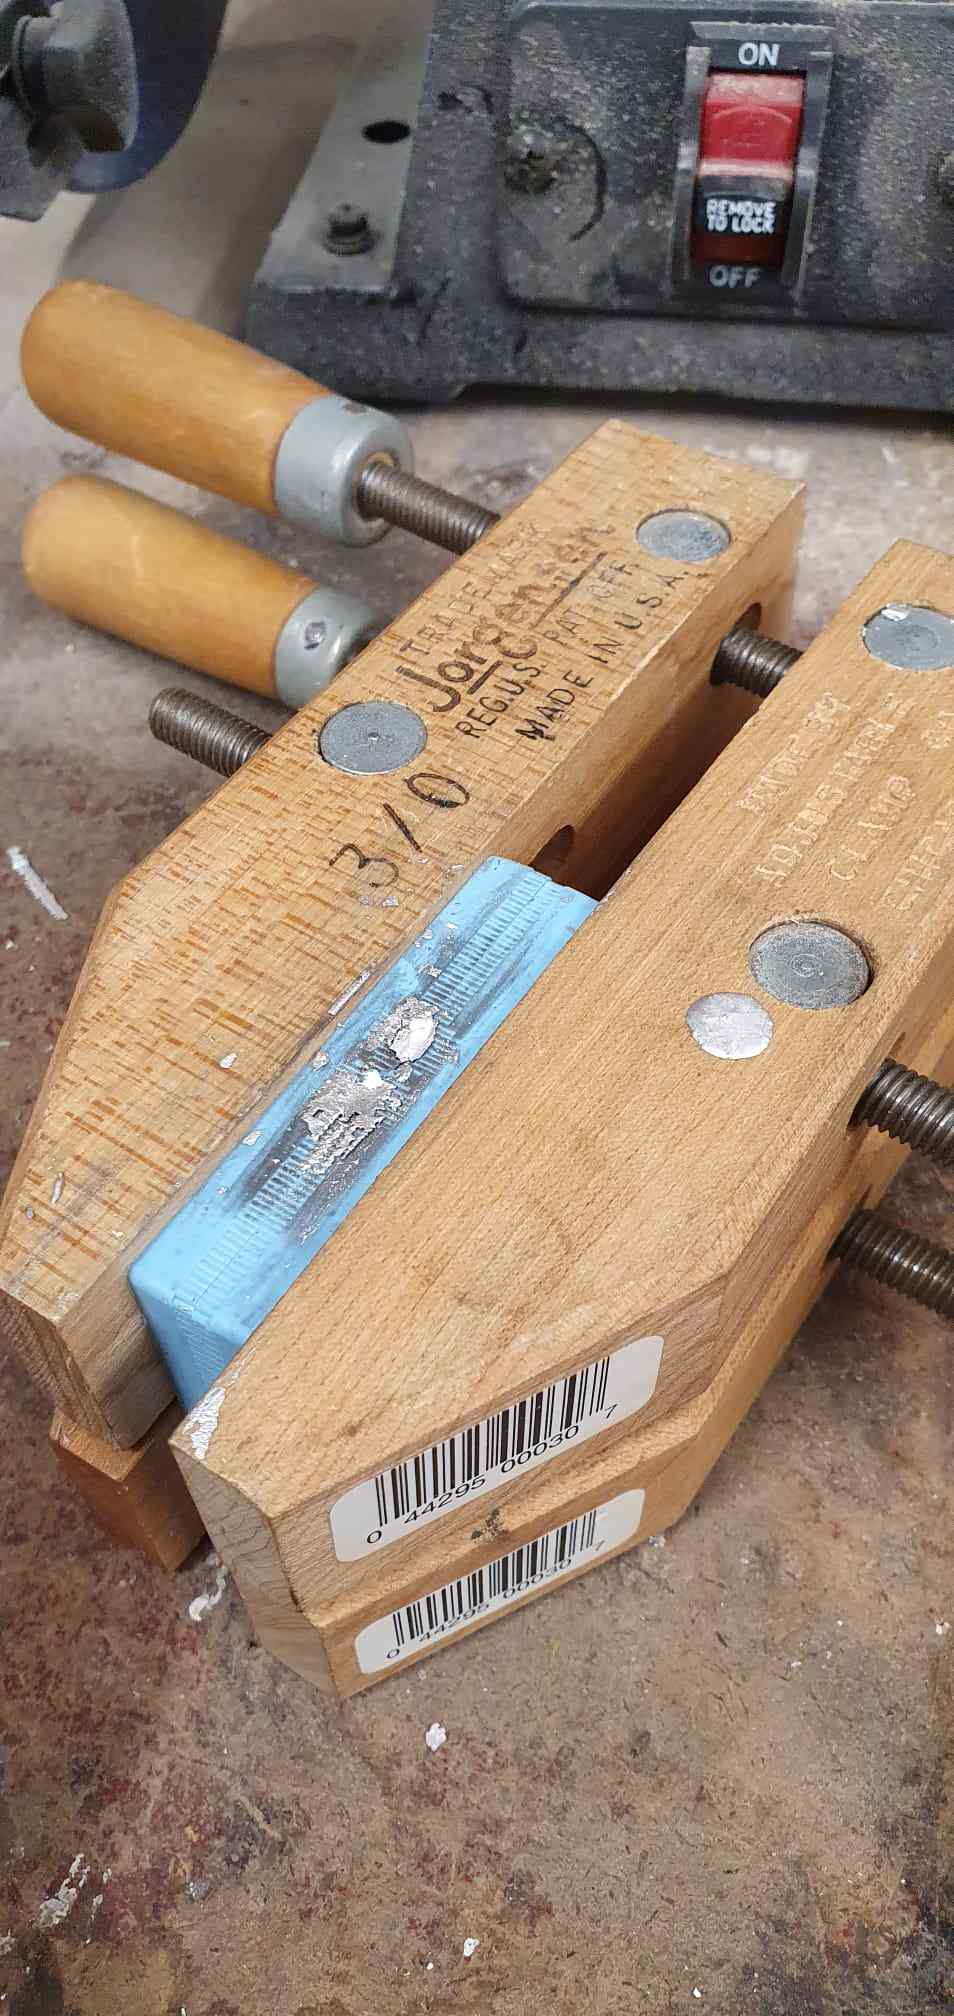
I mixed the OOMOO silicone using equal amounts of liquid parts 1 and 2 by using a scale to get precise measurements. I made two molds with the idea that this would be just perfect and they would combine to become the perfect 3D rose-shaped earring. So I casted it with metal that I heated up at 450 F.

I clamped it using two funny clamps I found and they were perfect for the job:
But oh boy was I wrong about the molds...
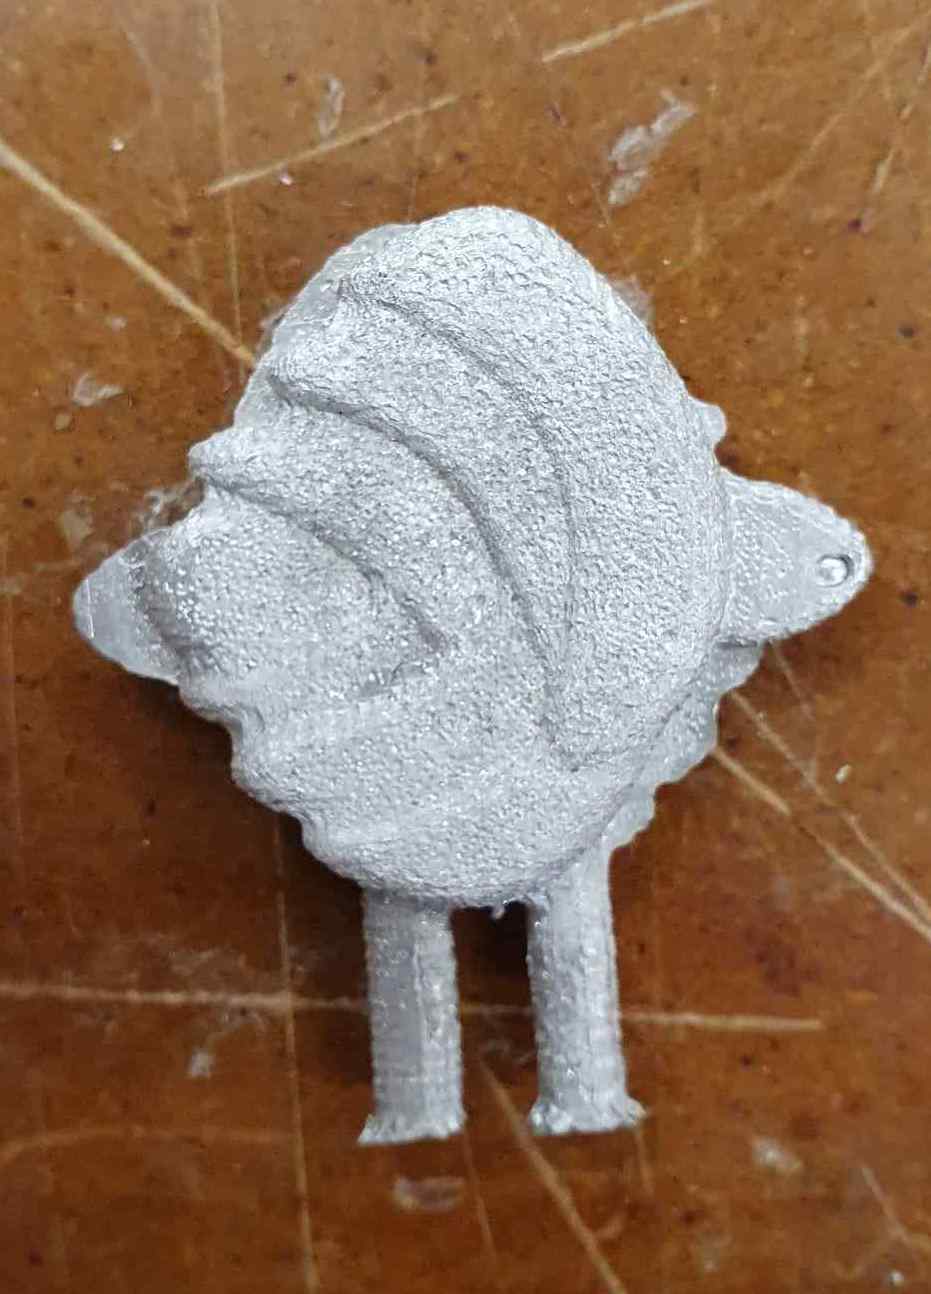
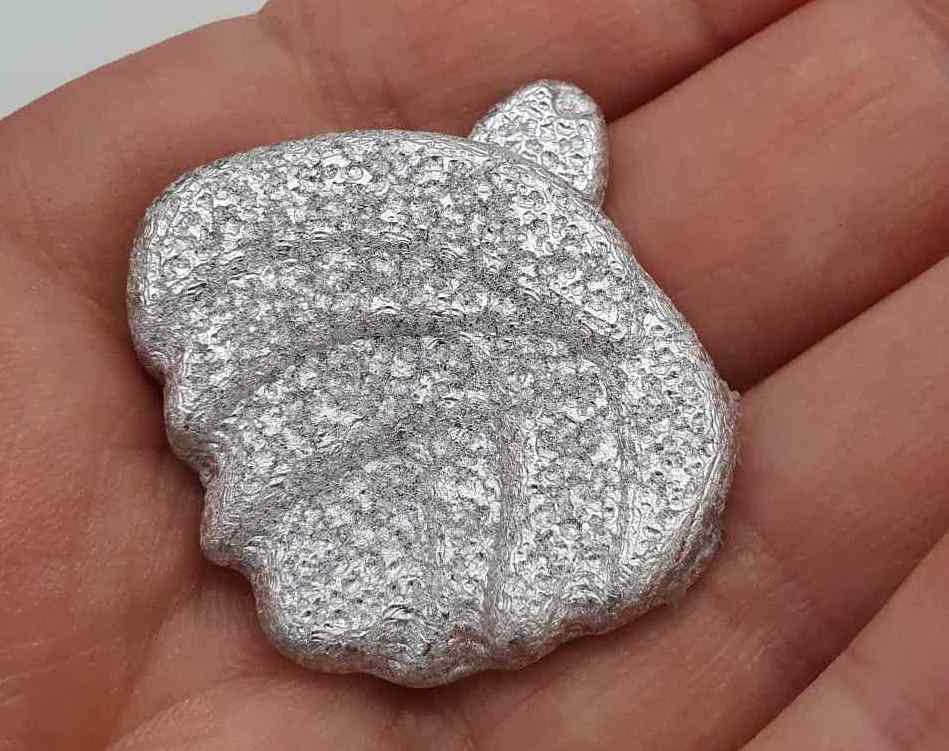
It looks like a shark costume gone wrong. But that's ok, because I could use a single mold to cast another flatter one:
That does look better, but I realise that the hole I made for the earring post wasn't extruded up, and instead came out as a negative. I should have extruded the hole to the length of the walls of my mold so that it would actually cast the hole. Per Leo's advice, I could drill a hole in so we are all good. Plus I learned a lot!
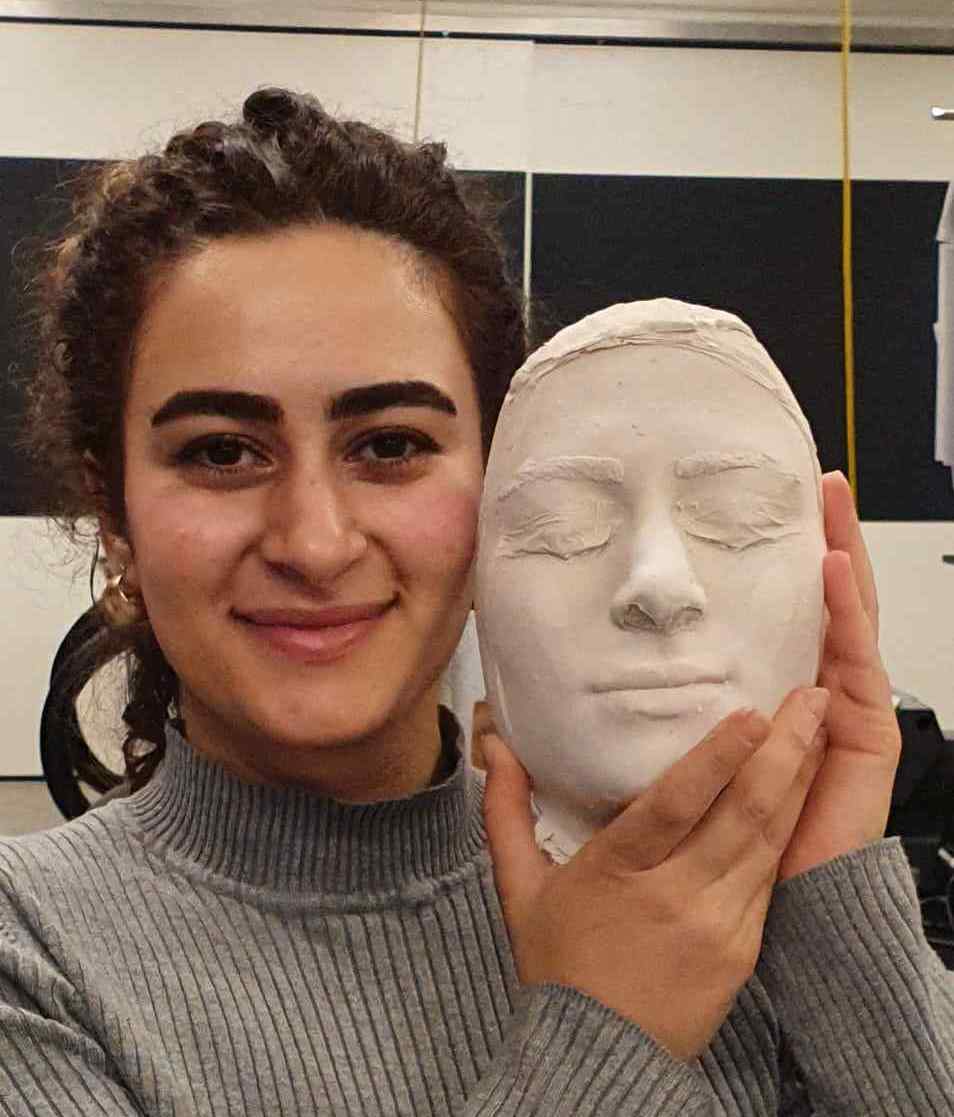
Face Casting
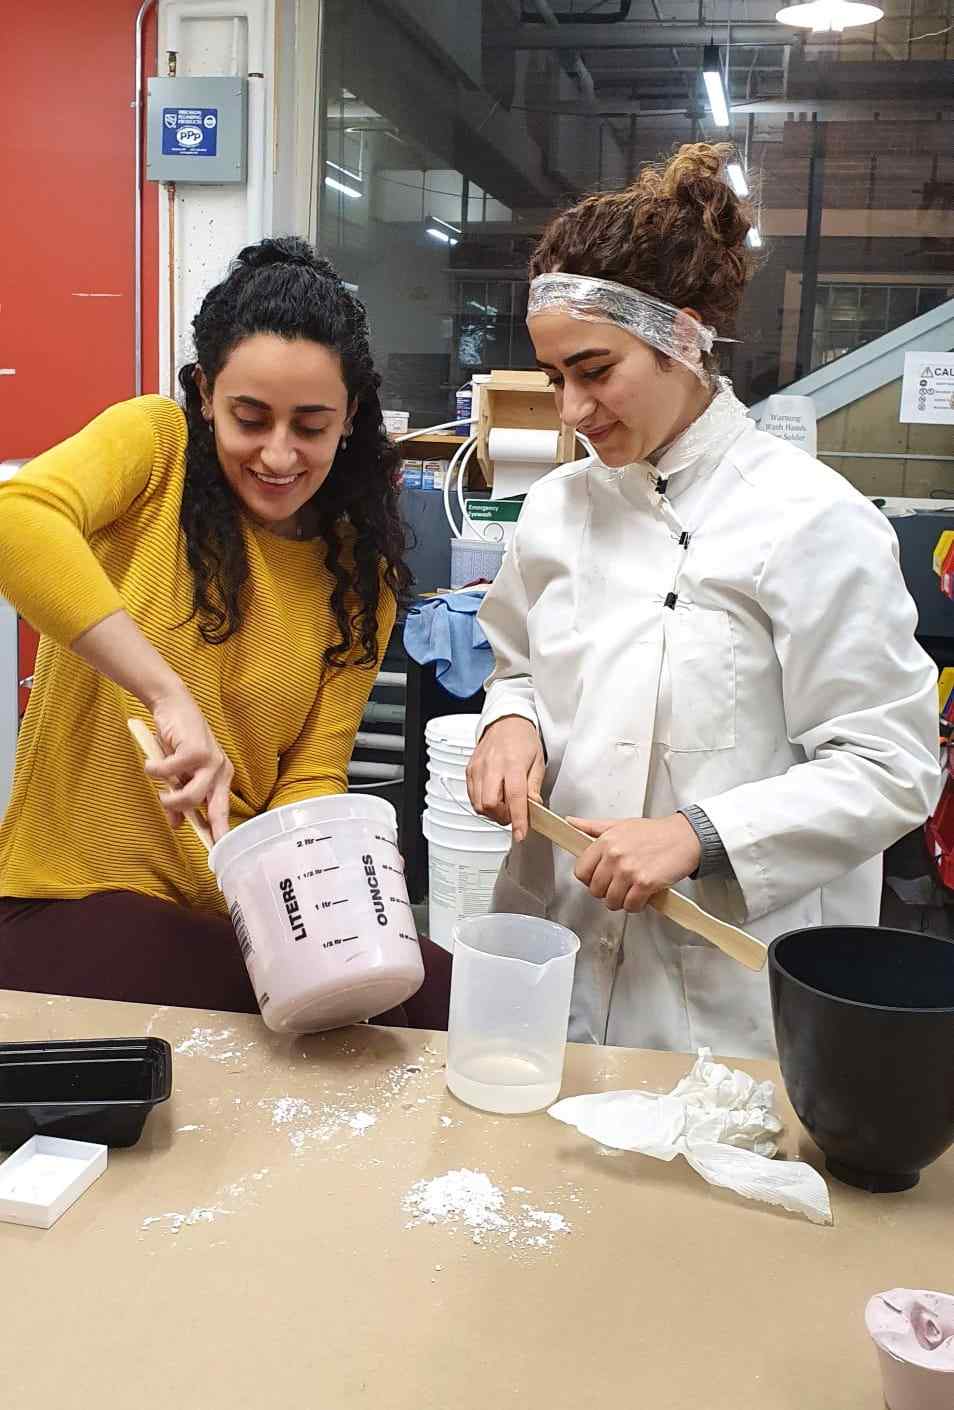
Another fun thing I did for this week was casting my face! We had a modest amount of Algisoft in the lab, which is a skin safe silicone. Casting my face would allow me to make face accessories I have seen on Schiaparelli, the brand I referenced for the rose earring earlier. If you are curious to see what they make, check them out here.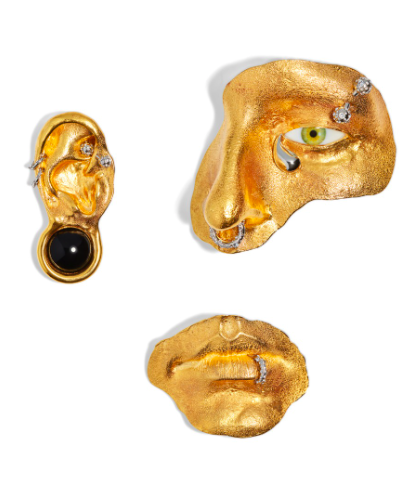
Sondos was our absolute hero this week! There were a few of us who wanted to do face casting and because she has a background in dentistry and dental casting, she knew all the ins and outs of casting and guided us through the entire process. Danny was the brave one going first, casting his nose. I prepped myself mentally and physically, including wrapping part of my hair and face with saran wrap to protect it from the silicone.
I kept my eyebrows untouched but we didn't want any silicone going into my eyes or eyelashes so we used the same saran wrap, cut a small piece enough to cover my eyes, and used water to make it stick to my eyes. In hindsight we should have used cotton rounds and cut them in a thinner crescent shape. You will later see why.
We used Q-tips to keep me alive and breathing for the 10 minutes the cast had to stay on my face, and I reclined on a chair so I could rest my head on a table. I didn't know what to expect, but it is akin to a facial that is smells funny, feels very heavy, and without any of the dermalogical benefits.
When we took off the cast, it felt a bit fragile and there was no way I could put it on the table without tearing anything. That is when we realised that we probably should have finished watching the Smooth-On video on the face casting. It is linked here for your own benefit, because we missed a crucial step! We had to plaster my face too to keep the mold in shape. We didn't have large amount of bandage in the lab, so we turned to fabrics. We cut them in strips
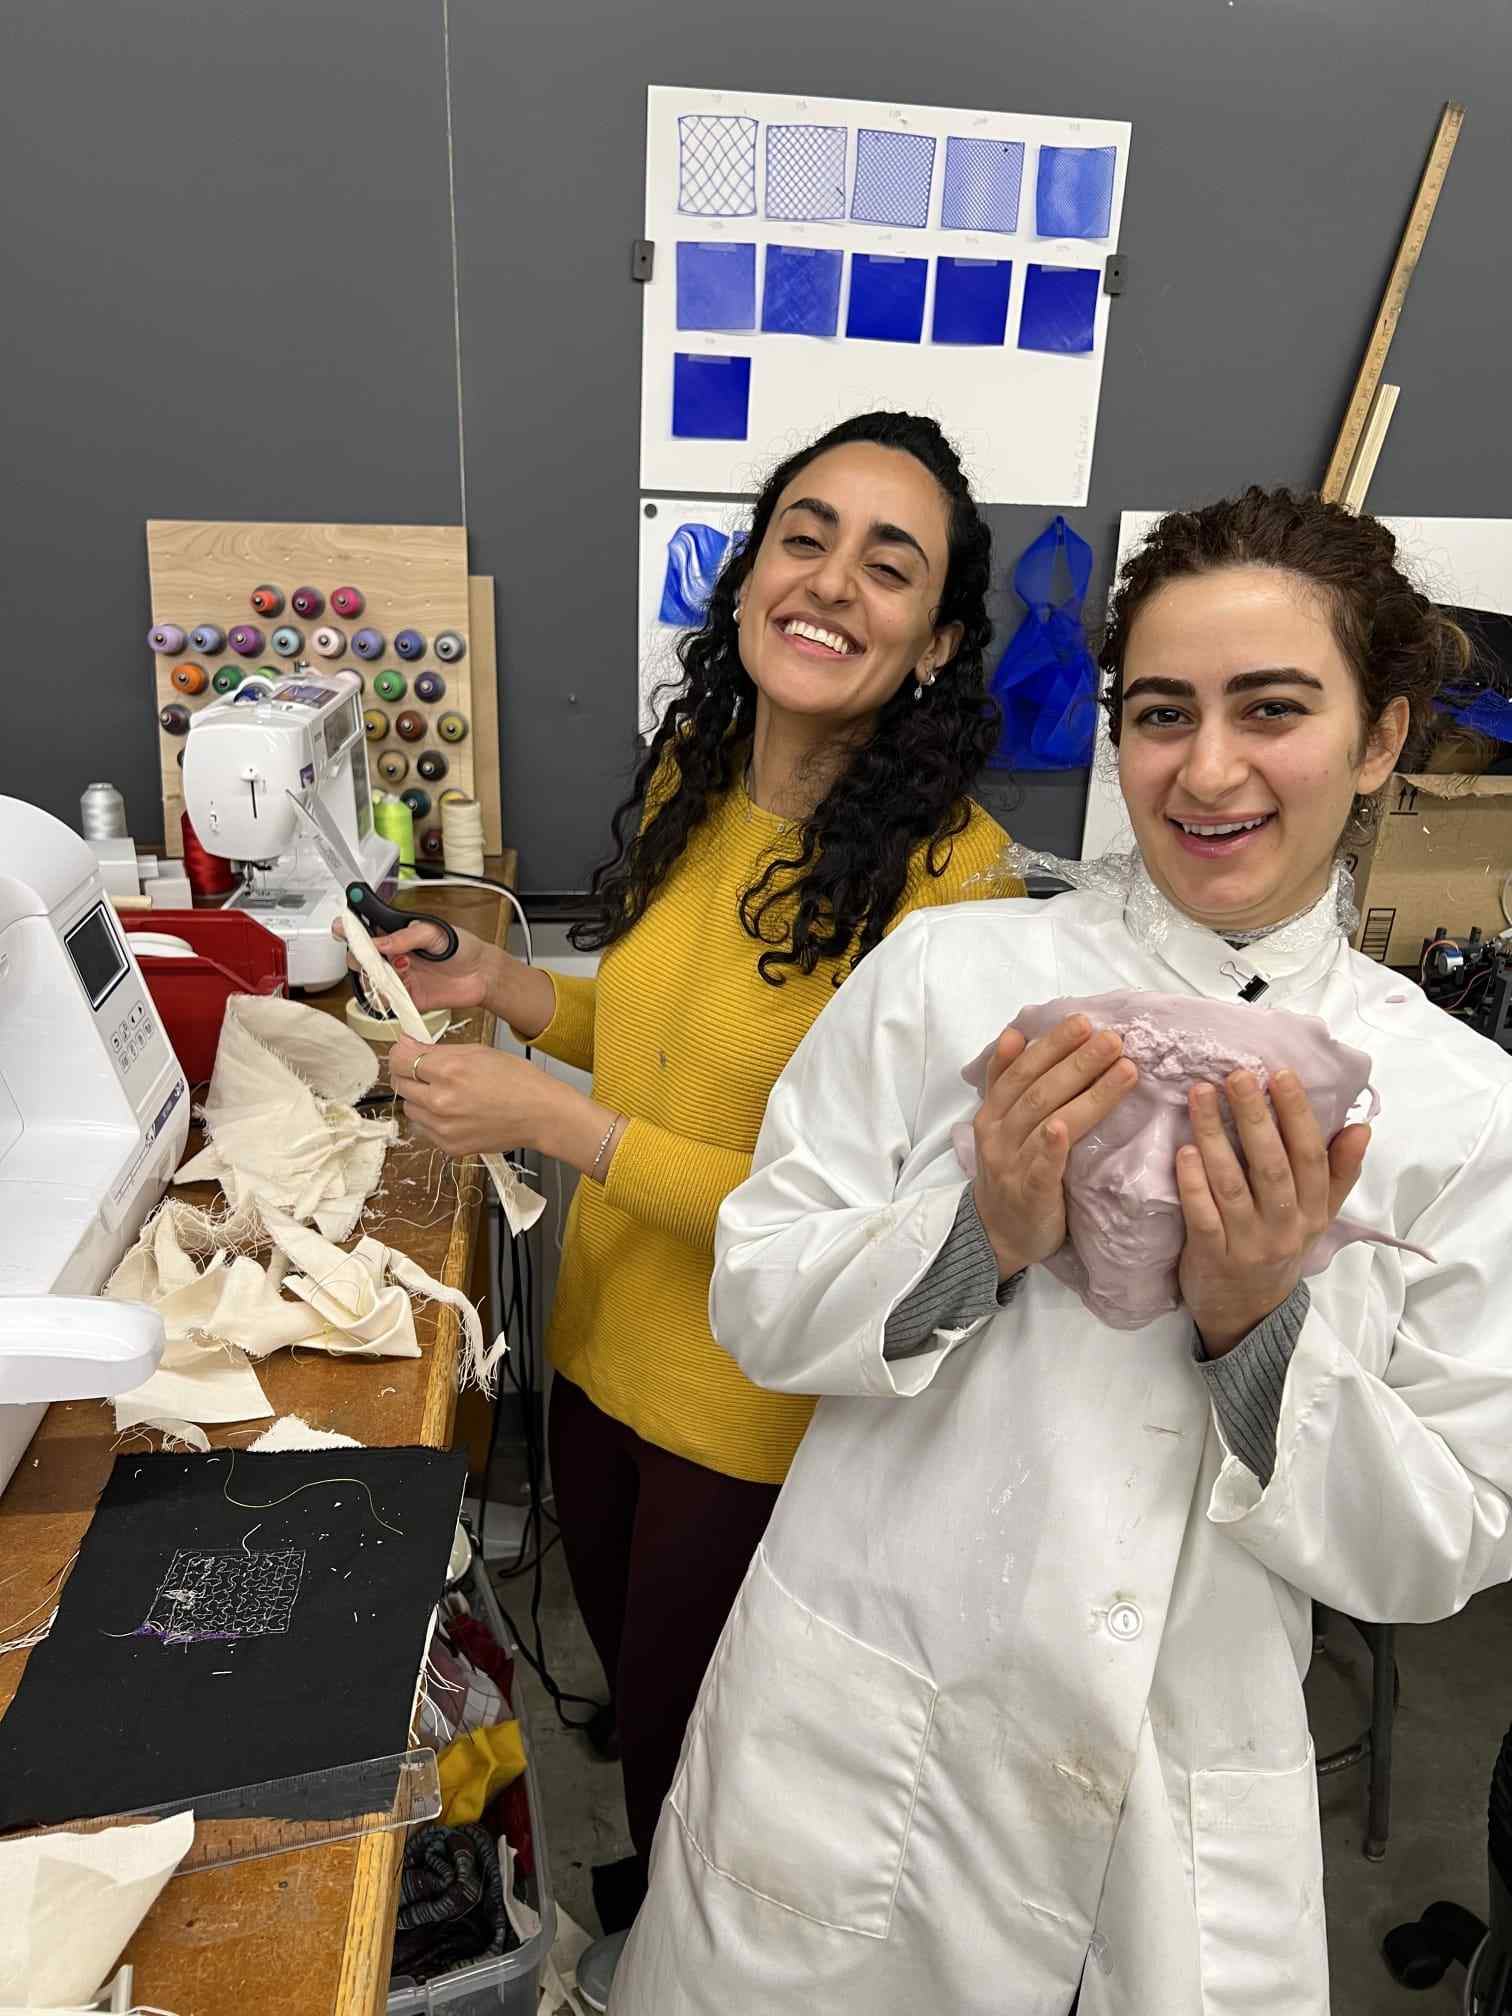
We then soaked it in gypsum cement while I laid down again with the silicone cast on my face. Sondos laid them carefully on my face. It had to stay on my face until the cement was completely dry. When it came off it didn't look like anything like me yet but I was very excited to start casting!
I had to fill up the nose holes with cement first, so that when I poured in the face mold, it wouldn't steep out. After I did that I mixed a big batch of cement.
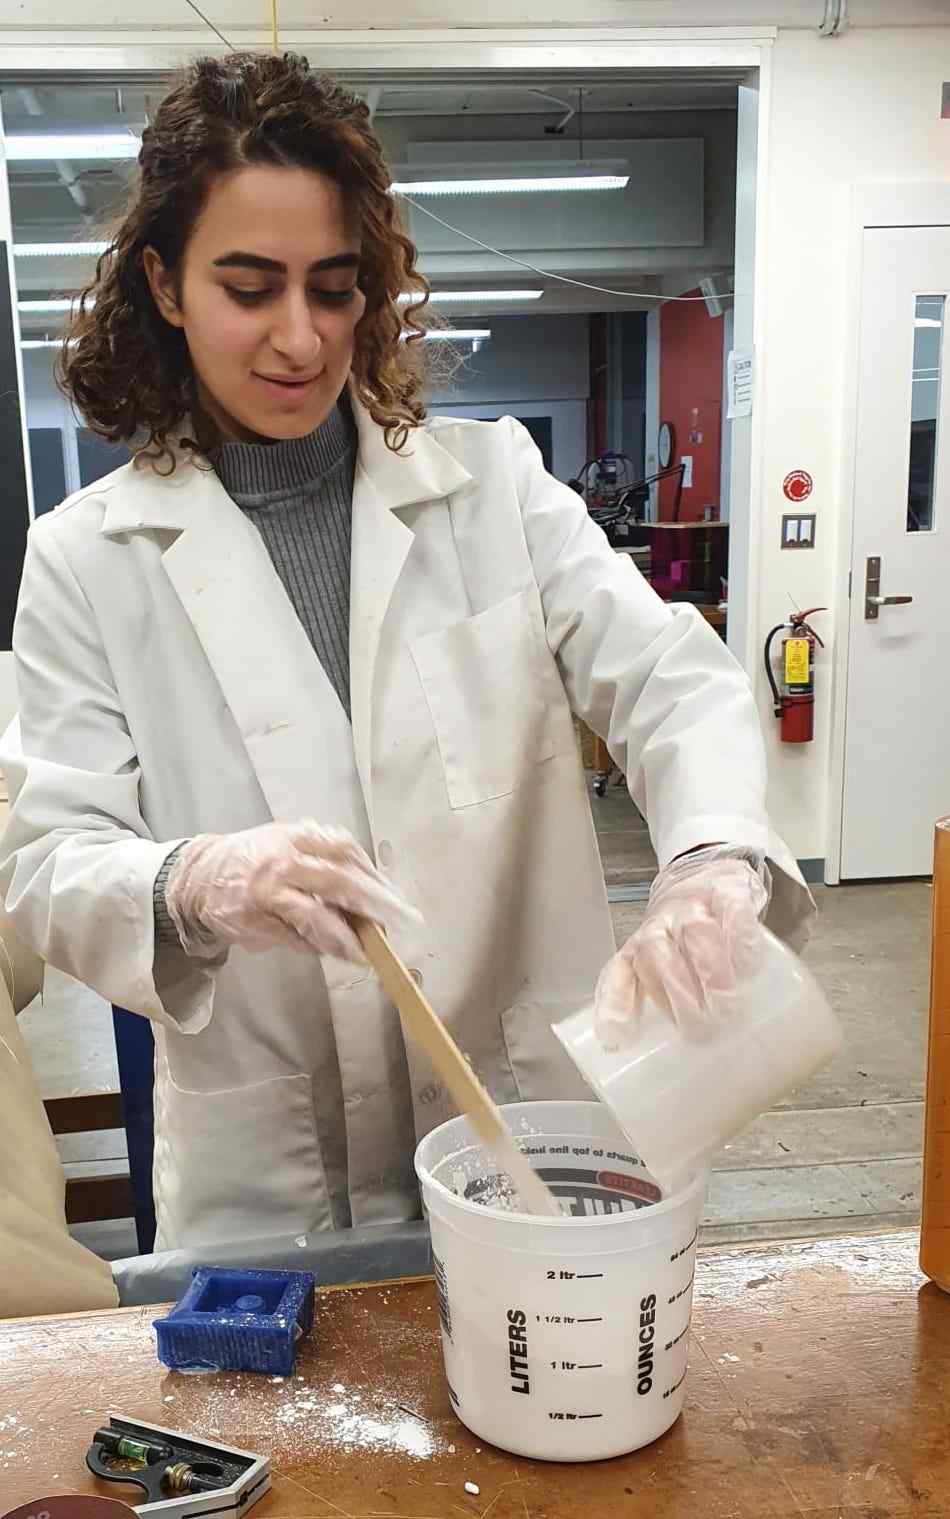
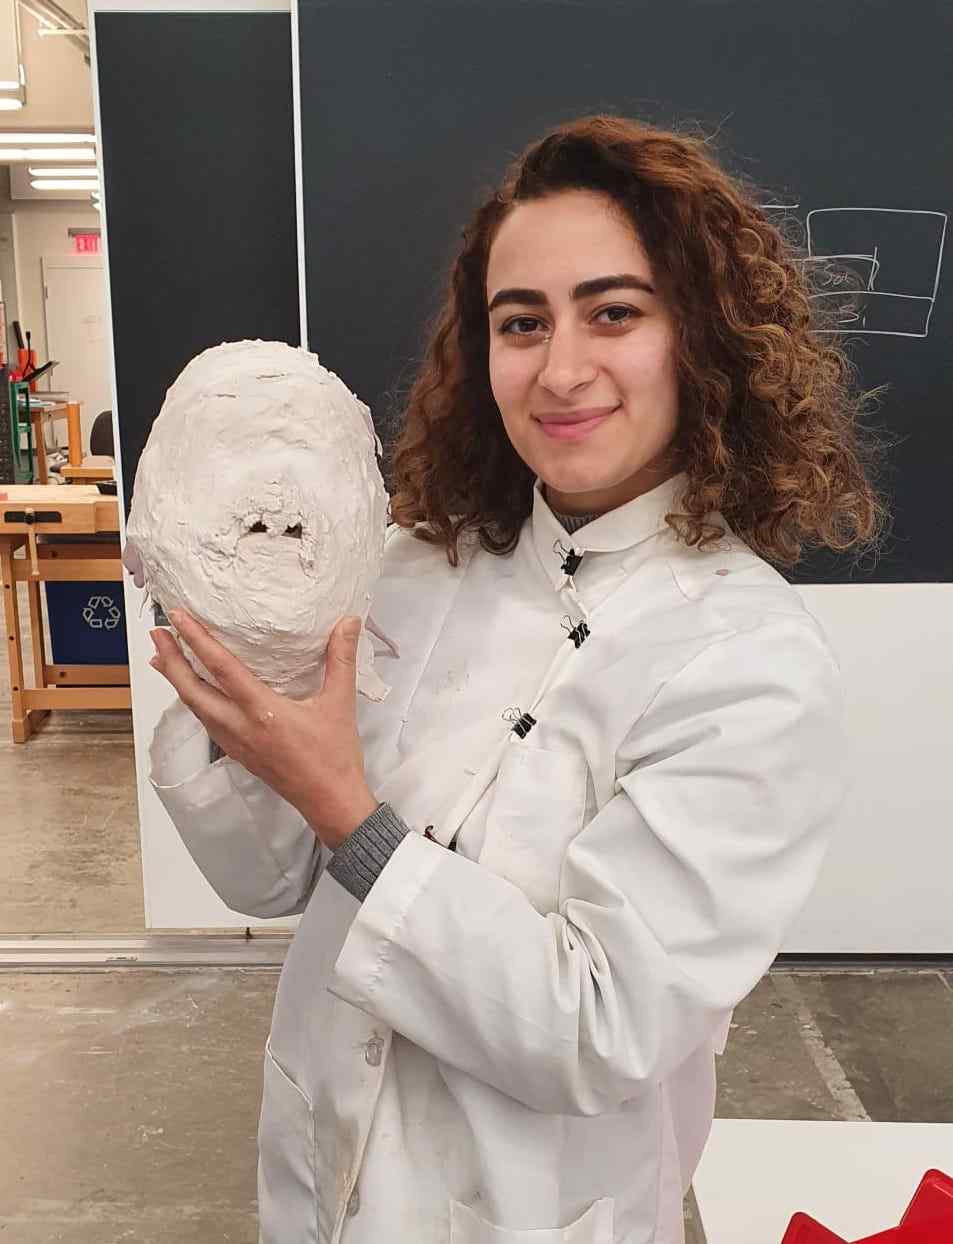
I poured it into the face mold and let it sit overnight. I came back the next day and poured in a thicker mix to create the outer edges of the face mold.
After a few hours I came back, and look at the result!
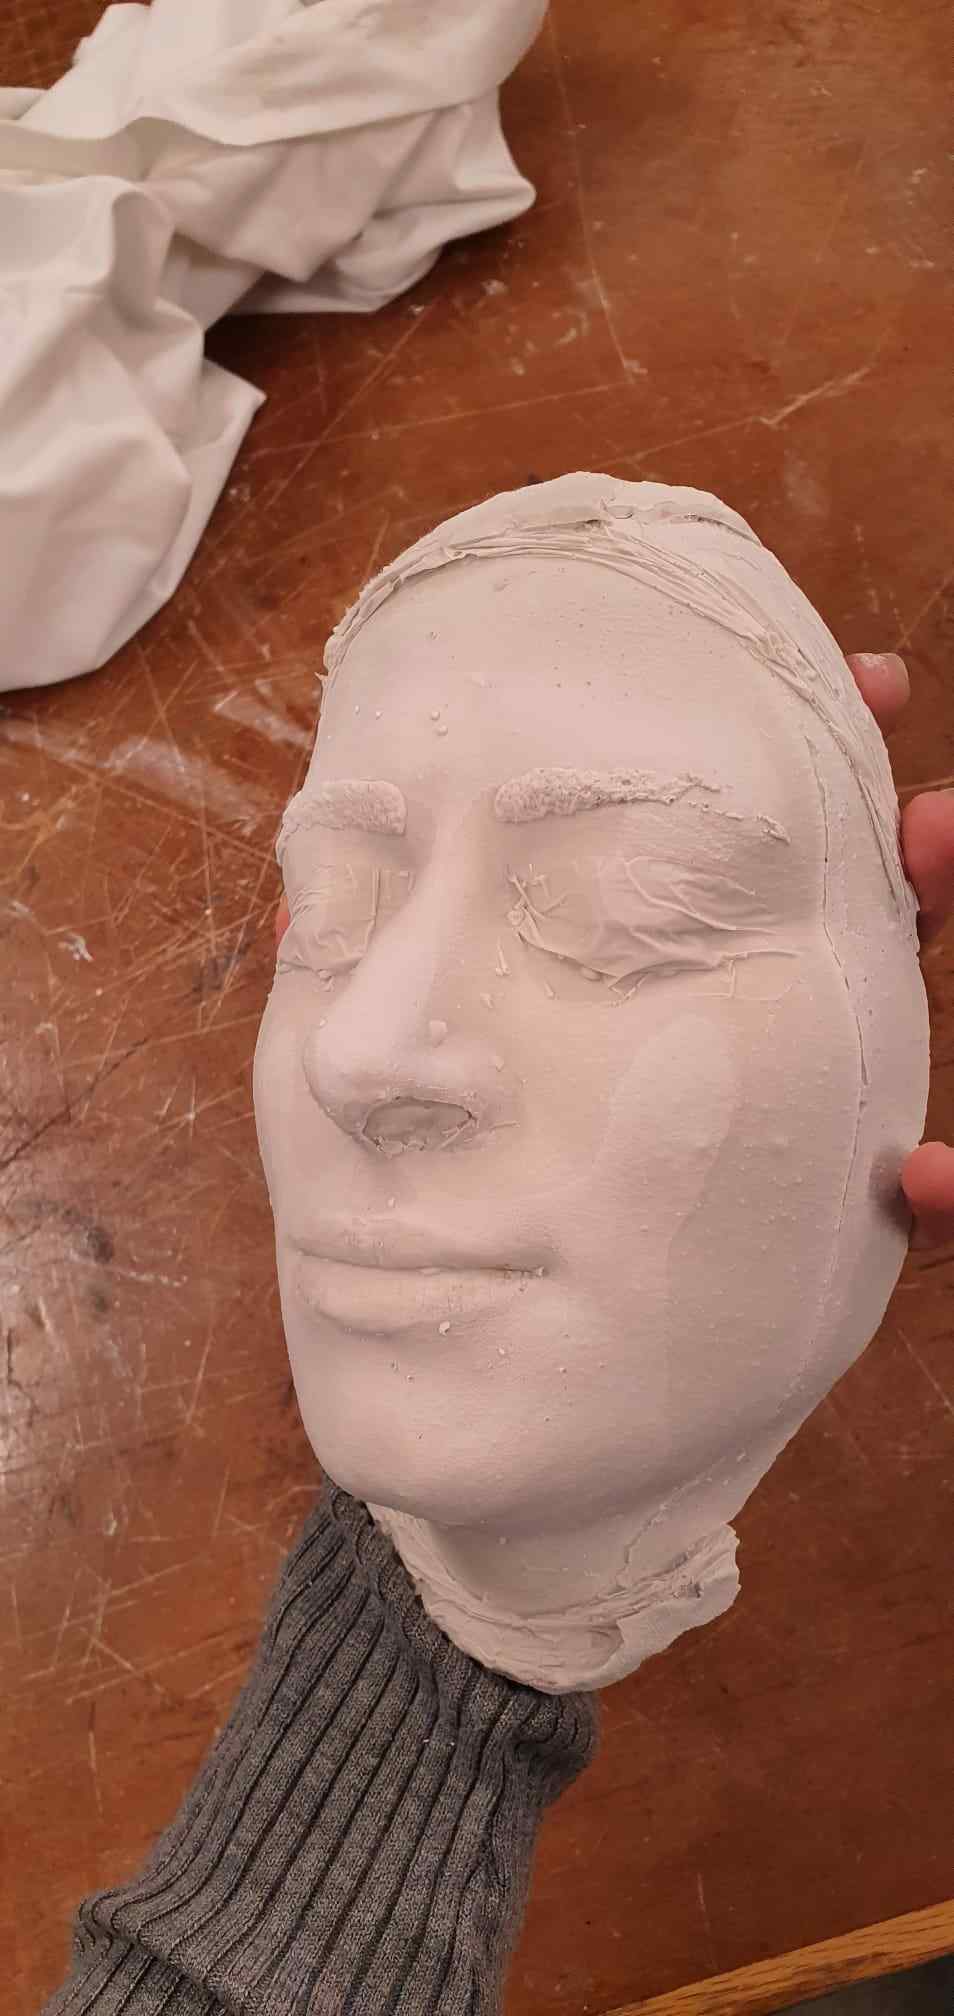
The resemblance is uncanny: