Application and Interface Programming
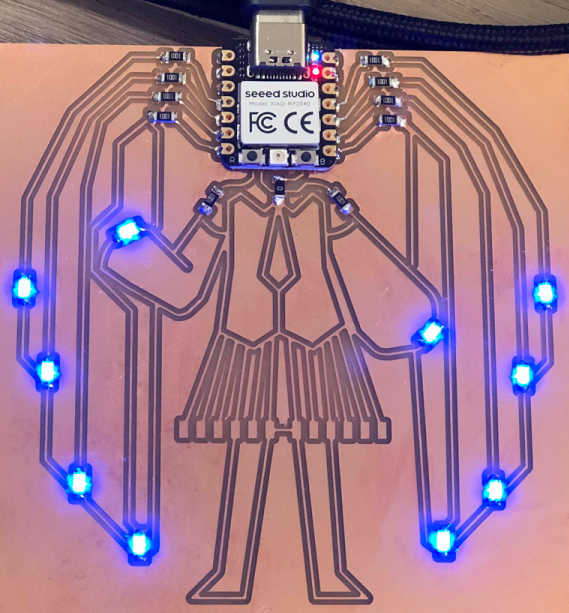
For this week, I decided to reuse the Miku board from Week 6.

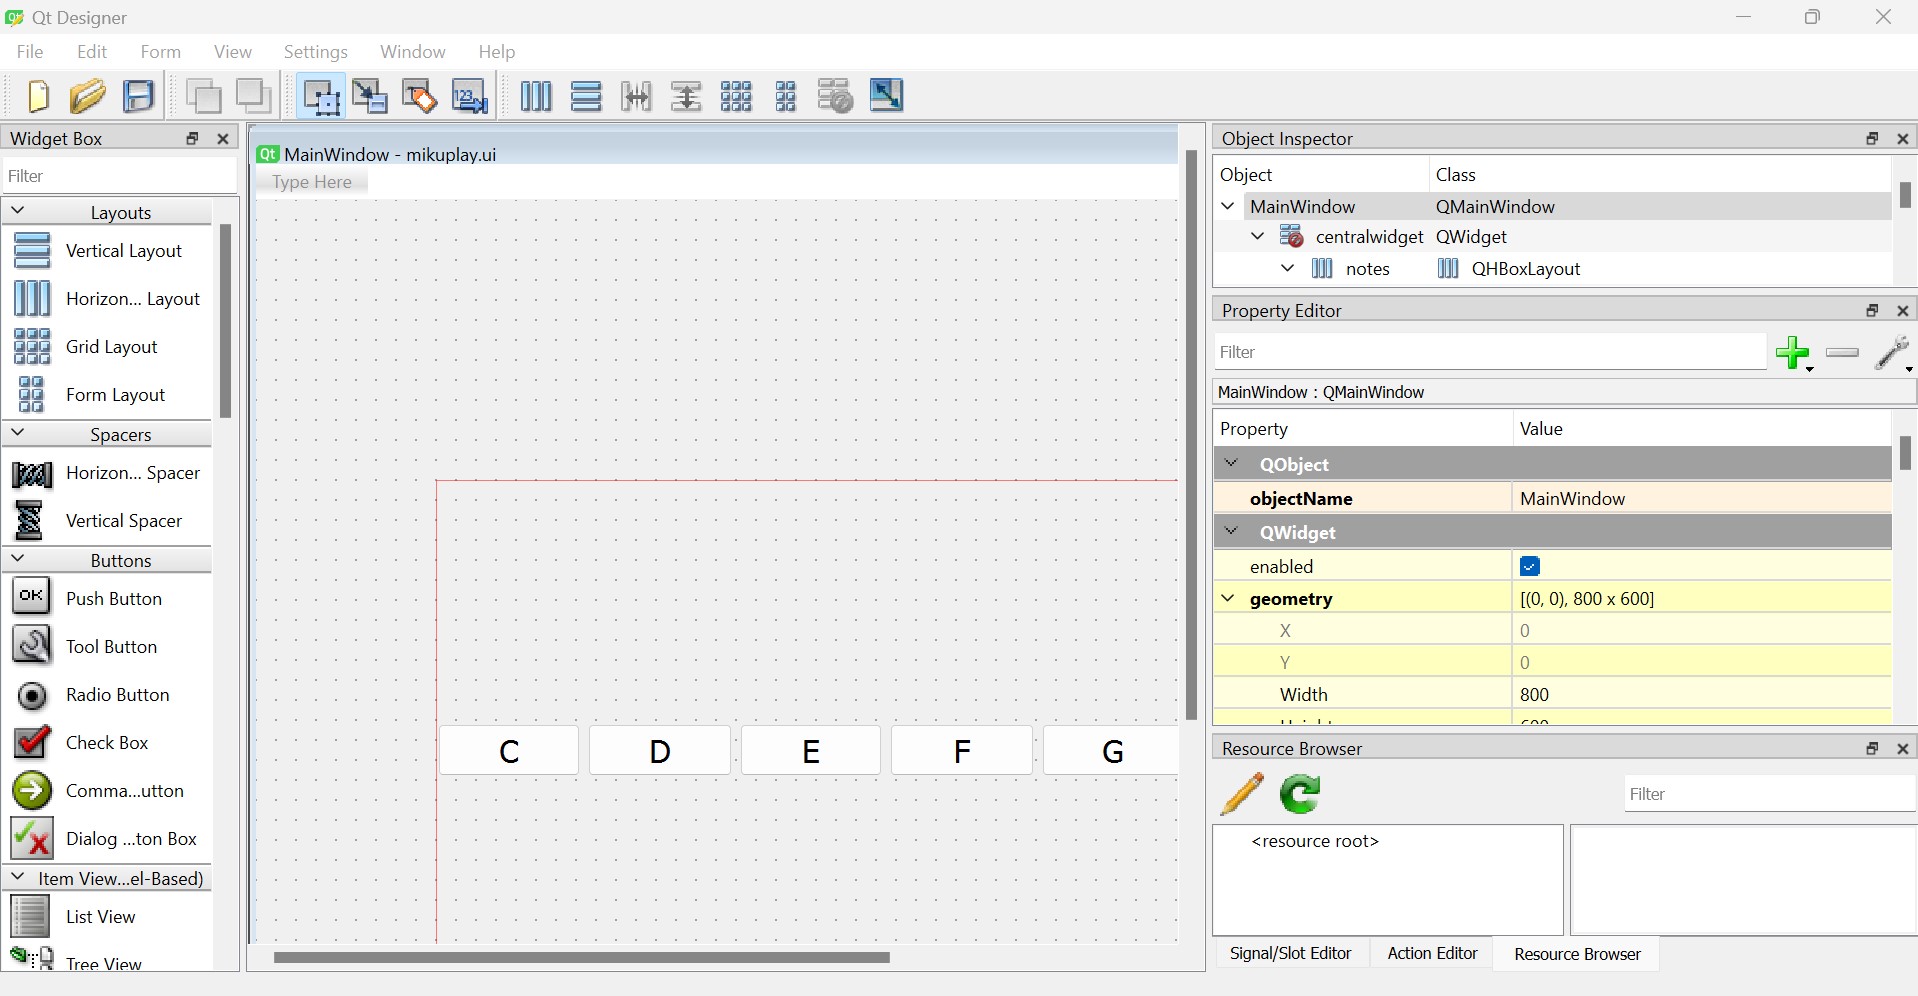
I used QT Designer to create an interface that would control which lights would light up. QT Designer allows for generation of PyQT files through PyUIC, so all I needed to do was to pick and place buttons and generate the python file. More information can be found in Week 11.


Remembering machine week, I added in pyserial to allow it to interface with the Xiao board by sending which button was being pressed as a character. The Xiao would then interpret the command and light up the specified LED.
Resources
Python Code (requires mikuplay.py to work.)
import sys
import time

import serial

# run if you need to get port info, on pc port should just be something like COM3
from mikuplay import Ui_MainWindow
from PyQt5.QtWidgets import (QApplication, QDialog, QMainWindow, QMessageBox)
from PyQt5.QtMultimedia import QMediaContent, QMediaPlayer
from PyQt5.uic import loadUi
from PyQt5.QtCore import QUrl

# try uploading dummy code through the arduino IDE via UF2 connection. then, click on port - a port # should appear
# run to allow arduino script to run for dur (20) sec
port = "COM5"  # Replace with your Arduino's port

baudrate = (
	115200  # make sure this matches the baud rate in the Arduino sketch (.ino file)
)
dur = 5  # sec

#initialize serial connection
ser = serial.Serial(port, baudrate, timeout=1)
time.sleep(2)  # wait for the connection to be established

class Window(QMainWindow, Ui_MainWindow):
	def __init__(self, parent=None):
		super().__init__(parent)
		self.setupUi(self)
		self.media_player = QMediaPlayer()
		self.connectSignalsSlots()

	def connectSignalsSlots(self):
		# starting state, connects buttons to various functions
		self.a_note.pressed.connect(lambda: self.light_up('0'))
		self.b_note.pressed.connect(lambda: self.light_up('1'))
		self.c_note.pressed.connect(lambda: self.light_up('2'))
		self.d_note.pressed.connect(lambda: self.light_up('3'))
		self.e_note.pressed.connect(lambda: self.light_up('4'))
		self.f_note.pressed.connect(lambda: self.light_up('5'))
		self.g_note.pressed.connect(lambda: self.light_up('6'))

	def light_up(self, note):
		# Set the media content to the desired MP3 file
		ser.write(note.encode())


if __name__ == "__main__":
	app = QApplication(sys.argv)
	win = Window()
	win.show()
	sys.exit(app.exec())
Xiao Code
void setup() {
// put your setup code here, to run once:
pinMode(D0,OUTPUT);
	pinMode(D1,OUTPUT);
	pinMode(D3,OUTPUT);
	pinMode(D4,OUTPUT);
	pinMode(D5,OUTPUT);
	pinMode(D6,OUTPUT);
	pinMode(D7,OUTPUT);
	pinMode(D8,OUTPUT);
	pinMode(D9,OUTPUT);
	pinMode(D10,OUTPUT);
	Serial.begin(115200);
//  Serial.setTimeout(10);

}
int incomingByte = 0;
void loop() {
// put your main code here, to run repeatedly:
if (Serial.available() > 0) {
	incomingByte = Serial.read() - 48;
	// say what you got:
	Serial.print("I received: ");
	Serial.println(incomingByte, DEC);
	switch (incomingByte){
	case 0:
		digitalWrite(D3,HIGH); // left highest
		digitalWrite(D10,HIGH); // left highest
		delay(100);
		break;
	case 1:
			digitalWrite(D4,HIGH);// left second highest
			delay(100);
		break;
	case 2:
			digitalWrite(D5,HIGH); // left second lowest
			delay(100);
		break;
	case 3:
			digitalWrite(D6,HIGH); //left lowest
			delay(100);
		break;
	case 4:
			digitalWrite(D7,HIGH); //left lowest
			delay(100);
		break;
	case 5:
			digitalWrite(D8,HIGH); //left lowest
			delay(100);
		break;
	case 6:
			digitalWrite(D9,HIGH); //left lowest
			delay(100);
		break;
	}
}
else{
	digitalWrite(D0,LOW);
	digitalWrite(D1,LOW);
	digitalWrite(D3,LOW);
	digitalWrite(D4,LOW);
	digitalWrite(D5,LOW);
	digitalWrite(D6,LOW);
	digitalWrite(D7,LOW);
	digitalWrite(D8,LOW);
	digitalWrite(D9,LOW);
	digitalWrite(D10,LOW);
}
}
Group Project