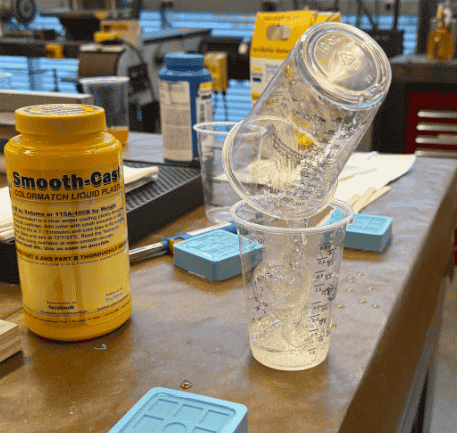
I kicked off the week by facing the scary world of resin ratios and noxious fumes.
You’d be surprised how quickly pot life (basically the "uh-oh" timer) ticks down once
you start mixing. It’s usually around 8.5 minutes—just enough time for me to stress
over air bubbles and double-check I didn’t swap Part A with Part B.
After the adrenaline rush of pouring, you wait about two hours for things to cure.
Meanwhile, I tried everything to banish bubbles: vacuum chambers, vibration plates,
and even a quick swipe of a lighter. Once I got the hang of that, I also played with
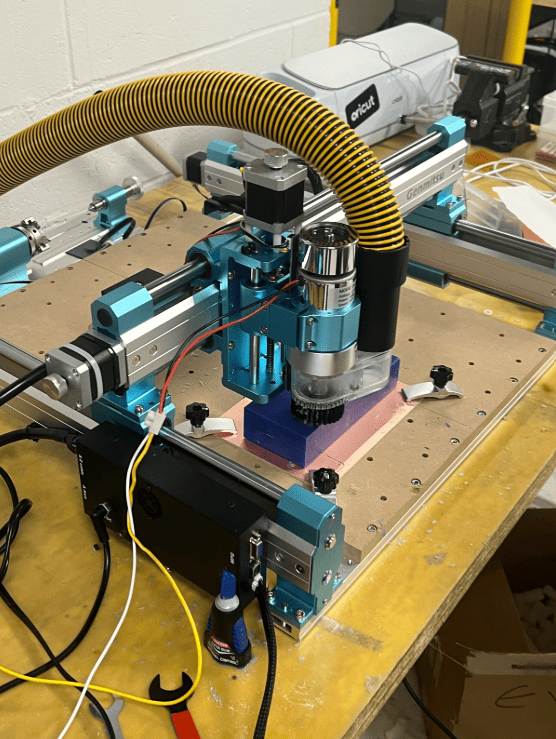
milling wax blocks on a mini CNC—oddly mesmerizing. 3D printing molds turned out to be
just as cool for weird shapes. Let’s just say both old-school and new-school
techniques have their perks.
Week 7: Molding & Casting
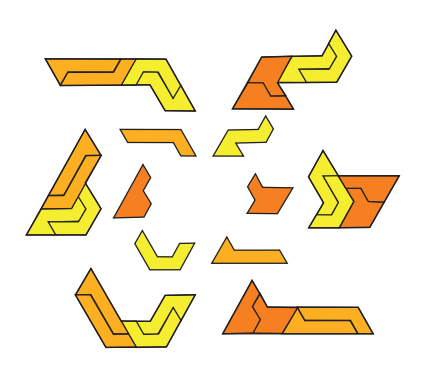
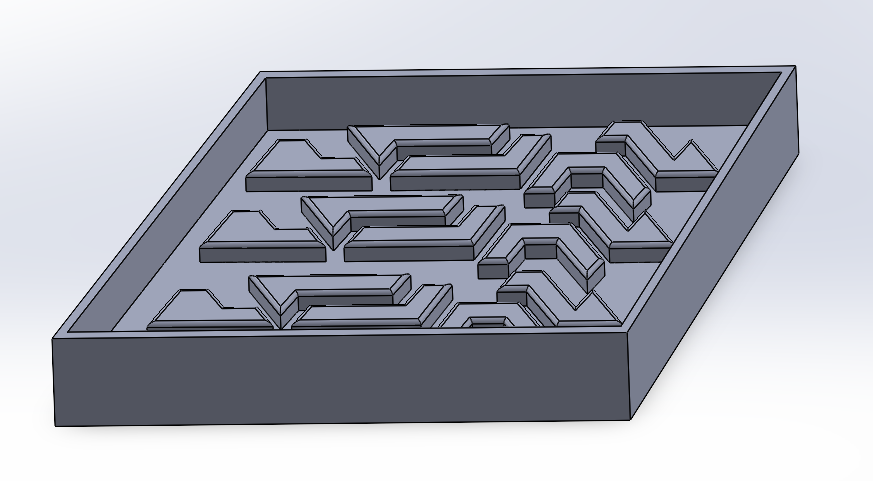
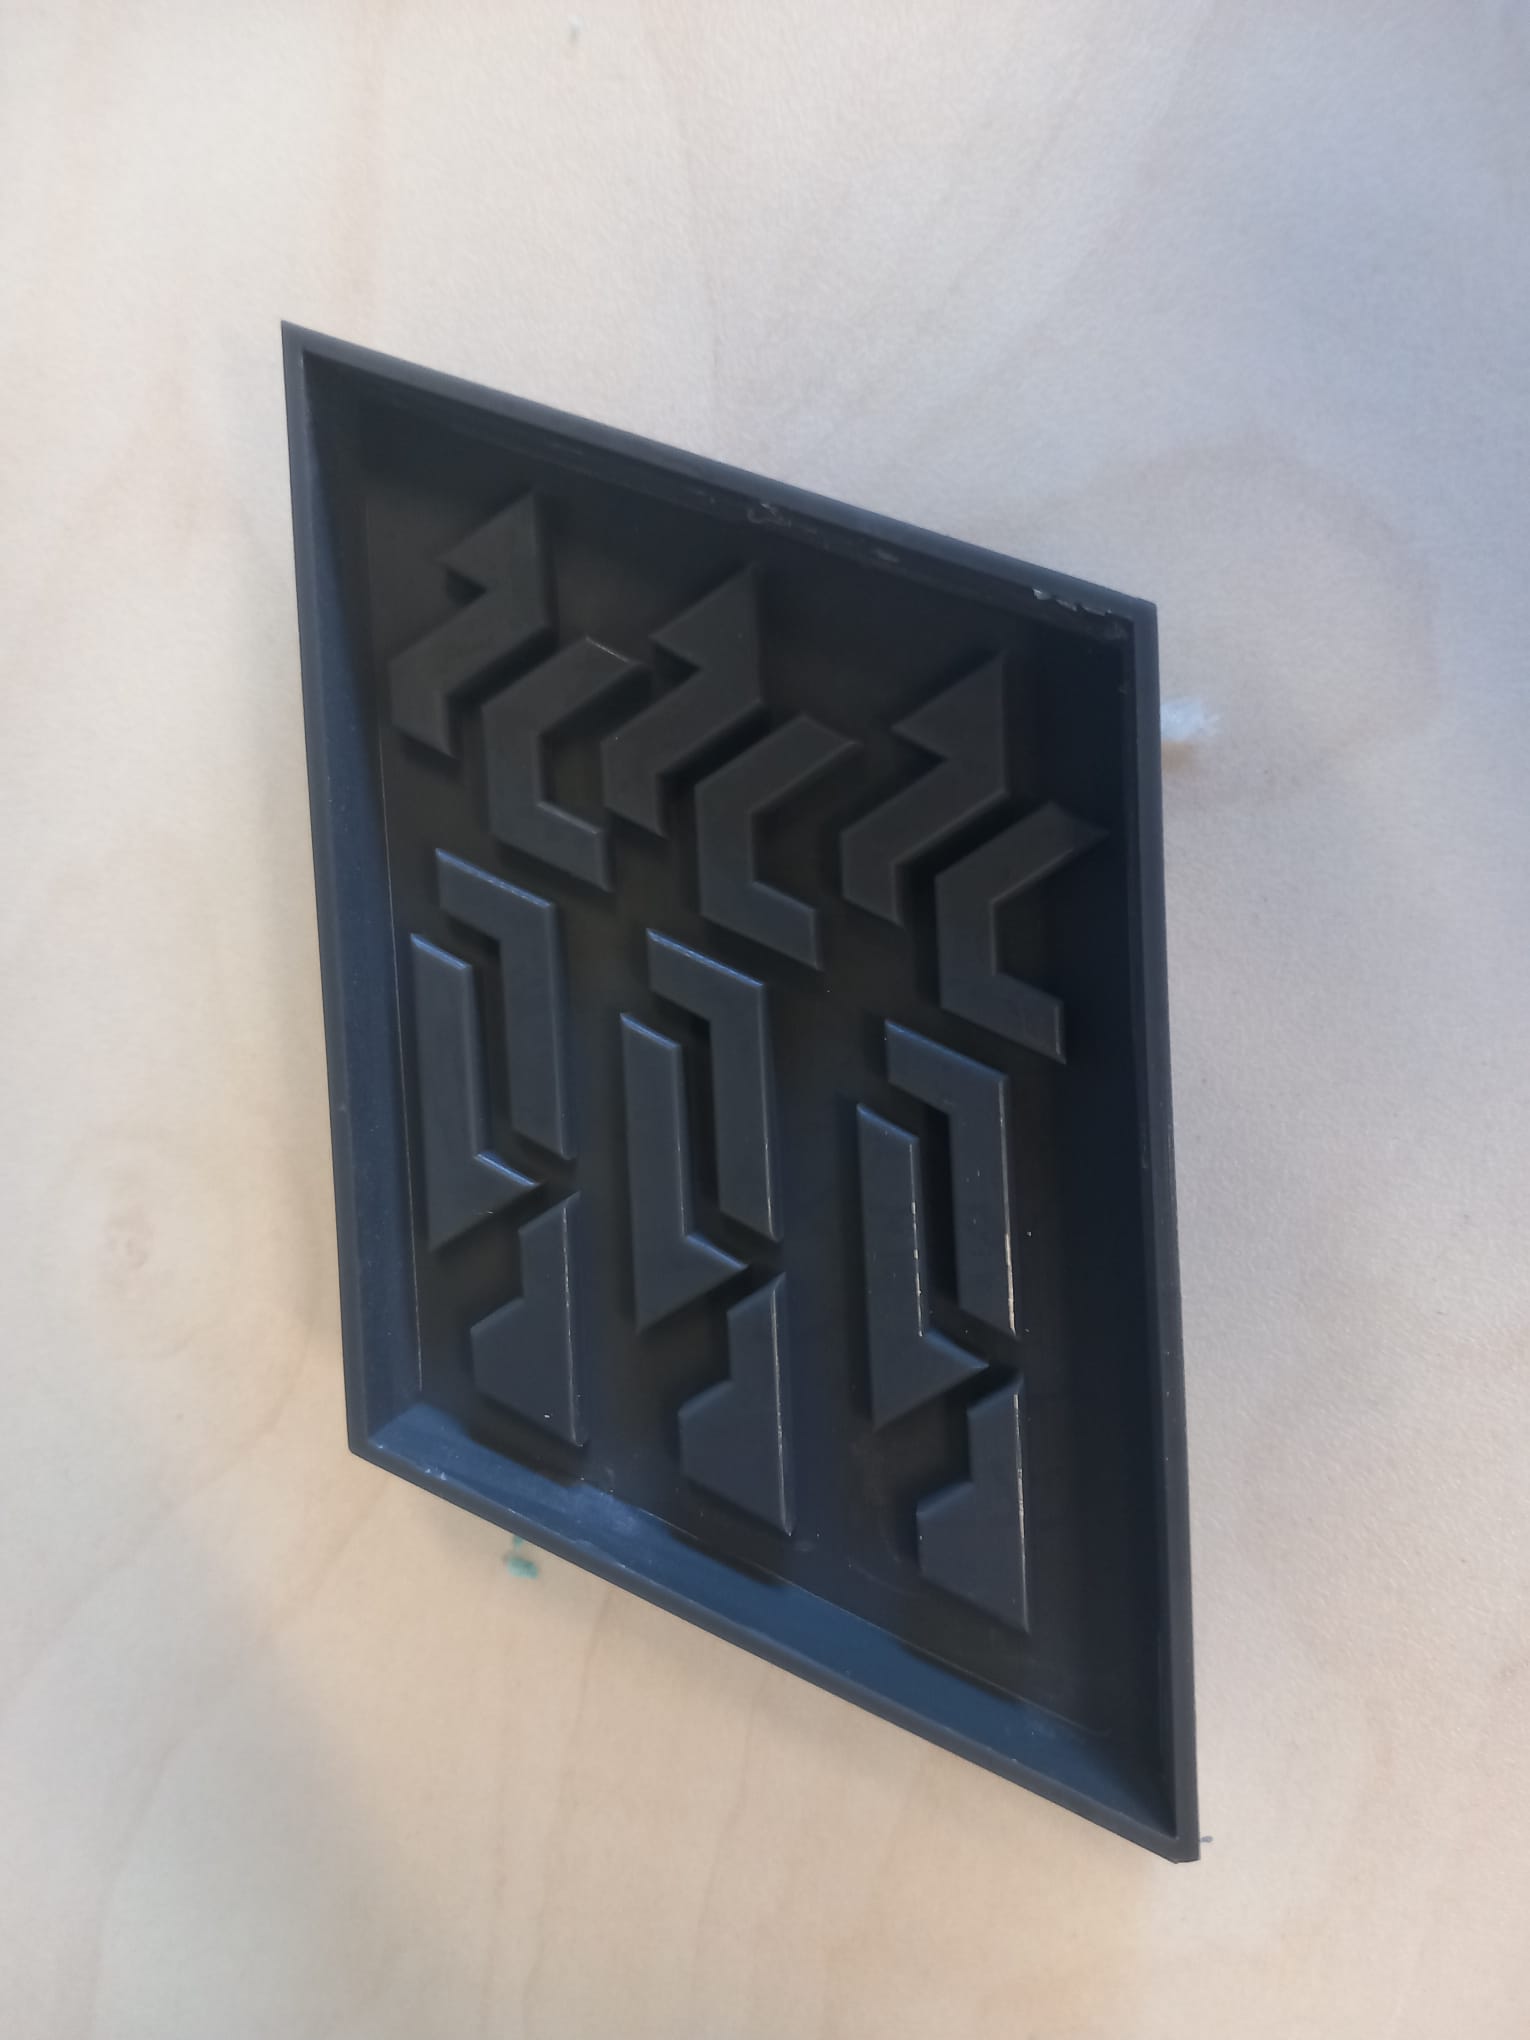
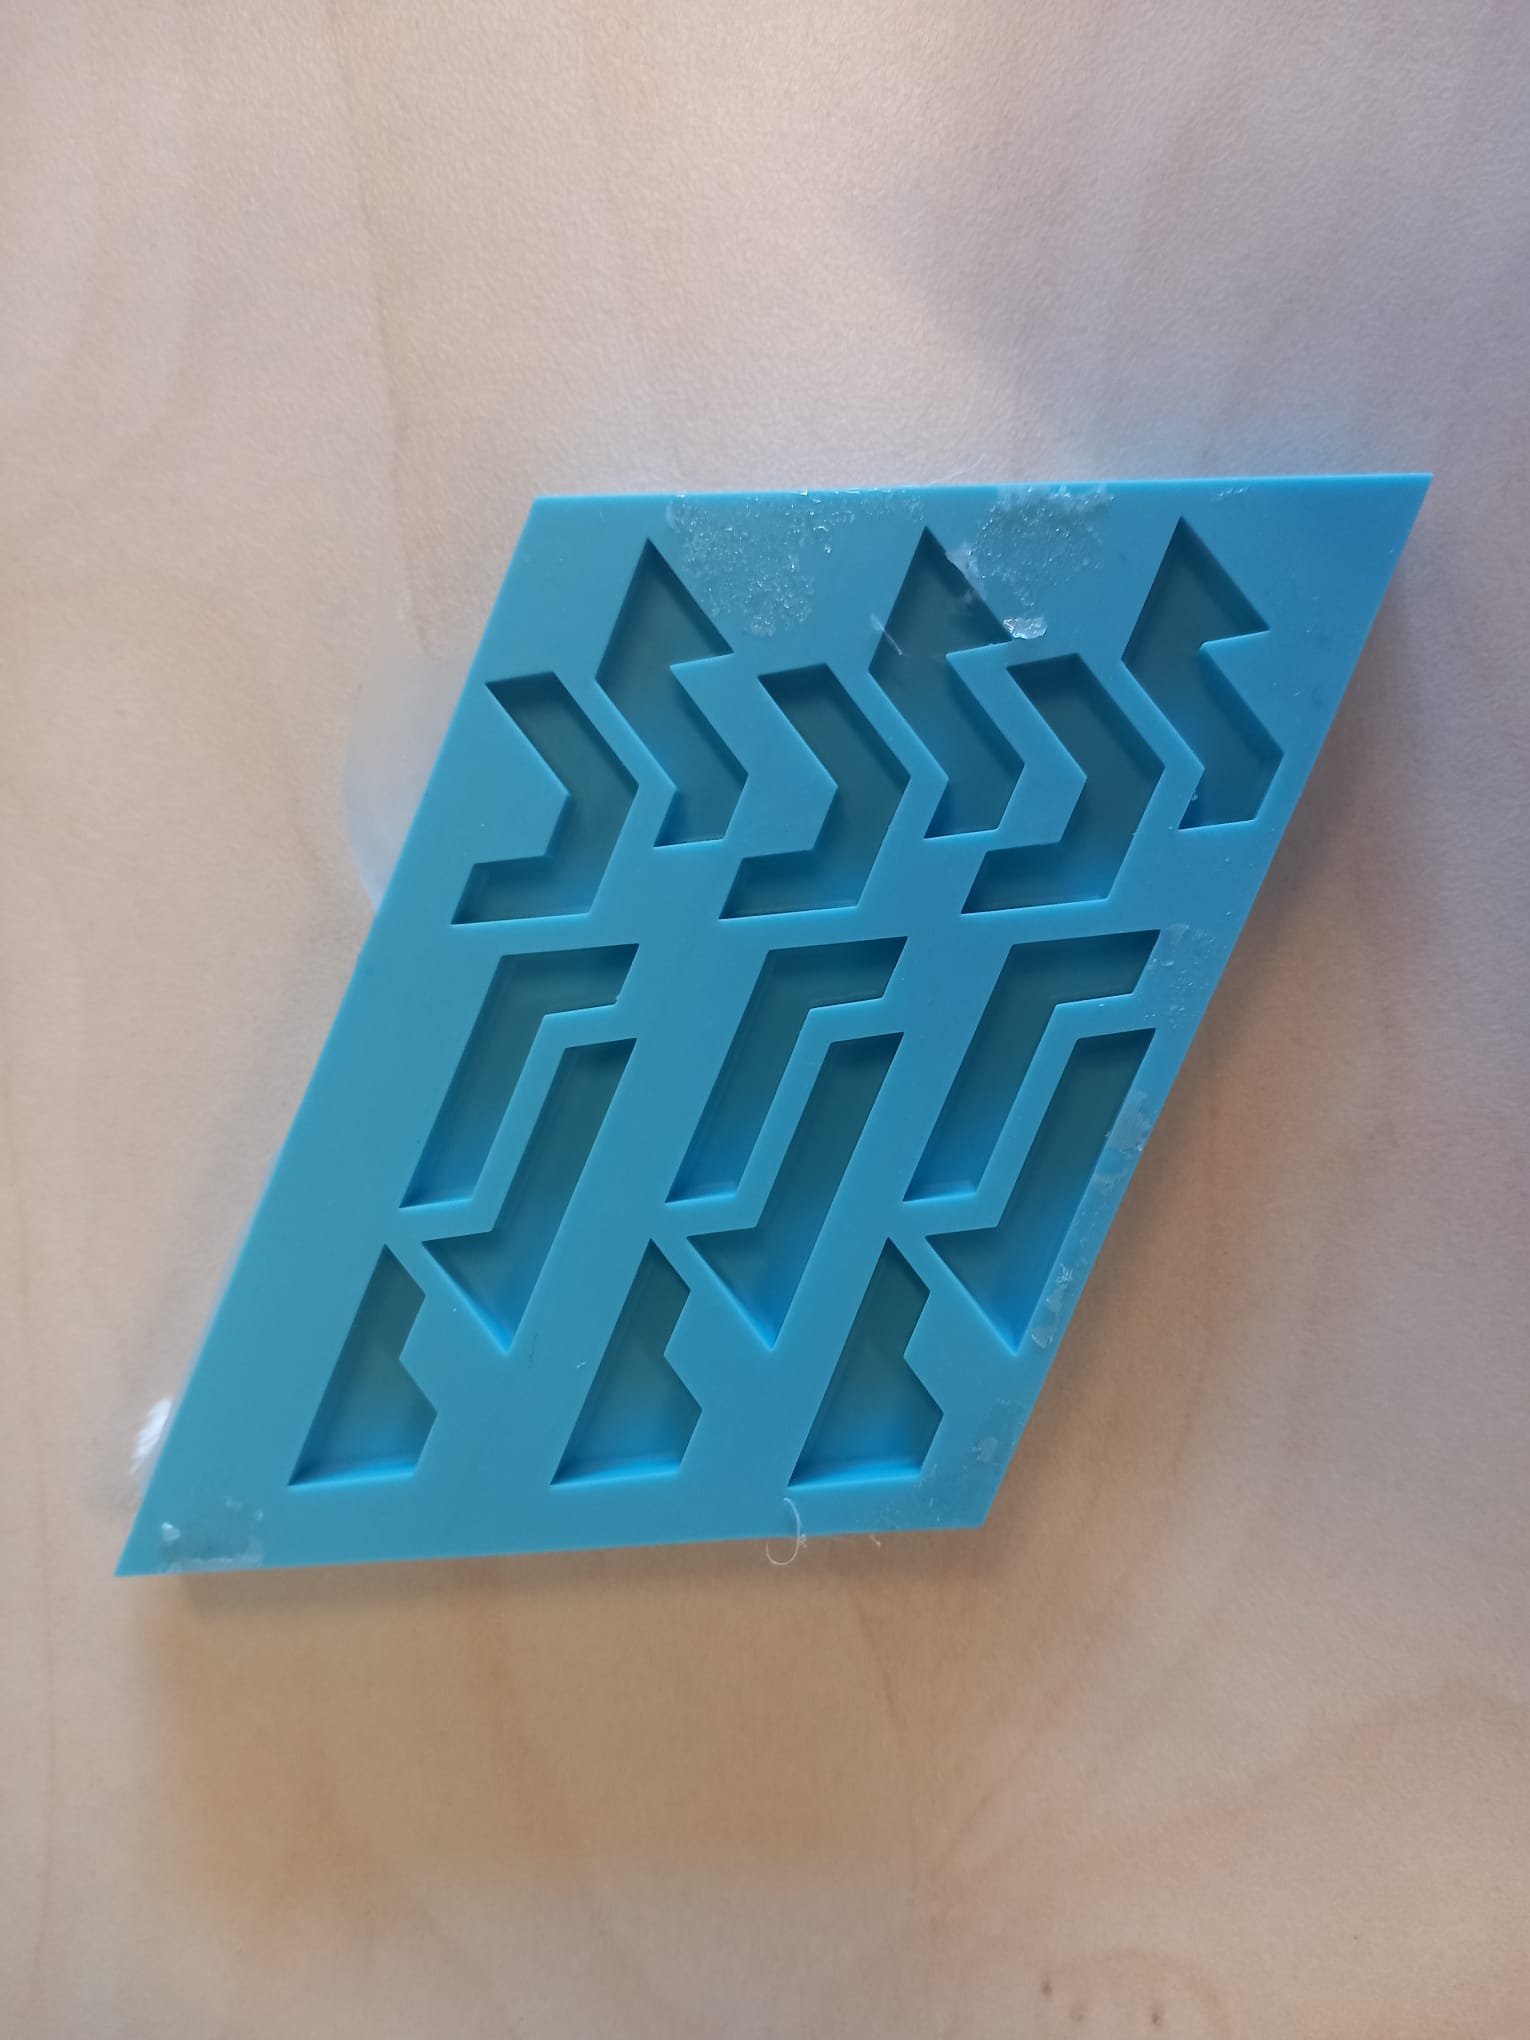
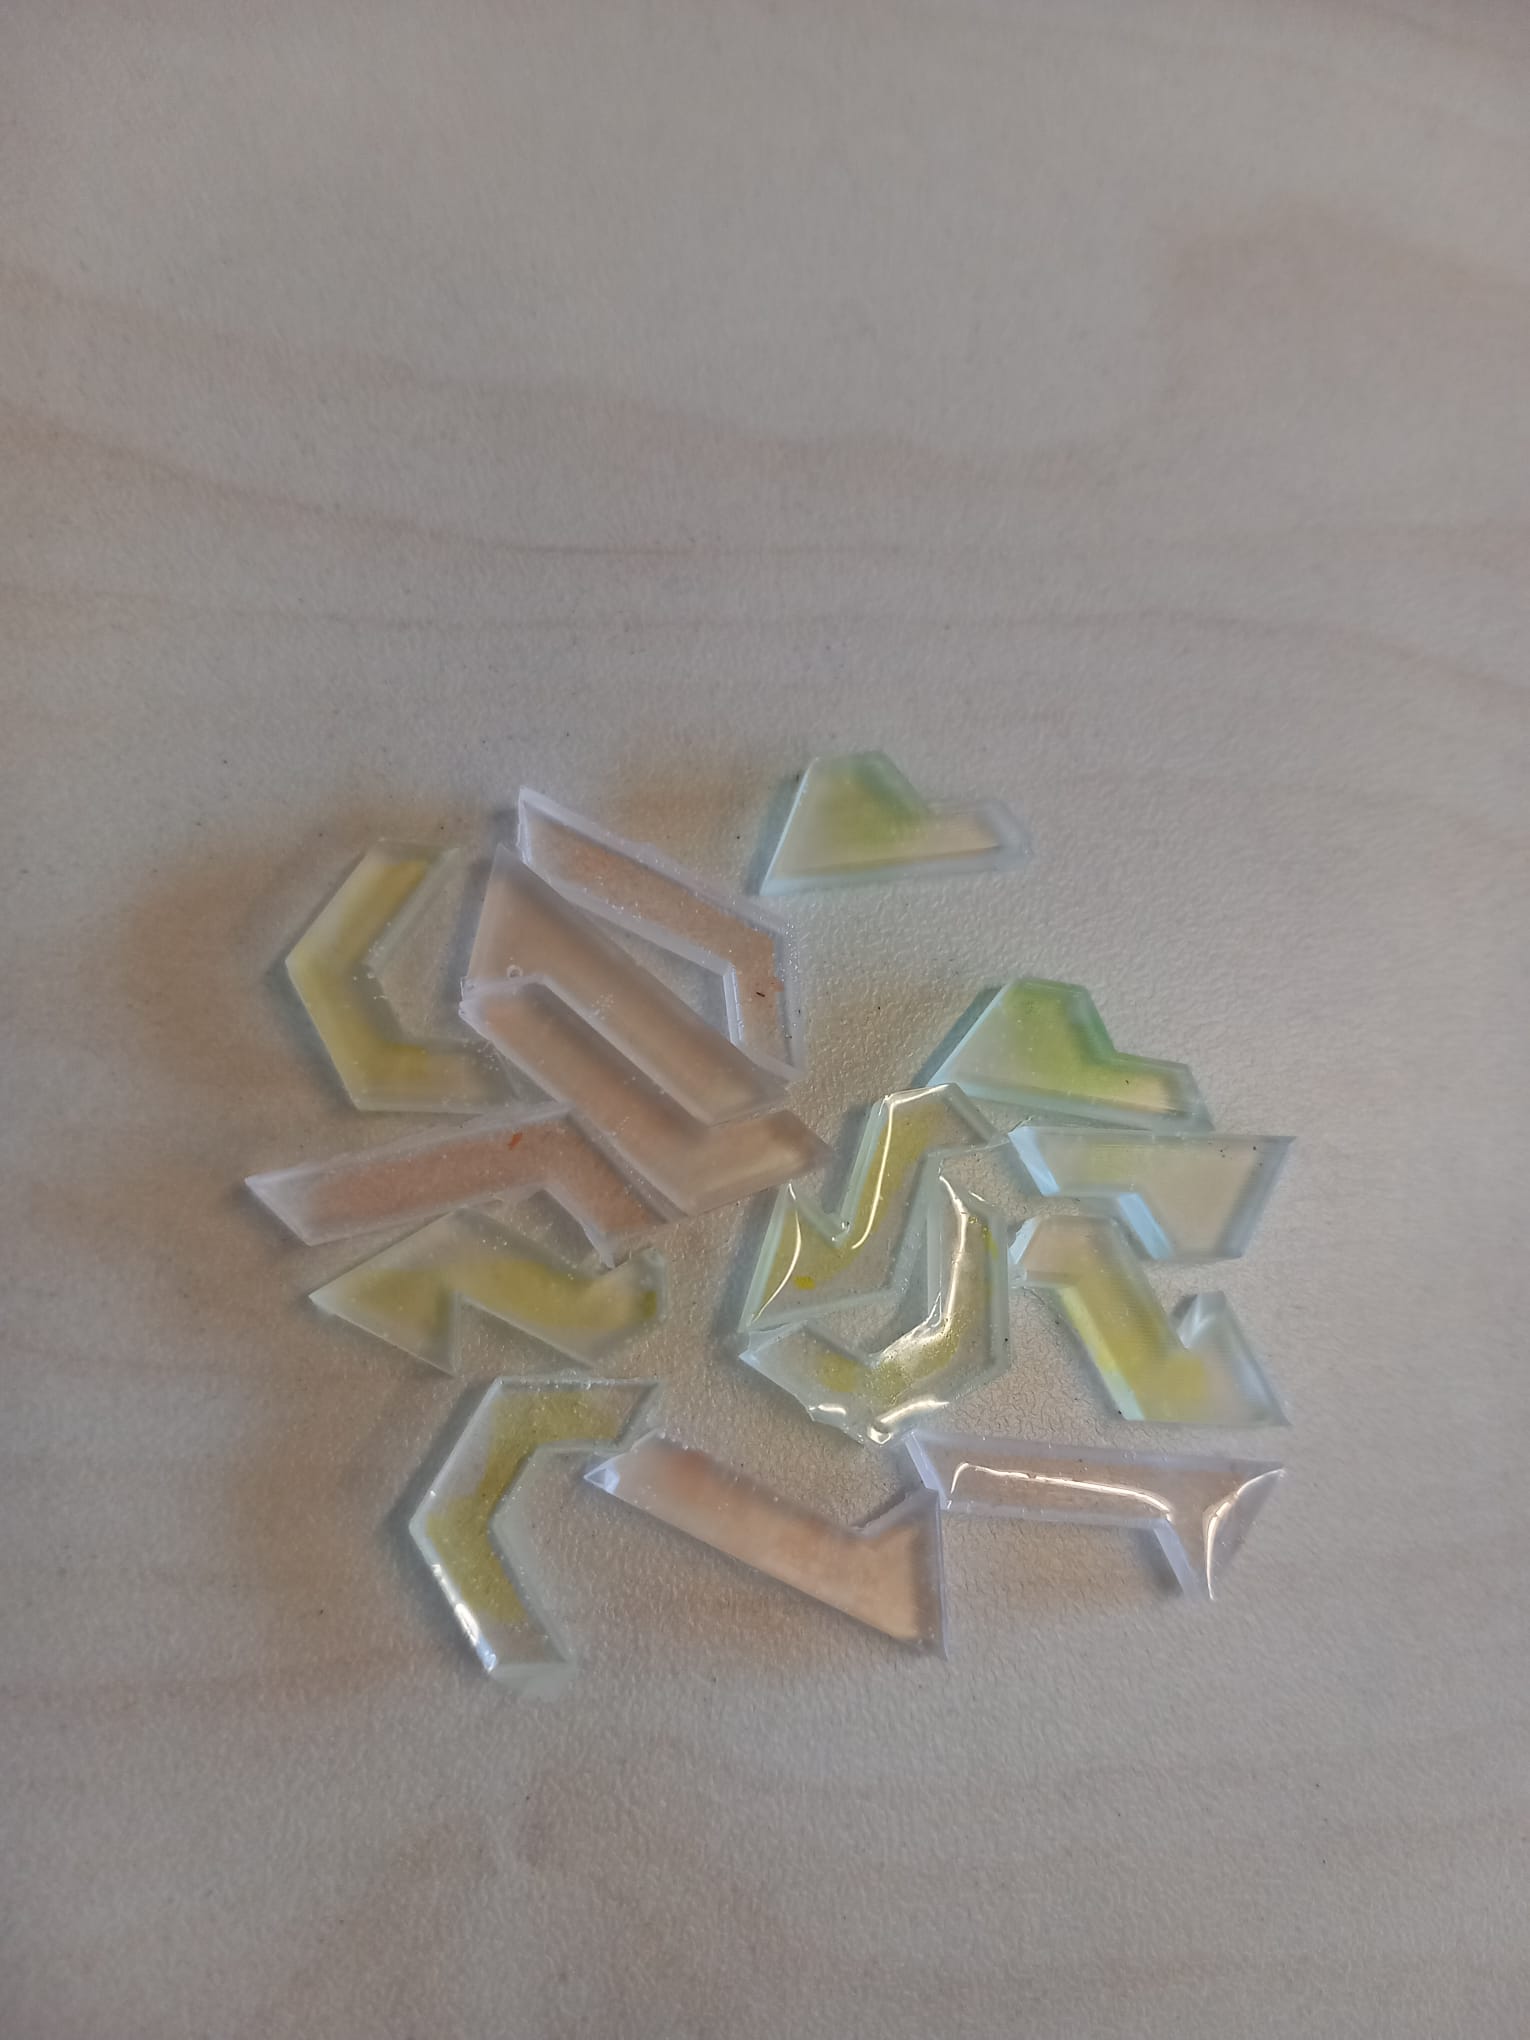
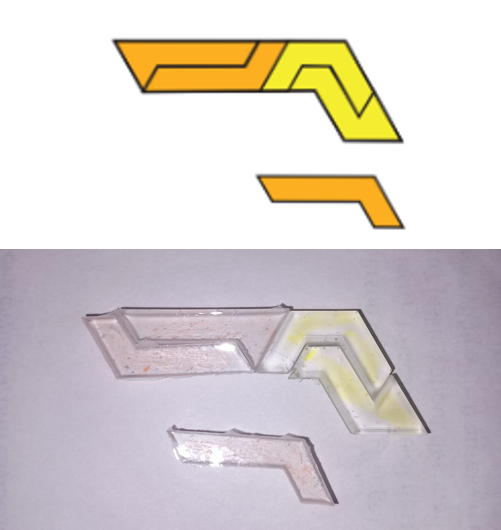
This week’s mission? Transforming gooey mixtures into solid artwork. I designed a few
molds—including “Constructor Tiles” that can piece together into funky patterns. I also
made “self-tiles,” which are just personal experiments to geek out on fun geometries and
see how wacky shapes could fit together. Because why not?
Constructor Tiles: Snap, connect, and create a puzzle of your own.My CAD mold: Because I love seeing 3D shapes on a 2D screen first.3D Printed Negative Mold: If a mold is “negative,” does that make me positive?Flexible silicone mold—so satisfying to peel back!Finished Tiles: Crisp, clean, and ready to puzzle people.Self-Tile: My little geometry playground, because I’m a shape-obsessed nerd.
Molding and Casting Training
Traditionally, molds are created by milling wax blocks using a CNC machine. However, 3D-printed molds offer a faster and more flexible alternative, especially for complex designs. This week, I experimented with both methods to understand their strengths and limitations.
Working with casting materials requires careful attention to safety and precision. Mixing materials often releases harmful gases, so it's essential to work in a well-ventilated area and maintain a safe distance during the process. Precision is key—materials must be mixed in an exact 1:1 ratio to ensure the final cast has the desired texture and durability.
Two critical terms to keep in mind are pot life and cure time. Pot life refers to the time available to mix, pour, and work with the material before it begins to set (about 8.5 minutes for our materials). Cure time is the period required for the cast to fully harden (approximately 2 hours). During the pot life, we focused on removing air bubbles and carefully filling the mold to avoid imperfections.
To minimize bubbles, we used several techniques:
Vibration plates to shake out air pockets.
Vacuum chambers to reduce porosity.
Lighters to pop surface bubbles.
These methods ensured smooth, high-quality casts.
Milling wax on the Genmitsu CNC.Testing various materials during training.
Assignments
Group Assignment:
Review the safety data sheets for each of your molding and casting materials ✓
Make and compare test casts with each of them ✓
Compare mold-making processes ✓
Individual Assignment:
Design a mold around the process you'll be using ✓
Produce it with a smooth surface finish that does not show the production process toolpath ✓