Week 9 — Output Devices
Final Result
Using rfid to open certain webpage
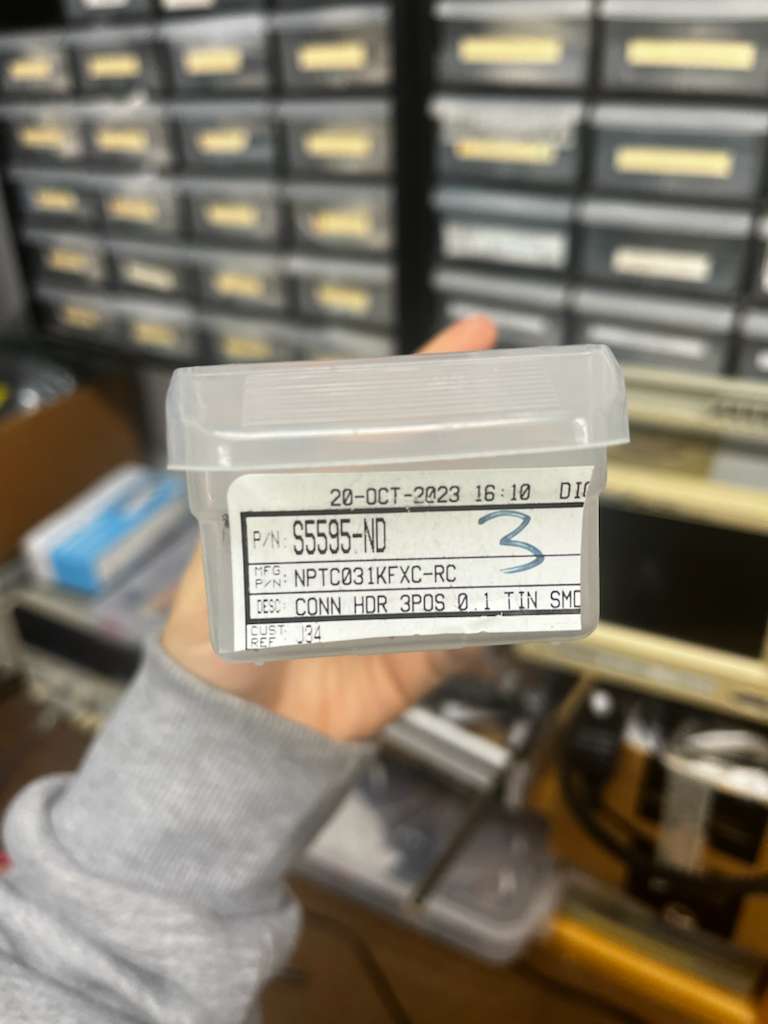
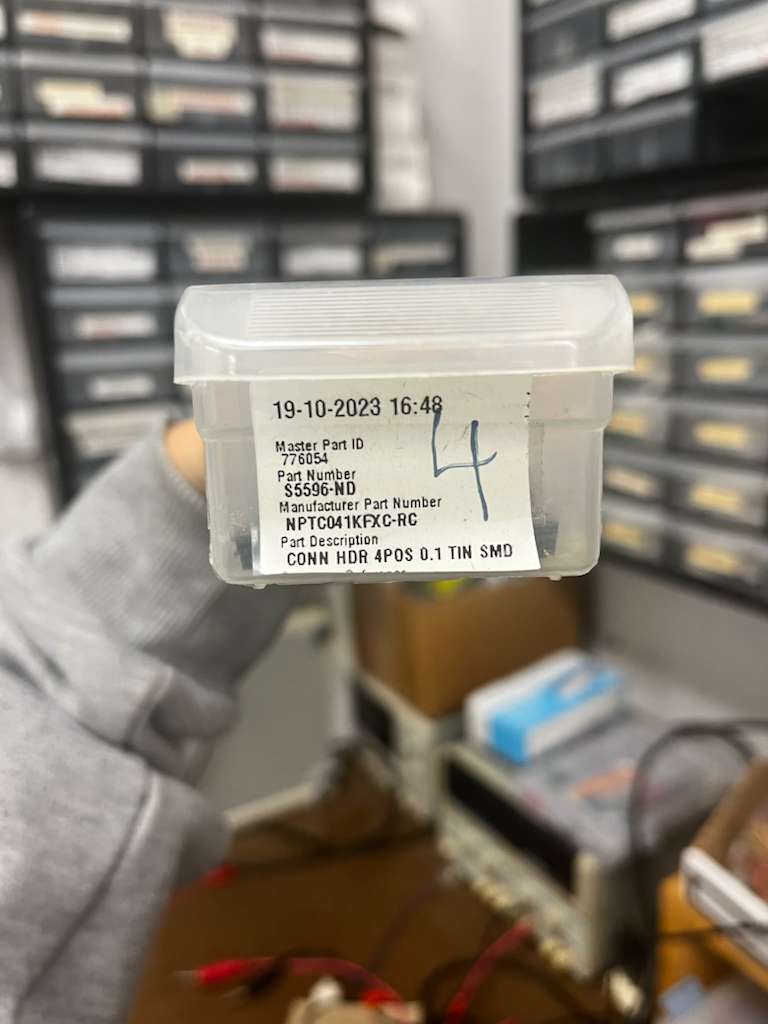
Last week for input device there were a lot of bug and the connection didn’t really work. To figure out the RFID Connection and also not waste parts


Debugging
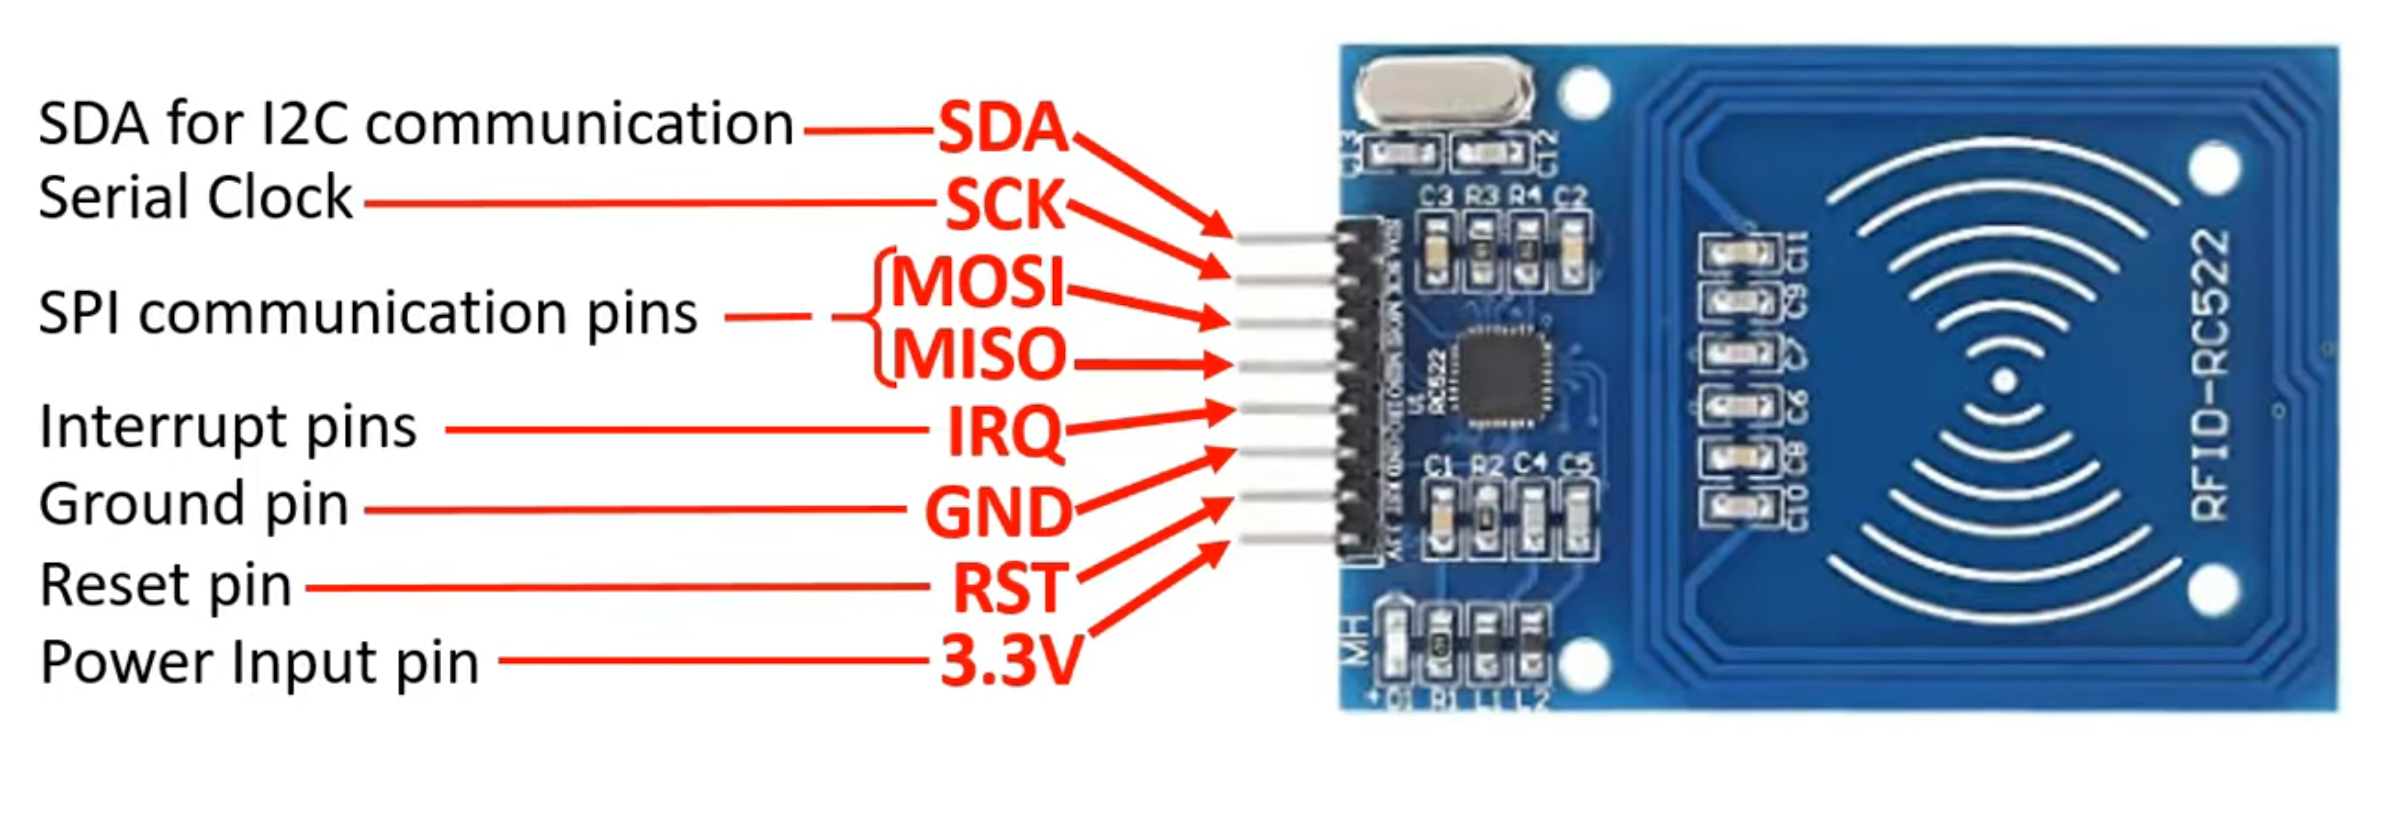
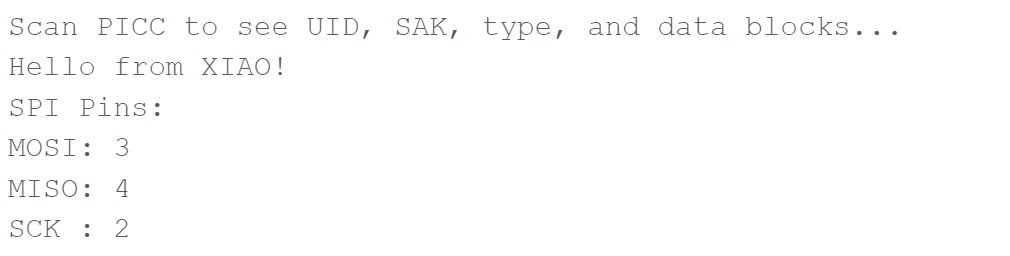
- verifying SPI pin mapping
#include <SPI.h>
void setup() {
  Serial.begin(115200);
  while(!Serial);
  Serial.println("SPI Pins:");
  Serial.print("MOSI: "); Serial.println(MOSI);
  Serial.print("MISO: "); Serial.println(MISO);
  Serial.print("SCK : "); Serial.println(SCK);
}
void loop() {}
output:
SPI Pins:
MOSI: 3
MISO: 4
SCK : 2
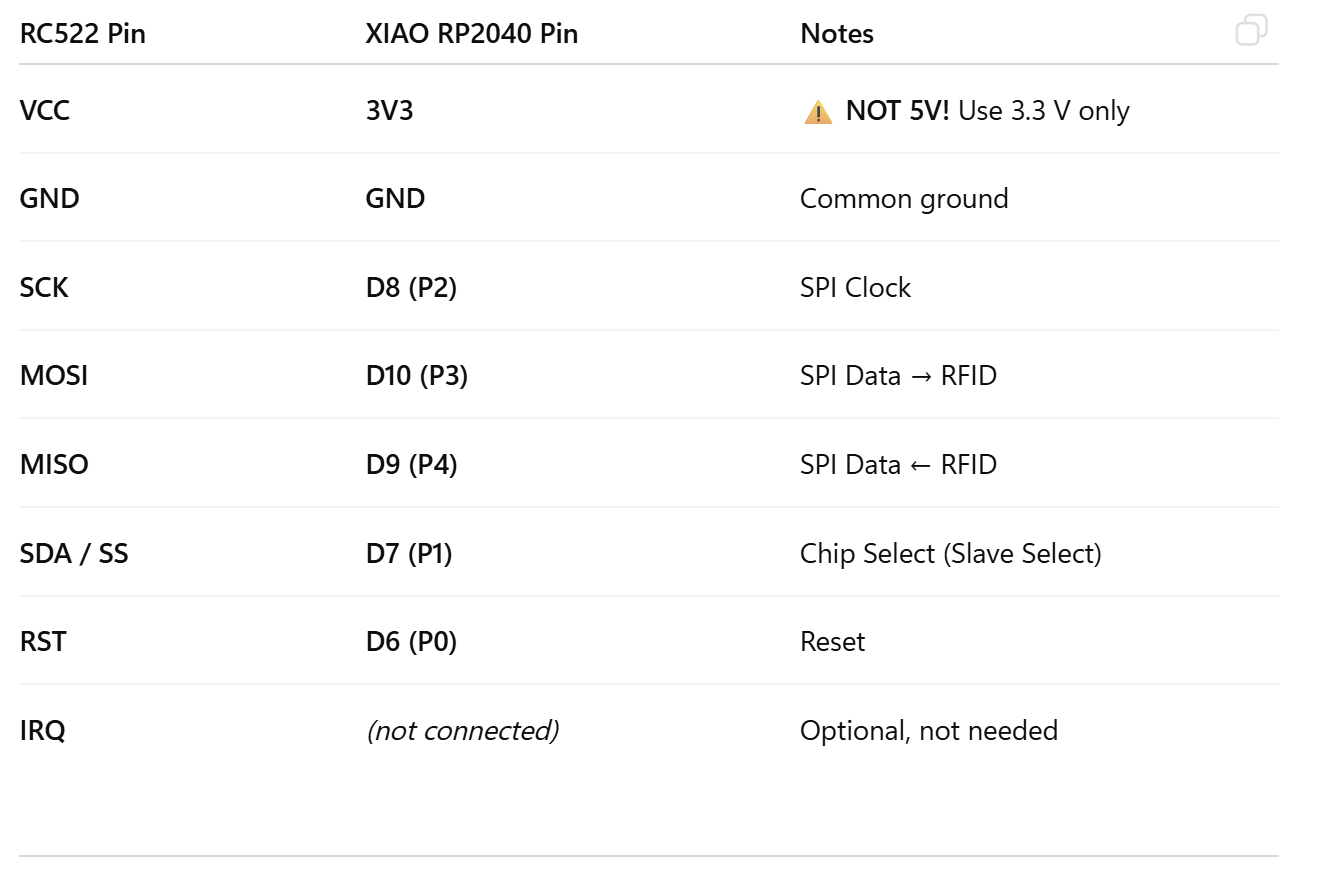
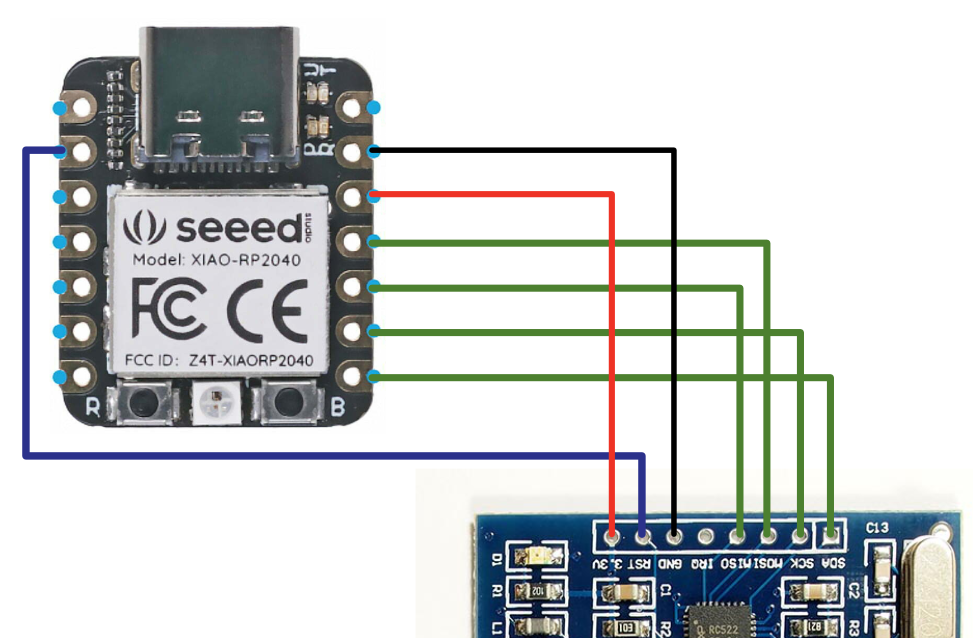
- the final correct connection

/*
* --------------------------------------------------------------------------------------------------------------------
* Example sketch/program showing how to read data from a PICC to serial.
* --------------------------------------------------------------------------------------------------------------------
* This is a MFRC522 library example; for further details and other examples see: https://github.com/miguelbalboa/rfid
*
* Example sketch/program showing how to read data from a PICC (that is: a RFID Tag or Card) using a MFRC522 based RFID
* Reader on the Arduino SPI interface.
*
* When the Arduino and the MFRC522 module are connected (see the pin layout below), load this sketch into Arduino IDE
* then verify/compile and upload it. To see the output: use Tools, Serial Monitor of the IDE (hit Ctrl+Shft+M). When
* you present a PICC (that is: a RFID Tag or Card) at reading distance of the MFRC522 Reader/PCD, the serial output
* will show the ID/UID, type and any data blocks it can read. Note: you may see "Timeout in communication" messages
* when removing the PICC from reading distance too early.
*
* If your reader supports it, this sketch/program will read all the PICCs presented (that is: multiple tag reading).
* So if you stack two or more PICCs on top of each other and present them to the reader, it will first output all
* details of the first and then the next PICC. Note that this may take some time as all data blocks are dumped, so
* keep the PICCs at reading distance until complete.
*
* @license Released into the public domain.
*
* Typical pin layout used:
* -----------------------------------------------------------------------------------------
* MFRC522 Arduino Arduino Arduino Arduino Arduino
* Reader/PCD Uno/101 Mega Nano v3 Leonardo/Micro Pro Micro
* Signal Pin Pin Pin Pin Pin Pin
* -----------------------------------------------------------------------------------------
* RST/Reset RST 9 5 D9 RESET/ICSP-5 RST
* SPI SS SDA(SS) 10 53 D10 10 10
* SPI MOSI MOSI 11 / ICSP-4 51 D11 ICSP-4 16
* SPI MISO MISO 12 / ICSP-1 50 D12 ICSP-1 14
* SPI SCK SCK 13 / ICSP-3 52 D13 ICSP-3 15
*
* More pin layouts for other boards can be found here: https://github.com/miguelbalboa/rfid#pin-layout
*/
#include <SPI.h>
#include <MFRC522.h>
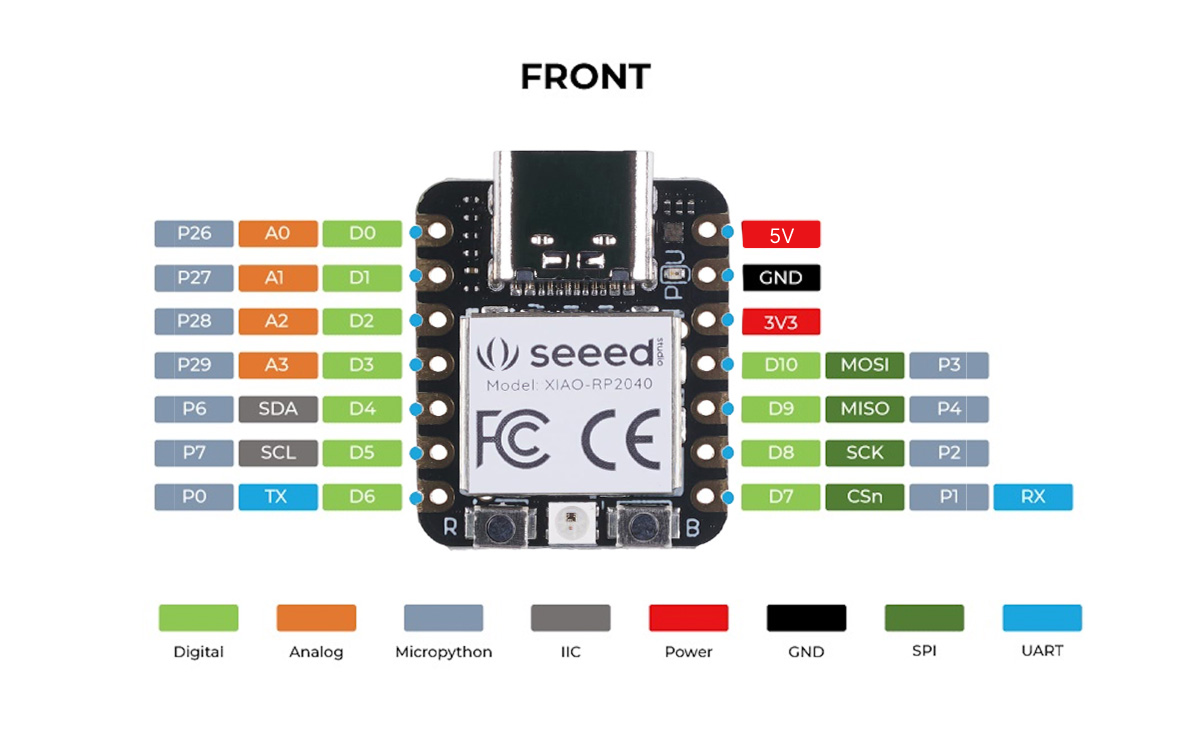
#define RST_PIN 27 // check the P numbers in the xiao image
#define SS_PIN 1 // check the P numbers in the xiao image
MFRC522 mfrc522(SS_PIN, RST_PIN); // Create MFRC522 instance
void setup() {
Serial.begin(9600); // Initialize serial communications with the PC
while (!Serial); // Do nothing if no serial port is opened (added for Arduinos based on ATMEGA32U4)
SPI.begin(); // Init SPI bus
mfrc522.PCD_Init(); // Init MFRC522
delay(4); // Optional delay. Some board do need more time after init to be ready, see Readme
mfrc522.PCD_DumpVersionToSerial(); // Show details of PCD - MFRC522 Card Reader details
Serial.println(F("Scan PICC to see UID, SAK, type, and data blocks..."));
}
void loop() {
// Reset the loop if no new card present on the sensor/reader. This saves the entire process when idle.
if ( ! mfrc522.PICC_IsNewCardPresent()) {
return;
}
// Select one of the cards
if ( ! mfrc522.PICC_ReadCardSerial()) {
return;
}
// Dump debug info about the card; PICC_HaltA() is automatically called
mfrc522.PICC_DumpToSerial(&(mfrc522.uid));
- output

RFID UID reading
            #include <SPI.h>
#include <MFRC522.h>
// Pins (match wiring above)
constexpr uint8_t PIN_SS  = 1;
constexpr uint8_t PIN_RST = D2;
MFRC522 mfrc522(PIN_SS, PIN_RST);
String uidToHex(const MFRC522::Uid &uid) {
  String s;
  for (byte i = 0; i < uid.size; i++) {
    if (uid.uidByte[i] < 0x10) s += "0";
    s += String(uid.uidByte[i], HEX);
  }
  s.toUpperCase();
  return s;
}
void setup() {
  Serial.begin(115200);
  while (!Serial) { delay(5); } // wait for Serial on some boards
  SPI.begin();
  mfrc522.PCD_Init();
  Serial.println("XIAO + RC522 ready. Tap a tag.");
}
void loop() {
  // Wait for a new card
  if (!mfrc522.PICC_IsNewCardPresent()) {
    delay(50);
    return;
  }
  if (!mfrc522.PICC_ReadCardSerial()) {
    delay(50);
    return;
  }
  String uidHex = uidToHex(mfrc522.uid);
  Serial.print("UID:");
  Serial.println(uidHex); // prints e.g. UID:04986F2A
  // Halt until tag removed (simple debounce)
  delay(200);
  while (mfrc522.PICC_IsNewCardPresent()) {
    delay(100);
  }
  delay(200);
}
Python Helper Script
- setting up the environment (anaconda prompt)
conda create -n rfidhelper python=3.10 -y
conda activate rfidhelper
pip install pyserial
- create a project folder and code in the project folder
cd "D:\school\A_MIT\1_2025Fall\6.9020 How to make almost anything\01_Assginments\week 9 output device\rfid_url_helper"
code .
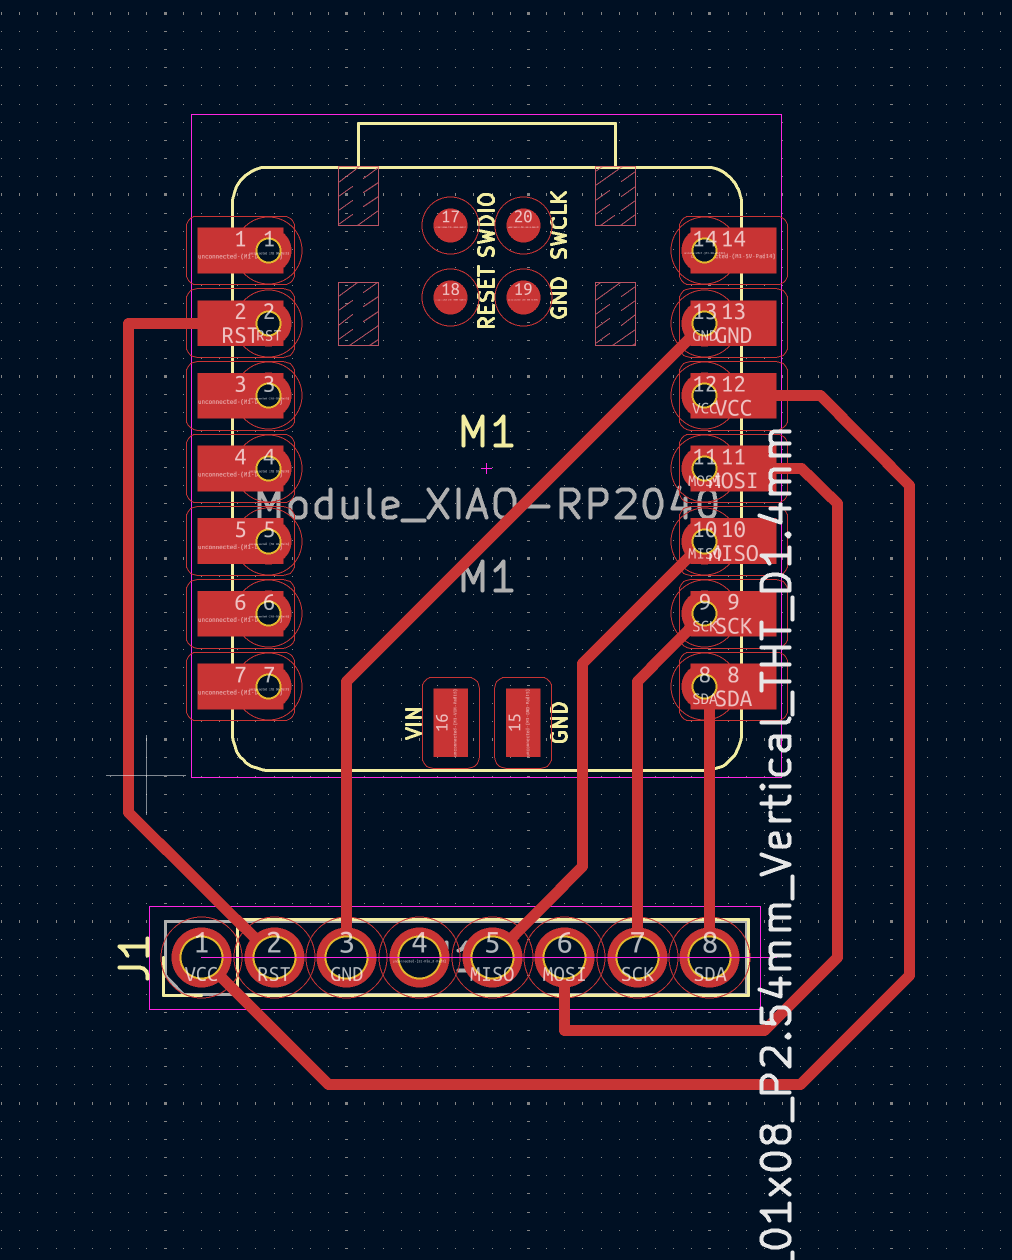
PCB Design
OLED Screen
            #include <Wire.h>
#include <Adafruit_GFX.h>
#include <Adafruit_SSD1306.h>
#define SCREEN_WIDTH 128
#define SCREEN_HEIGHT 64
#define OLED_RESET -1
Adafruit_SSD1306 display(SCREEN_WIDTH, SCREEN_HEIGHT, &Wire, OLED_RESET);
void setup() {
  Serial.begin(115200);
  while(!Serial) {}
  Wire.setSDA(6);
  Wire.setSCL(7);
  Wire.begin();
  if (!display.begin(SSD1306_SWITCHCAPVCC, 0x3C)) { // change to 0x3D if scanner showed 0x3D
    Serial.println("SSD1306 init failed.");
    for(;;);
  }
  display.clearDisplay();
  display.setTextSize(2);
  display.setTextColor(SSD1306_WHITE);
  display.setCursor(0, 0);
  display.println("OLED OK");
  display.display();
}
void loop() {}
Final RFID input and OLED output
            // XIAO RP2040 + RC522 + 0.96" I2C OLED (SSD1306)
// Keeps UID on screen for HOLD_MS after tag removal.
#include <Wire.h>
#include <SPI.h>
#include <MFRC522.h>
#include <Adafruit_GFX.h>
#include <Adafruit_SSD1306.h>
// ---------- TUNABLE ----------
constexpr uint32_t HOLD_MS = 2500;   // how long to keep UID after tag is removed
// -----------------------------
// ---------- OLED ----------
#define SCREEN_WIDTH 128
#define SCREEN_HEIGHT 64
#define OLED_RESET -1
Adafruit_SSD1306 display(SCREEN_WIDTH, SCREEN_HEIGHT, &Wire, OLED_RESET);
// ---------- RC522 ----------
constexpr uint8_t PIN_SS  = 1;   // change to D3 if that's your SS wiring
constexpr uint8_t PIN_RST = 27;  // if RST is tied to 3V3 you can still keep this
MFRC522 mfrc522(PIN_SS, PIN_RST);
// ---------- STATE ----------
enum class UiState { IDLE, SHOWING };
UiState uiState = UiState::IDLE;
unsigned long lastSeenMs = 0;
String lastUID;
// ---------- helpers ----------
String uidToHex(const MFRC522::Uid &uid) {
  String s;
  for (byte i = 0; i < uid.size; i++) {
    if (uid.uidByte[i] < 0x10) s += "0";
    s += String(uid.uidByte[i], HEX);
  }
  s.toUpperCase();
  return s;
}
void showReady() {
  display.clearDisplay();
  display.setTextSize(1);
  display.setTextColor(SSD1306_WHITE);
  display.setCursor(0, 0);
  display.println("XIAO + RC522");
  display.println("Ready for tag...");
  display.display();
}
void showUID(const String &uidHex) {
  display.clearDisplay();
  display.setTextColor(SSD1306_WHITE);
  display.setTextSize(1);
  display.setCursor(0, 0);
  display.println("Tag detected:");
  display.setTextSize(2);
  display.setCursor(0, 20);
  display.println(uidHex);
  display.display();
}
// ---------- setup ----------
void setup() {
  Serial.begin(115200);
  while (!Serial) { delay(5); }
  // I2C (OLED)
  Wire.setSDA(6);
  Wire.setSCL(7);
  Wire.begin();
  if (!display.begin(SSD1306_SWITCHCAPVCC, 0x3C)) {
    if (!display.begin(SSD1306_SWITCHCAPVCC, 0x3D)) {
      Serial.println("OLED not found at 0x3C/0x3D. Check wiring.");
      for(;;) { delay(1000); }
    }
  }
  showReady();
  // SPI (RFID)
  SPI.begin();
  mfrc522.PCD_Init();
  Serial.println("Ready. Tap a tag.");
}
// ---------- loop ----------
void loop() {
  // If a card is present, read it and update "last seen" time
  if (mfrc522.PICC_IsNewCardPresent() && mfrc522.PICC_ReadCardSerial()) {
    String uidHex = uidToHex(mfrc522.uid);
    // Only redraw/print if the UID changed or we were idle
    if (uiState != UiState::SHOWING || uidHex != lastUID) {
      Serial.print("UID:");
      Serial.println(uidHex);
      showUID(uidHex);
      lastUID = uidHex;
    }
    lastSeenMs = millis();
    uiState = UiState::SHOWING;
    // Be polite with the card
    mfrc522.PICC_HaltA();
    mfrc522.PCD_StopCrypto1();
  }
  // If we're showing a UID, keep it up until HOLD_MS after last sighting
  if (uiState == UiState::SHOWING) {
    if (millis() - lastSeenMs > HOLD_MS) {
      uiState = UiState::IDLE;
      showReady();
    }
  }
  // Small idle delay to reduce CPU noise
  delay(20);
}