Project Overview
Workshop Details
- Instructors: Kat, Neil
- Location: CBA shop
- Machine: Genmitsu ProVerXL430 V2 Tabletop CNC
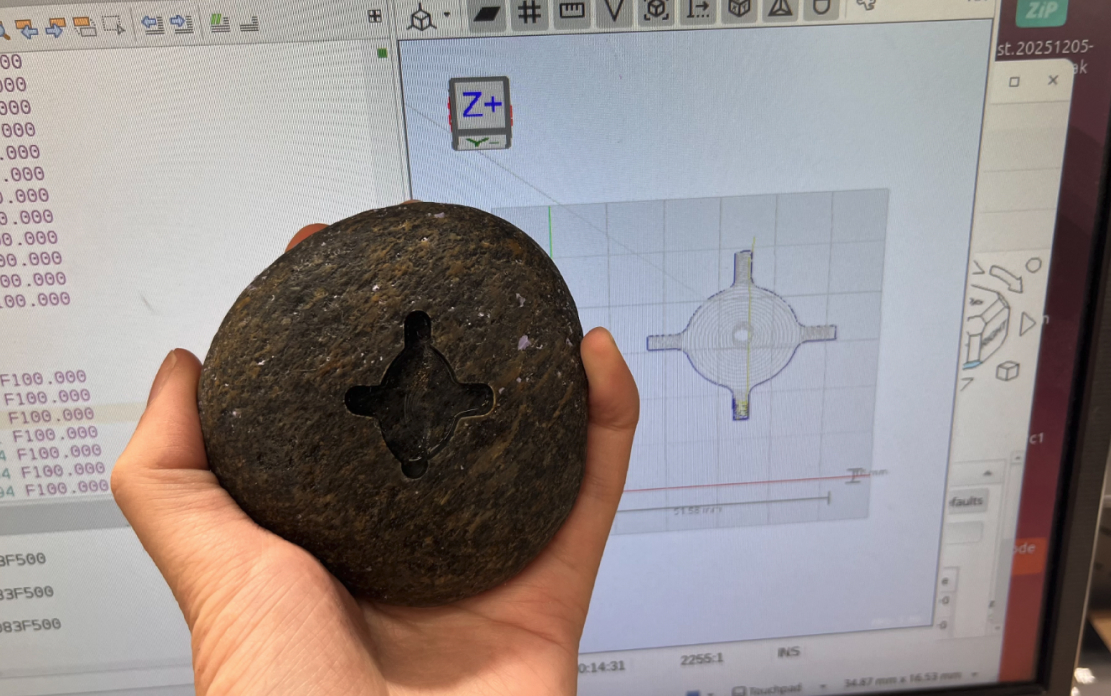
Project Goal
The goal was to embed an RFID tag inside a rock and seal it with a 3D-printed lid. To achieve this, I needed to create a cavity in the rock for the RFID sticker using CNC stone grinding techniques.
⚠️ CRITICAL SAFETY WARNING
Silica dust causes silicosis and lung disease. Your material MUST be completely submerged in water during all cutting operations. Never run dry. Never breathe stone dust.
Material Selection
Recommended Materials
- Flat slabs in granite or marble
- Ceramic or stone tiles
- Materials with uniform surface height
Materials to Avoid
- Organic shapes/river rocks: Irregular surfaces make zeroing difficult
- Layered slate: Delaminates and breaks diamond bits
- Thick materials (>1.5"): Limits Z-clearance
- Surfaces with irregular heights: Cannot maintain consistent depth
Material Properties
- Harder rock: Requires slower spindle speed
- Softer rock: Can handle faster spindle speed
Toolpath Generation in FreeCAD
Software Setup
- FreeCAD: Download development version
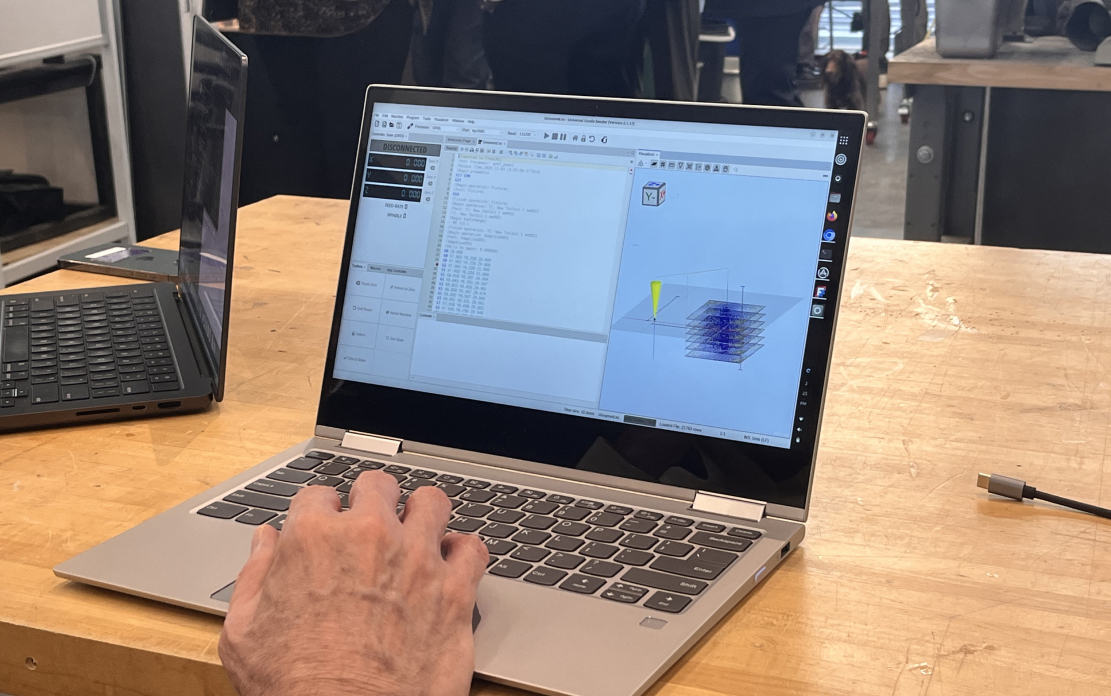
- Universal GCode Sender: Download UGS
- Reference: Adaptive Tool Path Tutorial
FreeCAD Workflow
- Import or Create Model: Import STEP file or create sketch in FreeCAD
- Extrude Below Z0: Extrude the sketch to negative value so it goes under Z0 (tool is at bottom of stock, not top)
- Set Up Stock: Configure stock as bounding box below Z0
- Configure Tools:
- Go to CAM Workbench → Tool Library → Open Library Editor
- Add Tool → Select Endmill Shape → New Toolbit
- Set Tool Diameter (measure your actual diamond bit diameter)
- Save the toolbit
- Create CAM Job:
- Output: GRBL/Gerber
- Click stock as bounding box
- Pick the face to work on
- Add tools from library
- Adaptive Clearing:
- Select Adaptive operation
- Click Apply
- Use CAM Simulator to preview toolpath
- Speeds and Feeds:
- Cutting Speed: Based on material hardness
- Feed Rate: 100 mm/min (recommended starting point)
- Plunge Rate: Slower than feed rate
- Spindle Speed: 500 RPM (for rock)
- Stepover: Adjust based on bit diameter
- Post Process:
- Go to Post Processor → Select GRBL
- Choose save location
- Click Post Process
Important Notes
- If using Fusion 360, delete
G28 G91 Z0lines in Universal GCode Sender (warning symbols will appear) - Export as GRBL format
- Pay attention to scale and depth in relation to adaptive clearing
; Recommended Settings for Rock
G21 ; Set units to millimeters
G90 ; Absolute positioning
M3 S500 ; Spindle on at 500 RPM
F100 ; Feed rate 100 mm/min
Machine Setup & Operation
Work Holding Challenges
Securing irregularly shaped rocks proved to be one of the biggest challenges:
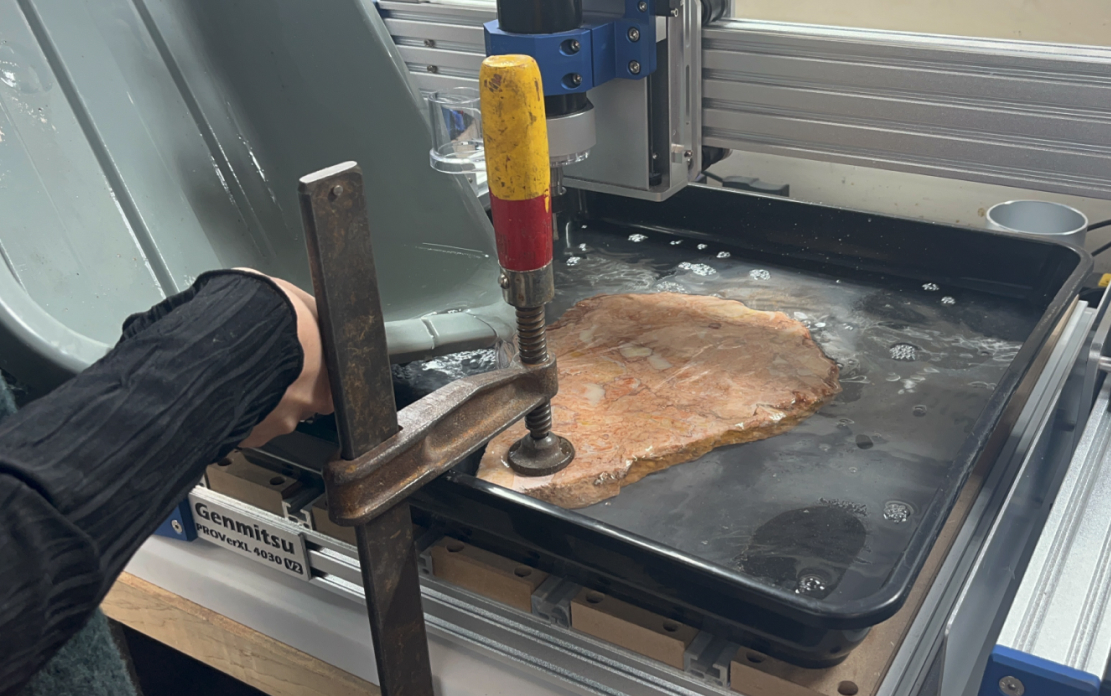
Solutions That Work
- Clamps: Work well with large flat slabs
- Custom clamping jigs: Similar to wax milling clamps
Failed Attempts
- Clay support: Water softens clay too much
- Silicone mold around rocks: Insufficient rigidity, vibration issues (see Attempt 02 below)
Potential Solutions
- Marine adhesive for temporary bonding
- Hot glue rock/mold to flat backing material (wood or marble tile)
- Custom clamp designs for small irregular shapes
Zeroing Sequence
- Secure the rock: Clamp firmly, ensuring no movement
- Set X0 Y0: Corner or center of design area
- Set Z0: Use paper method at top of material surface
- Verify: Jog to X0 Y0 Z0 — bit should just touch surface
- Check clearance: Ensure machine won't collide with clamps
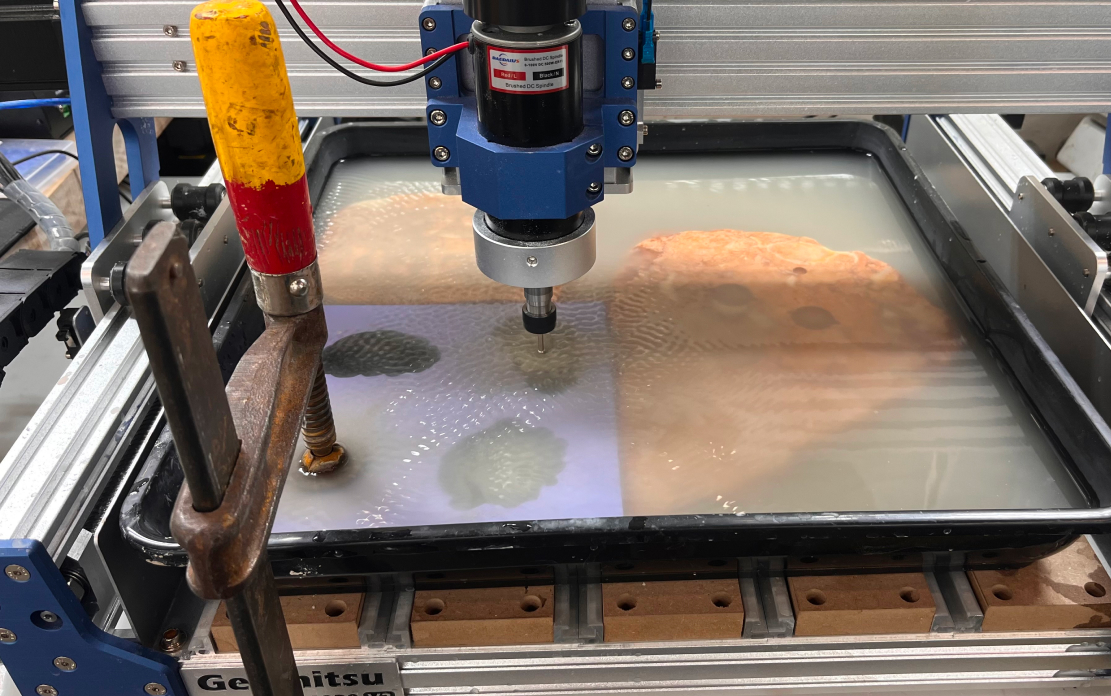
Water Management
- Pour water until it lightly covers the rock surface
- Water captures silica dust and creates a slurry
- Since material is rock, slurry can be safely disposed in CBA sink
- Never run dry — this creates dangerous silica dust
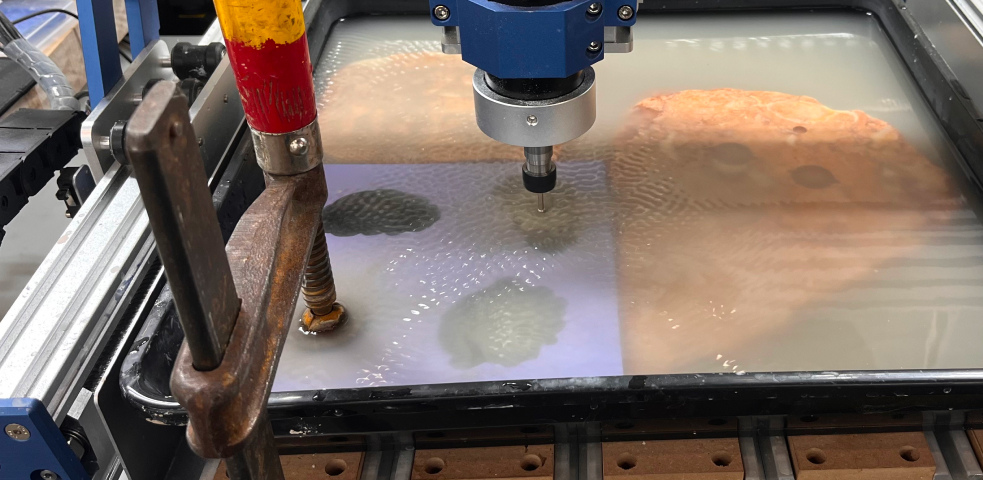
Cutting Process
Load the G-code in Universal GCode Sender and begin the cut. Grinding rock produces excellent dust suspended on the water surface.
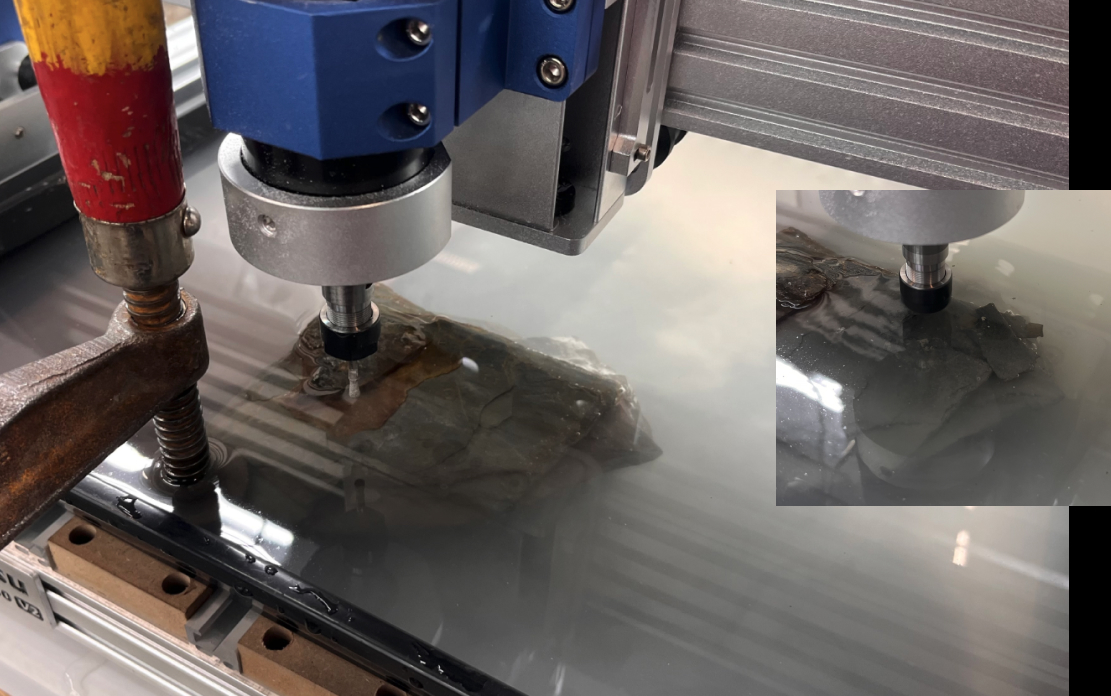
Attempt 01: Direct Rock Milling
Setup
- Used the adaptive clearing toolpath on an actual river rock
- Clamped the most stable flat surface
- Set X/Y/Z so cutting region was as level as possible
- Note: There was a dimple in the center of the indent area
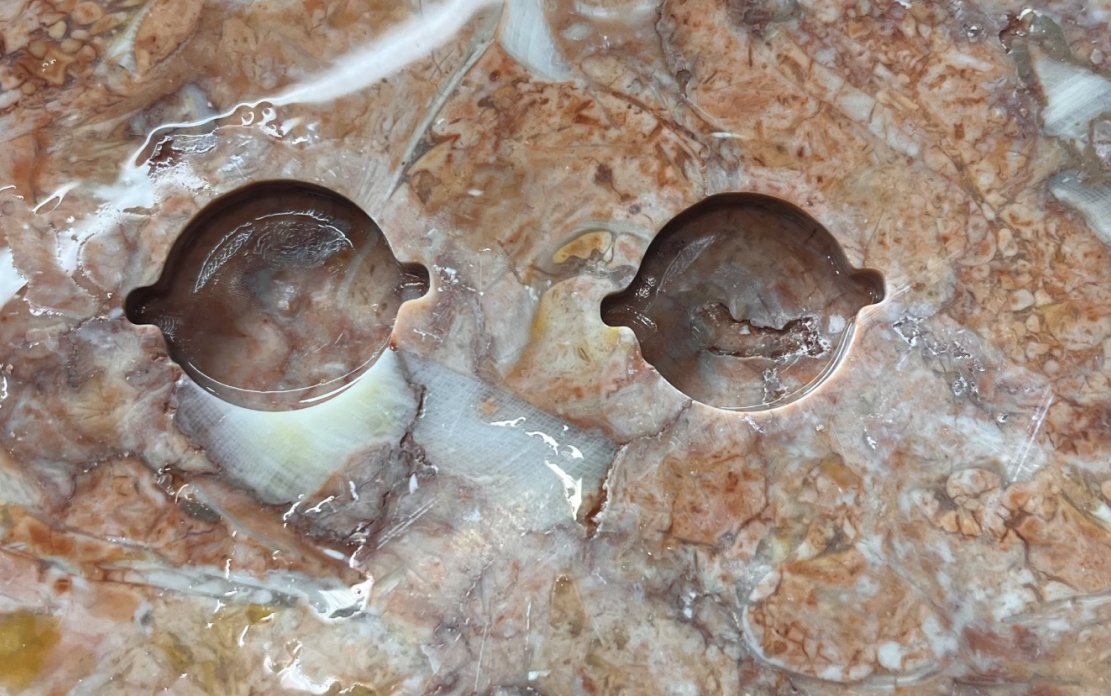
Problems Encountered
- Layered Structure: Rock contained multiple thin sedimentary layers
- Unstable Cutting: Bit drifted and couldn't cut a clean circle
- Tool Damage: Diamond bit connector section was ground away
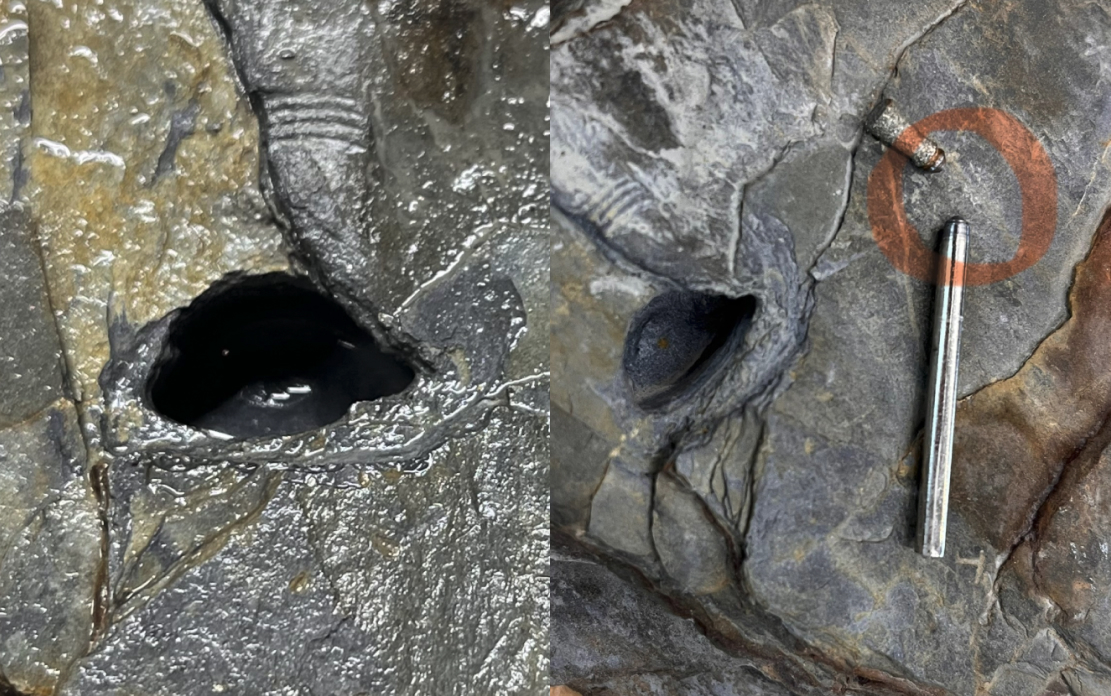
Root Causes
- Feed rate too high: 250 mm/min was excessive for layered rock
- Material hardness: Exposed sediment layer was too hard and abrasive
- Bit design: Fragile connector section couldn't withstand forces
Solution
Switched to a different diamond bit without a fragile connector section and reduced feed rate to 100 mm/min.
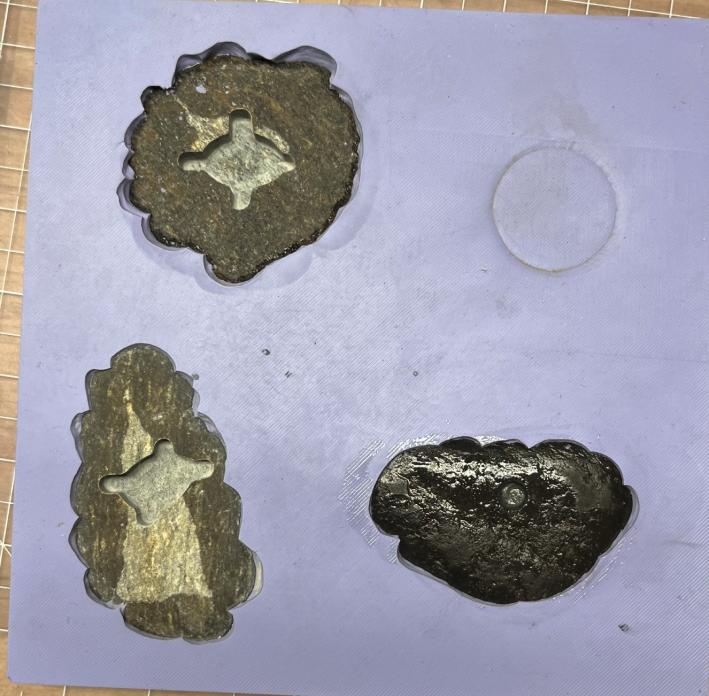
Attempt 02: Soft Mold Support
Concept
Since achieving a perfectly flat surface is essential, I created a soft silicone mold to stabilize the irregular rock shape.
Mold Creation Process

- Placed rock surface down in a container
- Poured Oomoo silicone to create negative mold
- Let cure overnight
- Removed rock, leaving perfect mold cavity
Results
✅ Successes
- Surface flatness problem solved: Mold successfully held rock geometry
- Excellent cutting quality: Surface finish was very good
- Repeatable positioning: Rock could be removed and replaced accurately
❌ Problems
- Mold too soft: Vibrated and shifted during machining
- Distorted cut shape: Movement caused geometric inaccuracy
- Clamping insufficient: Standard clamps couldn't prevent vibration
Clamping Attempts
Method 1: Weight Distribution
- Placed heavy marbles on top and right of mold
- Result: Reduced but didn't eliminate movement
Method 2: Wood Backing
- Placed wood blocks around mold for support
- Result: Slight improvement but still vibration issues
Recommended Improvements
After discussing with Dan, we identified several better approaches:
- Hot glue mold to backing: Attach mold or rock to flat material (wood or marble tile) to prevent shifting
- Wax-milling clamps: Use the same clamp type from wax grinding to secure irregular shapes
- Custom small-rock jig: Design specific clamping system for small stones
- Harder mold material: Consider using harder casting materials for mold
Key Learnings
Technical Insights
- Feed rate matters: Start slow (100 mm/min) and increase carefully
- Material knowledge crucial: Layered rocks are problematic for diamond bits
- Flat reference essential: All zeroing depends on flat, stable surface
- Water is mandatory: Never compromise on dust suppression
- Tool selection critical: Bit geometry must match material forces
Work Holding Lessons
- Irregular shapes require custom solutions
- Soft molds need rigid backing to prevent vibration
- Standard clamps work best with flat slabs
- Hot glue temporary bonding is underrated
Process Improvements
- Test toolpath on scrap material first
- Measure actual tool diameter before generating toolpath
- Start with conservative speeds and feeds
- Monitor bit wear constantly
- Keep water level consistent throughout cut
Recitation: High Tech & Community
Hygiene Technology Discussion
During the recitation, we discussed the intersection of technology and community development:
Key Questions
- How do you ensure you're having conversations with communities, not just placing infrastructure?
- How can we help indigenous people produce sustainable products within their community without waste?
- How can we help indigenous people continue their ancestral knowledge?
- What are communities actually worried about?
Field Experience: Peru
- What people value cannot be known from one-time visits
- Community is important: Introducing people to your community builds trust
- Goal: Help people test their products, not just build products for them
Designing Infrastructure
What does it mean to design infrastructure?
- Start with people, not machines
- Physical labs are entirely volunteer-based, maintained through local managers
- Technology should enable communities, not replace their knowledge
Appendix
Files
Recommended Settings Summary
| Parameter | Value | Notes |
|---|---|---|
| Feed Rate | 100 mm/min | Starting point, adjust based on material |
| Spindle Speed | 500 RPM | For hard rock |
| Plunge Rate | 50 mm/min | Slower than feed rate |
| Stepover | 50% tool diameter | Adjust for finish quality |