Final Project - Prosthetic Manipulator (Day of Edition)
-
Soooo... How's Final Project?
Please refer to the Final Project Page for more technical details.
This page is about personal reflection on the project and presentation (and anything I found valuable from others' work).
This was supposed to be a fun and cheerful page full of excitement about all the projects people have built. However, COVID thought otherwise and I only got to see other projects from their websites. I would regardless want to note down my experience this semester on the website, although it would only have reflection from my project and class sessions.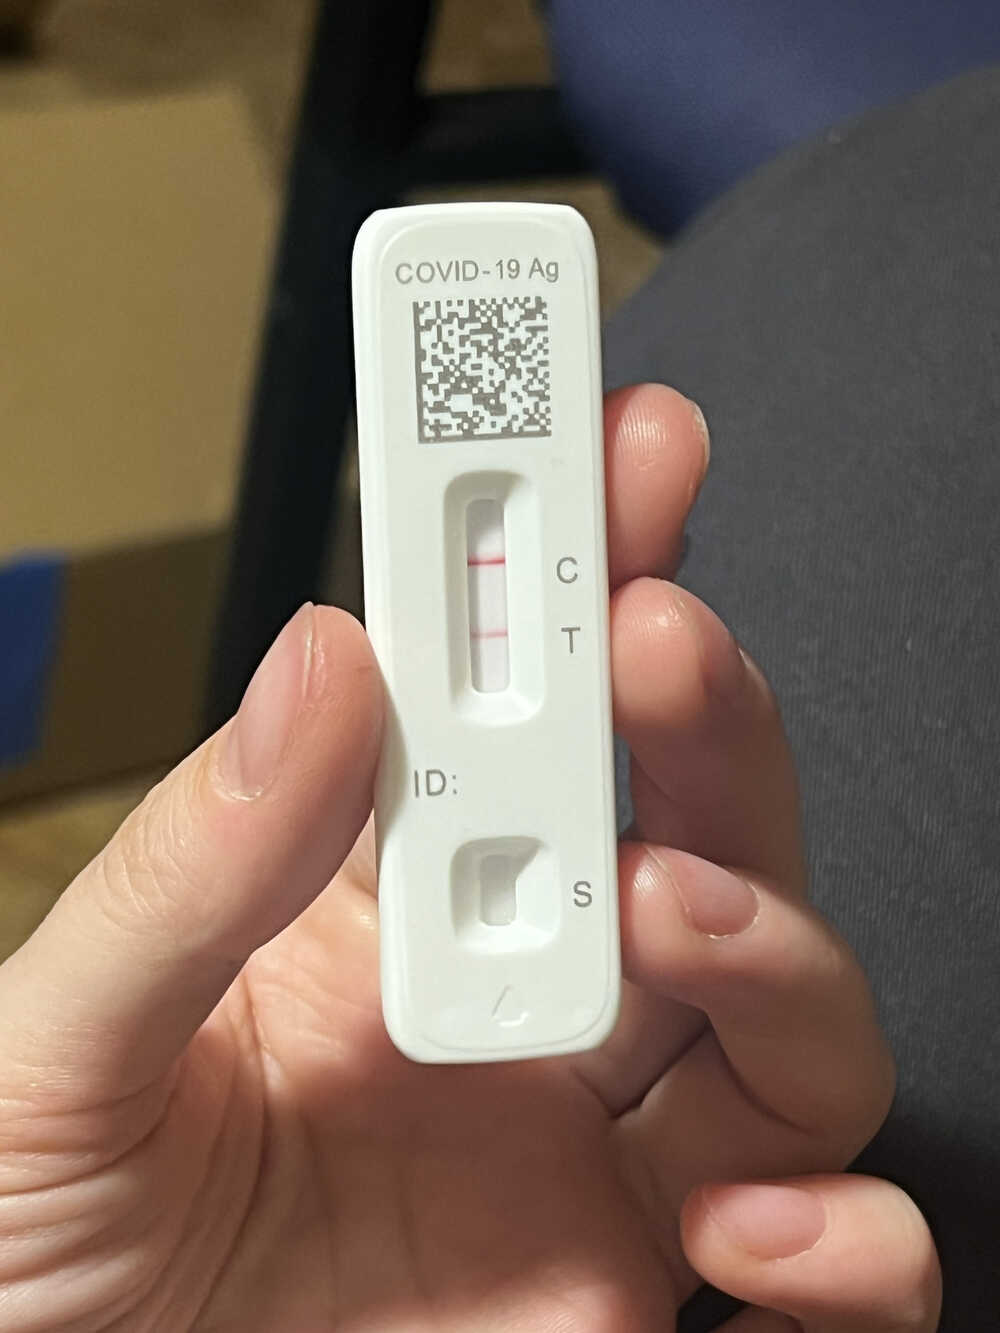

-

COVID or no COVID - probably my favorite class so far, thanks!
While I wish I got to experience the culmination of the class on the presentation day, I had an incredible experience being part of this class, which I want to share for myself and anyone who is looking to take it.
1. Yes, it does take time. It is an 18 units class and it has corresponsive workload. Each week throws a completely new technology at you and it is exciting and terrifying at the same time. Now looking back, I can see how much new things I learned, and this website is a solid snapshot of it. If I was asked again - I would take it again. Thanks to everyone who supported me on this journey!
2. This class was an incredible combination of people with completely opposite skillsets and ways of thinking. I was amazed how this class organically combined artists, electrical engineers, architects, computer scientists, mechanical engineers, and many more people from radically different viewpoints. A combination of students from different schools, undergrad and grad, an incredible range of specialities of the TAs - everything made my frame of thinking much more diverse and I am grateful for that.
3. After this class, I am no longer afraid of big projects, machines, software, and Making (almost) Anything feels more than possible. Nothing feels like too big or ambitious, which is the mindset I have been looking for during my whole time in MIT. It is exciting how now while looking at things I note what could have been lasercutted, 3D printed, or CNCed, what is a super simple pcb and a sensor, and how is practically anything engineered. I am excited to continue learning and making things. -
Results and Summary
And this wraps up an MVP for the project. The system is able to move fingers, and it is able to be controlled through a computer interface. The system is not perfect, and there are a lot of things that could be improved, but it is a good start.
A few more notes about the project. It was a lot of work throughout the semester (and I am writing it as I am finishing up during IAP). I really appreciate help of all the people who contributed to my learning and project development, with special thanks to EECS TAs Anthony and Maaya and professor Gershenfeld. There was also a lot of learning and advice from other students, which I didn't expect and am very grateful for.
Now, I wanted to talk about the project presentation that I didn't get to give because I got COVID. There was a very extensive checklist posted on the website regarding final project presentation, so let me iterate through those. -

Project Presentation
Q: What does it do?
A: My project is working on prosthetic systems which can also be described as a robotic arm. Its main goal is bieng able to move fingers and be reliably controlled.Q: Who's done what beforehand?
A: Section Background of the final project page gives a lot of references to the work that was done before. I was inspired by the work of Xu et al., talk with my friend who used to work at Biomechatronics group at MIT Media Lab, and following Superhumans - a recently opened reabilitation and prosthetics hub at Ukraine. Their CEO is sharing a lot of insights on importance of high quality prosthetics but also reabilitation process. The main takeaway was that there is a wide range of prosthetic systems, with key factors being cost, comfort and personalization, and that there is a lot of work to be done in this field.Q: What did you design?
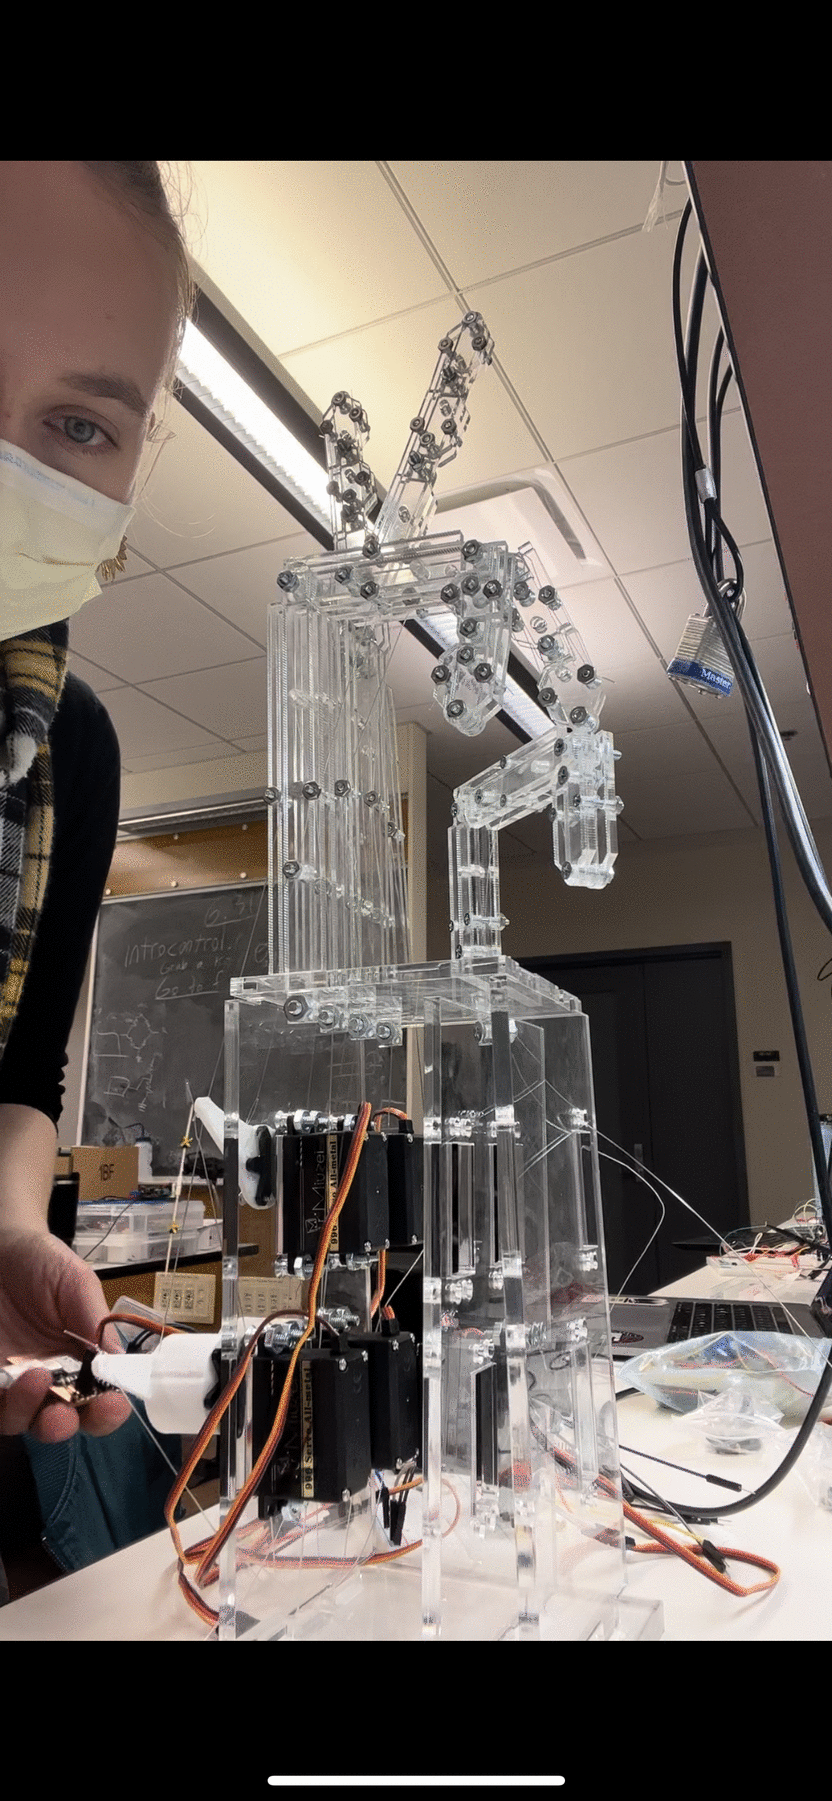
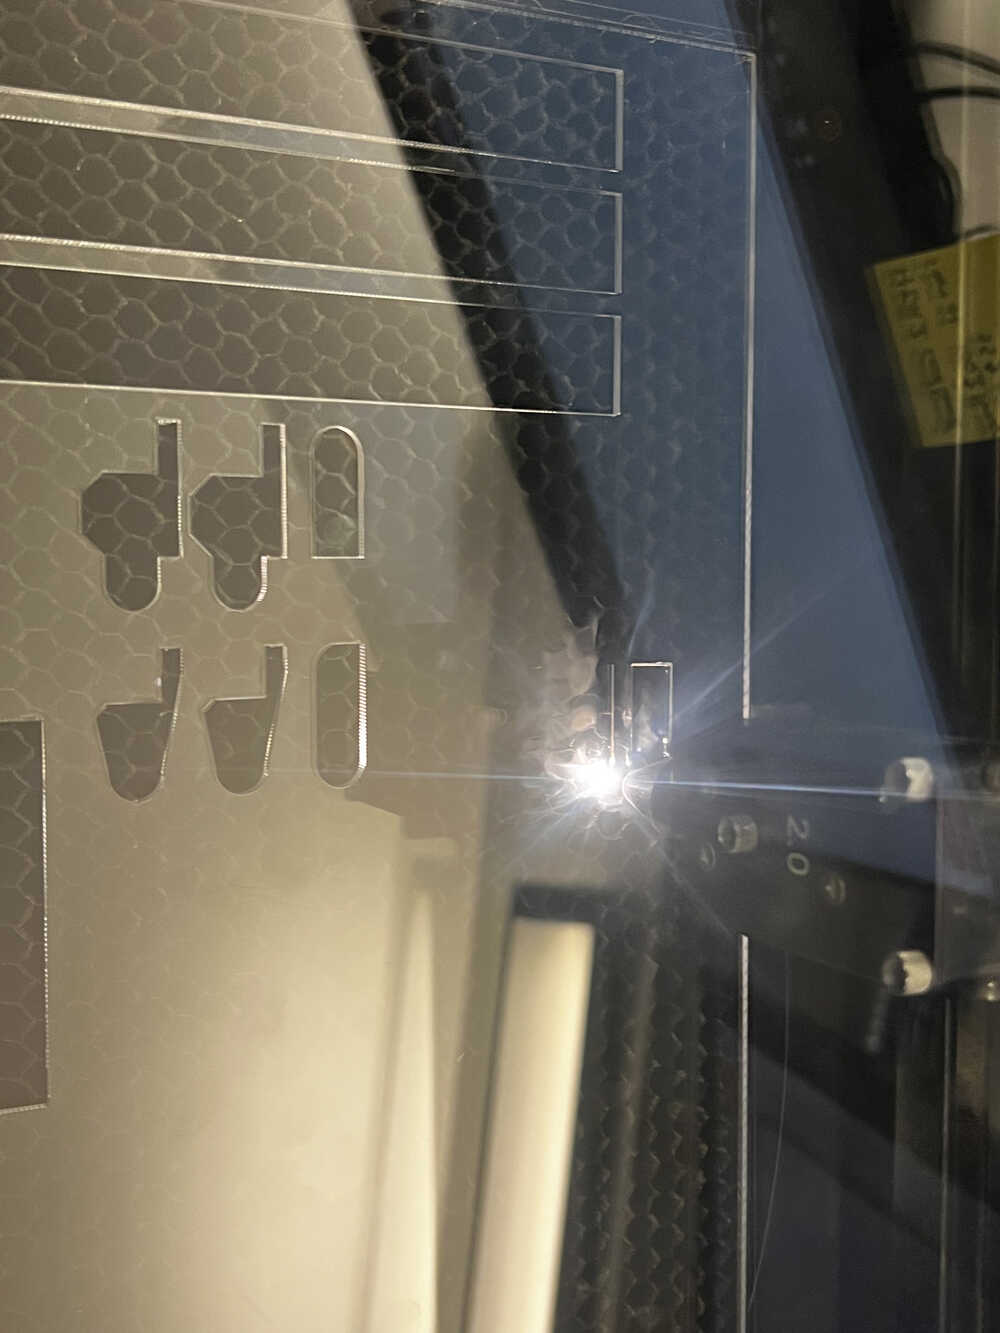
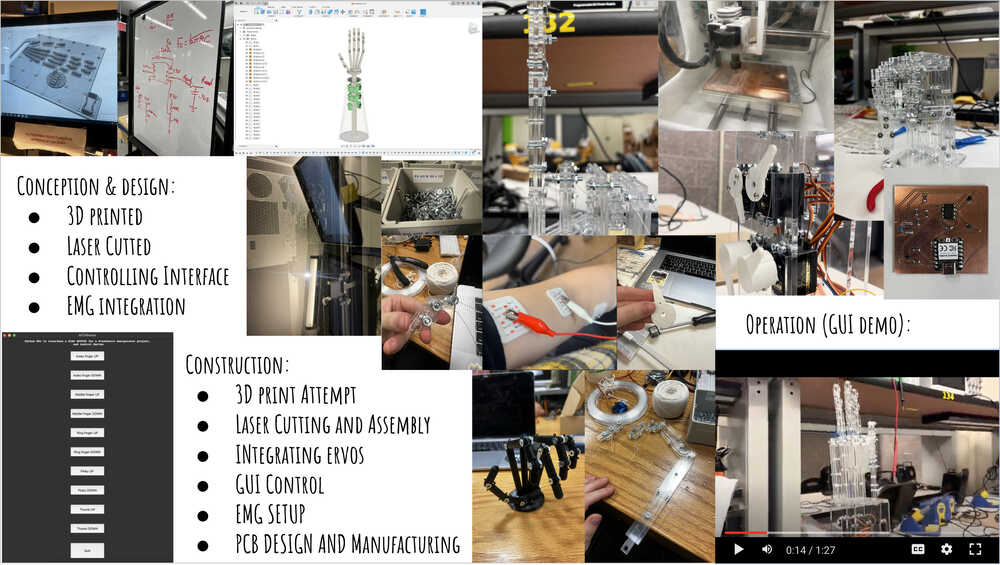
A: This whole page described my design and manufacturing journey, but to keep it brief - I designed several iterations of the body of the robotic hand (3D printed and lasercutted), PCBs for control (EMG and Application Interface) and actuation (Servo Motors), and a computer interface for control (Interface).
My manufacturing files and code is linked along the description of the process and duplicated at the very end of this page.Q: What materials and components were used? Where did they come from? How much did they cost?
A: My answer would definitely vary depending on whether I need to count the ones which were used for development, or just the final product. Let's add the R&D costs to the final product costs and assume that tool usage was free (which is definitely not the case in real life, but also just putting the price of the whole machine doesn't feel reasonable). Here is a spreadsheet with the cost and approximate breakdown. The most pricy ones were clear acrylic, microcontrollers, servos, bolts, but overall it all summed up to 85$, which is pretty good for a total price of the product. ALL of the coponents listed above came from the EDS lab, which was very convenient. -
Project Presentation (continued)
Q: What parts and systems were made?
A: The physical structure of the robotic hand, actuation system (servos), two PCBs, Arduino code, EMG system, and a computer interface.Q: What processes were used?
A: I used 3D modelling, 3D printing, 2D modelling, laser cutting, milling, soldering, coding, assemblying, debugging, and testing.Q: What questions were answered?
A: My main objective was to dive into prostetics as a system, and understand what are the bottlenecks and how does the whole process work together. The few other questions were:
1. Can I use artificial muscles to control the system? In my head I was considering amplifying the muscle signal, so that maybe the thread gets heated enough but to the safe temperature, and flexes muscles. Didn't work, main reason: too slow.
2. Can I use EMG to control the system? I was hoping to get a signal from the forearm, and then use it to control the system. I was able to get a signal, but it was weak and unreliable. So I kinda can, but I needed more careful denoising and maybe EMG sensors.
3. Can I use a computer interface to control the system? Yes, I can, and it is reliable and easy to use.
4. Can I use just 5 servos to actuate the hand or do I need all 10? I was able to use just 5 and design it so that it was enough.Q: What worked? What didn't?
A: Final design worked. Controlling hand from GUI worked. Using EMG didn't exactly work. Using just 5 servos worked. 3D printed model didn't exactly work but probably can be iterated on.Q: How was it evaluated?
A: The final demo was an evaluation of my work. Can I actually control all the fingers of the hand in some way? Yes, from the GUI I designed.Q: What are the implications?
A: I am actually curious to talk to Biomechatronics group to see if they have any use for my system. I think it is a good start for a prosthetic system, and I would be happy to see it being used in some way, although I doubt that it has anything drastically novel. It feels at this point that it was a great time self-learning, but for more global impact I should rather join an existing prosthetic project than make one from scratch.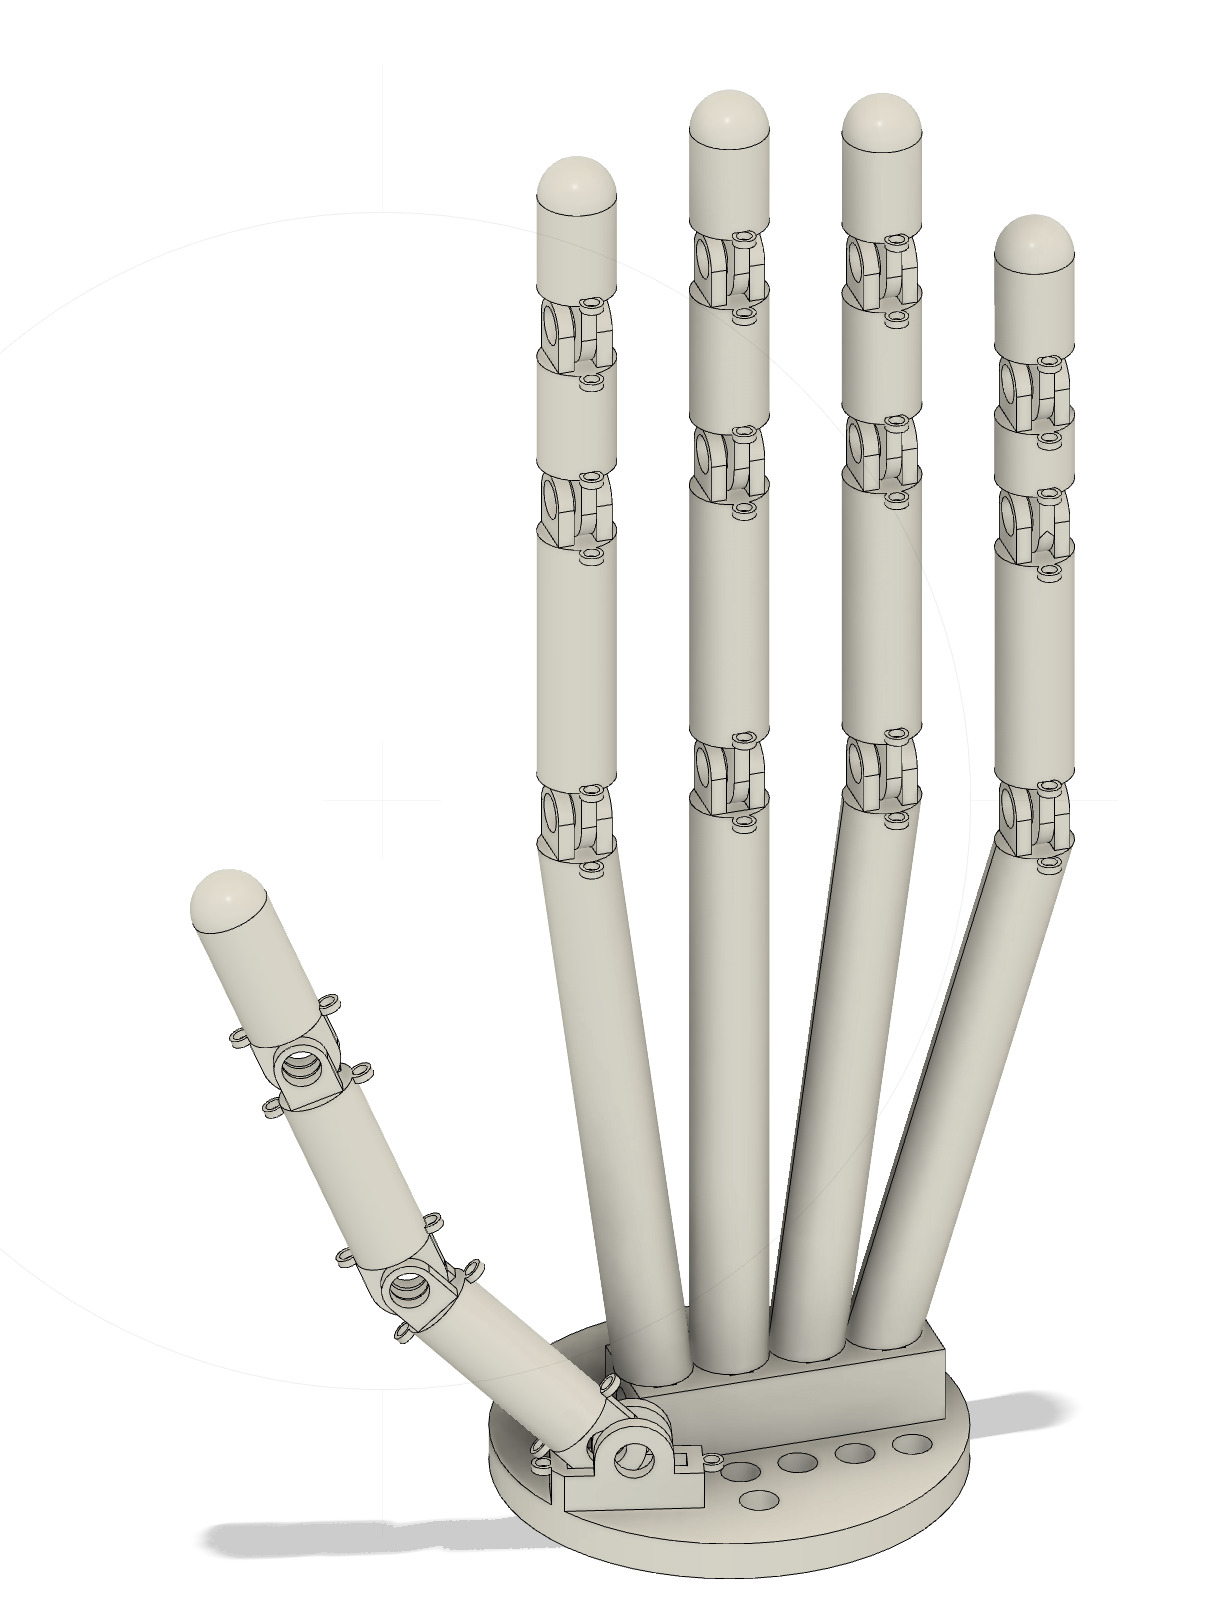

-
Project Presentation (continued)
Q: Prepare a summary slide and a one minute video showing its conception, construction, and operation.
A: Please find them linked here: Summary Slide, Demo, and Final Presentation, and at the right.
Q: Your project should incorporate 2D and 3D design, additive and subtractive fabrication processes, electronics design and production, embedded microcontroller design, interfacing, and programming, system integration and packaging.
A: 2D design was for lasercutting, 3D design was for connectors from fishing lane to servos and one of the first iterations; additive fabrication was 3D printing and subtractive process was lasercutting and PCB milling; electronics design and production was for EMG and servo control; embedded microcontroller design, interfacing, and programming was for servo control and computer interface GUI; system integration and packaging was embedded in a course of development, but it was probably linkage from making servos move to incorporating them in structure, and constructing a communication computer interface GUI; making slots for servo motors is part of packaging.
Q: Where possible, you should make rather than buy the parts of your project.
A: I made all the parts of the project, except for the servos, sensors and microcontrollers, which I got from the EDS lab.
Q: Projects can be separate or joint, but need to show individual mastery of the skills, and be independently operable.
A: I did the project individually.
Q: Present your final project, weekly and group assignments, and documentation.
A: This website is probably the most extensive documentation of my project except from my head :) Please let me know if anything is missing or confusing - I am trying my best to keep it up to date and very detailed for easy reference in the future. -
Manufacturing Files
Finally, I just wanted to link all the manufacturing files together so that it is easier to access them.
- 3D printed iteration of the hand (STL)
- Laser Cutting DXF (fingers)
- Laser Cutting DXF (base)
- Laser Cutting DXF (forearm)
- Servo connectors to fishing lanes, STL
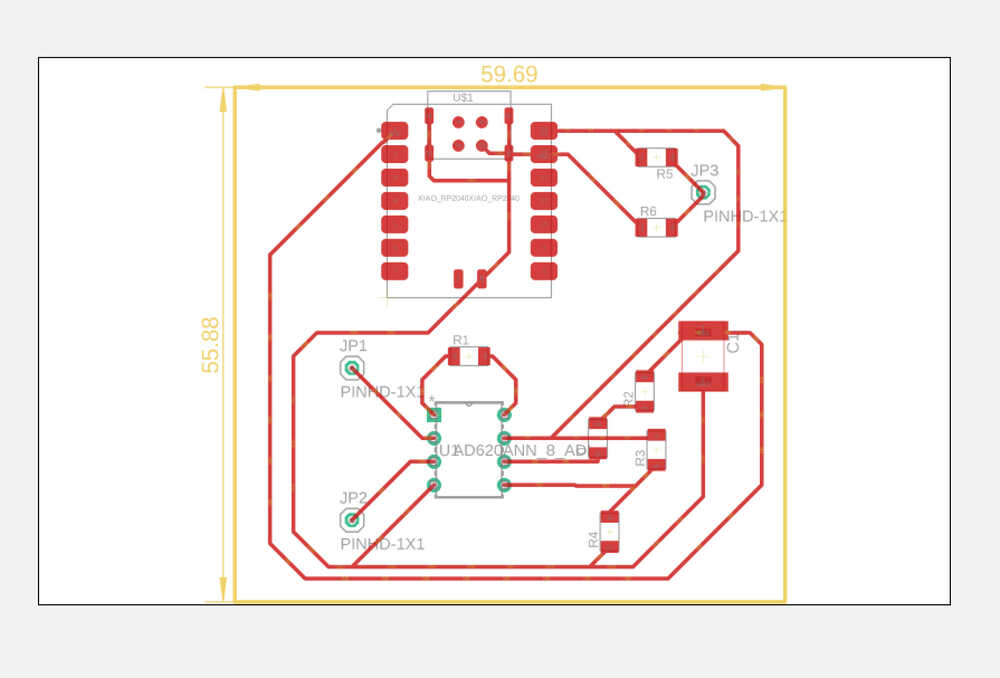
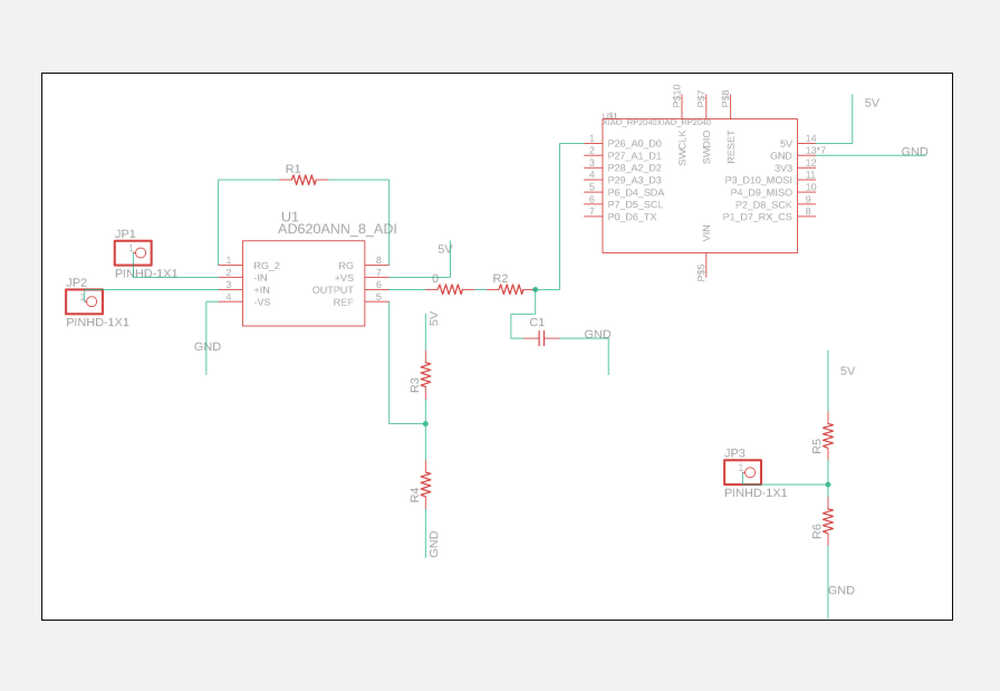
- Servos Xiao-RP-2040 BRD file for PCB
- Arduino File that controls servos when launched together with GUI
- GUI Python code (for interface control of fingers)
- EMG Fusion File for circuit print
- EMG Arduino Code for reading signal

-
.gif)
Keep Making :)
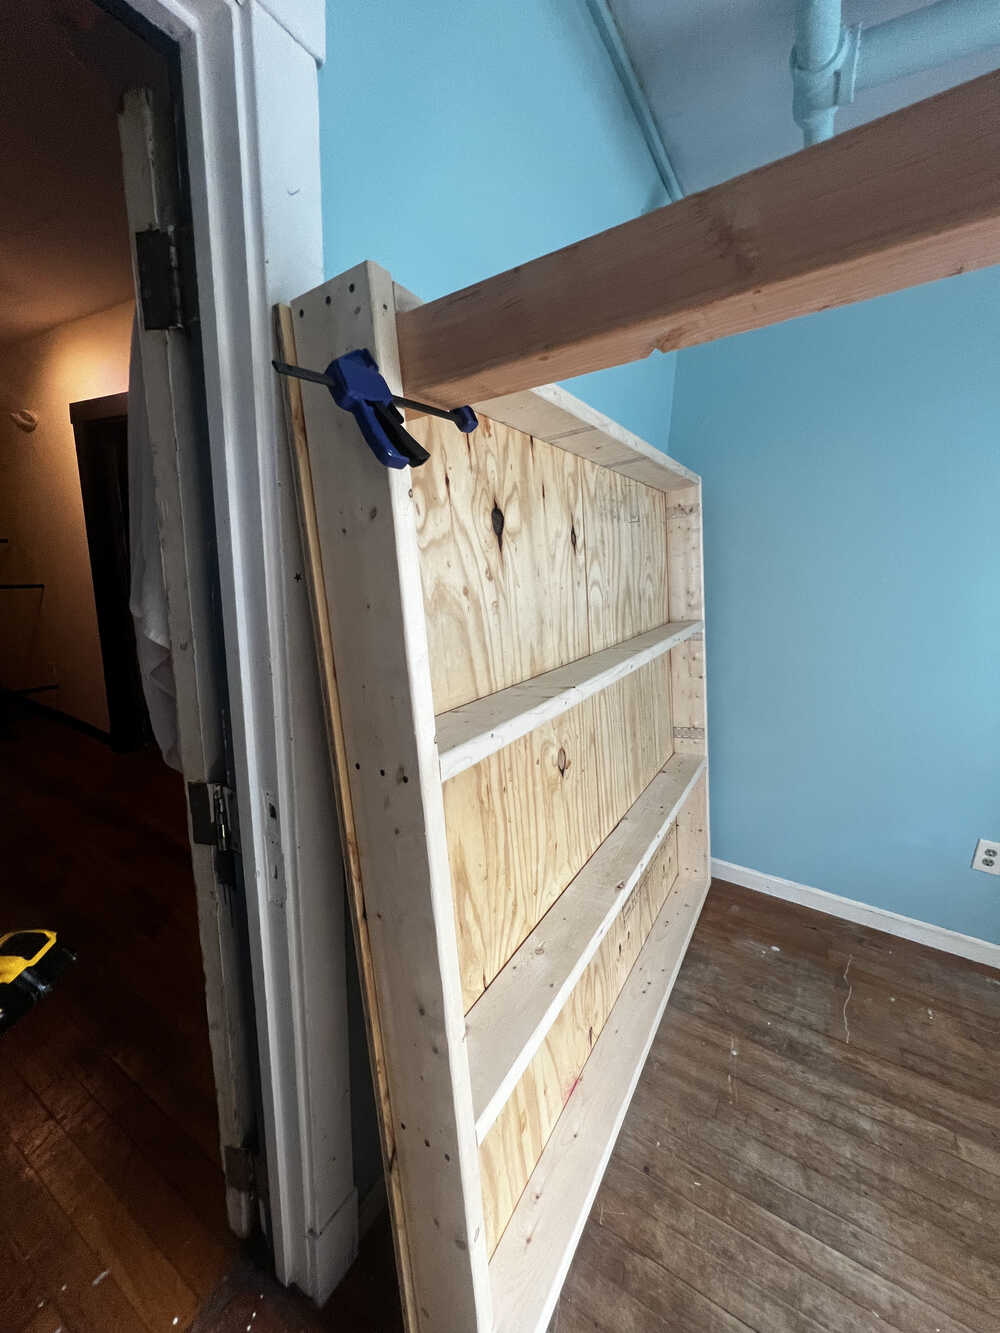
Aside from the class projects, I have been making things. I have built a loft bed from scratch, lasercutted acrylic for a different project, and I believe that the desire to keep building will stay with me.
I want to thank everyone who made this class possible, with separate thanks to Anthony and Maaya, ChatGPT and Github Copilot, who supported my learning process this semester!