variable length coffee table:
This week's assignment was to make something big. I knew right away that I wanted to use the ShopBot (a CNC mill with a 5' by 10' bed! wow!). The biggest obstacle I tackled at the beginning was where to store something big. As an undergrad thousands of miles from home, I only have a room in a college dorm. So after hours of CADing and brainstorming, I came up with the perfect solution.
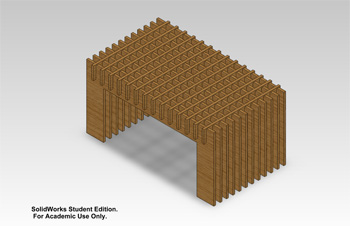
I made a variable length coffee table. It's a table that can be as small as 1 foot by 2 feet, or as large as 12 feet by 2 feet.
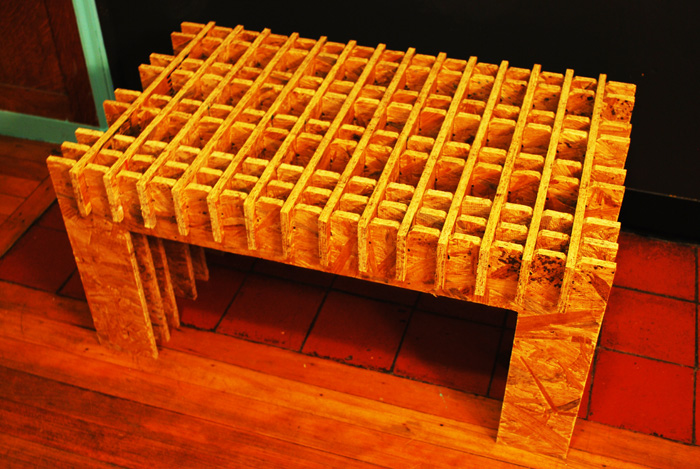
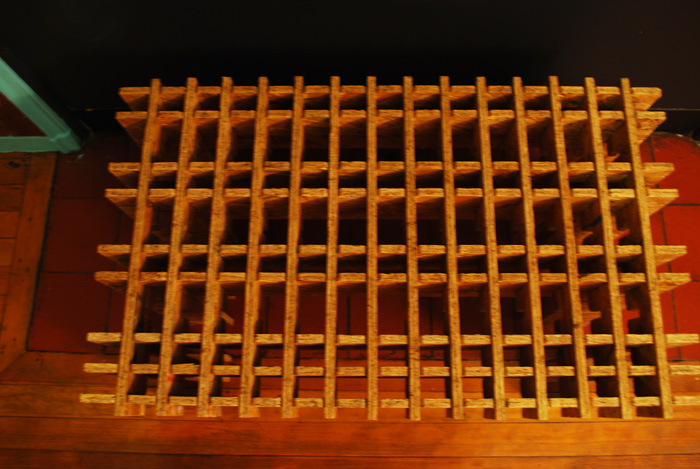
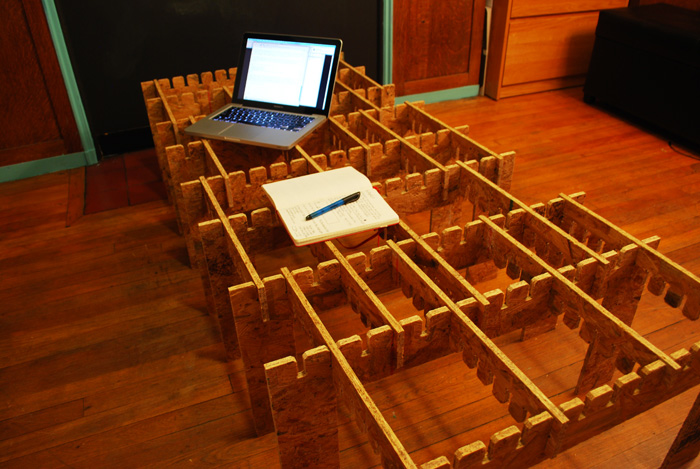
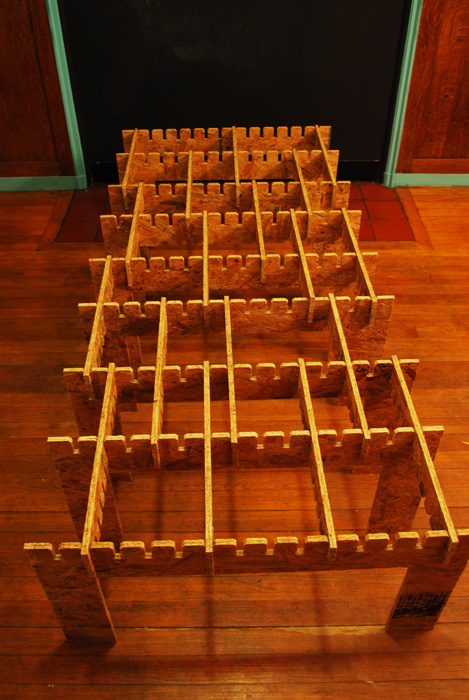
It's a very simple design. It only has two components- the legs and the runners. The legs provide the main structure of the table, and the runners connect them and hold them in place. The two pieces fit in place when they are perpendicular to each other. Each set of legs has 14 slots along the top, and each runner has 12 slots. The closest the legs can be is 1 inch apart, so the smallest length the table can have is 12 inches. The farthest the legs can be apart is 12 inches, so the table can be up to 144 inches (12 feet) long. There are many more runners than legs so that the runner can fill the large gaps created whenthe legs are far apart and maintain the functionality of the table.
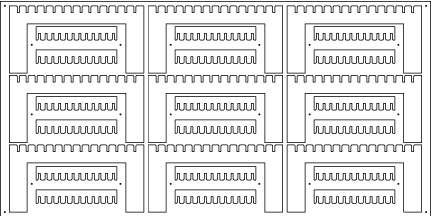
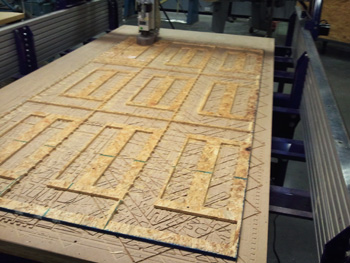
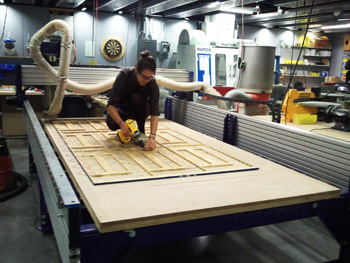
This week, however, I only made 9 sets of legs and 18 runners, because that was all I could fit in a 4 foot by 8 foot board of OSB. In the future, I will make the remaining 3 sets of legs and some more runners.
This is what the components look like:
Solidworkd Assembly rendering of the 1 foot by 2 feet congifuration. The legs are spaced 1 inch apart:
the fabrication process:
I started by making a few sketches by hand. I started with the idea that I had to have 12 slots ot the runners becuase 12 is a multiple of 1, 2, 3, 4, 6, and 12, so the legs could be spread apart by any of these distances in inches. In practice, these distances workd well because the ends of the runners match up perfectly with the leg components. In pratice, I can also space them out 5 and 7 inches apart, but the runners won't necessarily start or eng at a leg piece.
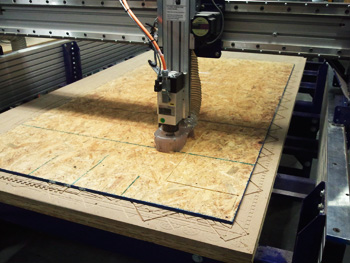
Then I went on to model the two parts in Solidworks, and I made assemblies of different possible configurations. When I was happy witht he parts, I created a layout that would allow me to print the maximum number of pieces on a 4 feet by 8 feet board. I saved this as a DWG file, used Rhino to save it as an Autocad R12 drawing (Lines and Arcs), and finally exported it to Partworks, the software used for the ShopBot. Here, I made the toolpaths and I was ready to go!
The ShopBot is incredible. It as great accuracy, and has a bed of 5 feet by 10 feet. It's huge! The CEO of the company that makes them is so excited about them, that he sells them for a very good price because he wants everyone to have a ShopBot. So I even fantasized about buying one and putting it in my dorm room. Since the bed is so big, I could just sleep on it and it would fit in my room.
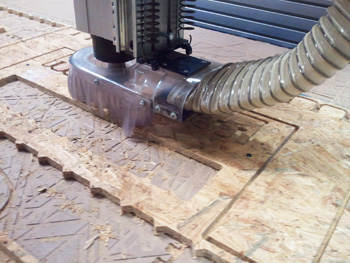
Here are the settings I used for OSB:
- Spindle speed: 100 rmp
- Feed rate: 100 inch/min
- Plunge speed: 60 ips
- Cutting depth: 0.465 inches (material thickness = ~0.45 inches)
So I used a 4 feet by 8 feet sheet of OSB, or Oriented Strand Board, a wood product made by layering strand of wood in specific orientations and ound together with wax and resin adhesives. It has a rough and rustic esthetic that eventually grew on me. I decided not to paint it becuase I want to keet it honest, just as it came out of the ShopBot. No adhesives, no paint. I did sand down all the edges. The side of the parts that foced down was ofted rough and full of splinters. This also has to do with the nature of the OSB.
Sunday morning breakfast!