objects of constant width:
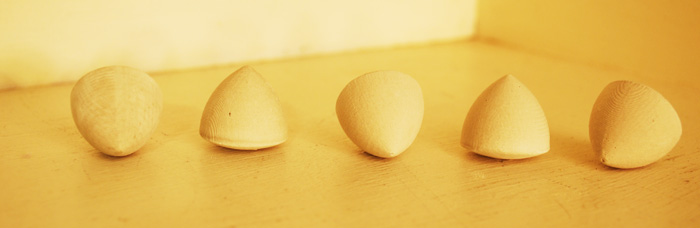
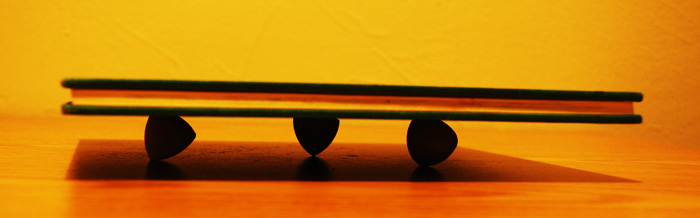
This week I molded and casted objects of contant width. These are very special 3-dimensional objects. No matter what orientation you place them in, they will wlays have the same maximum height, or width. Despite having edges and vetices, they behave like spheres.
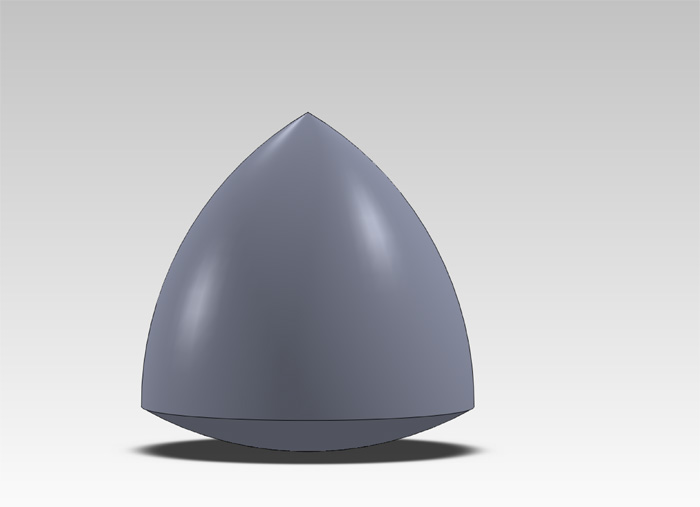
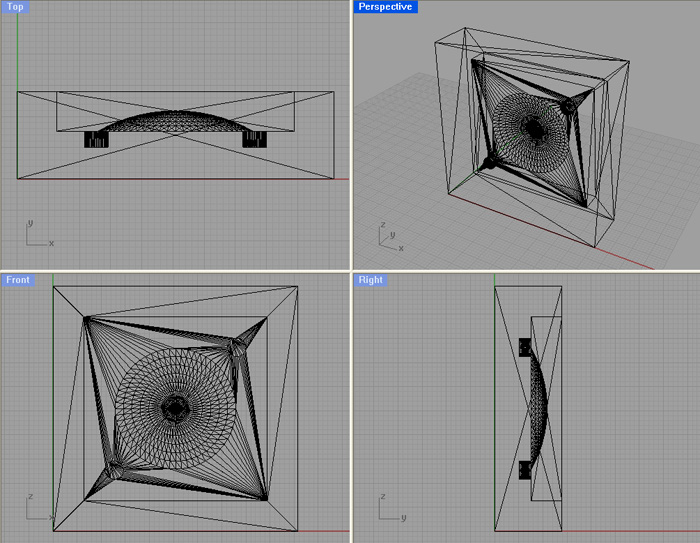
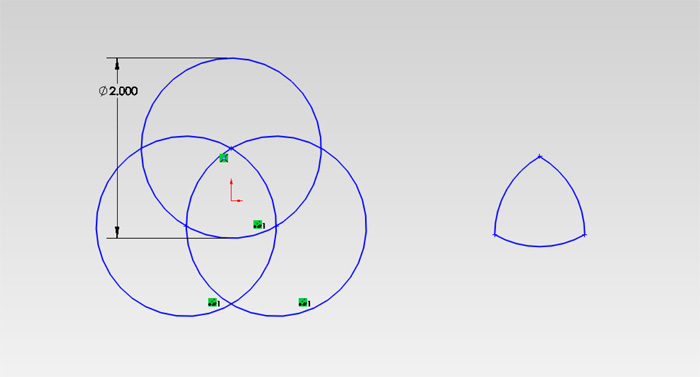
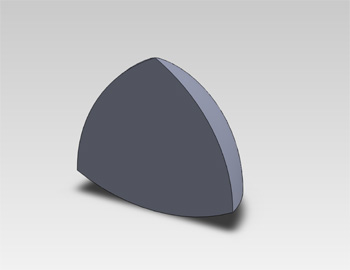
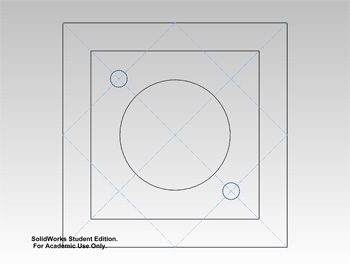
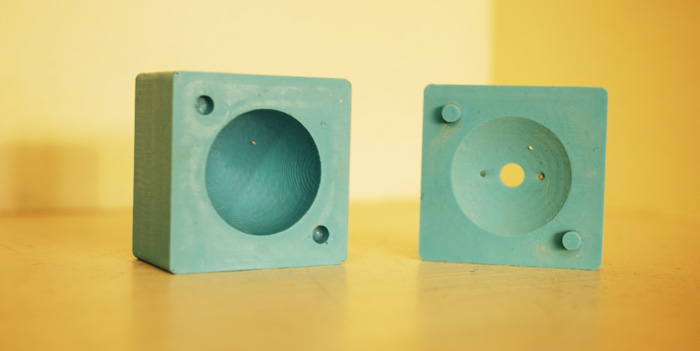
There are several different such objects. The one I made comes from the Reuleaux Triangle, which is the intersection of three circles. This curved triagle has a constant diameter, no matter where you measure it. This resultant shape is then revolved around its center axis to create a 3D shape. You can see that the cross section of the second image corresponds to the Reuleaux triangle of the first image. They third image shows a top view of the was mold and key placement withinn it.
I made this out of a two-part mold. There was a natural parting line at the edge between the cone and the bottom curce, so that's where I made the two molds meet.
mold making:
This week we followed a molding sequence that involved three steps. Making a hard positive, a soft negative, and finally a hard cast positive of our object.
Ultimately, our pieces were to be cast out of DryStone or HydroStone, preferably. In order to be able to cast something so rigid and strong, we need a soft mo ld. Because we can't machine a soft mold, we begin by machining a positive of our object in a high-density wax with a hight heat resistance. This positive of our object also includes any keys that will be present to hold the soft molds together or any holes needed for casting/ air escaping. I designed both the parts and the first positive molds in SolidWorks, and saved them as .stl (stereolithography) files. I made the larger cavity using the Rolland MOdella. It was very small and temperamental. I made the other part on the ShopBot, which took longer to set up but ran much faster than the Modella did.
Once the first positive mold was ready, we made soft negative molds by casting a two-part silicone called Oomoo. This Oomoo had to be measured to the right proportions on a gram scale, and had to be mixed very carefully for a while. Ideally, there will be no air bubbles in the silicone. To avoid air bubbles, stir the mixture by shearing slowly and pour the silicone in a very thin stream, which makes any remaining air bubbles pop on their way down. This silicone takes 75 minutes to dry. You need 130 parts of Part B (blue container) to 100 parts of Part A (yellow container). Since the final object will be made of hard material, we have to make a soft and flexible negative mold in order to take the pieces out.
Finally, we cast my objects out of a very hard plaster/ cement material called Hydrostone. Becuase I would be placing multiaxial stresess on the ojbects, I chose the hardest material available. Hydrostone requrires 22 parts water for 100 parts powder. The result is very viscous, which sometimes made it very difficult to pour into my mold. The advantage is that Hydrostone only has a 20 minute curing time.
The wax mold has two added features. It has keys, which are small extrusions on the base of one mold and matching cut extrusins on the base of the other mold to help the silicone molds fit together perfectly. Here, I made the extrusions small cylinders. The second feature are three cylindrical extrusions coming out of the surface of the bottom mold. The largest of these will become the pour hole in the silicone mold, and the other ones will become the spew holes, which allow the air to escape while the Hydrostone is being poured in. These holes ended up causing small deformations on the curve. Spew holes would create little extrusions, just like in the wax mold. The pour hole would sometimes cause an indent and sometimes a small bump. I would simply smooth all these out manually once the hydrostone was done curing.
Mesh of the TOP part of the mold (.stl file):
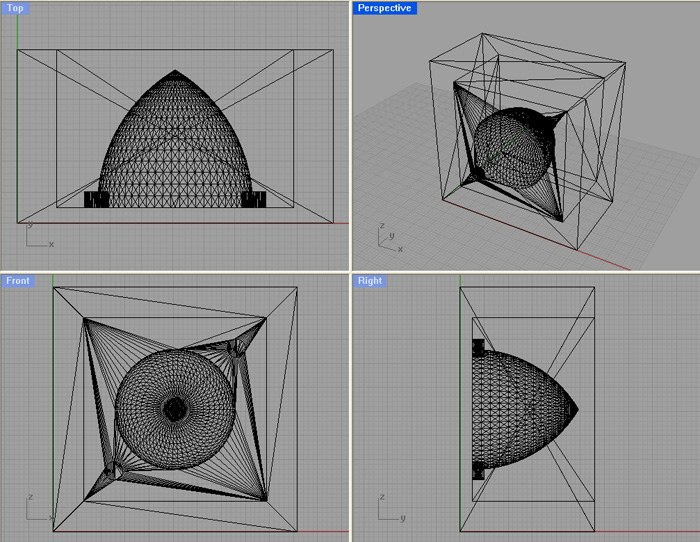
Mesh of the BOTTOM part of the mold (.stl file):