Input Devices Adventures :
The approach
This week I took a different apporach to the assignment. Usually, I get started as soon as possible, to make sure I give myself time to complete the assignemnt and then to try something new. but this week I really wanted to make something practical, something that I could really use on a daily basis. I spent all of Monday night learning about all the different kinds of sensors. I also looked through many projects from previous years to get ideas of what I could do with them. My favorite was by far Matt Blackshaw's TouchPad. I examined his board and schematic and all his code.
I decided that I wanted to make a portable tablet. I have a Wacom tablet that I use very often, but I don't like to carry it around. So I spent some time reading and learining about multiplexers, hoping to implement Matt's design but on a larger scale. Matt's design used up all the pins available on the Tiny 44, so I would use multiplexing to stich several of these boards together. I wanted to put the vinyl cut copper on a flezible transparent material, so that you can roll it up to store it, or put it on any surface.
Test Sensor:
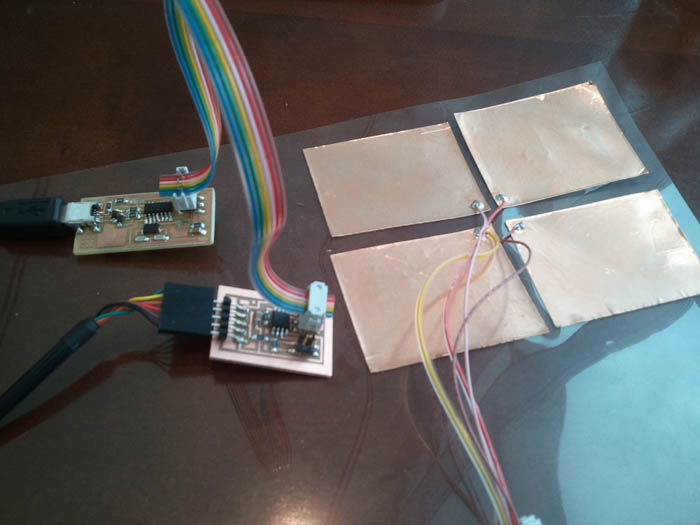
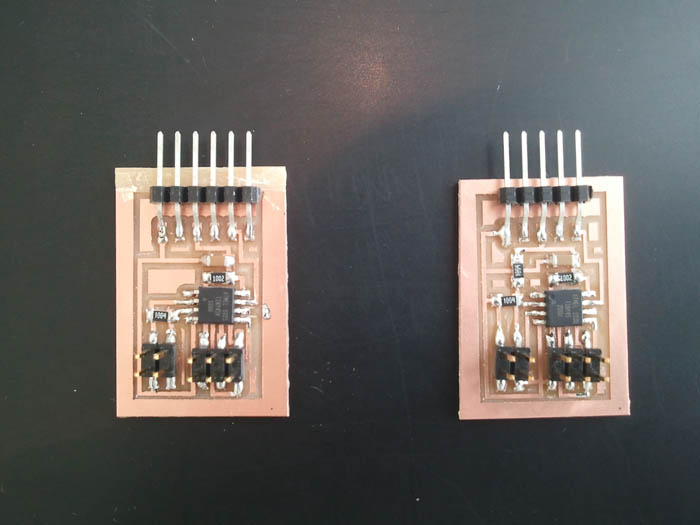
So first I started just making Neil's step load response board. The milling and stuffing went well, or so I thought. When I programmed my board, I unknowingly also created fuses. Because I did not have and external resonator, I fried my microprocessor and rendered it lifeless. So I replaced the Tiny 45 with a new one, hoping that would solve the problem. Unfortunately, I kept running into errors, telling me to check my connections. I concluded that there was a problem with my board that I could not detect visually or with the tools I had, so I made a new board. This time. I was able to program it just fine. I milled and stuffed my board in record time.
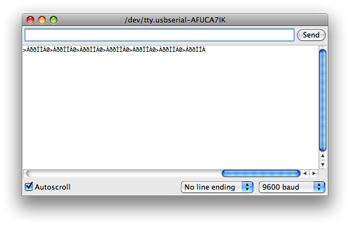
The new problem I encountered involved the python visualization. I was able to load it and display it, but it would freeze almost immediately. I had to kill it from Terminal in order to close it. After checking the code, checking my board, and trying the ribbon cable in every possible configuration, I checked what my serial input was in Arduino. Instead of numbers, I received a constant string of symbols that remained unchanged when I disconnected my sensor. With the help of some classmates, I made some adjustments to my code. But when I tried to reupload it to my board, my entire computer froze. After a while, it started making ticking noises, so I shut it down. Unfortunately, that was the end of my adventure up to now.
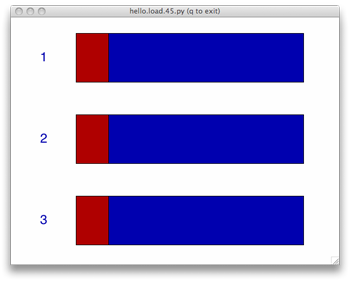
I was able to create the visualization, but I was not getting any numerical input:
Finally, after checking all the files, I realized I had hadn't changes the Tiny 44 to a 45 on the Makefile, after I copied it from a previous week. And voila!
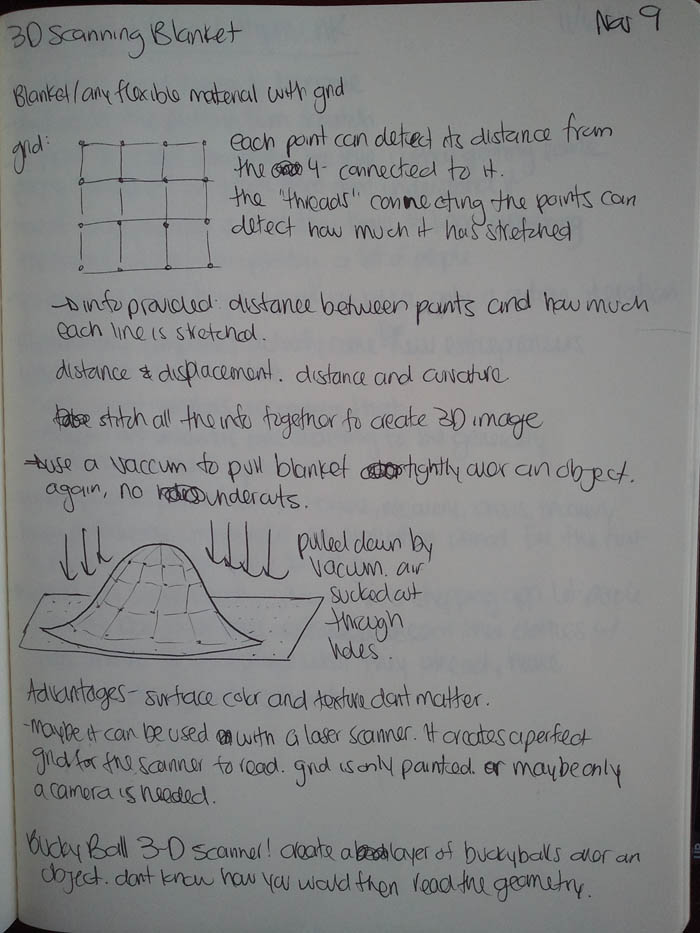
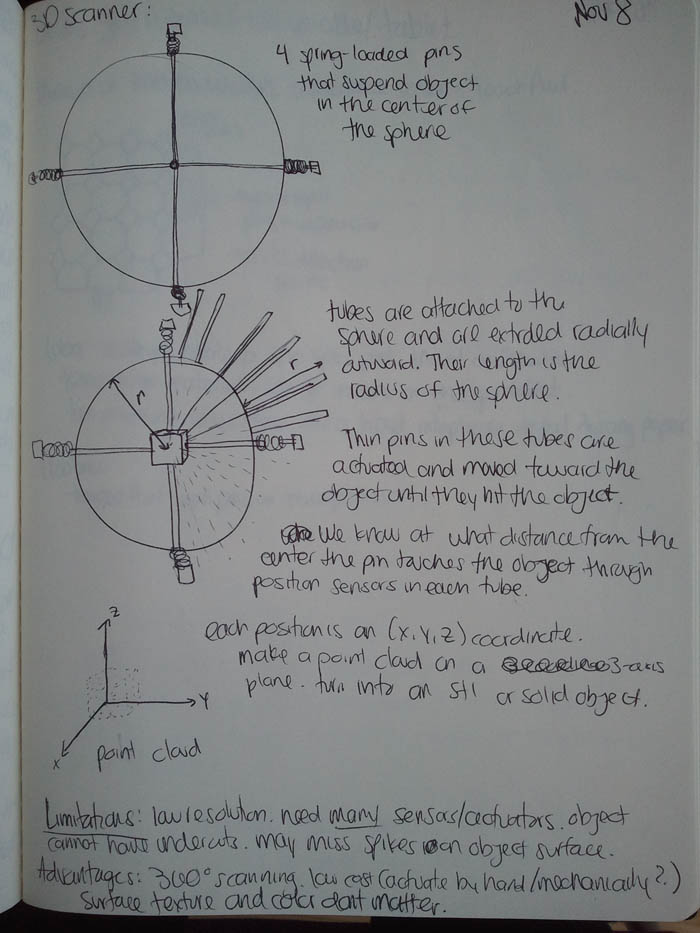
I also spent many hours this week learning and brainstorming. I learned about sensors, I read about multiplexing, I experimented with some processing, and I came up with some fun ideas. After using the 3D scanner last week, I was frustrated by the difficulties of scanning objects with shinny or fuzzy textures, and colors that were too light or too dark. I thought of two ways of making 3D scans. One invloves a blanket that wraps around the object. It has a grid of points that hac tell how far apart they are from each other and how much stress there is betweent them. The second involves an object suspended in a hollow sphere. Hundreds of pins of know lenght are then pushed toward radially inward. Knowing how far they moved before touching the object would provide an (x,y,z) or an (x,r,theta) coordinate. Putting all these coordinates in a 3D plane would create a point cloud of the object.