FabISP v2.3
-
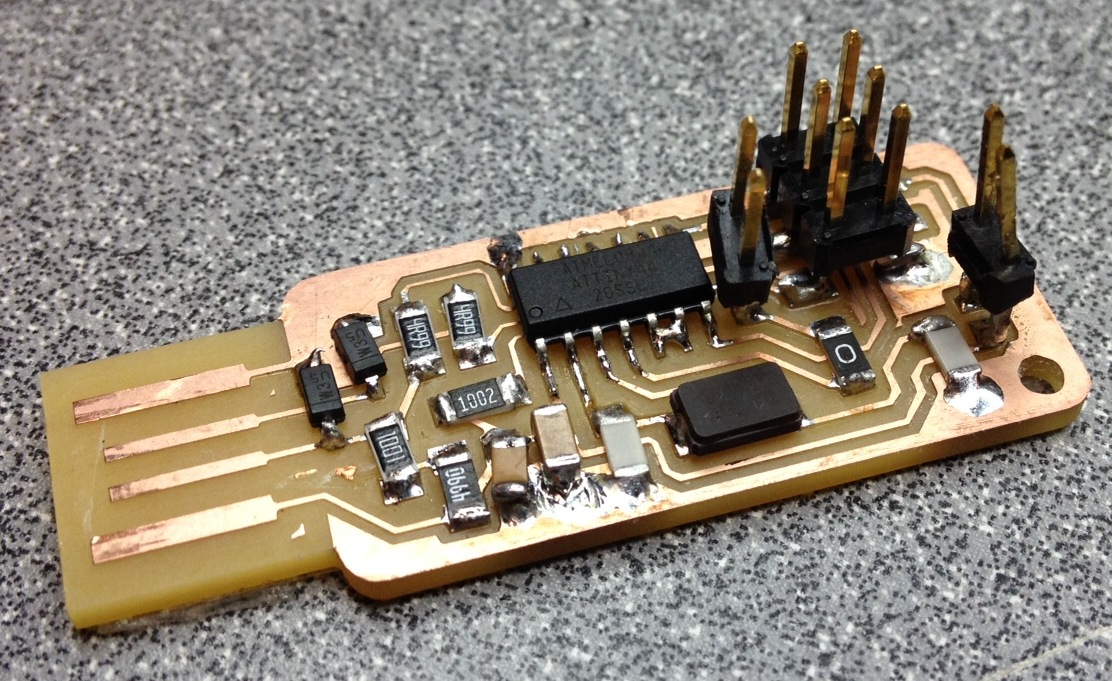
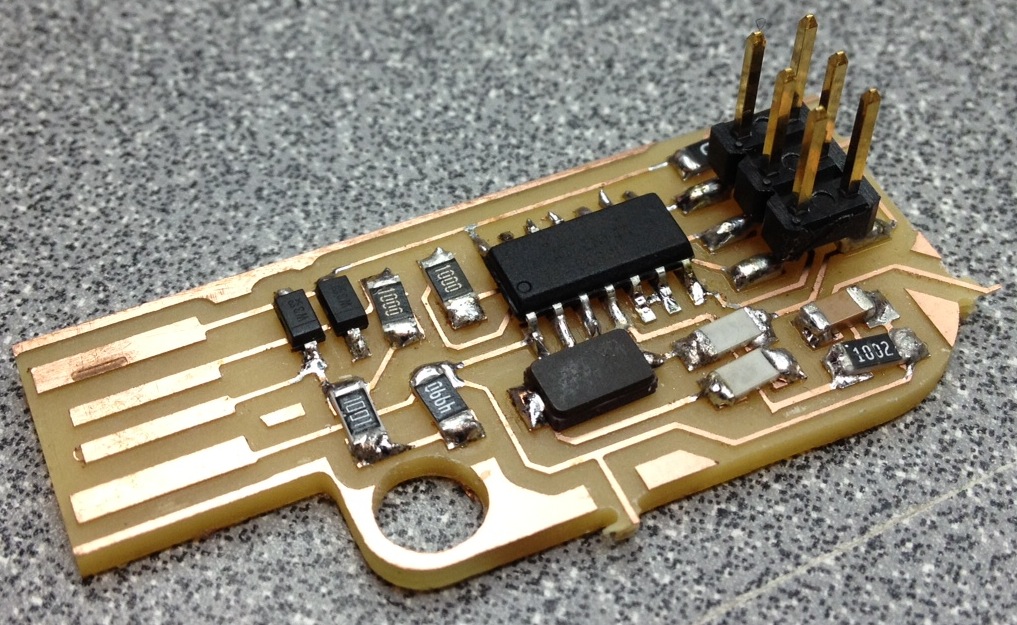
Stuffed FabISP v2.3
In order to make prototyping easier for the FabISP, I decided to cut a 4x0.1 header in two to replace the jumpers on the board. I bent the feet straight to minimize the footprint of the header as the original design does not accomodate for them. I also try to ensure that the solder wicks all around the ends of the components and that I am able to see a clean connection wicking on the side.
-
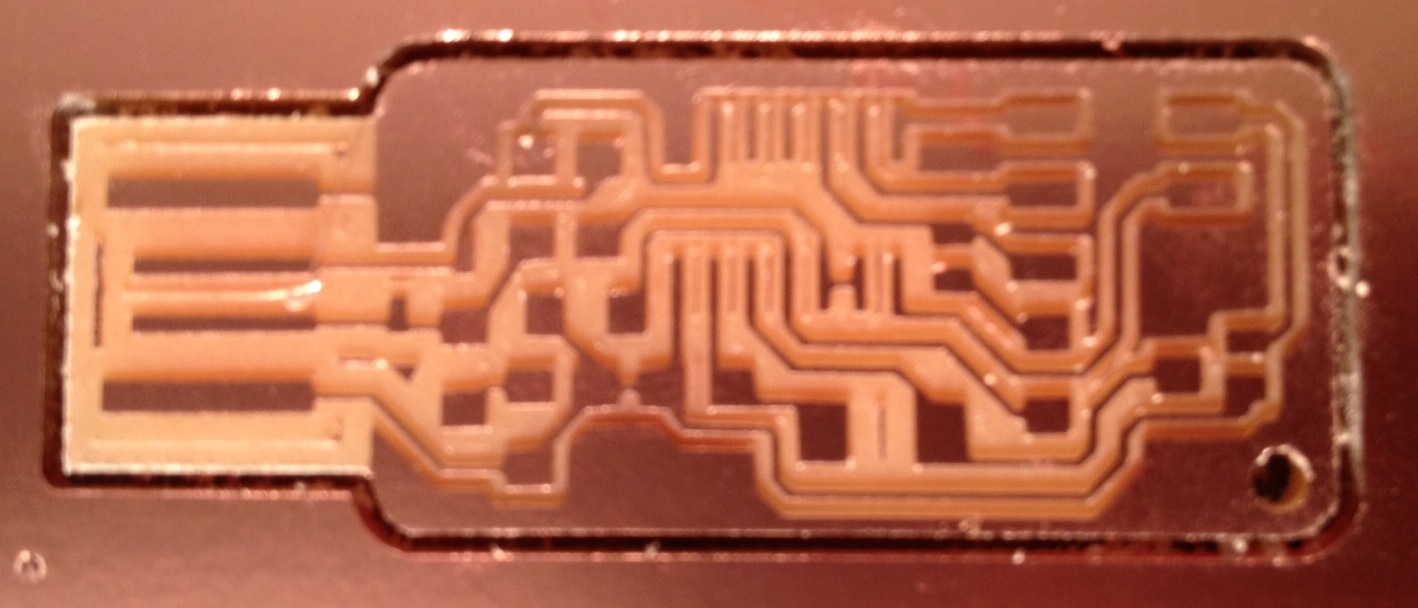
FabISP hot off the Modela
Note the difference between the two pictures, you can notice I have carefully cut out some leftover copper between different traces. I used an exacto knife to that, making sure I was not destroying any functional traces.
-
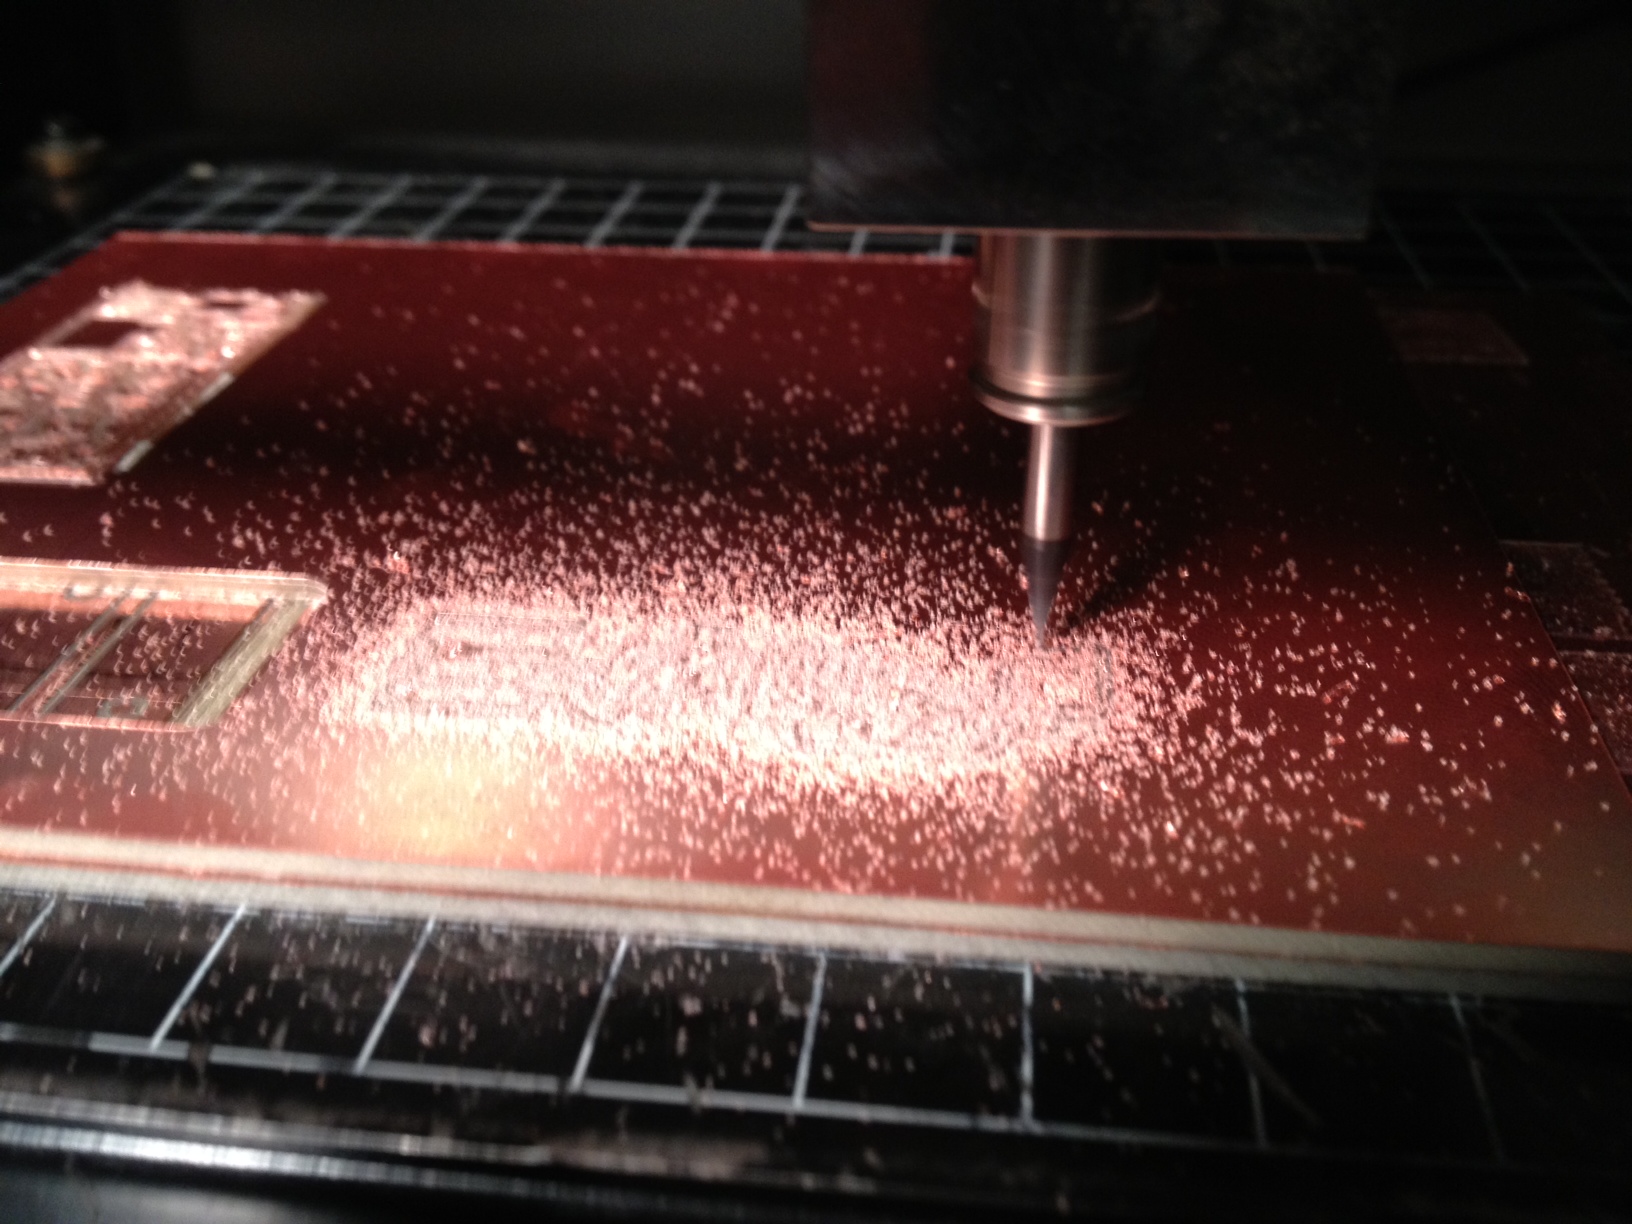
Milling process
You can see in this picture that the dust being generated by the 1/64" milling is pink. This generally means that the traces are being cut correctly and that you are not just polishing the copper layer.
SnapISP
-
Stuffed SnapISP with programming jumpers snapped off
-

Completed SnapISP
Firmware ZIP fixed for AVR-GCC 4.7.0
AVR toolchain for Mac OS
Install Homebrew
Homebrew is a great packet manager for Mac OS. It allows you to easily install, update and remove packages and their dependencies. You will need to download and install at least the XCode Command Line Tools (171MB, requires AppleID, and then search for "command line tools") or full XCode (much bulkier)
Once you have installed one of the XCode tools, you can install Homebrew by running the following command in your terminal:
ruby <(curl -fsSkL raw.github.com/mxcl/homebrew/go)
Once installed, you should check that your specific system does not need to be altered in any way for brew (short for homebrew) to run correctly. Do this by running the following command and follow instructions that may appear.
brew doctor
Heads Up! If you have TrueCrypt installed on your machine, you may get the following errors that you should ignore. Following brew's suggestion of removing those files will break TrueCrypt.
Warning: Unbrewed dylibs were found in /usr/local/lib.
If you didn't put them there on purpose they could cause problems when
building Homebrew formulae, and may need to be deleted.

Unexpected dylibs:
    /usr/local/lib/libmacfuse_i32.2.dylib    /usr/local/lib/libmacfuse_i64.2.dylib    /usr/local/lib/libosxfuse_i32.2.dylib    /usr/local/lib/libosxfuse_i64.2.dylib
Warning: Unbrewed .la files were found in /usr/local/lib.
If you didn't put them there on purpose they could cause problems when
building Homebrew formulae, and may need to be deleted.

Unexpected .la files:
    /usr/local/lib/libosxfuse_i32.la    /usr/local/lib/libosxfuse_i64.la
Warning: Unbrewed .pc files were found in /usr/local/lib/pkgconfig.
If you didn't put them there on purpose they could cause problems when
building Homebrew formulae, and may need to be deleted.

Unexpected .pc files:
    /usr/local/lib/pkgconfig/osxfuse.pc
Installing AVR tools
Once your Brew environment is correctly installed, you need to obtain and install the AVR tools that you will need to progrm your board, and in the future use your board to program other microcontrollers.
First however, we need to obtain the correct formulae for brew that contain up-to-date instructions and links to install these tools. This is done through:
brew tap larsimmisch/avr
Now we can install the avr-libc and avrdude packages and their dependencies through brew very easily:
brew install avr-libcbrew install avrdude
Upgrading the ISP firmware
It turns out that the latest version of the AVR compiler on brew (4.7.0) doesn't support PROGMEM instructions without defining them as a constant (error description). You can check which version of the avr compiler you installed using:
brew info avr-gcc
To fix that I replaced every occurence of the PROGMEM instruction with const PROGMEM in the following files of the original firmware folder:
usbdrv/usbdrv.c
usbdrv/usbdrv.h
For convenience, I provide the upgraded version of the firmware in the zip file above.
Flashing the Firmware onto your ISP
Navigate to the unzipped firmware folder in terminal. Assuming all AVR software tools have been installed, you can run the following commands in sequence to get your ISP programmed. Don't forget to jump the connection to allow programming to happen. This is different for different hardware board. On the FabISP v2.3, I just held a piece of wire between the each of the two header pins that I soldered at positions J1 and J2 (see the Fab ISP section)
make clean
make hex
make fuse
make program
Below is the output of a correct flashing. Lines starting with $ refer to typing in the terminal.
$make clean
rm -f main.hex main.lst main.obj main.cof main.list main.map main.eep.hex main.elf *.o usbdrv/*.o main.s usbdrv/oddebug.s usbdrv/usbdrv.s

$make hex
avr-gcc -Wall -Os -DF_CPU=20000000	 -Iusbdrv -I. -DDEBUG_LEVEL=0 -mmcu=attiny44 -c usbdrv/usbdrv.c -o usbdrv/usbdrv.o
avr-gcc -Wall -Os -DF_CPU=20000000	 -Iusbdrv -I. -DDEBUG_LEVEL=0 -mmcu=attiny44 -x assembler-with-cpp -c usbdrv/usbdrvasm.S -o usbdrv/usbdrvasm.o
avr-gcc -Wall -Os -DF_CPU=20000000	 -Iusbdrv -I. -DDEBUG_LEVEL=0 -mmcu=attiny44 -c usbdrv/oddebug.c -o usbdrv/oddebug.o
avr-gcc -Wall -Os -DF_CPU=20000000	 -Iusbdrv -I. -DDEBUG_LEVEL=0 -mmcu=attiny44 -c main.c -o main.o
main.c:88:13: warning: always_inline function might not be inlinable [-Wattributes]
avr-gcc -Wall -Os -DF_CPU=20000000	 -Iusbdrv -I. -DDEBUG_LEVEL=0 -mmcu=attiny44 -o main.elf usbdrv/usbdrv.o usbdrv/usbdrvasm.o usbdrv/oddebug.o main.o
rm -f main.hex main.eep.hex
avr-objcopy -j .text -j .data -O ihex main.elf main.hex
avr-size main.hex
text	   data	    bss	    dec	    hex	filename
0	   2000	      0	   2000	    7d0	main.hex

$make fuse
avrdude -c avrisp2 -P usb -p attiny44  -U hfuse:w:0xDF:m -U lfuse:w:0xFF:m

avrdude: AVR device initialized and ready to accept instructions

Reading | ################################################## | 100% 0.00s

avrdude: Device signature = 0x1e9207
avrdude: reading input file "0xDF"
avrdude: writing hfuse (1 bytes):

Writing | ################################################## | 100% 0.00s

avrdude: 1 bytes of hfuse written
avrdude: verifying hfuse memory against 0xDF:
avrdude: load data hfuse data from input file 0xDF:
avrdude: input file 0xDF contains 1 bytes
avrdude: reading on-chip hfuse data:

Reading | ################################################## | 100% 0.00s

avrdude: verifying ...
avrdude: 1 bytes of hfuse verified
avrdude: reading input file "0xFF"
avrdude: writing lfuse (1 bytes):

Writing | ################################################## | 100% 0.00s

avrdude: 1 bytes of lfuse written
avrdude: verifying lfuse memory against 0xFF:
avrdude: load data lfuse data from input file 0xFF:
avrdude: input file 0xFF contains 1 bytes
avrdude: reading on-chip lfuse data:

Reading | ################################################## | 100% 0.00s

avrdude: verifying ...
avrdude: 1 bytes of lfuse verified

avrdude: safemode: Fuses OK

avrdude done.  Thank you.

$make program
avrdude -c avrisp2 -P usb -p attiny44  -U flash:w:main.hex:i

avrdude: AVR device initialized and ready to accept instructions

Reading | ################################################## | 100% 0.01s

avrdude: Device signature = 0x1e9207
avrdude: NOTE: FLASH memory has been specified, an erase cycle will be performed
         To disable this feature, specify the -D option.
avrdude: erasing chip
avrdude: reading input file "main.hex"
avrdude: writing flash (2000 bytes):

Writing | ################################################## | 100% 0.70s

avrdude: 2000 bytes of flash written
avrdude: verifying flash memory against main.hex:
avrdude: load data flash data from input file main.hex:
avrdude: input file main.hex contains 2000 bytes
avrdude: reading on-chip flash data:

Reading | ################################################## | 100% 0.57s

avrdude: verifying ...
avrdude: 2000 bytes of flash verified

avrdude: safemode: Fuses OK

avrdude done.  Thank you.

avrdude -c avrisp2 -P usb -p attiny44  -U hfuse:w:0xDF:m -U lfuse:w:0xFF:m

avrdude: AVR device initialized and ready to accept instructions

Reading | ################################################## | 100% 0.01s

avrdude: Device signature = 0x1e9207
avrdude: reading input file "0xDF"
avrdude: writing hfuse (1 bytes):

Writing | ################################################## | 100% 0.00s

avrdude: 1 bytes of hfuse written
avrdude: verifying hfuse memory against 0xDF:
avrdude: load data hfuse data from input file 0xDF:
avrdude: input file 0xDF contains 1 bytes
avrdude: reading on-chip hfuse data:

Reading | ################################################## | 100% 0.00s

avrdude: verifying ...
avrdude: 1 bytes of hfuse verified
avrdude: reading input file "0xFF"
avrdude: writing lfuse (1 bytes):

Writing | ################################################## | 100% 0.00s

avrdude: 1 bytes of lfuse written
avrdude: verifying lfuse memory against 0xFF:
avrdude: load data lfuse data from input file 0xFF:
avrdude: input file 0xFF contains 1 bytes
avrdude: reading on-chip lfuse data:

Reading | ################################################## | 100% 0.00s

avrdude: verifying ...
avrdude: 1 bytes of lfuse verified

avrdude: safemode: Fuses OK

avrdude done.  Thank you.
A common error that I have seen when trying to set the fuse ($make fuse) is shown below. This is often due to not bridging one of the jumpers. Also, with the insertable USB key design, make sure you press down on the key to ensure contact between the pads and your USB port.
avrdude -c avrisp2 -P usb -p attiny44  -U hfuse:w:0xDF:m -U lfuse:w:0xFF:m

avrdude: stk500v2_command(): command failed
avrdude: stk500v2_program_enable(): bad AVRISPmkII connection status: MOSI fail, RST fail, SCK fail, Target not detected
avrdude: initialization failed, rc=-1
         Double check connections and try again, or use -F to override
         this check.


avrdude done.  Thank you.

make: *** [fuse] Error 1