FabSampler: Sampling data from FabECG
Using the AVR Dragon with the Arduino IDE
-
AVR Dragon
-

Modifying the box
You can cut a slot for the USB and anchor the Dragon AVR using the opposite tab
-
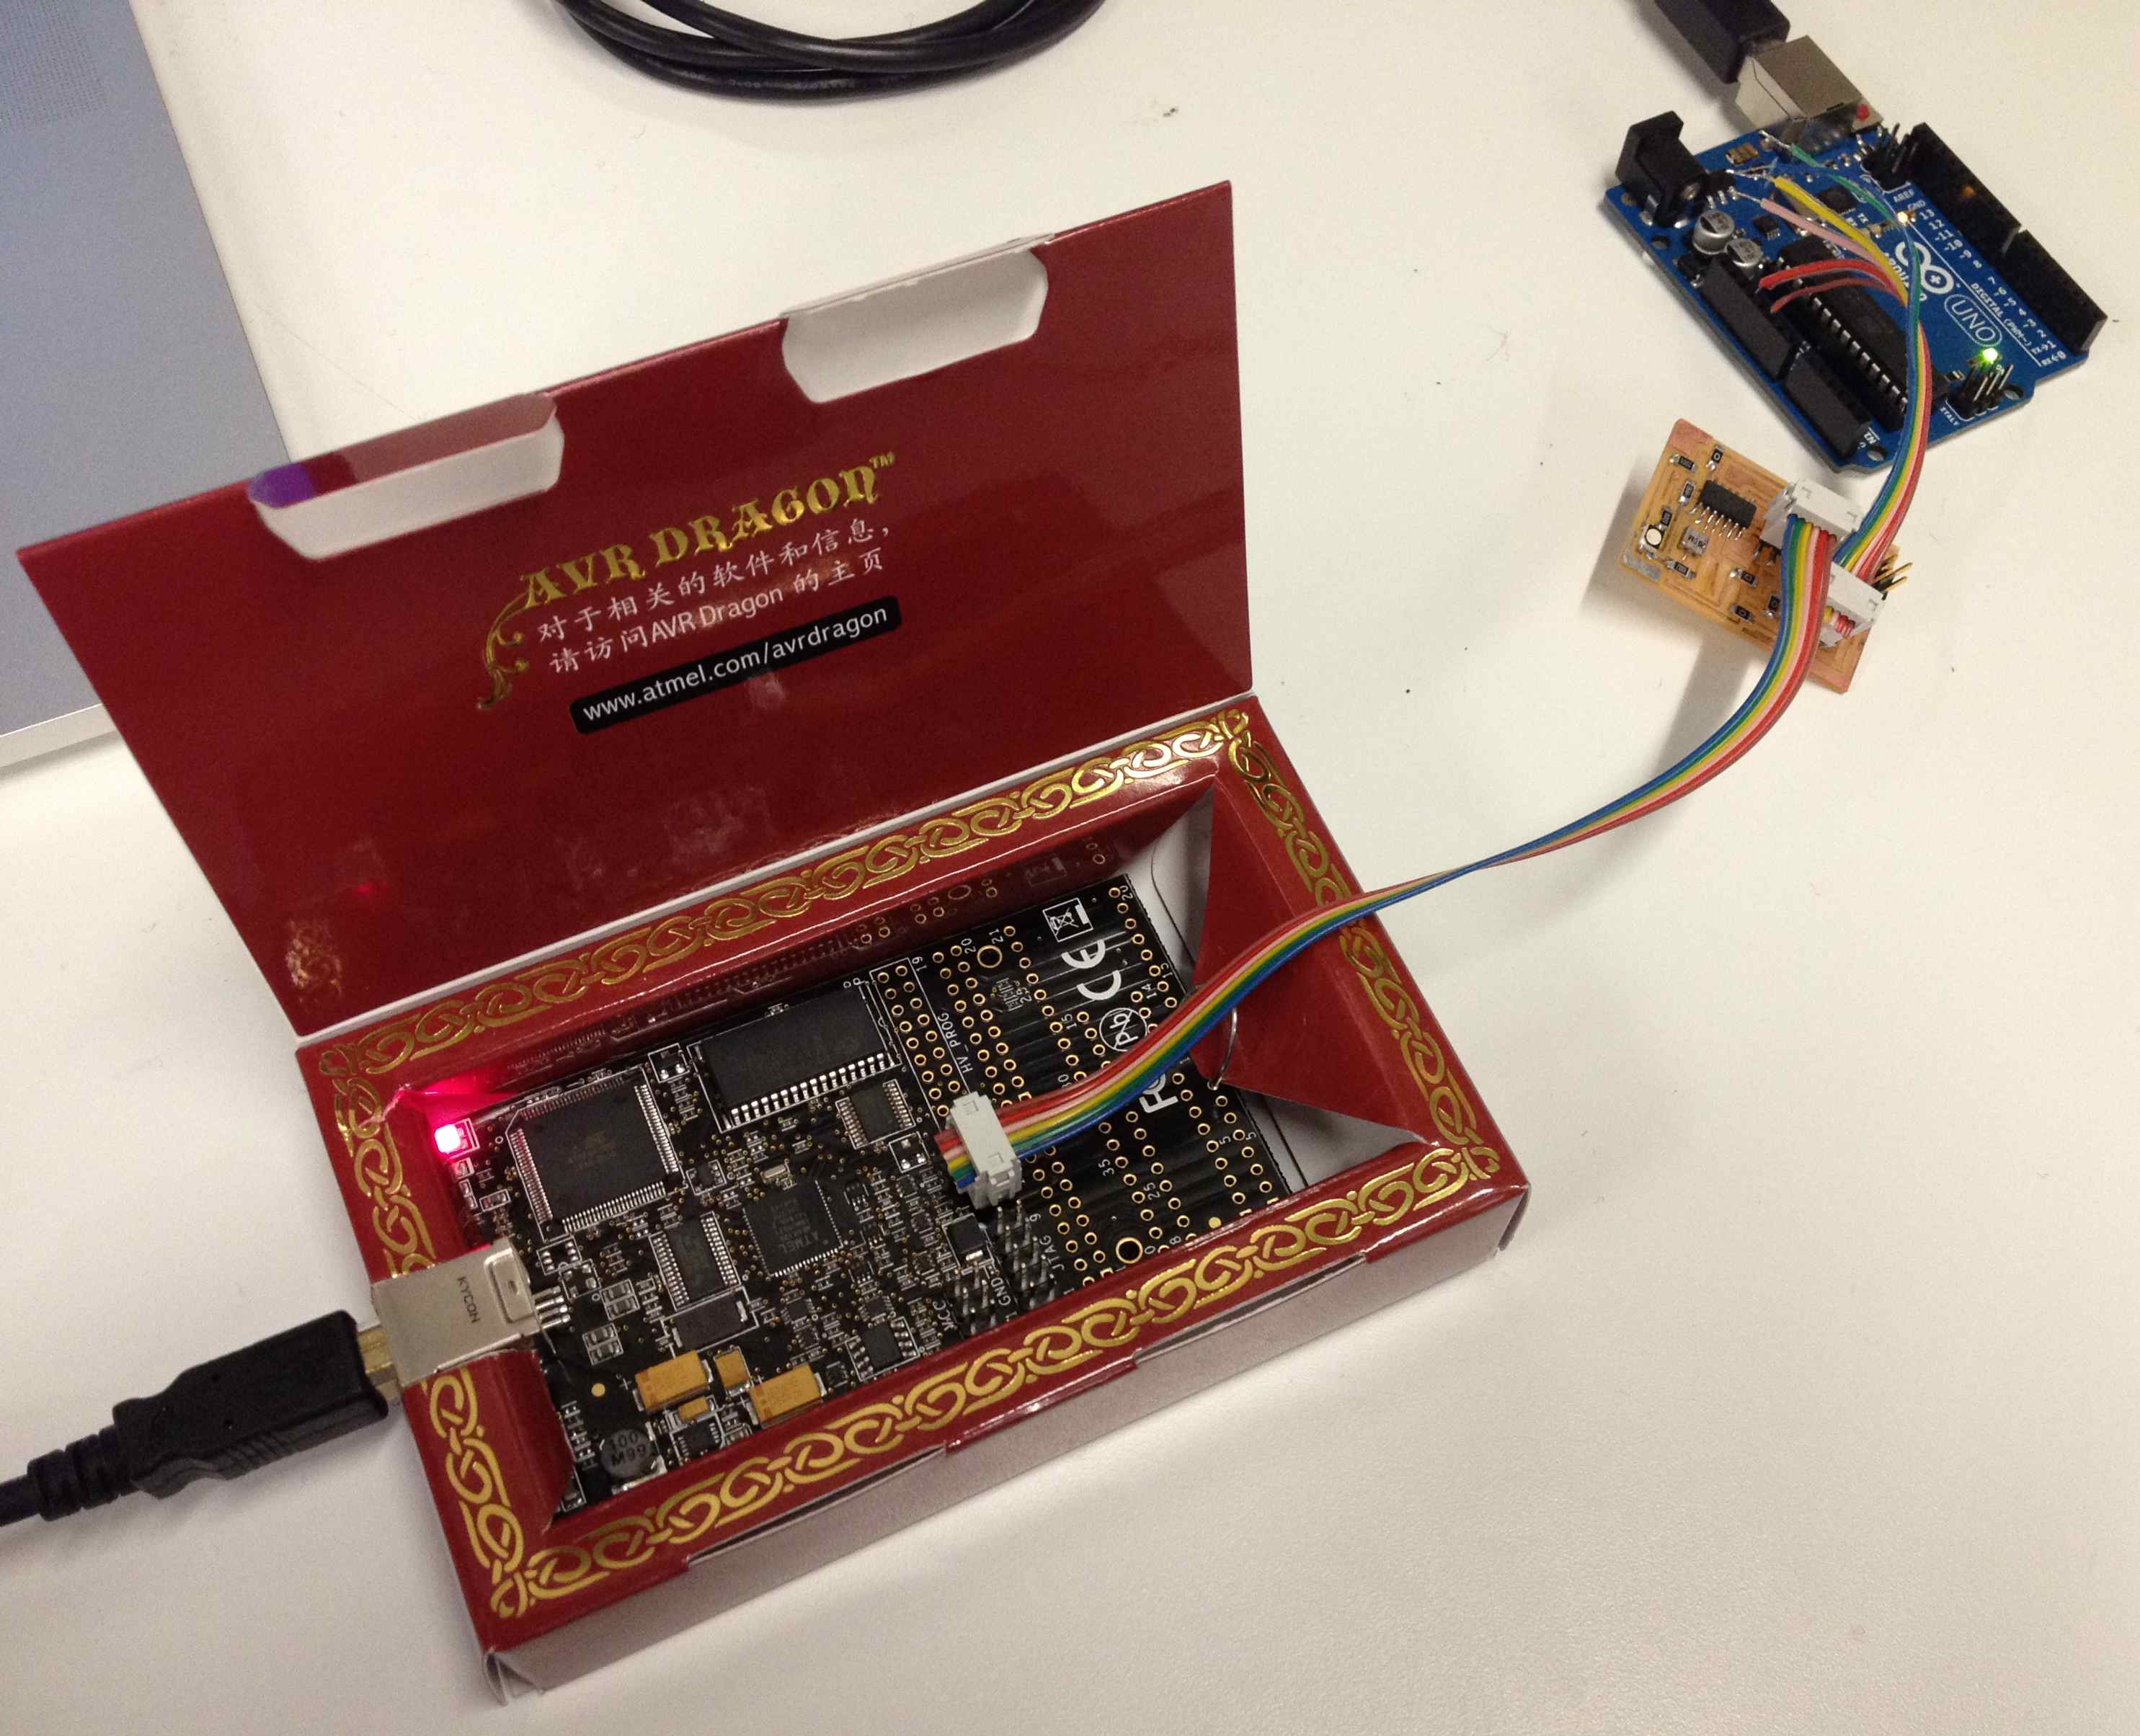
Using the Dragon as ISP
The ISP header is marked on the Dragon PCB
In order to use the AVR Dragon with the Arduino IDE, you need to edit the internal programmers.txt file to add an entry for the Dragon. On Mac OS and Arduino 1.0.1, the file is present at:
/Applications/Arduino.app/Contents/Resources/Java/hardware/arduino/programmers.txt
Quit all running instances of the Arduino IDE, open the file with your favorite text editor and add the following:
dragon.name=Atmel AVR Dragon in ISP mode
dragon.communication=usb
dragon.protocol=dragon_isp
You should now be able to select the AVR Dragon in:
Tools > Programmer > AVR Dragon in ISP Mode
Making RGB LED blink with ATTiny44
The first test was to check whether I could make the RGB LED included blink.
Warning! While troubleshooting my first iteration of the board, I noticed that the RGB LED package from the Fab Eagle library is rotated 180°. So please bear that in mind if you are trying to use this part while the issue is being fixed.
Analog to Digital Conversion on ATTiny44
Serial Communication on ATTiny44
The easiest way to get serial communication with your design is to use an FTDI cable. I used the SoftwareSerial library from the Arduino IDE to implement the Tx and Rx pins onto arbitrary pins on the ATTiny. The pins are chosen in the following line of the code:
SoftwareSerial mySerial(rxPin, txPin);
In order to choose the pins correctly, refer to the image below. It provides a mapping of the physical pins to Arduino IDE pins.
-
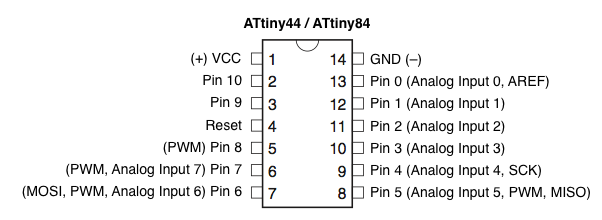
Pin mapping between Arduino IDE and Physical
e.g.: refer to pin 1 in your Arduino code if you want to target physical pin 12. Image courtesy of the very good High-Low Tech post on support for ATTinys in the Arduino IDE.